


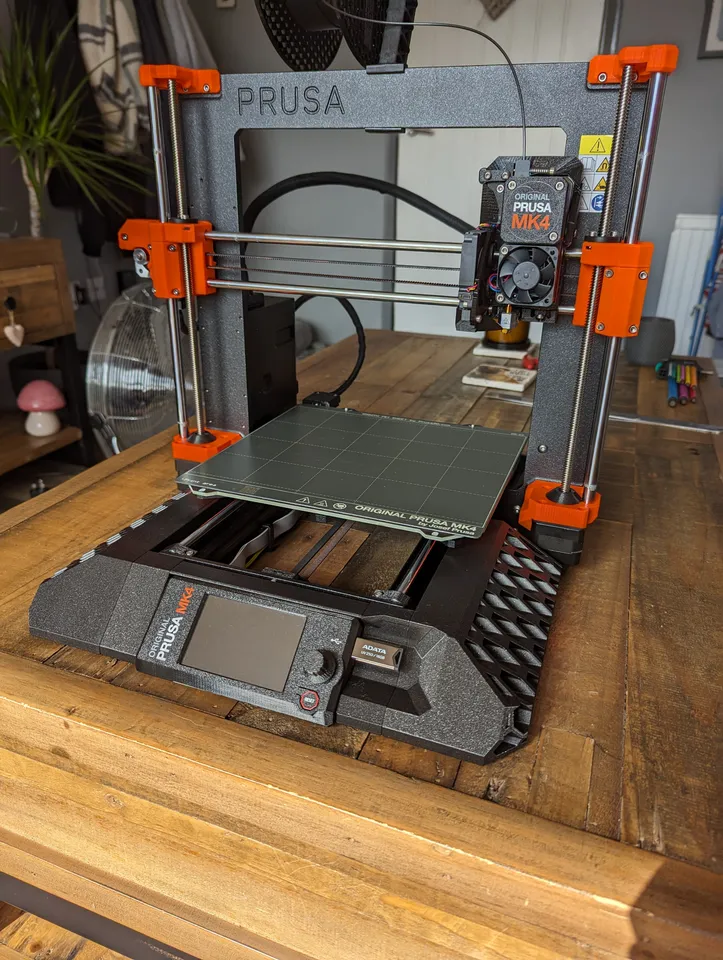
Bit of bedliner and clear coat to match the textured build plate finish on the screen trim 😉👌also sunk in the logo and some font


Bit of bedliner and clear coat to match the textured build plate finish on the screen trim 😉👌also sunk in the logo and some font
@NATEwismer_716891 I may be bias but I feel that when I see a printer without the kit that it looks weird now.
@CalsTechConcepts lmao same way here, looks so small and naked without
This has been one of the best additions / mods I've printed since getting my MK4 last year. Not just pretty - it's practical, I've made plenty of use of the drawered version. Earlier this month, I upgraded to the MK4S. The change to the display means the side connectors and bridge over the top no longer fit. I tried to adapt parts from Extrutim's updated MK4S but they're incompatible with the sides you created. Any update coming for the 4S? Or have I missed a resource where this has already been done?
@BKeith97_1534566 firstly thank you very much for your kind words and I'm so glad that you've had good use of this model up until now. I'm still running a MK4 so didn't even realise that the change in the display case for the MK4S would be a problem. Thank you for bringing this to my attention. Could you please provide a bit more information on the issues/ interferences the new screen provides?


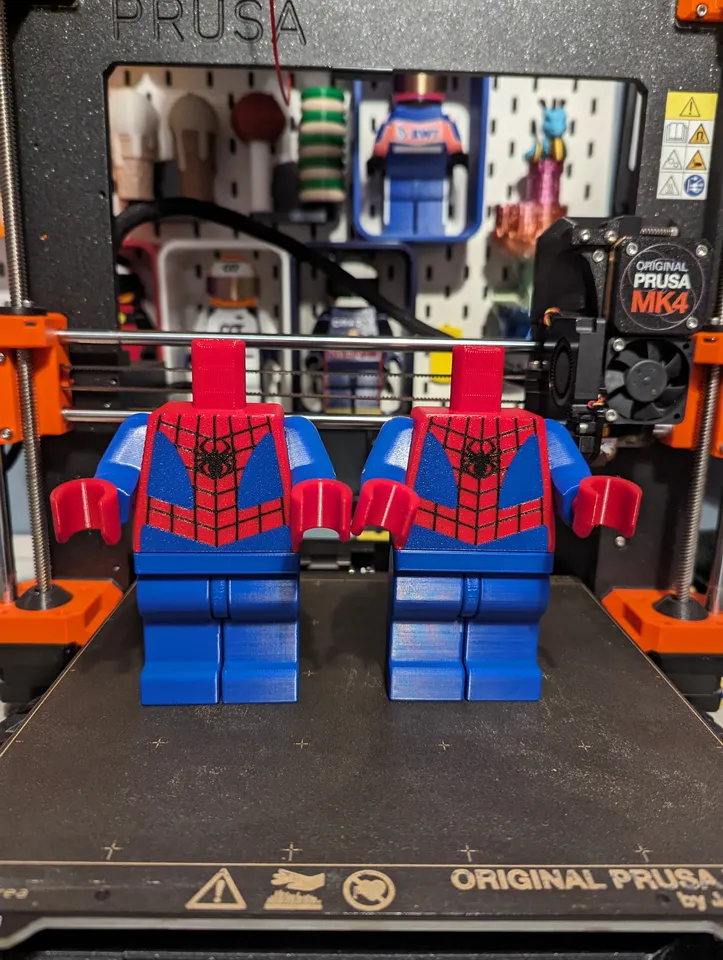
Another great Spider-Man/Venom model. But it seems that my printer settings are not good enough, so I had a hard time to get the head inlays right. But finally, with a little (or much) force, one of the prints fits. For the chest inlay I rotated the body and made the inlay thicker. I posted a remix for the body, if somebody needs...


Absolutely love this model!! Very easy to print and incredibly well designed. Appreciated how you went out of your way to make the print as user friendly as possible, with all the files correctly oriented and containing any necessary supports already built in.
I don't have an AMS printer, so after trying a couple of times to print out all the head components separately without much success (as you helpfully warned might be the case in the description!) I decided it would be easier to just print the head completely in black and then paint it with white and red acrylic paints and some very tiny brushes. To that end, I slightly recessed each facial component into the symbiote's head so that the depth differential created a border, making it a lot easier for me to paint "within the lines" - I'll upload the file for that as a remix shortly in case it could be helpful for anyone else!
Only other tip I have for anyone else trying to make this is that the white part of the symbiote's chest printed better for me rotated 180 degrees from the file's orientation so that the side of the symbol that ends up being glued to the moveable figure prints first onto the buidplate and the visible part prints last. I also increased the height slightly to 1 mm as printing smaller than that ended up looking a bit rough coming out of my (admittedly not particularly fine tuned at the moment) printer. Oh and definitely go for the swivel hips from the skeleton remix - super fun to have that extra dimension of movement.
Thanks again for making and publishing this model!


Thank you so much for sharing and putting the effort in to help others with a more paint friendly version. You're absolutely right about changing the body orientation of you're printing the parts separately (that's a whole lot of messy bridges otherwise). I appreciate that the manual colour swaps aren't that ideal. Of I find the time I may get round to creating versions for colour changes at determined layer heights.

Scaled at 250% since I have printed other Lego minifigures at 10:1 scale. Awesome design!

@jwhangsta_185724 Thank you very much for sharing your print looks great! How are the joints at 250% scale?
@CalsTechConcepts Not bad, the one between the body and hips are tight, but honestly that is to be expected. All the other joints were smooth during assembly.
Great Model, i just removed all the built in support, and used organic trees of the slicer. Additionally I gave Web Slinger Man some red boots.


@possebaer I love it! Thanks for sharing. The boots are a nice touch. That's exactly how I used to print them but I'd always forget to add the supports (hence having the built in ones).

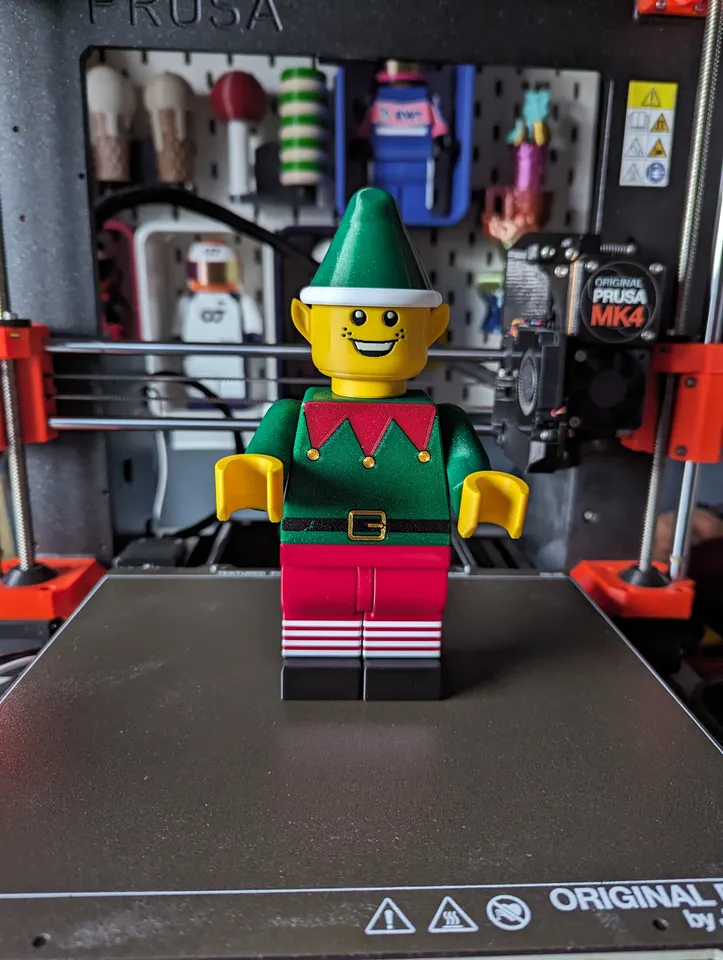
Super cute print, I had a little trouble with his eyes and mouth but overall I love the file it's perfect to go with my Lego Santa. Thanks


Great, for children who love Lego..Simply Lego king (edited)
@PetrPravda_332934 thank you very much for the kind words
Took the Full Scale model and scaled it up even bigger!! to 175%
I managed to even print all the facial details individually and then place them into the head, with a little help from sanding.
Overall the model was perfect! Everything fit snug and securely, and as advertised.
Definitely a gift for the ages and makes it a one of a kind.
Edit: Had to make a second one for the other grandmother. Made this one with the updated skirt (edited)


@CalsTechConcepts I had to make a few adjustments to the model as the first time it wasn't the right scale. I was able to fix it quickly but the skirt didn't fit over the legs as the inside was too tight. Printing the third one now, lol. Hopefully this time it fits
@IroncatRace_1037965 thank you for the continued work and development on it to make it right. The legs are a pain for fitting stuff over that's for sure. Maybe print one in TPU to be even closer to a skirt material with some squish


Think I will let my son paint it. I really enjoyed the print and my son enjoys playing with it. Thanks (edited)

@Karlen_762692 amazing, thank you so much for sharing. I love hearing how people get on and use designs. I hope your son enjoys painting it just as much a he does playing with it.


Model approuved! It takes a little effort to install, but once in place, the result is perfect.
> Printed in Prusament PLA Galaxy Black.


Perfect to cover the front cables. It cleans up the space a bit.
Would recommend to print in PETG as this area can get quite hot due to the heatbed radiating downwards.
Use "Vase-Mode" to get best results! :D


@davekz4_395084 looks a really clean print, thanks for sharing. That's a good idea on PETG for the radiating heat. I mainly print PLA on my MK4 as I have other printers for other materials so it hadn't crossed my mind.


Hi,
I've modified one back plate for Ikea bekand peg lateral peg board. I could sent it to you to add it in your project. great design :-) Thank you

@DrSnake74_529299 that looks really good! Thank you for taking the time to post a make and to put the effort into creating your own bracket. I'd love to add the bracket to the design. I see you've uploaded your design already so I will add a link to it in all the relevant models I have. (edited)


any chance you can put a Moderate Bearing Snap from multiboard on top and a regular snap on the next lower spot? https://thangs.com/designer/Multiboard/3d-model/Moderate%20Weight-Bearing%20Snap-989145 https://thangs.com/designer/Multiboard/3d-model/Multiboard%20Snap-974295
Step Files: https://thangs.com/designer/Multiboard/3d-model/Snaps%20-%20STEP%20Multiboard%20Remixing%20Files-994682
@GoBlues22_2853718 I see you've created a remix yourself, thank you very much for putting the time in to do this. I'll add a link to your file in the description of this model.
@CalsTechConcepts I appreciate it. First time tinkering with building something.


so will the base head here at 100% scale fit on the full size fig at 100%?
just gauging if i can match the scale and they fit no prob...
@CalsTechConcepts oh ok. I thought they all had a hole which used an adapter. I didn’t think anything had that hex shape
@AJ_2850313 yes you're right they don't have the hex shape as that was a design revision to control the tolerance between printers better but both the round hole and hex hole are designed around the same neck diameter so are interchangeable.
@CalsTechConcepts Hi,
yes in the slicer I cut the ends so that they were all flat on the mat and I didn't have to use supports. And he just pushed them in, no glue needed. Thanks again for the design... :) (edited)

@LuckyJaS I did wonder if that would work so thank you very much for sharing your findings. I'll try to get round to adding files that are already flat bottomed to help with this in the future.


Nice design :-! I've made a custom plate to mount it on an IKEA bekant peg board. Thank you
@DrSnake74_529299 Amazing work! Is there any chance you'd be able to upload a remix with the bekant mount? It looks a very interesting system that I haven't seen before.


any more accessories coming?
@AJ_2850313 unfortunately not in the near future. I'm already trying to balance finishing my masters, working a full time job (with a new role), enjoying our little 18 months old daughter and now we've decided to throw in moving house too 😂
@CalsTechConcepts ahh yes, life happens LOL. It’s good stuff though, enjoy!