Multi function display stands
Description
PDFStep 1: Decide how you want to mount your display stand.
- Free standing - skip to the next step
- Wall mounted - download and print the “Wall mount mounting slide” from the “mounting slides” folder below. Attach to your wall with appropriate fixings. The hole spacing is 35mm and has clearance for a 5mm screw.
- Skadis pegboard (IKEA) - download and print the “Skadis mount mounting slide” from the following model from the “mounting slides” folder below. Remove the brims and install into your pegboard.
- Extrusion mounted - choose between “Plain extrusion mounting slide” and “3030 extrusion mounting slide with lugs” and download and print. Attach to your extrusion with M5 button or low head cap screws and relevant T-nut for your size and style of extrusion.
- Ploga mounted (IKEA) - download and print both “Ploga mounting slide” and “Ploga mounting slide and screw”. Remove the existing bar from the Ploga unit and insert the mounting slide on one side. Then screw the screw into the back of the slide, through the wood, to clamp the mounting slide in place.
- Honeycomb storage wall - download and print “Honeycomb storage wall insert mounting slide” and clip vertically into one of the honeycomb storage wall panels from the following system Honeycomb storage wall by RostaP | Download free STL model | Printables.com.
- Bekand mounted (IKEA) - see remix here by DrSnake74 thank you for your work on the design.
- Multiboard - see remixes here by GoBlues22 and here by Pedro Leite, thank you both for your work on the design, and mount to the appropriate multiboard components from the following system https://www.multiboard.io/.
- Other method - I have attached a STEP file of the mounting slide base design for anyone to create their own adaptations for mounting options. Be sure to share a remix so I can link your model and share the hard work put in.
Step 2: Decide your item to display.
- 3Dbenchy - use the “Benchy wave display stand insert” from the “Display stand inserts” folder. This is a remix from the following file Benchy at Sea | Wave Display by nexnox - Thingiverse.
- Moveable figure - use the “Display stand insert for half scale moveable figures” for any of the half scale moveable figures and use the “Display stand insert for full scale moveable figures” for any of the full scale moveable figures. The moveable figures and accessories can be found here.
- Bobble head - use the “Bobble head display stand insert” from the following model Racing drivers and many more bobbleheads by Cal'sTechConcepts | Download free STL model | Printables.com.
- Spool holder - download and print the “Skadis Spool Holder roller mount” from the following model Universal/Skadis spool holder V2 by Cal'sTechConcepts | Download free STL model | Printables.com follow the assembly instructions for that and then skip to step 5.
- Bullet Bill - use the “Bullet Bill display stand insert” to display the Bullet Bill model from Forge 3D which can be found at the following link https://www.myminifactory.com/object/3d-print-bullet-bill-26743.
- Lego - use the Display stand for Lego to display any of your small Lego sets. Make sure your printer and flow rate are calibrated to ensure the best fit. I will be working on a future design that utilizes a genuine Lego plate to remedy this problem.
- The Ultimate Cereal Container Filament Drybox - use any of the available mounting slides listed in the previous step, download and print the drybox files from here and then skip to step 5.
- Other item - I have attached a STEP file for a blank display stand insert so anyone can create their own inserts for any item that fits. Be sure to share a remix so I can link your model and share the hard work put in.
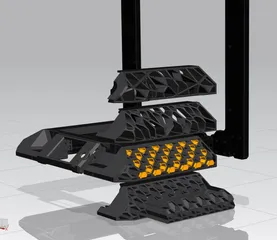
Step 3: Decide the display stand you want from the “Display stands” folder. Some of the stands are multi pieces that click together or multimaterial prints. This information is highlighted in each of the model notes. I have attached a STEP file to the blank model that I use for making all of my display stands from for anyone to create their own display stands from. Be sure to share a remix so I can link your model and share the hard work put in.
Step 4: Slide your chosen display stand insert into your chosen display stand.
Step 5: If using a mounting slide, slide your display stand assembly onto your chosen mounting slide.
Step 6: Place your chosen display item onto your display stand and enjoy. I would love to see all your display pieces so share a make with a photo showing your best prints.
More designs to follow soon but in the meantime if you have any ideas you would like to see please let me know in the comments and I'll see what I can do.
Happy printing!!!
Update 23/12/2022: Extrusion, Ploga and Honeycomb storage wall mounting slides and instructions added.
Update 10/08/2023: New version 2 spool holder link added.
Update 13/08/2023: Added remix for Bekand mount by DrSnake74.
Update 10/04/2025: Added remixes for Multiboard mounts by GoBlues22 and Pedro Leite and added reference to “The Ultimate Cereal Container Filament Drybox” that makes use of the slides from this model for mounting.
Update 11/04/2025: Added display stand inserts that are compatible with my moveable figure models which can be found here. Also archived “Mega figure display stand insert” from the “Display stand inserts” folder.
Tags
Model origin
The author remixed this model.
Differences of the remix compared to the original
Used the snap in connectors from HSW system to create a slide that fits the HSW system.


