Transformers: Ham and Cheese

Description
PDFRecently I had entered a Hippie Van Transformer into the “Toy Cars” contest and had so much fun that I have to make more Transformers. I won't be making any cars, vans, planes or any other type of vehicle though. That's been done and I would rather make Transformers out of random everyday objects, like a Ham and Cheese sandwich.
My favorite Transformer has always been Soundwave. I love how the cassette tapes also transformed into smaller robots so when I was trying to figure out what to make, I knew I wanted use something similar in my design. I had settled on a toaster that has two transforming slices of toast and decided I should make the toast first since that seemed like the toughest part. After I had one slice designed and printed I realized that my toast didn't look like toast, it looked like bread. I switched course, started making it into a sandwich and ended up with Ham and Cheese.
I'm still making the toaster (working on it now) but it will probably end up being a Decepticon bounty hunter or something who is chasing them all like “When I catch you, you're going to be toast!”
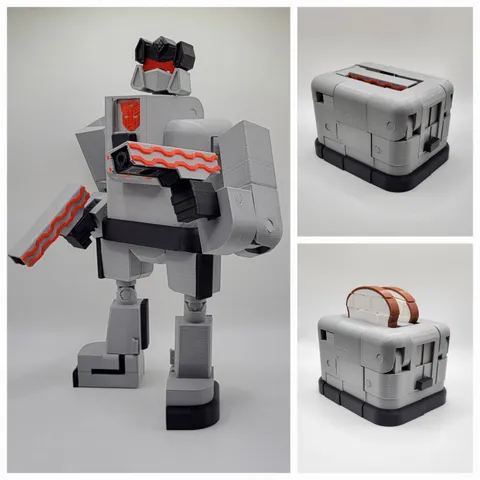
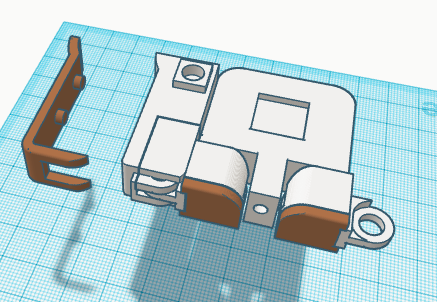
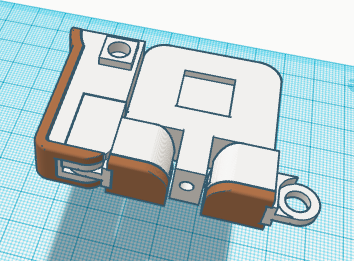
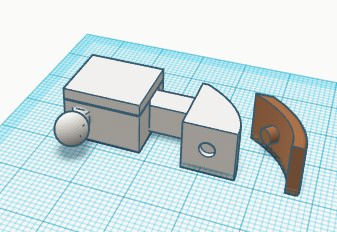
Since this was initially designed to fit into another Transformer, it is a fairly small model. When in sandwich form it measures 64 mm x 57 mm x 24 mm. In robot form, they are about 115 mm tall
TLDR: I really like making Transformers so you can expect to see more.
BACKSTORY:
Forced to be soldiers on opposite sides of a never ending war, Autobot Ham and Decepticon Cheese abandon the fight when they set aside their differences, finding common ground in their shared love of both 3D printing and tasty sandwiches.
Labelled deserters, Ham and Cheese find themselves on the run when they are hunted by both the Decepticons and the Autobots.
ASSEMBLY:
This is a work in progress. There is nothing but pictures here right now and you could probably figure out assembly from just looking at them but I will be writing a guide to go with the pictures here soon. It will be updated over the next couple days.
Optional hardware:
5 mm x 3 mm neodymium magnets X 4
3 mm x 1 mm neodymium magnets X 16
Scroll to the bottom of the assembly instructions to see how to use the magnets.
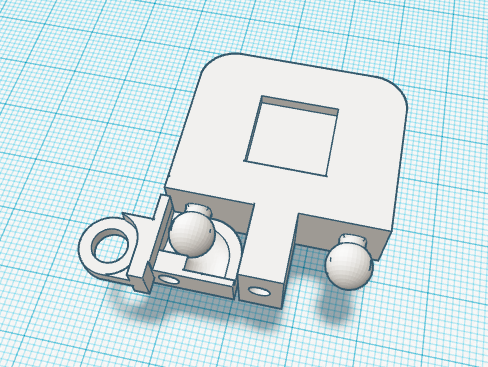
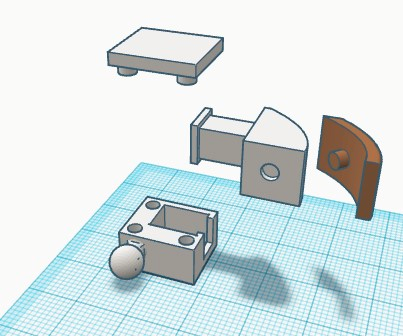
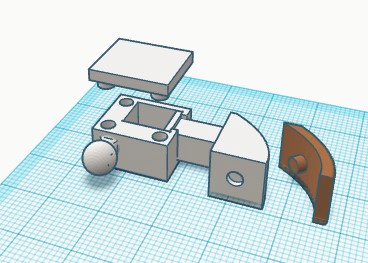
You'll want to get the thighs attached to the chest first. Take the two pieces of the right thigh and place the bigger of the two pieces under Chest 1 so that the ball on Chest 1 is sitting in the track on the thigh piece, as seen in the following picture.
Then take the smaller right thigh piece and place it over top.
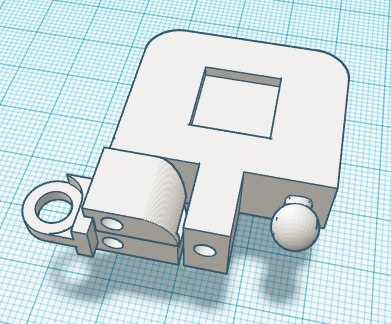
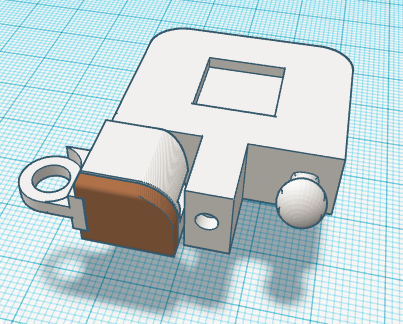
At this point I put a couple drops of glue into the two holes in the bottom of the thigh pieces before attaching the right thigh crust, seen below.
Repeat those same steps for the left thigh and then we'll move on to the legs. For that we'll need Right Leg 1, Right Leg 2 and Leg Crust.

Right Leg 1 and Right Leg 2 snap together over the right thigh as seen below
Slide the Leg crust over top of the right leg. Repeat the steps for the left leg and then put the completed legs off to the side for a minute.
Next, we're going to assemble the arms. For this, you will need Left Arm 1, Left Arm 2, Left Arm 3 and Arm Crust.
Insert Left Arm 3 into Left Arm 1, making sure that the flat side of Left Arm 3 is pointing in the same direction as the ball on Left Arm 1. See below for proper orientation.
Take Left Arm 2 and snap it into place on Left Arm 1
Fit the Arm Crust into the end of Left Arm 3, then this arm is complete. Repeat the steps for the right arm and put them to the side for now.

To assemble the head you will need Head 1, Head 2, Head Pin, Head Crust and Glasses
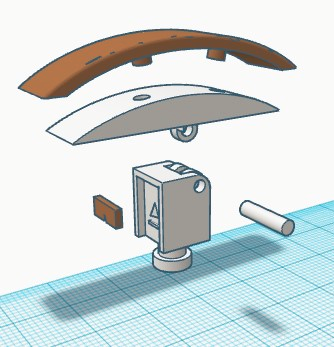
First, fit Head 2 into Head 1 and then insert the Head Pin.
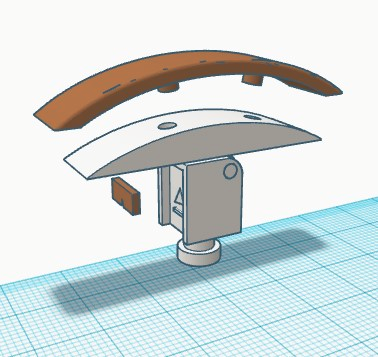
Then snap Head Crust onto Head 2 and the glasses should just snap into Head 1

Now we'll combine all the pieces. Chest 1 with the legs attached, both arms, the head and Chest 2
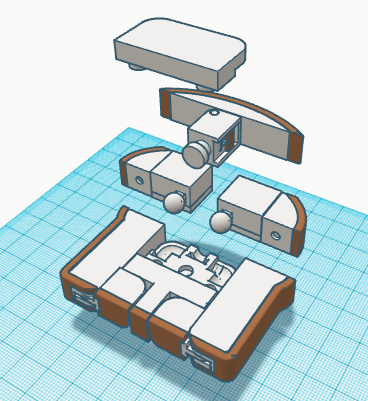
Place the arms down so the ball on each arm rests in a track on Chest 1 and then place the head into Chest 1 as seen in the picture below.
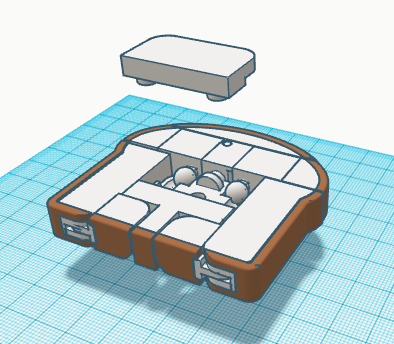
Before I snapped Chest 2 into place, I put some glue on the three pegs on Chest 2
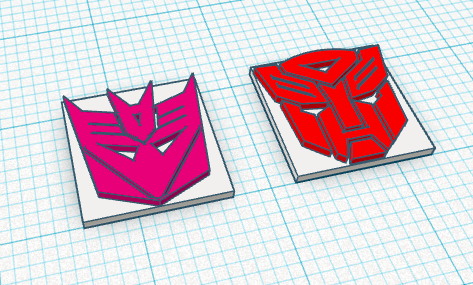
The two logos will require a filament swap. I printed everything with a layer height of 0.12 mm which will slice the logo into twelve layers. You want to swap after layer six.
The Ham and Cheese printer is very easy to assemble. I used bits of 1.75mm PLA as pins for every piece. I swapped filament from orange to sakura pink when the print was 50% complete.
The way everything is orientated, the color you print with first is the color the printer will be when transformed. 
OPTIONAL:
You will notice that there are two, 3mm x 1mm holes in each leg as well as one hole in each side of Chest 1 and a hole in both Arm 3 pieces. There are also 5mm x 3mm holes in each Leg 1 piece.
All of these holes are for optional magnets to help keep it together when transformed.
Make sure you have the orientation of the magnets correct before setting them into the printed parts.

NOTES:
- I print everything with a layer height of 0.12 mm and a speed of 50 mm/s
Tags
Model origin
The author marked this model as their own original creation.