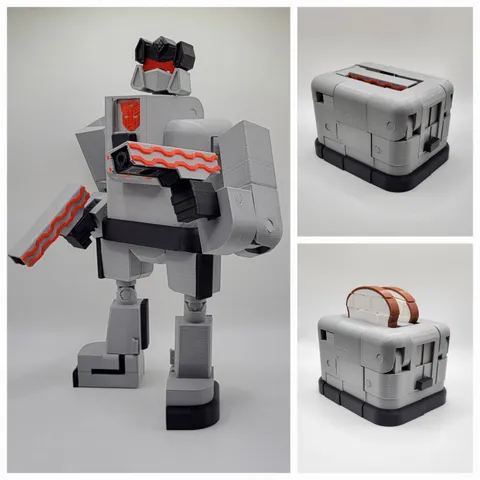
Hippie Van Transformer

Description
PDFMatchbox, Hot Wheels, Micro Machines, and Tonka Trucks are all great but growing up in the eighties, I thought the coolest cars were the Transformers and that's immediately where my mind went when I read the contest detail.
The dimensions of the Transformer in van form are 75mm (L) x 43mm (W) x 51mm (H) and when in robot form, it stands about 172mm (6 ¾")
UPDATE 2/3/2023: I wasn't happy with the first version of the Head - Grey.stl so I made a new one.
ASSEMBLY:
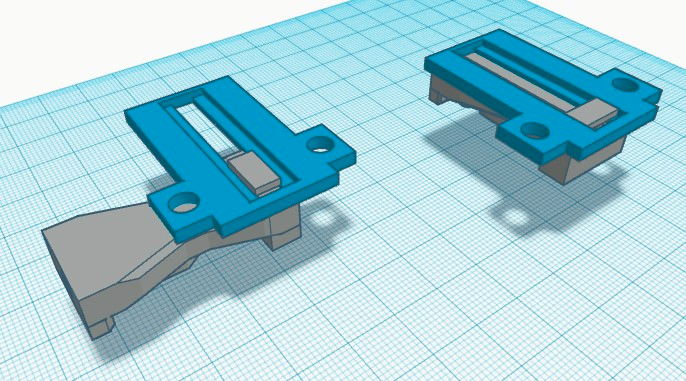
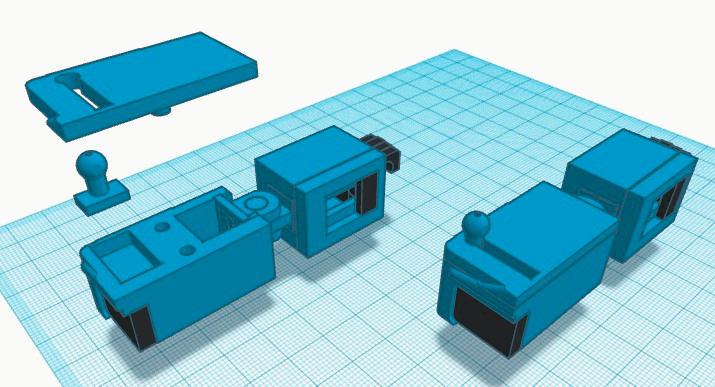
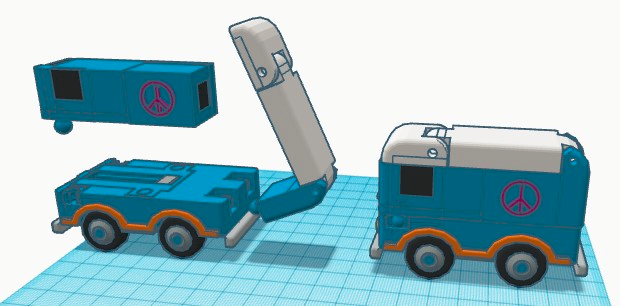
Take Head - Grey.stl and fit the slider into Frame Plate - Blue.stl sideways and then twist until the head and frame plate are aligned as seen in the following picture.
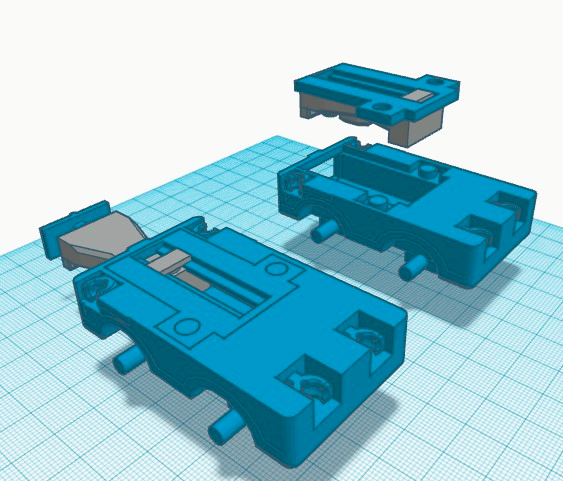
Now take that head/frame plate assembly, fit it into Frame - Blue.stl and then slide the head out and attach Head Plate - Blue.stl to the head as seen below.
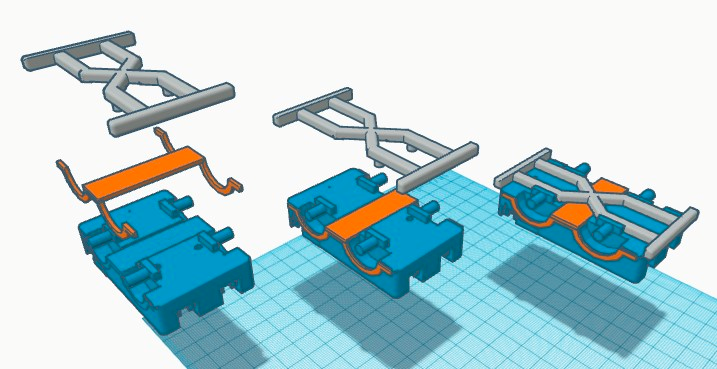
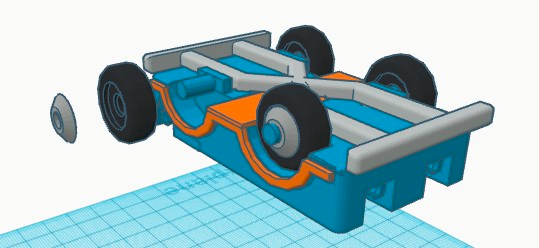
Take the frame, turn it over and carefully slide Trim - Orange.stl onto the frame and then snap Bumpers - Grey.stl over top of the trim, making sure to line up the pegs on the bumper with the holes in the frame.
Once that's done, attach the wheels and hubcaps. If your wheels don't spin freely when you slide them onto the axles, use a small file to widen the hole of the wheel.
Now put that frame assembly down for a minute and we'll assemble the legs and arms.
The legs are straightforward, the foot and thigh attaches to the shin using two pins. Most pieces in this model print out as a nice snug fit for me but I did use a small, round file to widen the holes in the foot, shin and thigh pieces to make it a little easier to get the pins in. Repeat the process for the other leg.
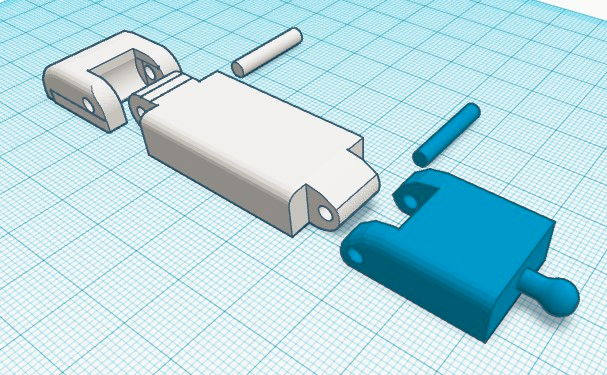
Take Fist - Black.stl and fit it sideways into Forearm 2 - Blue.stl and then twist so the two pieces are aligned like they are in the following picture.
Take the hand/forearm 2 piece and fit it into Forearm 1 - Blue.stl. Now take Elbow - Blue.stl and attach it to Forearm 1 using Elbow Pins - Blue.stl as seen below.

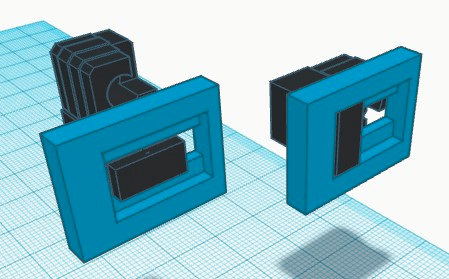
Snap Window - Black.stl and Windshield - Black.stl into Upper Arm 1 - Blue.stl, they only fit one way. Then take the completed forearm assembly and slide it into Upper Arm 1, making sure that the arrow on the back of the elbow is pointing up. Now fit Shoulder - Blue.stl and Upper Arm 2 - Blue.stl onto Upper Arm 1. Repeat the process for the other arm.
Now that you have the arms and legs completed, you can snap them onto the frame and your transformer is complete.
NOTES:
- I printed everything with a layer height of .12mm and a speed of 50 mm/s. Doing so, made almost every piece fit nice and snug. If I were to print with a layer height of .2mm and speed of 100, nothing would fit together.
- This is a work in progress so I'll probably be adding stuff in the next couple days.
Tags
Model origin
The author marked this model as their own original creation.