Transformers: A toaster named Crumbs

Description
PDFUPDATE 2/2/2024: After getting feedback from the first few users to print Crumbs, it has become apparent that adjustments need to be made. I have some pieces test printing now but I expect it to take a few days to work out the bugs. Sorry for the inconvenience.
UPDATE 12/29/23: Updated the orientation of most parts so they are easier to print.
UPDATE 12/28/23: Added mirrored version of the heating element.
This is a model I've been meaning to publish for quite some time but unfortunately life kept me busy the past 6 months.
NOTES:
- I print everything with a layer height of 0.12 mm and a speed no faster than 50 mm/s.
- Also pictured is my Transformers: Ham and Cheese model.
- A filament swap will be required when printing the logo
ASSEMBLY:
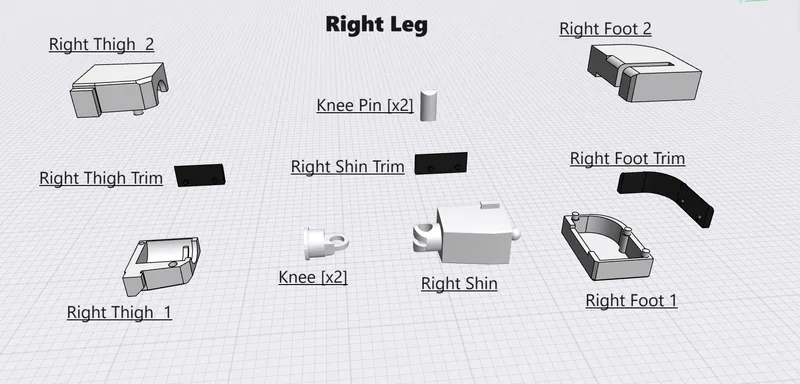
We're going to start the assembly with the legs.
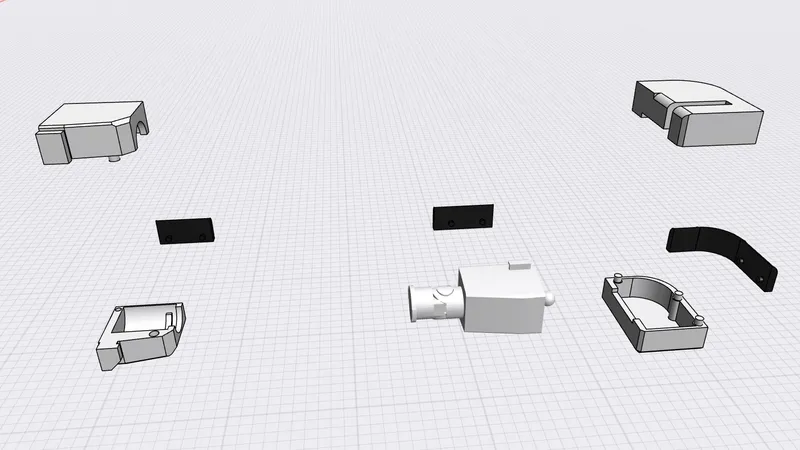
Take a Knee, put it into the Right Shin and then insert the Knee Pin as seen below.
Next Connect Right Foot 1 to Right Foot 2, making sure that the ball on the Right Shin is situated inside the completed Right Foot as seen in the following picture. When put together properly, the Right Shin should be able to move along the track in the foot.
When putting the foot together, I would suggest using a drop of glue on each peg on Right Foot 1 to help keep it secure.
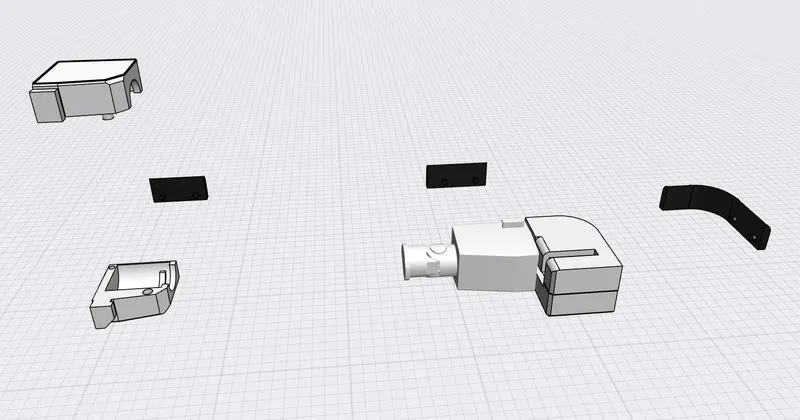
After you have the foot together, take Right Thigh 1 and Right Thigh 2 and connect them together with the knee inside the completed thigh. Again, I would suggest using glue on the pegs of Right Thigh 2.
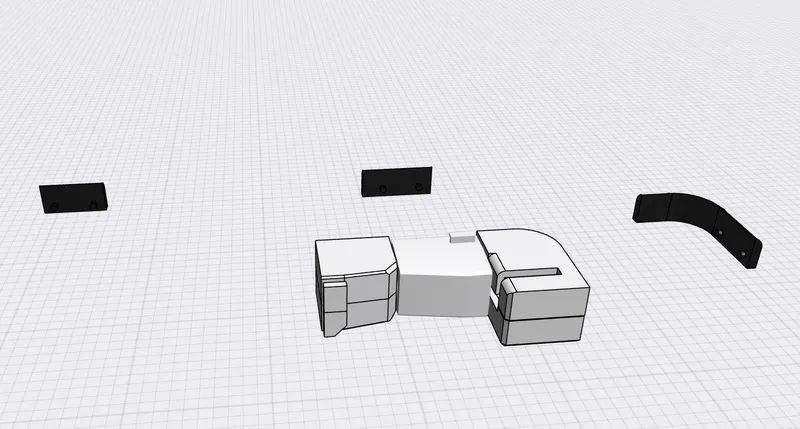
At this point, your leg should look like this.
Finally, attach the Right Thigh Trim, Right Shin Trim and the Right Foot Trim to each corresponding leg part as seen below.

With the right leg completed, put it aside and repeat the steps using the left leg parts.
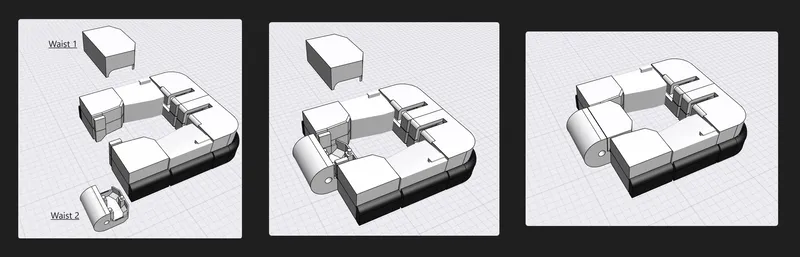
After you have both legs finished, take Waist 2 and slide the tab on each thigh inside it as seen in the middle picture below. Then take Waist 1 and attach it to Waist 2, securing both legs and the waist together.
We'll set aside the completed legs/waist and move on to the arms.
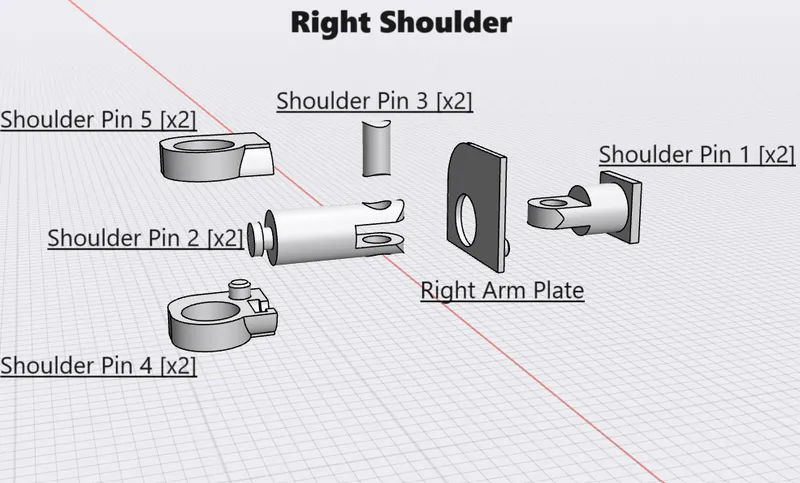
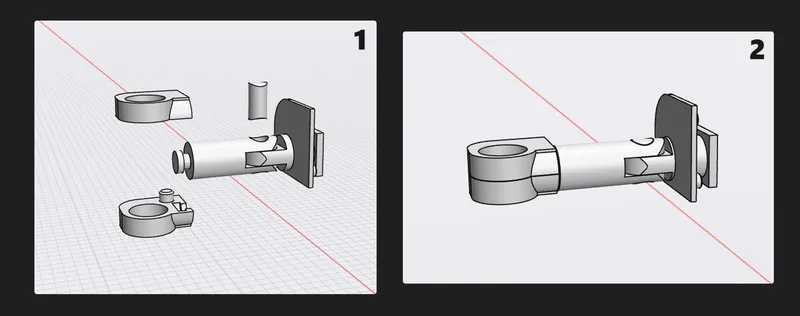
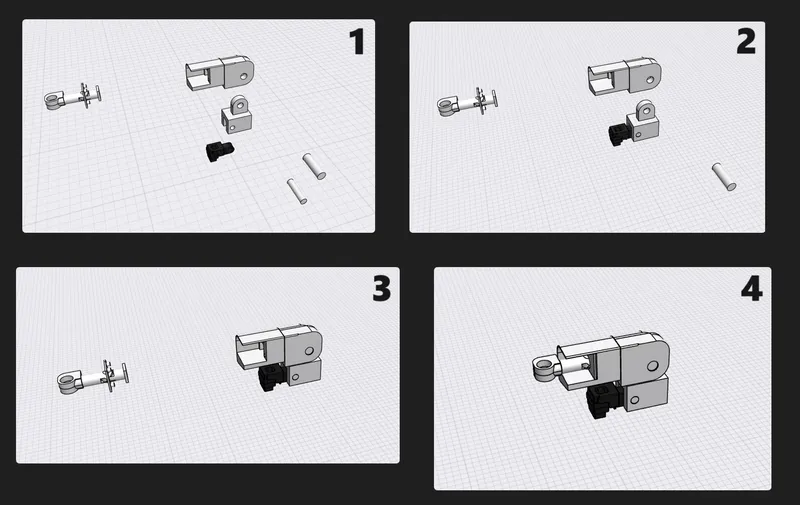
Slide the Right Arm Plate over Shoulder Pin 1, line up the holes on Shoulder Pins 1 & 2 as seen below in image 1 and then Insert Shoulder Pin 3. Shoulder Pin 4 and 5 fit onto Shoulder Pin 2 as seen in image 2. Repeat the steps for the Left Shoulder using the Left Arm Plate.
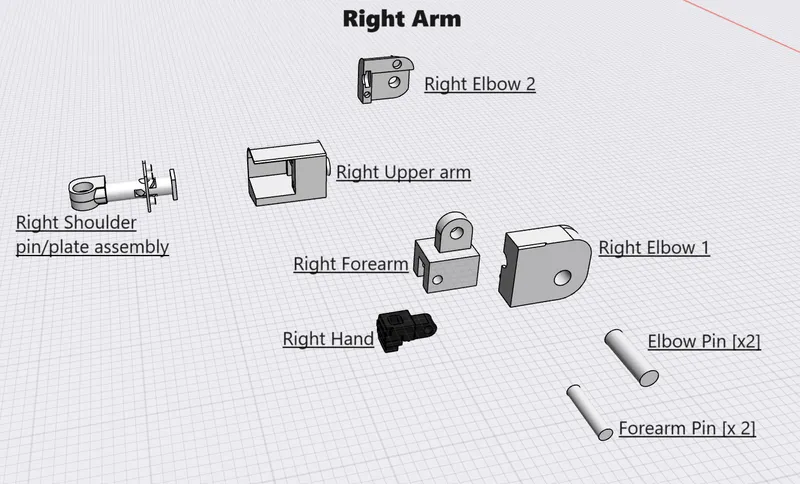
Attach Right Elbow 1 and Right Elbow 2 to Right Upper Arm as seen in image 1. Slide Right Hand into Right Forearm and insert the Forearm Pin (image 2). Combine the Right Forarm and the Right Elbow together and insert the Elbow Pin as seen in image 3. Finally, insert the Right Shoulder assembly into the completed Right Arm (image 4) and put it aside for the moment. Repeat the steps for the left arm using the Left Arm specific pieces.
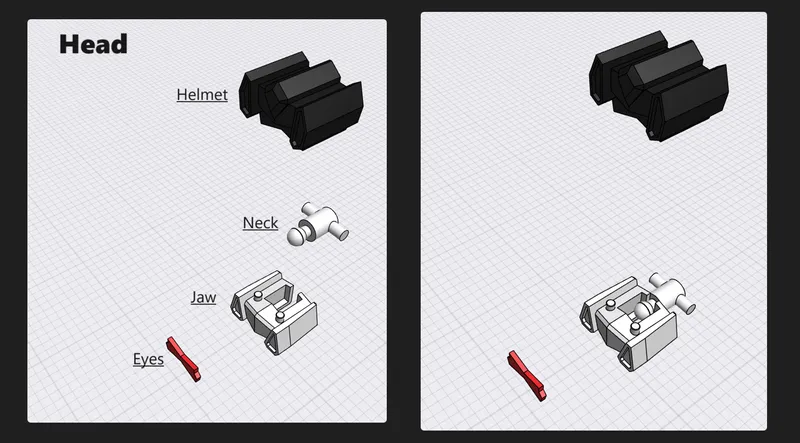
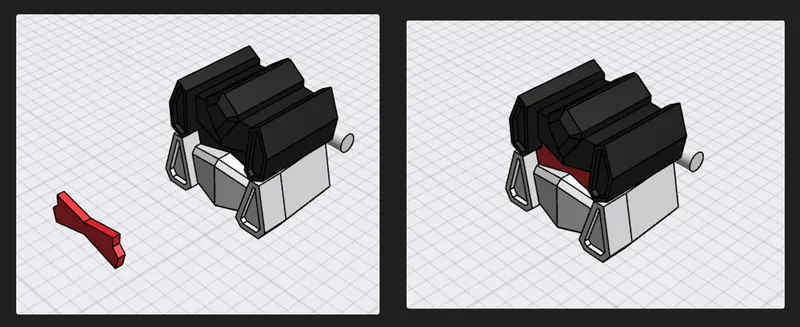
The head is pretty simple. Take the neck and slide it into the jaw as seen below. Then take the Helmet, connect it to the jaw and snap the eyes into place.
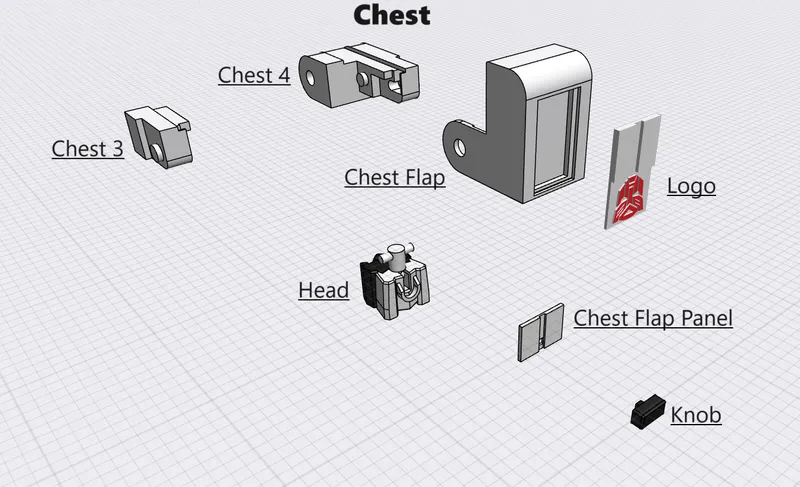
The first thing to do with the chest is to snap the Logo into the Chest Flap and then take the Chest Flap Panel and slide it into the slot in the Chest Flap. Once the Chest Flap Panel is in place, insert the Knob.
Take the assembled head and insert a peg from the neck into the track on Chest 4. Attach Chest 3 to Chest 4, making sure that the other peg on the neck is sitting inside the track on Chest 3. See the picture below for the proper orientation.

Your chest/head should look like this right now. Let's put that to the side for a moment and assemble the rest of the chest.
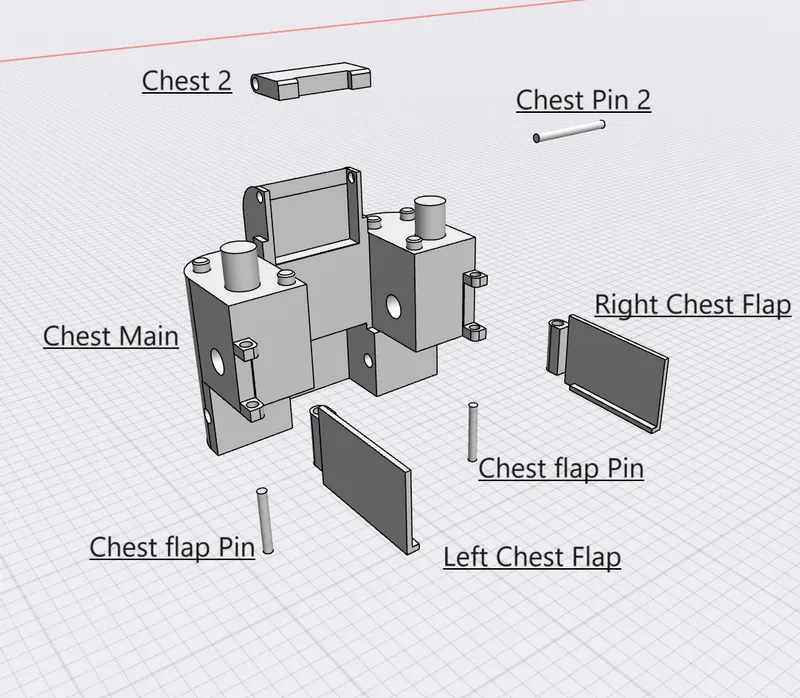
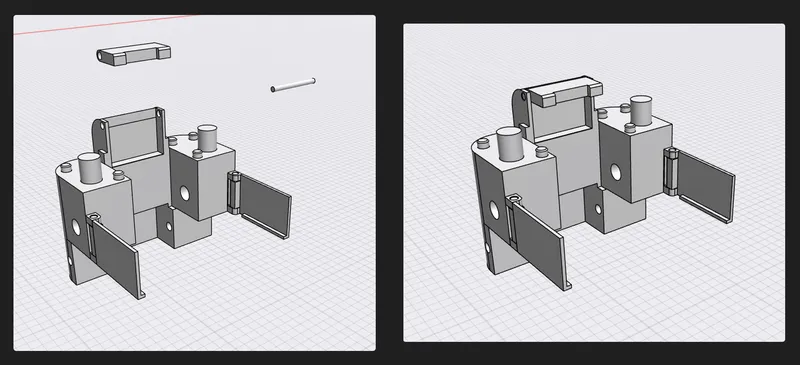
Attach Right Chest Flap and Left Chest Flap to Chest Main using the Chest flap Pins and the attach Chest 2 to Chest Main using Chest Pin 2 as seen below. Once that is done, we'll leave this for a moment and assemble the guns.
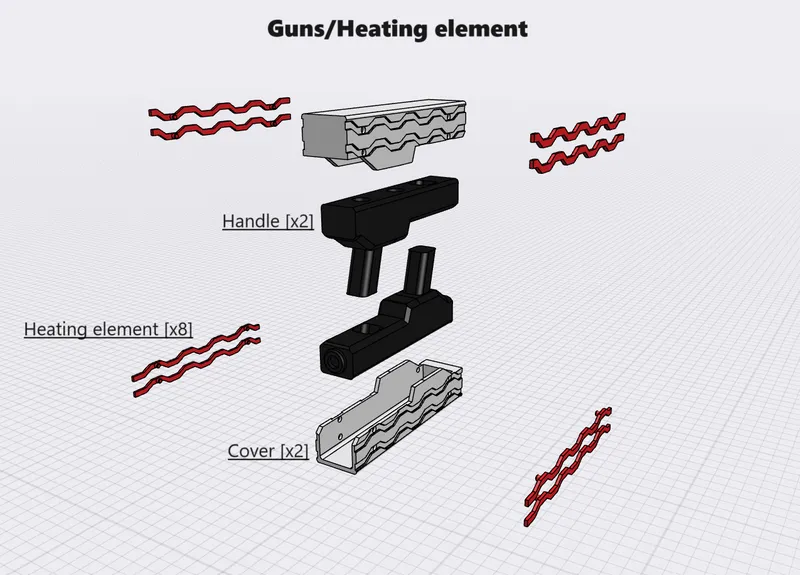
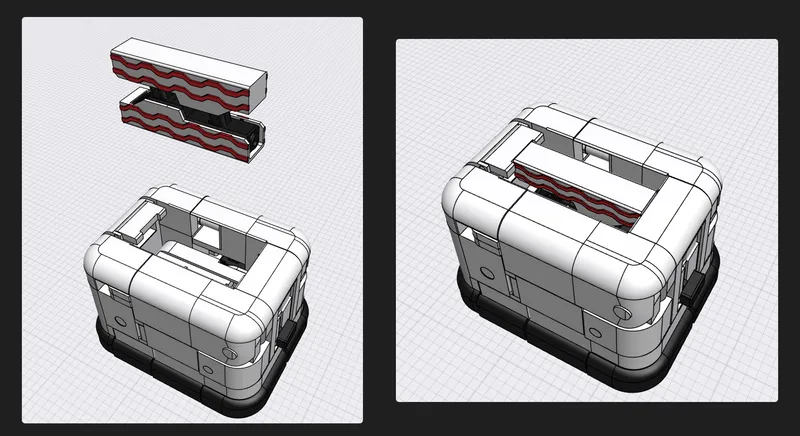
This is probably my favourite part of the model. When combined, the two guns form the heating element while in toaster form, giving a whole new meaning to the phrase “packing heat”.
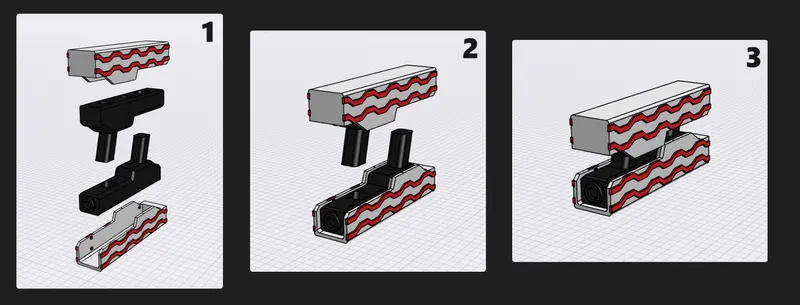
Each Heating Element has two pegs the fit into holes on the Cover. Attach four Heating Element to the cover as seen in image 1. There are two pegs on the inside of the Cover that fit into holes on the handle (image 2). Repeat the steps for a second Gun and then set them aside for the time being.
Now that we have all of our sections assembled, we can start putting them together. Let's start with the Chest Main and the Waist/Legs.
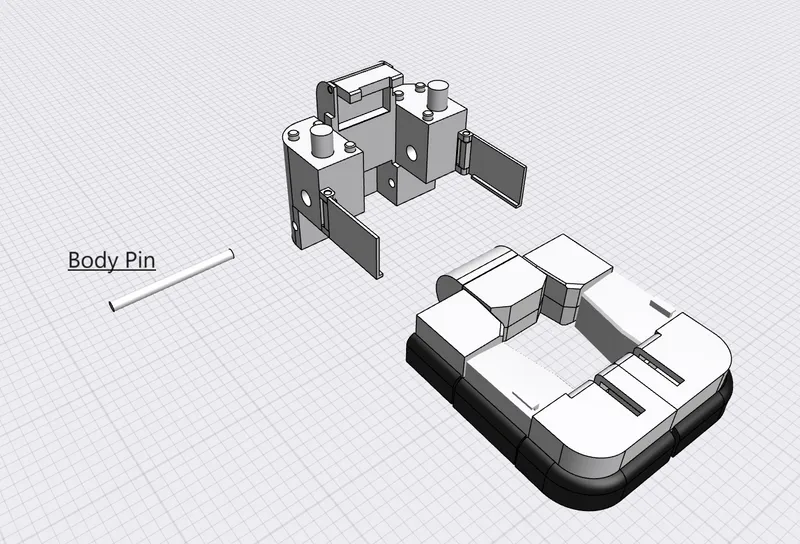
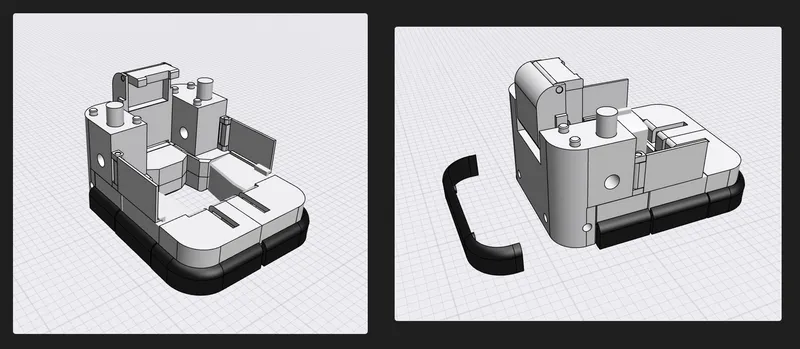
You want to slide the Waist/Legs into the bottom of Chest Main, lining up the two pieces and inserting the Body Pin to hold them together. Once the waist/legs are connected to the chest, you can attach the Body Trim.
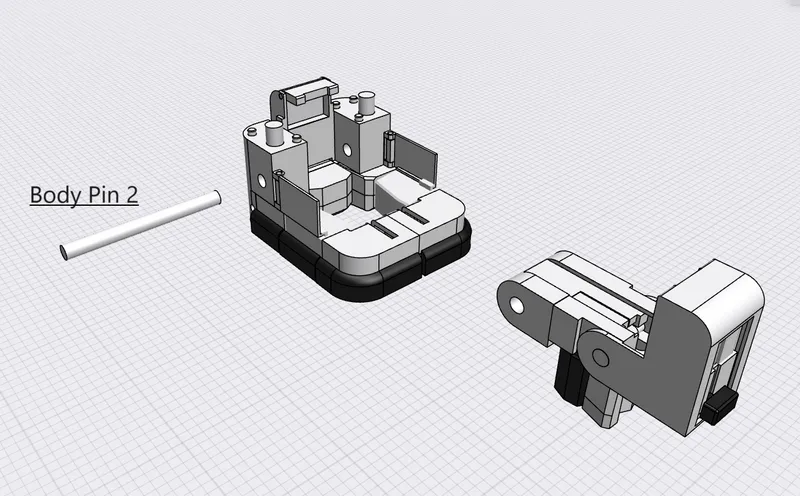
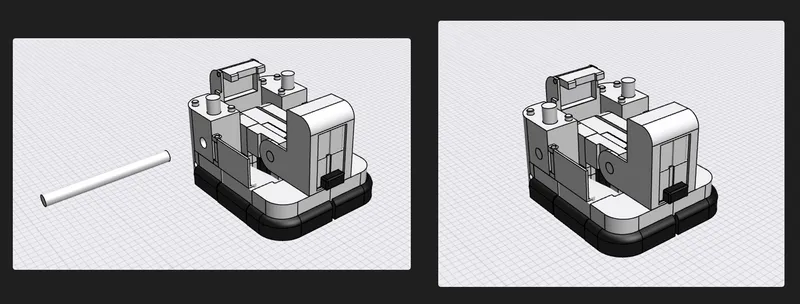
Next, we'll attach the Head/Chest using Body Pin 2. When correctly situated, the head should sit face down between both legs.
Once the Head/Chest is connected, we'll attach the arms.
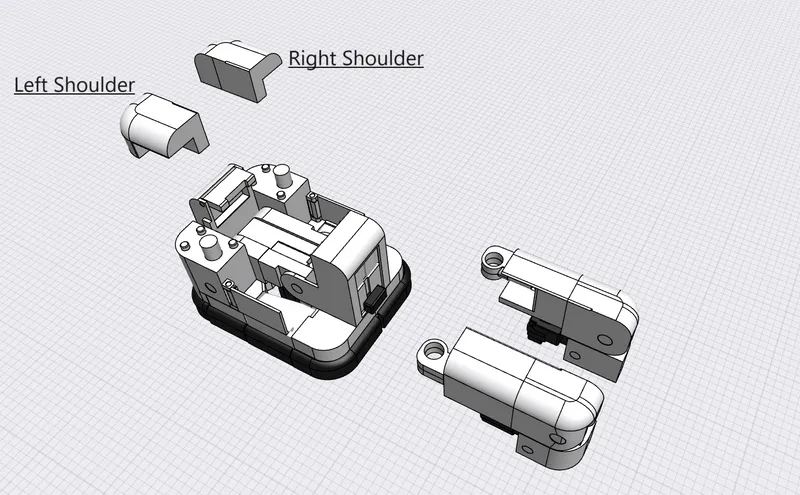
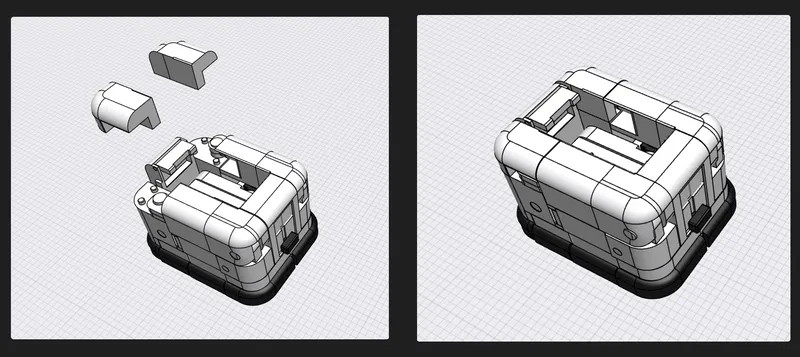
Each arm slides over top of a peg on each shoulder as seen below. Once the arms are on, you can cap them using the appropriate shoulder part.
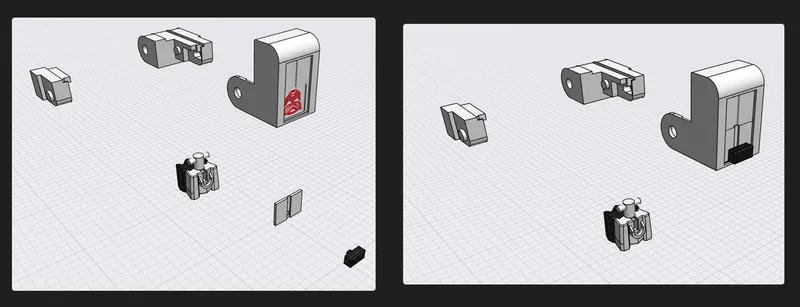
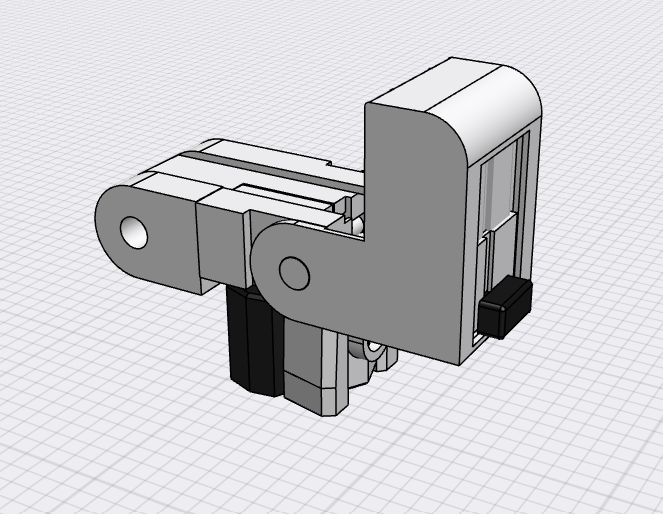
Lastly, pop in the assembled heating element/guns as seen in the following pictures. It might actually be easier to flip the Chest 2 piece up, place the Heating Element inside and then move Chest 2 back to keep the Heating Element in place.
BACKSTORY: Tired of fighting in a never-ending war with no purpose, Crumbs abandons his post to join up with deserters, Autobot Ham and Decepticon Cheese in search of a home where they can live in peace. A task easier said then done while being hunted by both the Decepticons and the Autobots.
Tags
Awarded in the contest
Jointed Figures – Jubilee Round!
Model origin
The author marked this model as their own original creation.


