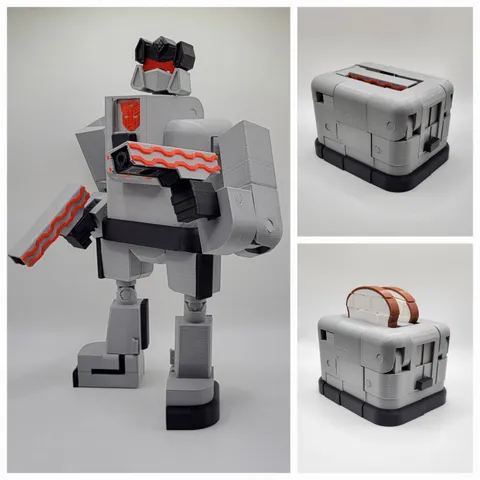
Lucky 13 skin: Orc Warrior

Description
PDFThis started out as just a set of armor but when I realized it looked a lot like gear from WoW, I decided to lean into it and made the axe based on Gorehowl.
LUCKY 13 PIECES NEEDED
On top of downloading my files, you will need to download most of the armature and some of the skin from the original Lucky 13 model. All of the following pieces should be printed in green.
If there is a [2X], [6x] or [12x] in the title, that means you need two, six or twelve of that piece. Those amounts are what you will need to make a full set of armor. That goes for both the files that I've uploaded as well as the Lucky 13 pieces I'm linking to below.
00A01 armature head.stl
00A02 armature neck.stl
00A03 armature chest.stl
00A04 armature abdomen.stl
00A05 armature waist.stl
00A06 armature hips.stl
00A08 [2X] armature shoulder.stl
00A09L armature upper arm left.stl
00A09R armature upper arm right.stl
00A10L [2X] armature forearm left.stl
00A10R [2X] armature forearm right.stl
00A11 [2X] armature glute.stl
00A12 [2X] armature thigh.stl
00A14 [2X] armature shin.stl
00A15L armature foot left.stl
00A15R armature foot right.stl
00B01 skin head.stl
00B02 skin neck.stl
00B03 skin chest 1.stl
00B04 skin chest 2.stl
00B05 skin abdomen.stl
00B11 [2X] skin glute.stl
00B12 [2X] skin thigh 1.stl
00B13 [2X] skin thigh 2.stl
HANDS
It doesn't matter what style of hands you use but they should be printed in green. The following list are the basic hands originally released with the Lucky 13 model however there are lots of different hands out there, you just have to search for them.
00A17L armature hand flat left.stl
00A17R armature hand flat right.stl
00A19R armature hand dynamic right.stl
00A19L armature hand dynamic left.stl
00A21R armature hand grip right.stl
00A21L armature hand grip left.stl
00A18L armature hand neutral left.stl
00A18R armature hand neutral right.stl
00A20L armature hand fist left.stl
00A20R armature hand fist right.stl
If you want to use the axe, you will need the Detailed Simple Grip hands made by Printables user Cromulent.
ASSEMBLY
Assembly shouldn't be too difficult.
First, assemble the L13 parts listed above the same way you would normally using my remixed clavicle and knee parts. If you're not familiar with Lucky 13 assembly, check out the Lucky 13 manual.
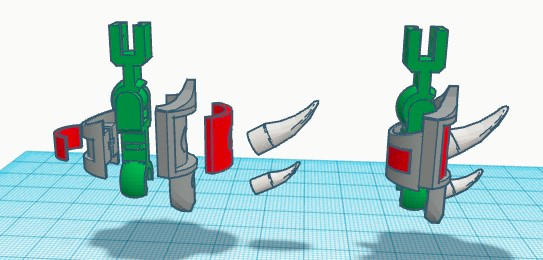
WRIST
Pieces you will need:
- Wrist 1 - Grey.stl
- Wrist 2 - Grey.stl
- Wrist 1 Plate - Red.stl
- Wrist 2 Plate - Red.stl
- Large Spike - White.stl
- Medium Spike - White.stl
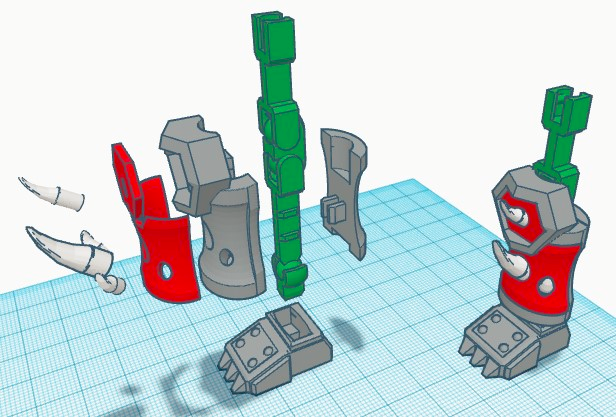
Fit the red wrist plates into the grey wrist pieces and then fit the spikes into Wrist 1 - Grey.stl as seen in the photo below. The completed Wrist 1 - Grey.stl and Wrist 2 - Grey.stl then snap together over the forearm armature.
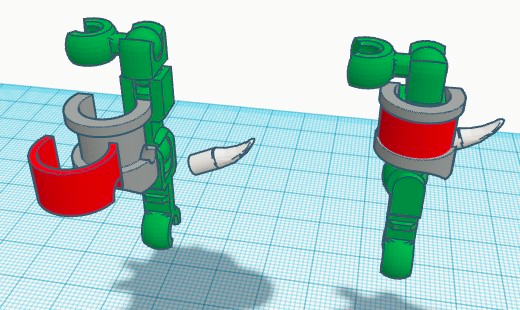
UPPER ARM
Pieces you will need:
- Left Upper Arm - Grey.stl
- Right Upper Arm - Grey.stl
- Right Upper Plate - Red.stl
- Left Upper Plate - Red.stl
- Small Spike - White.stl
Super easy to assemble just like the wrist. The red plate and the spike fit into the grey piece. The completed upper arm skin then slides onto the upper arm armature as seen in the following picture.
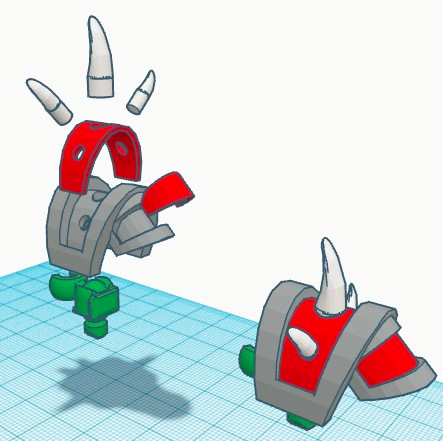
SHOULDER
Pieces you will need:
- Shoulder - Grey.stl
- Shoulder Plate 1 - Red.stl
- Shoulder Plate 2 - Red.stl
- Large Spike - White.stl
- Medium Spike - White.stl X2
Again, straightforward assembly. The red plates fit into the grey shoulder and then the spikes fit into the shoulder as seen in the following picture. The completed shoulder then slides onto the remixed clavicle armature.
SHIN
Pieces you will need:
- Shin 1 - Grey.stl
- Shin 2 - Grey.stl
- Shin Plate 1 - Red.stl
- Shin Plate 2 - Red.stl
- Large Spike - White.stl
- Medium Spike - White.stl X3
Just like the rest of the armor so far, the red plates fit into the grey. In this case, both red plates fit into Shin 1 - Grey.stl and then the spikes fit in as seen in the picture below. Shin 1 - Grey.stl and Shin 2 - Grey.stl connect to the shin armature the same way a regular shin skin would.
AXE
I'm actually including three axes although only one is pictured. The first version is what you see in the pictures, eight pieces and four colors. The other two versions are a solid, one piece axe (Axe - 1 Piece.stl) and a two piece (Axe 1 of 2.stl and Axe 2 of 2.stl) for those users who want the axe but aren't necessarily up for putting together a complicated piece.
This assembly is for the first version.
Pieces you will need:
- Axe Handle Knob - Grey.stl
- Axe Inscription - Grey.stl
- Axe Spikes - Grey.stl
- Axe Head - Grey.stl
- Axe Handle 1 - Dark Brown.stl
- Axe Handle 2 - Light Brown.stl
- Axe Inscription Plates - Red.stl
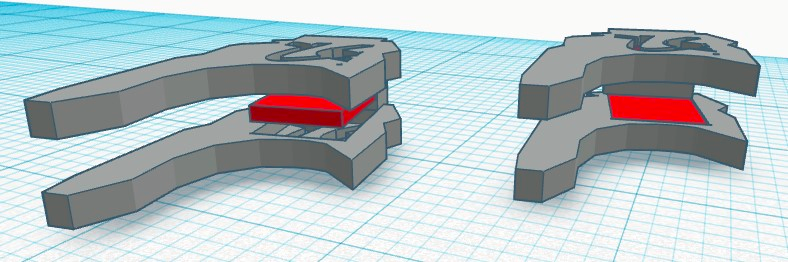
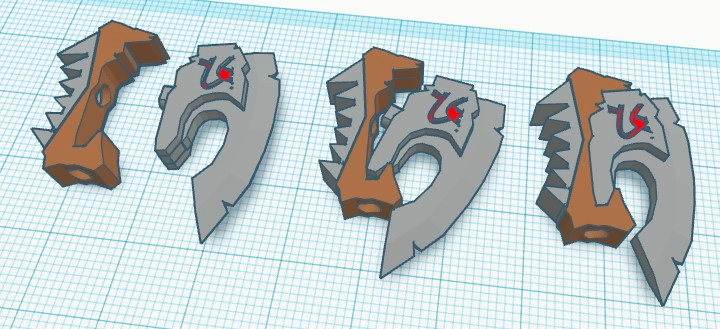
First thing you need to do is to fit the Axe Inscription Plates - Red.stl into Axe Inscription - Grey.stl as seen in the following photo.
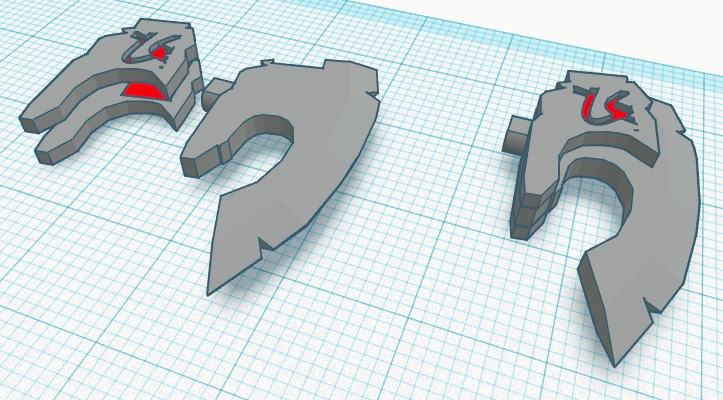
Next, take that inscription piece and fit Axe Head - Grey.stl into the middle and put that to the side for a moment.
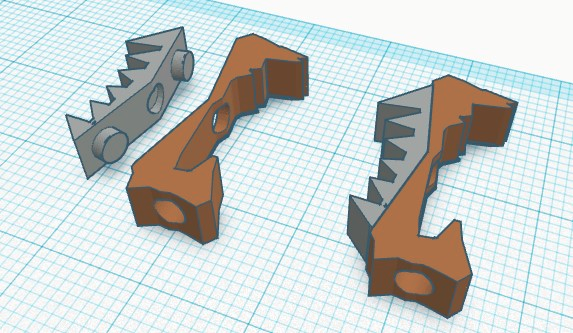
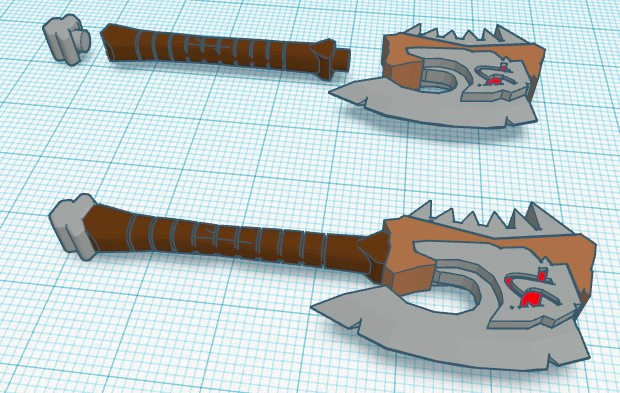
Take Axe Spikes - Grey.stl and fit it into Axe Handle 2 - Light Brown.stl as seen below.
Now take the completed axe head and fit it into the axe handle assembly. Start by putting the bottom of the axe head into the axe handle and then swinging the top of the axe head in. See the below photo for reference.
- Last thing to do is connect the handle and knob the the finished axe head and you're good to go.
NOTES:
- This skin is still a work in progress. there is a good chance that I end up adding a helmet, shield or something else.
- Wrist 1 [2X] - Grey.stl, Shin 1 [2X] - Grey.stl, Shin 2 [2X] - Grey.stl, Waist - Light Brown.stl, Axe Inscription - Grey.stl, Axe Head - Grey.stl, Axe 1 of 2.stl (optional) and Axe - 1 Piece.stl (optional) will require supports.
Tags
Model origin
The author remixed this model.

Differences of the remix compared to the original
Remixed Lucky 13