Qidi Plus4 Filament Cutter Buffer Block

Description
PDFUpdate:
This design is now on version 3, which is even less tall that some of the previous makes. It is reliably working on my machine.
After printing and installing the modified filament cutter block, I noticed that there was still a lot of extra space for the camera wire. This meant there was the opportunity to reduce the bed exclusion zone even further. Additionally, if a slight ramp was added it would allow the cutter lever to be depressed a couple millimeters and not restrict motion in the X direction.
This part allowed me to reduce the exclude region even further, to the sizes below
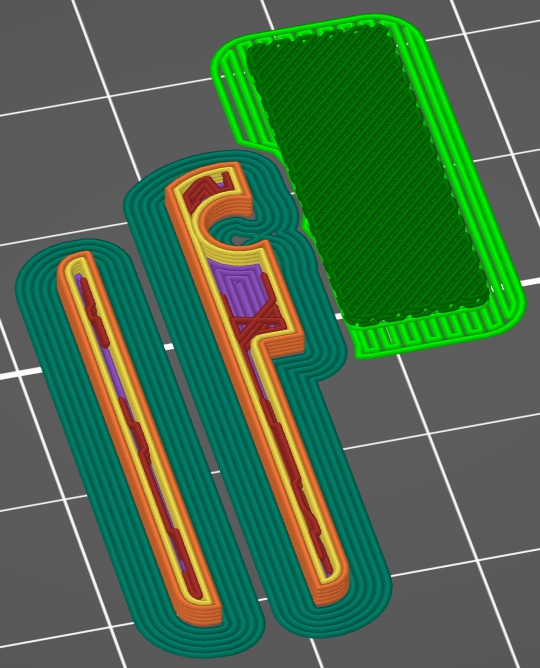
Stock: 12x20mm
Original: 7x18mm
This Remix: 5x10mm
Print settings…
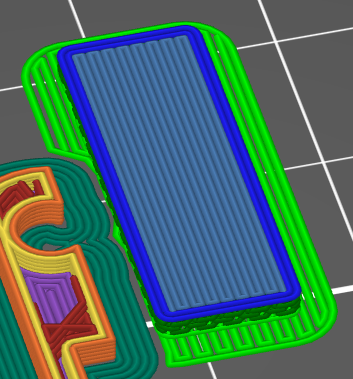
Unlike the original, I recommend printing this in the orientation that it imports. Use a brim. Paint supports on only the floating surface. Change the support interface layer angle if it is not at a 45degree angle relative to the bridging in the floating surface. This makes it easier to remove the supports
Use 0.15 or 0.2mm layers with ASA or ABS for chamber temperature resistance.
Open your printer settings in the slicer and change the following values
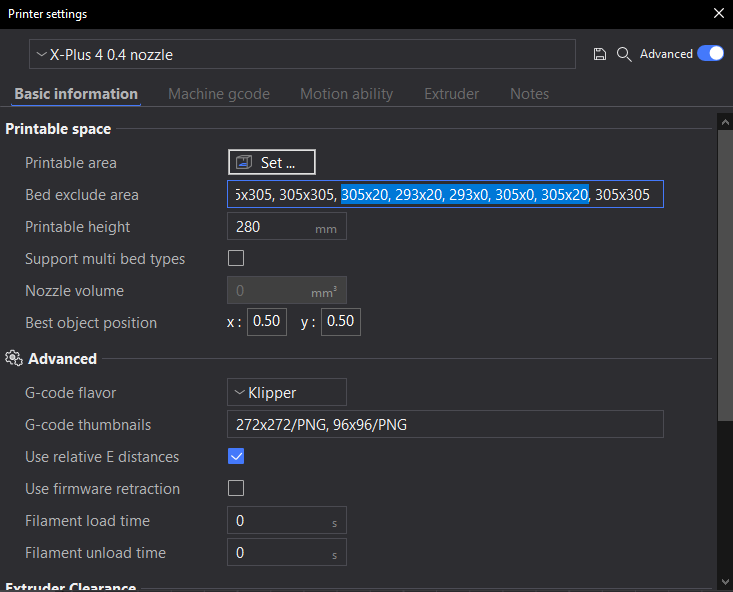
to the new values seen below, and save your printer profile as a new name

You should confirm these values by manually stepping your printer. Here is the procedure I used…
- Home the printer
- With the on-screen controls, move the head to the right and forward by two steps of 50mm each. Then, set it to 10mm steps and move it right and forward by four additional steps each. This should place you at X=290mm and Y=10mm. You can confirm this from the device interface in QidiStudio
- While watching the filament cutter, step by 1mm to the right on the X and confirm that you're happy with the clearance to the cutter once you reach X=300mm. You should be able to step to lower Y values without touching the cutter. If you would like more clearance, you can use 299mm for your exclusion limit instead.
- While at Y=10mm, move the X axis by 1mm increments to the right to confirm that the cutter lever will begin gently moving up the sloped region of the part. If you would like more clearance you can use 11mm for the exclusion limit. It will only depress the lever about 2mm and there seems to be a lot more travel required to make contact with and then cut the filament.
- Now, step towards Y=0 and confirm that the filament does get cut before you reach the movement end-stop.
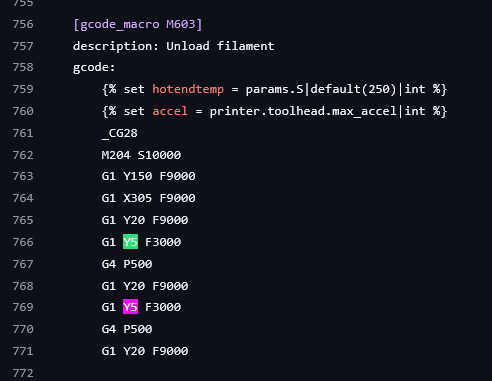
Thanks to @Variant13_977223 with his make, he provides info on how to adjust the filament cutting macro so that it will move further to cut the filament due to the end-stop being less tall
Change the highlighted Y5 values here to a lower value. I had to use Y0
Here is the onshape link to my design. https://cad.onshape.com/documents/d464bcc665df5e4be1828416/w/49086a2fc6baa3c874517617/e/10fac7a31e781deefa494c8d
Tags
Model origin
The author remixed this model.

Differences of the remix compared to the original
Redrew from original STL, adjusted the face that makes contact wit the cutter, and shrunk the channel for the camera wire.


