[Guide] Ratrig V-core-4 Smart Filament Sensor + Spacer Fittings

Description
PDF[Guide] V-Core-4 Smart Filament Sensor
ATTENTION: GUIDE CAN BE OUTDATED!
Last update: 14.11.2024
Check for your own safety!
(especially on the wiring and software side)
What you need to follow this guide
per Toolhead
- 1x LDO Orbiter 2 Smart Filament Sensor
- 1x M3x40 Screw
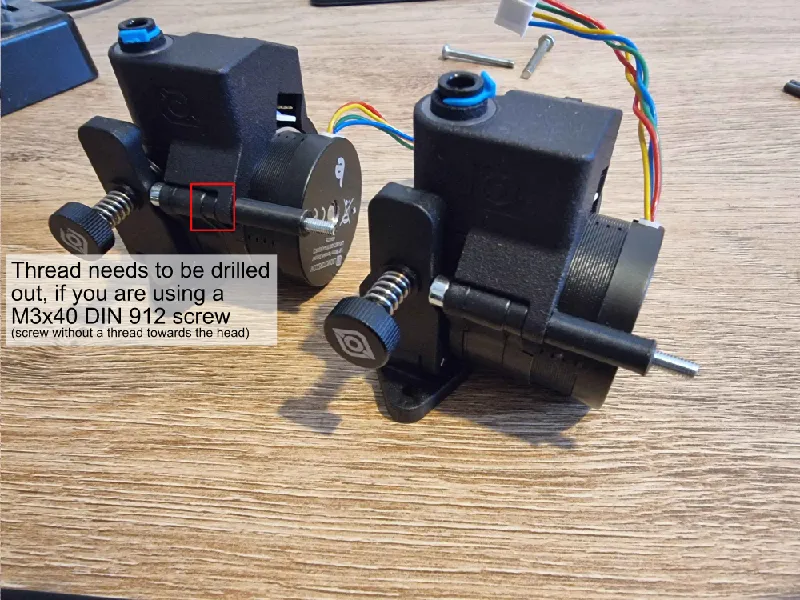
(Note: DIN 912 = no thread on the first 20mm, if you find a long m3 screw with a full thread use that one instead!) - 1x Brass Heat Insert ("default" one, M3 x 4.6 x 4)
- 1x 4pin dupont connector + 4 dupont crimps (or similar)
- Dupont Crimp-Tool(s) (or similar)
- High temp resistent filament like ABS, ASA, …
- (If you use a DIN912 M3 screw) 3mm metal drill
3D printed files (per toolhead)
- 1x rr_toolhead_vc4_toolboard_vertical_smartfilamentsensor (see files)
OR drill a hole on the already printed part (carefully with M4 drill) - 1x spacer_ebb
OR any M3 spacer that is temperature resistant and is 16.4mm long
Hardware Installation
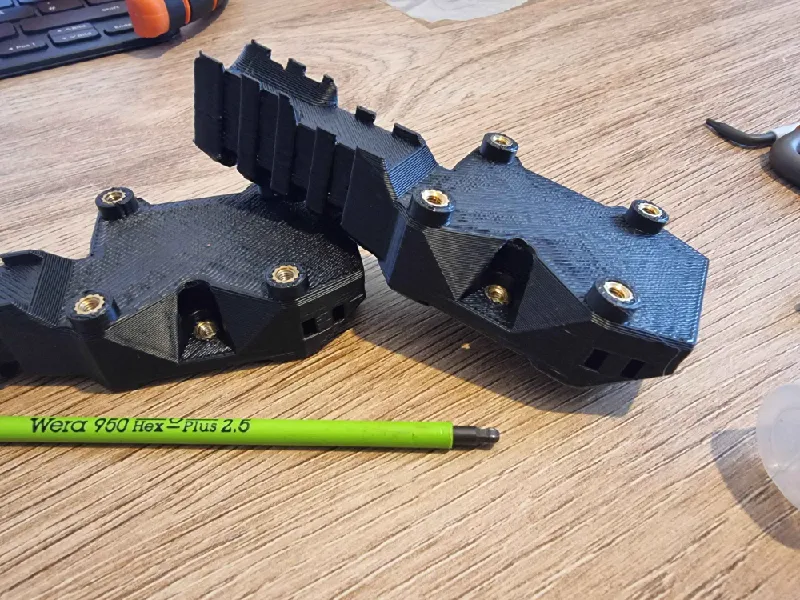
[1.] Print out rr_toolhead_vc4_toolboard_vertical_smartfilamentsensor and spacer_ebb in ABS or ASA (or similar). Insert the heat insert in the dedicated slot of the printed part.
[2.] Remove the default screws of the orbiter 2 extruder, rotate the motor according to the vcore-build guide.
[3.1.1] If you have a fully threaded M3x40 screw, you can skip [3.1.2], continue with [3.2].
[3.1.2] If you are using an DIN 912 M3x40 screw (a screw without thread on the first 20mm), you need to drill out the thread of the orbiter motor housing and make sure to catch the waste to not contaminate the filament gears.
[3.2] Insert the M3x40 screw on the upper screw hole and put the spacer already on the screw.
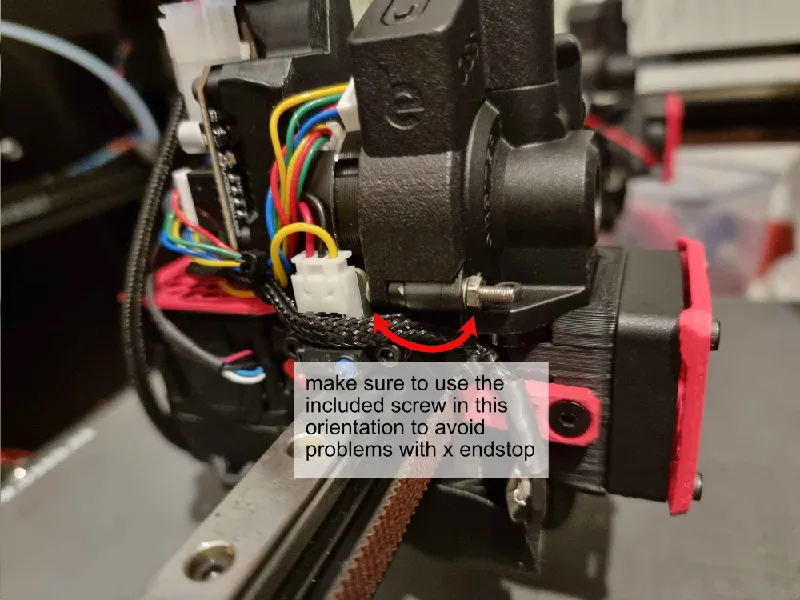
[4.] Take a screw of the LDO SFS and mount it on the lower hole. Make sure to use the screw head from the side of the filament sensor (and not from the original orbiter housing.). See image if you are unsure (the image shows how it fits)!
If you don't do this, the x-endstop wont fit!
[5.] Assemble the rr_toolhead_vc4_toolboard_vertical_smartfilamentsensor accoding to the vcore4 guide, but dont use the M3x8 cap-hat-scrrew. Instead tighten the M3x40 screw.
[6.] Continue normally with the vcore4 buildguide.
Wire setup
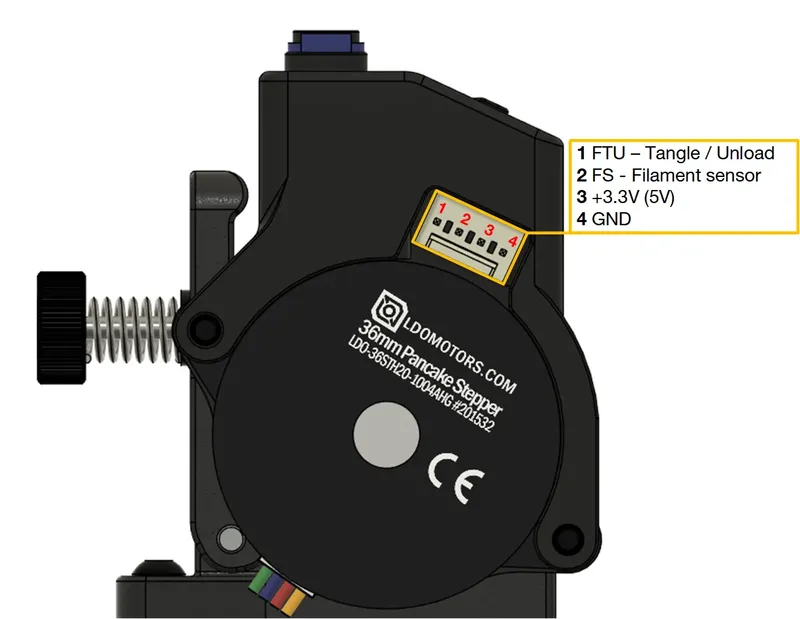
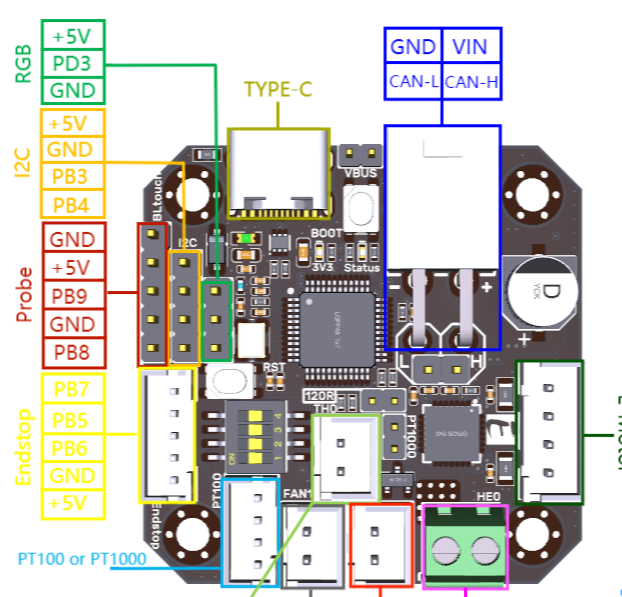
We want to connect the filament sensor to the four I2C pins.
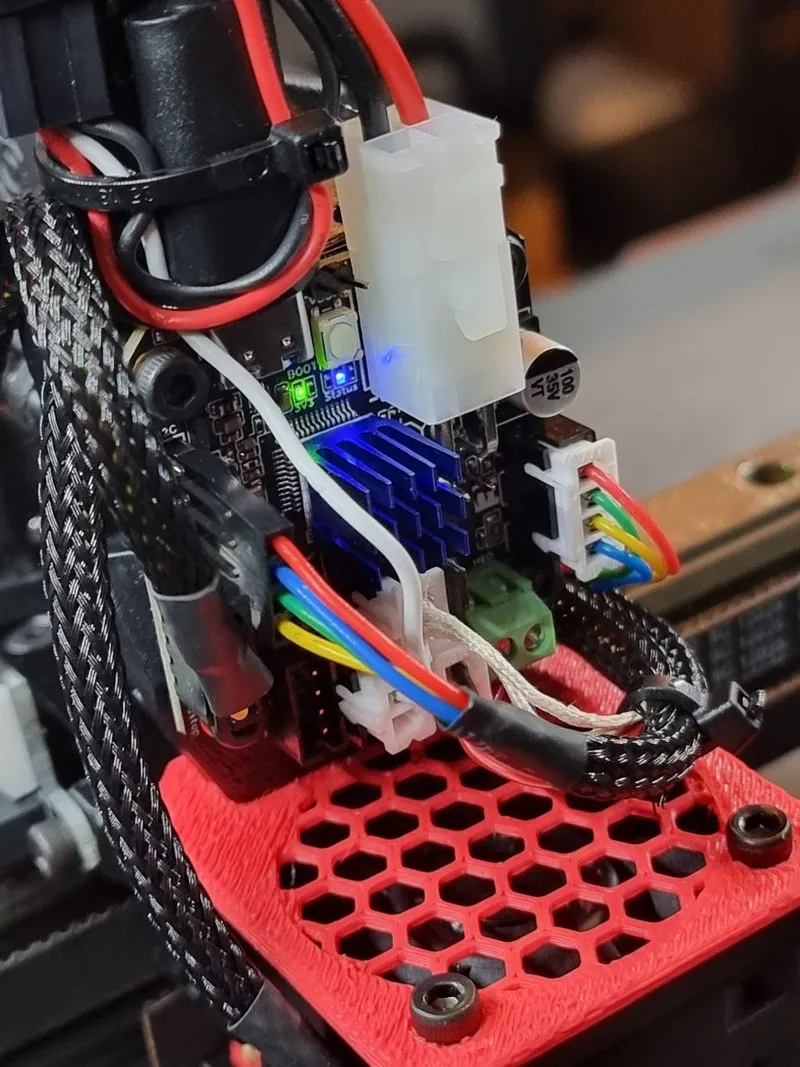
Use the default cable of the LDO kit and cut it shorter (check the length on your toolhead to route the cables like you want to be). Crimp new dupont connections.
Make sure to use the correct connections:
[1] 5V = Red[2] GND = Blue[3] FS = Green = PB3 (filament switch)[4] FTU = Yellow = PB4 (tangle/untangle/button)
Software setup
Insert the following Code initially by Helge Keck, now in RatOS integrated into your printer.cfg:
(T0 = all machines, T1 = IDEX only)
Attention!! After copy, paste it as TEXT! There are sometimes invisible characters that prevent everything from working! If in doubt, copy it from the linked RatOS Website!
# t0 orbiter smart filament sensor
[filament_switch_sensor toolhead_filament_sensor_t0]
pause_on_runout: False
event_delay: 0.1
switch_pin: ^toolboard_t0:PB3
runout_gcode:
_ON_TOOLHEAD_FILAMENT_SENSOR_RUNOUT TOOLHEAD=0
insert_gcode:
_ON_TOOLHEAD_FILAMENT_SENSOR_INSERT TOOLHEAD=0[gcode_button toolhead_filament_sensor_button_t0]
pin: ^toolboard_t0:PB4
release_gcode:
{% if (printer.print_stats.state == "printing") %}
_ON_TOOLHEAD_FILAMENT_SENSOR_CLOG TOOLHEAD=0
{% else %}
_ON_FILAMENT_SENSOR_BUTTON_PRESSED TOOLHEAD=0
{% endif %}
press_gcode:# t1 orbiter smart filament sensor
[filament_switch_sensor toolhead_filament_sensor_t1]
pause_on_runout: False
event_delay: 0.1
switch_pin: ^toolboard_t1:PB3
runout_gcode:
_ON_TOOLHEAD_FILAMENT_SENSOR_RUNOUT TOOLHEAD=1
insert_gcode:
_ON_TOOLHEAD_FILAMENT_SENSOR_INSERT TOOLHEAD=1[gcode_button toolhead_filament_sensor_button_t1]
pin: ^toolboard_t1:PB4
release_gcode:
{% if (printer.print_stats.state == "printing") %}
_ON_TOOLHEAD_FILAMENT_SENSOR_CLOG TOOLHEAD=1
{% else %}
_ON_FILAMENT_SENSOR_BUTTON_PRESSED TOOLHEAD=1
{% endif %}
press_gcode:
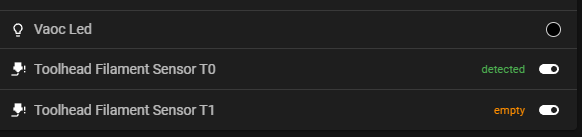
Save and Restart!
You should see both filament sensors light up on startup (and indicate red if nothing is loaded). You can now insert filament into the sensor and it will automatically grap the filament and perform a load macro (you can turn that off in the settings, see the following note)
Note:
These settings are (currently) default true. If you don't want them, you need to copy the lines and set it to false!
Model origin
The author remixed this model.

Differences of the remix compared to the original
Remixed “rr_toolhead_vc4_toolhead_vertical” to fit an heat insert for the mounting of a longer screw. Added a smaller spacer to print to replace the default one.


