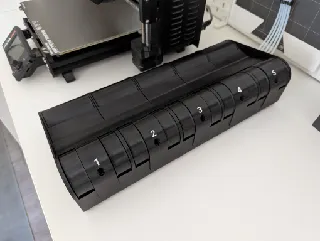
admittedly have not used mine in operation yet (waiting for the parts for the other 4 to print) but man I'm impressed with the design and documentation. I feel like I got my money back in just education (picking up little tips and design ideas for my own designs). Great work!
BUFFER UNIT - Made for Prusa MMU3
Makes
Comments
I’ll start by saying this is a really good design that has a lot of potential (pun intended). I agree with other people saying that a ratchet or clutch on the front would be the ideal/perfect solution. I saw your feedback on a clutch and agree. Have you tried a ratchet or slip gear? The only reason I gave it 4/5 is that I think I will need to do some tinkering to get cardboard spools to work. Mine currently binds against the front wheel and eventually falls off the edge. This is a nearly full spool. Raising the sidewalls about .25” above the circumference of the rollers could also help. (edited)
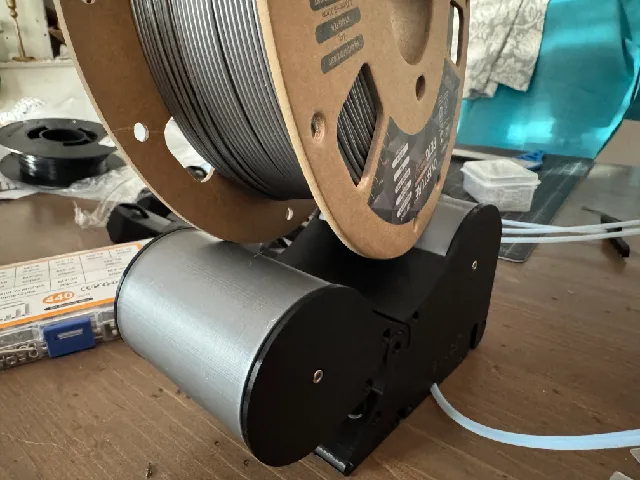
@cagoss85_3066844 With this ring it works fine for me https://www.printables.com/model/217622-cardboard-spool-ring
@Boomi Yeah I realized soon after I commented that I missed the note about cardboard needing spool rings. It seems to be working much better now. Might try out TPU sleeves for the rear roller though.
Question about this build. What would need to change to make this compatible with 2kg spools?
@MatchstickMan The designer said it is under development...
I have long hated the buffer and have tried numerous other solutions. This is by far the best design. Prusa should adopt this design as the mmu's official buffer unit. It's super easy to put together and print, works well, and shrinks the mmu footprint. One of the things I love about my X1c is the AMS. I would love to see the MMU get integrated into this buffer unit to further shrink the MMU for the core 1.
I printed the body in Overture Petg and the main gears in PC Blend. I have to finish printing the rest and do it all over again for my other MK4s. To be honest, I was really surprised at how well it worked when I was just playing around with it.
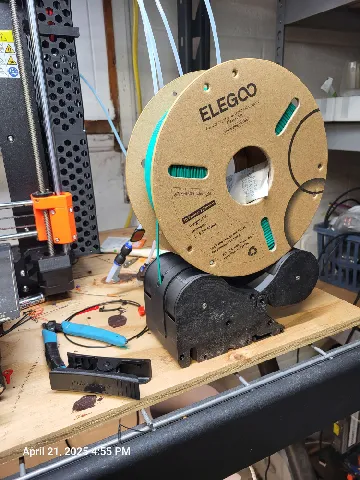
Which bearing version are people using. I have been using the 685 and wondering if anyone is having fewer issues with 686's?
@smartroad What issue are you encountering?
I used 685. Haven't run any prints yet with this setup but with just testing the lift and drop of the back spool from any height, it will drop from any height so I presume operation with a spool in place will work well. Would think there may be more drag in a 686.
I had two units which were kinda sticky but that's my filament and print... the design is solid. I added some synthetic grease(Super Lube) to the main gear surfaces and they work wonderfully now.
https://www.amazon.com/Super-Lube-21030-Synthetic-Grease/dp/B000XBH9HI/
Hello the system works ish when the mmu was unloading it didn’t roll back. Number 3 rolls back slightly same with 4 (edited)
@LudvigBroome thank you it seems to be getting a bit better the more changes it’s doing it works wonderfully on lighter spools the model is well designed thank you
@LudvigBroome I've just started printing this project. Do you know when the next version is going to be out? Will I be able to print the other items and just wait for your updated gears?
Question... have you considered a U shape clip or the like that could be added to this location? I like the bolt joints at the bottom but if you pick up by one end, you're putting a lot of lever weight on those joints. A press in U shape piece here could alleviate this? Or an insertable pin between the sides in a similar area? (edited)


@jurassic73 I'll consider this, thanks!
Cheap hardware source would be your local hardware store but you typically need to purchase boxes to get a good discount vs singles.
This aliexpress vendor has been good. There are a lot of hardware vendors. Search for your item and sort by order count.
M3 hex head hardware:
https://www.aliexpress.us/item/2251832782168715.html
M3 hex nuts:
https://www.aliexpress.us/item/2251832792236700.html
If you need ten, order more since you'll need them in the future. Build up a supply and then you'll just have this on hand for future builds. (edited)

The author is a genius :) Prusa could learn from you how to insert nuts into the model the quality of the model is amazing it is clear that you put a lot of work into it I will continue to follow you closely :)
As for the model I do not recommend TPU socks on the front roller only on the rear large roller that moves freely the front two rollers are blocked at the end of their path and the spool has to slide on them if you use too soft TPU like me ( FiberFlex 30D ) the spool will jump out.
If the author managed to make the front rollers continue to rotate in one direction it would be super perfect :)
PS: the author has my great admiration really great work (edited)
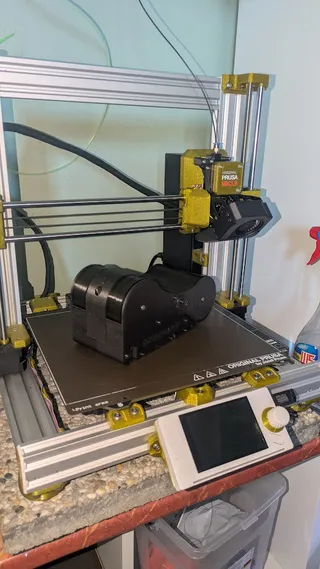
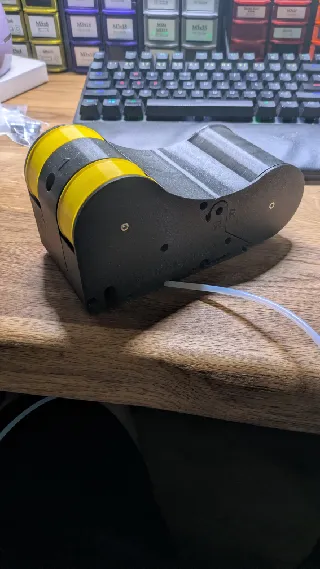
Question: Have you tried both scarf and random seam for the roller parts? See larger roller.
Edit - random seam(as my experiment) made random bumps on gear surface which made for rough and inconsistent operation, use aligned seam. (edited)

@LudvigBroome Okay - the random seams on the rollers worked nice but the one piece with the gear teeth, not so good. The random bumps made the gear not as smooth operating and it would stick in position if held. Will print another with just the scarf seam.
Edit - printed a replacement piece with the gear and just scarf joint, no random seam, and the gear printed nice and even and the mechanism is smooth now.
tldr - random seam bumps on gear surface made for rough operation, use aligned seam. (edited)
@jurassic73 Good to know, thank you!
Hello, I am starting to print your version A4 - ZZ 685 bearing.
What are the best print setting for Prusament PETG?
@adondysh_34244 Hi! General print settings are listed on the main-page, but it's basically just your standard profiles. You can of course use the ones prusa provides if you're using prusaslicer.


