Python AMS - Passively Dried Enclosure

Description
PDFBuy Python AMS
I've teamed up with a few different stores around the world offering the printed parts and everything you need for the build so you won't need anything outside of the kit:
If you're interested in the panels only for the enclosure, you can buy them from LaserFoundry.
Python AMS has a strict non-commercial license, it can only be sold with licensing through Hume Beam Engineering Solutions.
Update October 28, 2024
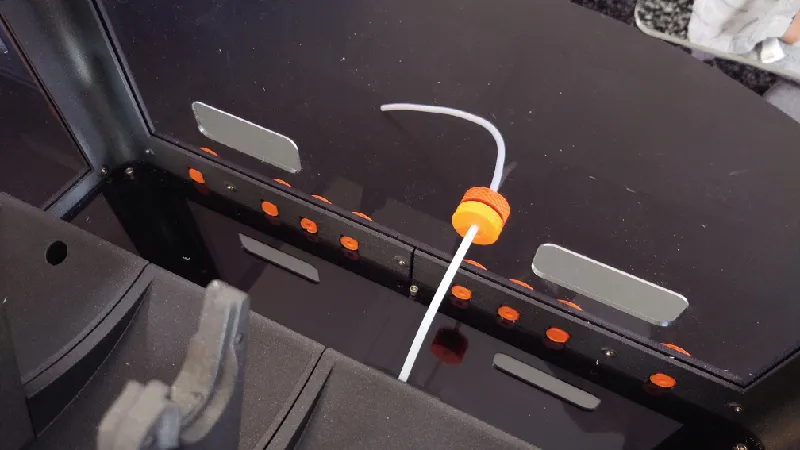
The bottom rear left and bottom rear right printed parts have been optimized. The plugs now sit 3 mm higher up and the cutouts enlarged so the AMS bus cable (black cable) is easier to pass through.
If you're using an earlier version of the enclosure and have issues passing through the cable, you may find it easier if you feed through the cable before you screw down the bottom panel.
There are no changes to the other parts.
Update October 20, 2024
I've added instructions on how to optimize the PTFE routing and also added a small coupler for the M14 plugs, please view the assembly guide here.
Update October 14, 2024
The Python AMS Enclosure has been updated to version 1.03. There are some minor fixes but the main change is it is now much easier to build and assemble as the M3 socket heads now screw directly to the printed parts (same as with the earlier threaded version) and everything is marked more clearly.
However, if you still want to use heated inserts for your Python Enclosure build, please download the version from the folder “heated-inserts-version”. Add a heated insert to all locations with a crossmark. You need around 50 x 4.0 mm long M3 heated inserts (M3S short inserts), the rest of the build and BOM is the same.
If you need help on how to install the heated inserts, please view the uploaded PDF in “Other Files”: python-heated-inserts-instructions-updated-october-16-2024.pdf
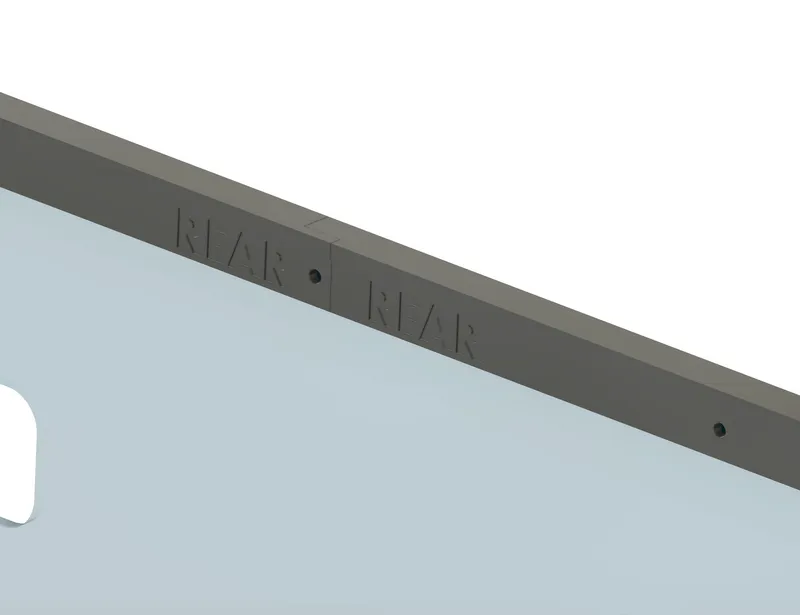
First screw together the four “bottom” parts with the 25 mm socket heads as per the assembly instructions a few scrolls down. The side with the cutouts in the bottom is the rear, this is where the PTFE tubes and cables exit.
Next, place the “top” parts with the parts with the debossing facing the correct way, so those parts with “rear” is facing rear and so on.
Then do the same so the “edge” parts, placed just in front the “top” parts.
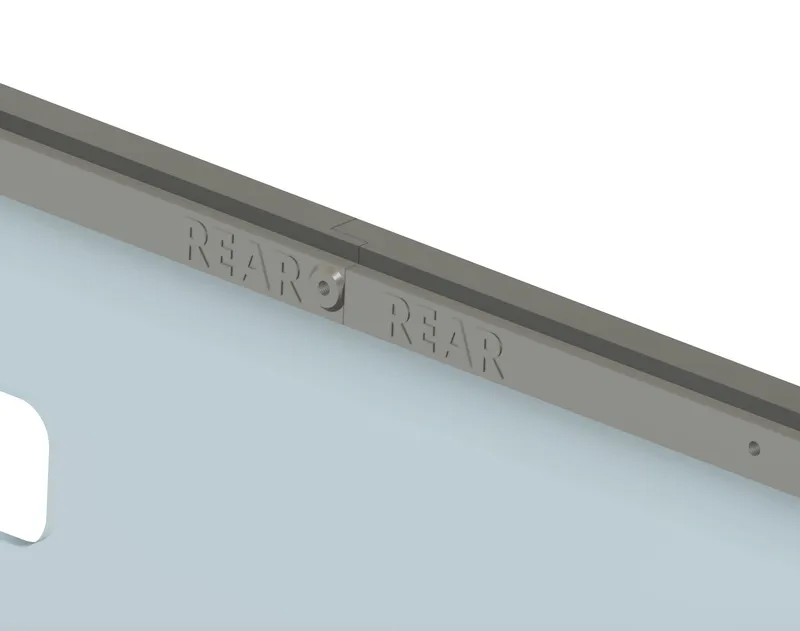
If the holes of the panels don't match up exactly, simply flip the panel around horizontally and you should be good to go, the panels are close but not fully symmetrical.
About
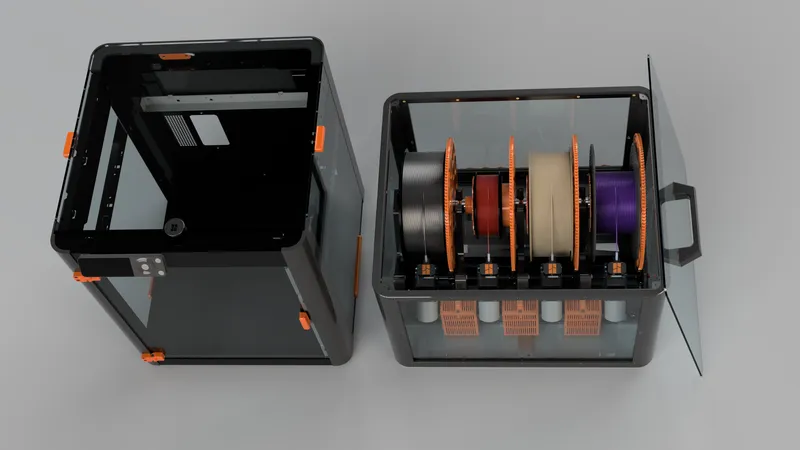
This is a Passively Dried Enclosure for Python AMS, so it works just as the stock AMS. There is also an Actively Heated Enclosure available. The printed parts are actually the same, it's just the front and rear panels that are different but I prefer to keep them apart for different reasons.
It's a good idea to use the Python AMS - Silica Gel Boxes to maintain low humidity inside the box.
The size of the enclosure is 460.0 mm (width) x 390.5 mm (depth) x 293.0 mm (height).
Support
All my designs and mods on Printables are free to use and remix. They have a non-commercial license. If you enjoy this or any of my other designs you can send me a small donation using the link below. Thanks :)
https://www.paypal.me/humebeamengineering
BOM - Bill of Materials
You can print the enclosure in just about any filament you like.
Around 1 Kg of filament is required at the recommended print settings.
I've printed most of the test builds in Prusament ASA and Prusament PC-CF.
Panels
- 3 mm Acrylic or PC panels cut according to the included DXF drawings.
Fasteners
The following M3 socket heads are required:
- Top screw holes (with the edges): 16 x M3-12 mm
- Middle screw holes 8 x M3-10 mm
- Lower screw holes : 20 x M3-10 mm
- Bottom of the enclosure (dovetails): 8 x M3-25 mm
- Handle: 4 x M3-16 mm
- Attaching the bottom panel: 6 x M3-8 mm
- Optionally securing Python to the enclosure: 4 x M3-16 mm
To summarize, the follow M3 socket heads are needed:
- 6 x M3-8 mm
- 28 x M3-10 mm
- 16 x M3-12 mm
- 8 x M3-16 mm
- 8 x M3-25 mm
If you don't have any at home it's best to grab the kit below, it will have everything you need for this build and more:
Magnets
8 pcs of round 6 x 3 mm Neodymium Magnets are required.
Print Settings
All parts print without supports and I recommend using 3 walls and an infill of around 15%. Print all parts in the direction I have set them.
Print one of each part except for the M14 plugs (see section at the bottom).
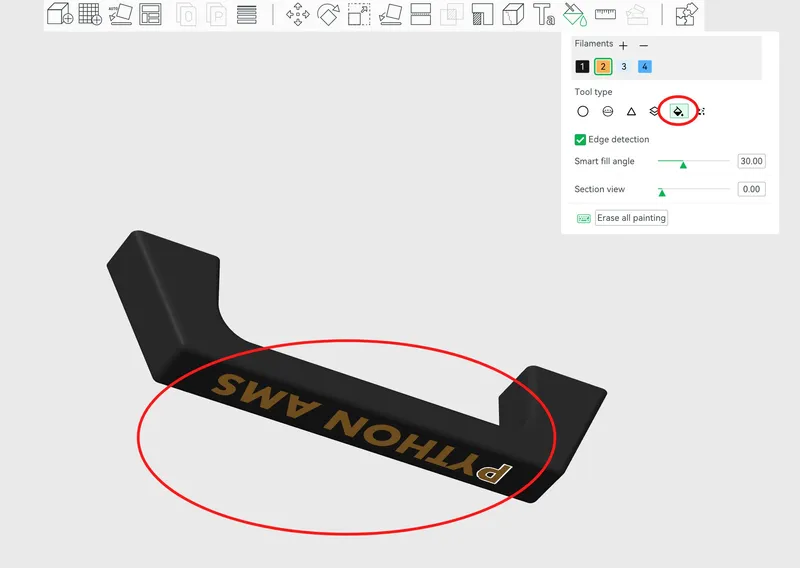
The handle has the text “Python AMS” hidden in the first layer that you can paint with your AMS if you like, use the Paint Bucket Tool in Bambu Studio:
Assembly Guide
Please follow the assembly guide for the Python AMS - Actively Heated Enclosure, assembly is identical apart from the dryers.
Tags
Model origin
The author marked this model as their own original creation.


