Teaching Tech Spacemouse remix

Description
PDFThe control levers need to be extended. I used some brass tubing that I already had. This is 4mm inside diameter/ 5mm outside diameter. I cut this to about 10mm in length using a standard pipe cutter by aligning the end of the tube with the two screws on the side of the cutter. To use the cutter, you rotate it around the tube a few times then tighten the screw on the end, repeat this until the tube comes apart. The brass tube came from Amazon and I think the cutter did too.
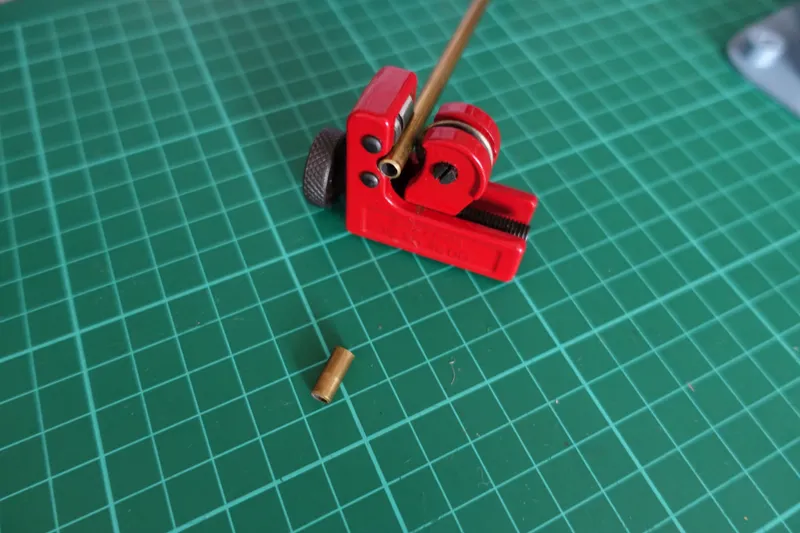
The pipe cutter squeezes the tube slightly so you may need to use pliers to widening the opening slightly. you still want a tight fit over the joystick lever.
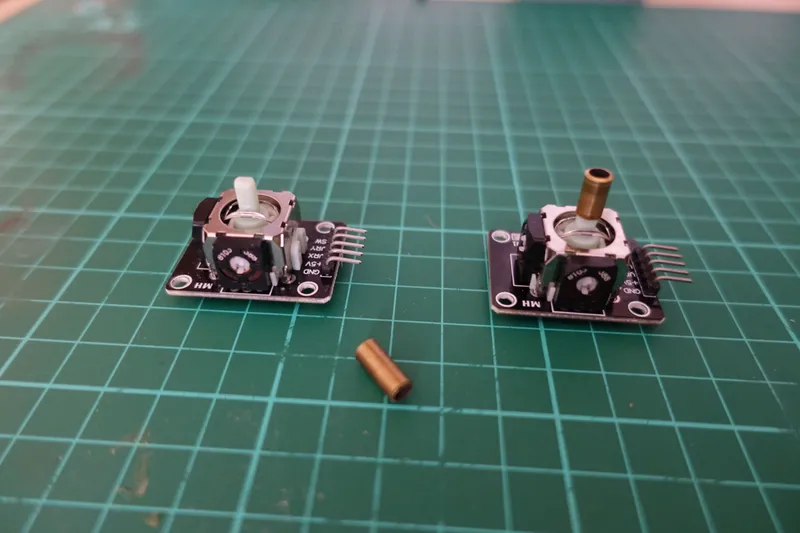
Once the tubes are fitted to all joysticks, we can start with the 3D printed parts.
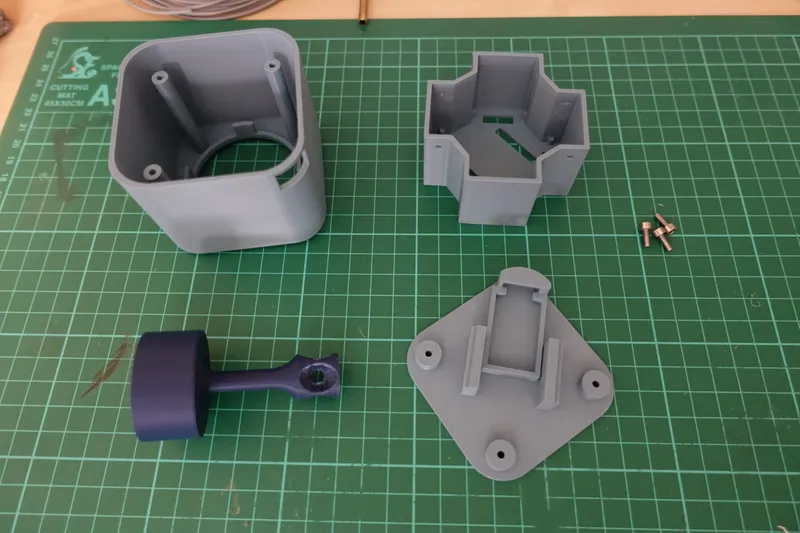
Take the Joystick holder and fit in the joysticks.

There are holes on the side which takes short lengths of filament to hold the joysticks in place.
I got the idea to do this from an assembly video for the kit version of Ajax-3Ds' TD1.
Adjust the position of the brass tubes on the joysticks to leave as small a gap as possible between the joysticks while ensuring they don't interfere with each other.
I prewired the Arduino Pro Micro according to the original wiring diagram. I cut off the connectors from some servo extension leads I had and used these together with some wires that came with the joysticks. I directly soldered these leads to the Arduino Pro micro to save space.
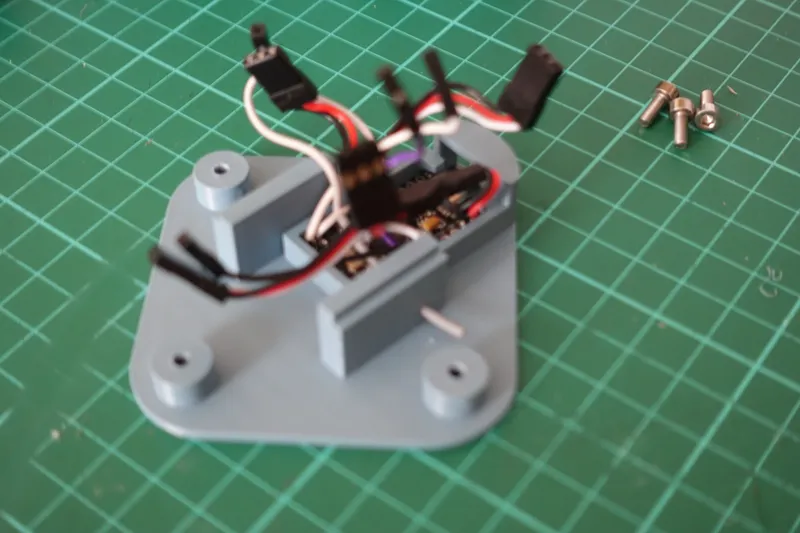
The Arduino Pro Micro slides into the base piece with the USB connector pointing towards the corner. The Pro Micro is held in place using a piece of filament.
Now is the time to decide which corner you want the USB cable to exit from. I'm going to be using this with my left hand and it will be sitting to the left of my laptop so the USB exiting from the back right corner is optimal for me.
Aligning the slots on the bottom of the joystick holder to the mounting post on the base piece, plug in the wires to the correct joysticks according to the original wiring diagram.
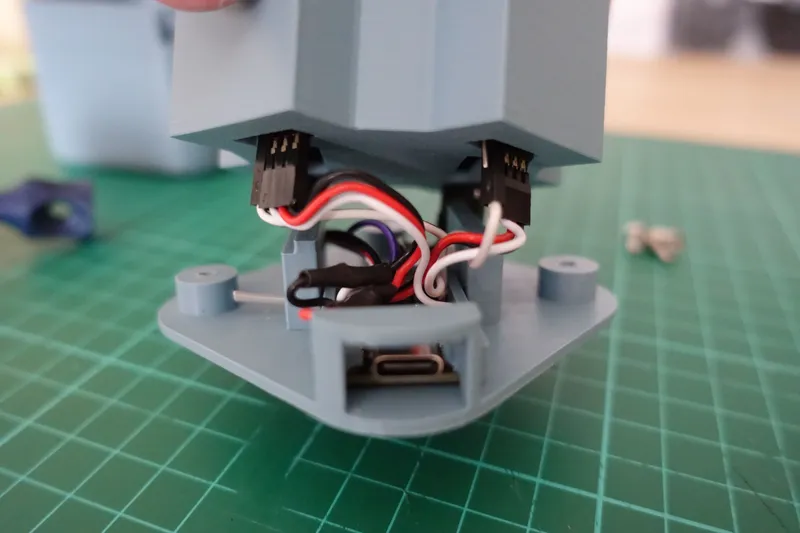
Now comes the most difficult part. Fitting the two bits together without trapping the wires. The wires for two of the joysticks should go behind the mounting blocks, while the other two go in front. If the wires are too short there will be problems and if they are too long there won't be space for the excess wire.
Once they are together, you can remove the filament that has been holding the joysticks in place and put on the cover. I was going to use the filament to permanently hold the joysticks in place but found that the wires underneath could push them out of alignment with each other so decided to design the cover to hold them in place. Identify the corner of the cover with the USB access hole and align this with the corner with the USB connector on the Pro Micro.
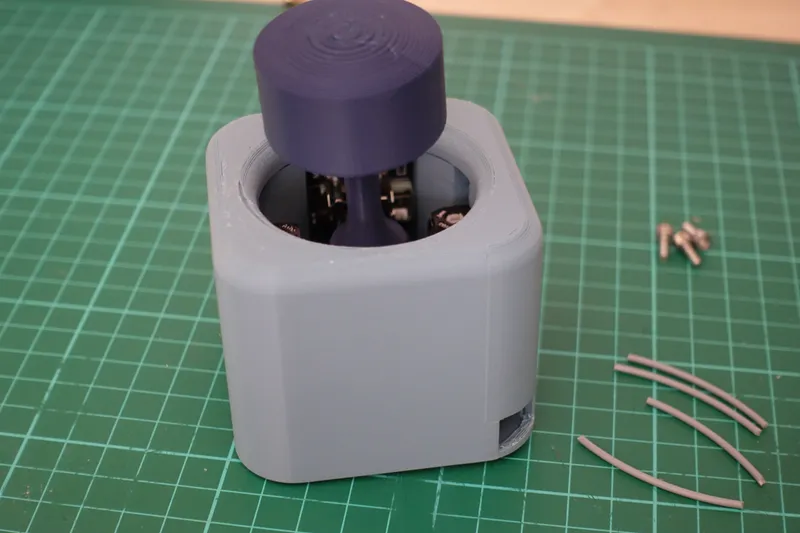
Attach the cover to the base using M3 bolts. I used M3 x 8mm, but i think, 10mm or 12mm would be better.
The handle can now be fitted. With the base of the handle towards one side it should be possible to push down on one joystick and slide the handle onto the joystick opposite. Moving it back to the centre should connect it to the the original one you pushed down. Now do the same for the other two. I have found that once you have it on one joystick a bit of twisting can be used to cause the other joysticks to self connect.
I have thin silicon sheet that I use to protect my cutting mat when using solvents, glue and when soldering. This has a very grippy side and a less grippy side.
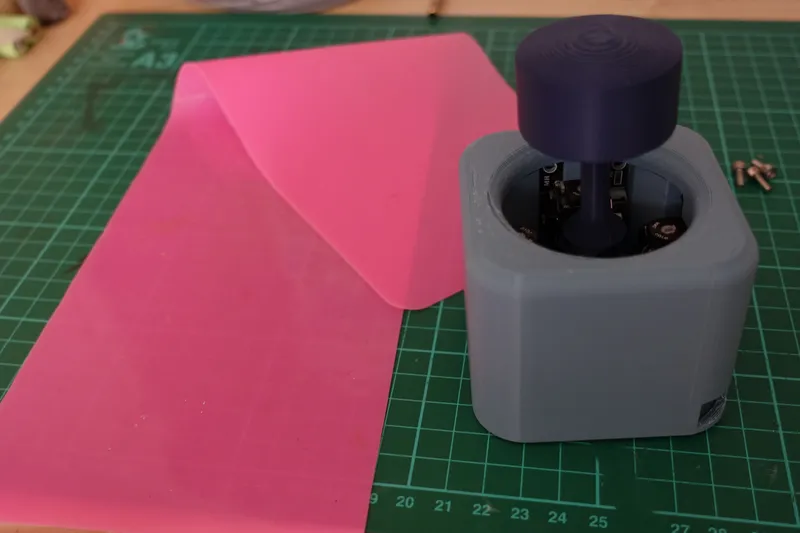
I'm going to use this to stop the spacemouse slipping on the desk. I'll use the base piece as a template and cut off a piece the same size and glue it to the base using a contact adhesive. I probably won't use pink though.
I used the code for the original V1 version without any changes and was surprised to find that it didn't seem to need any changes.
There is still room to make it smaller. If I soldered the wires directly on the joysticks, I think I could reduce the height by another 4mm. If I had a flat top rather than having the fillets to make it look nicer, I could save another 5mm.
Feel free to play with the design. I have included the Fusion 360 design file. Most measurements are parameterised so should be simple to change.
Tags
Model origin
The author remixed this model.

Differences of the remix compared to the original
I commented on the original Teaching Tech Spacemouse video that the reason it was so large was because all the joysticks had to be housed inside the control knob and I wondered if it was possible to move them to the outside.
I started this design a couple of days later, to see if I could design something based on my comments. A few days after that Teaching Tech release version 2. I thought about abandoning this project but decided to continue. It is a complete redesign of the 3D printed parts of the model but the wiring and the code remain unchanged.


