Hall effect Spacemouse / CAD mouse with TPU "springs"

Description
PDFI think I've cracked it and now have the perfect TPU "spring" version. It might even be better than the normal spring version and it is now the version that is sitting on the desk beside me.
This is the culmination of the experiments that have been covered on the projects GitHub page. https://github.com/ChromeBee/Hall-Effect-Sensor-CAD-Mouse-Spacemouse/tree/main if you have been following the project there, you will already have seen this.
While we have had TPU “springs” as an alternative to the tension springs used in the original for several months, this variation is different. It uses two TPU "springs" that are slightly longer and with thinner mounting hooks so that two of these "springs" can be used at the same time. One of the issues with the TPU “springs” was that a pendulum like rotary oscillation that could occur. It was simple to eliminate by twisting the two TPU hooks located above and below the magnet plate in opposite directions. This twist in the springs would stop the oscillation but also put a rotational strain on the M4 nuts which could cause them to loosen over time. This design counteracts that but applies the same principle.
This model uses the same parts as the original design located here - https://www.printables.com/model/940040-cad-mouse-spacemouse-using-hall-effect-sensors with the following changes.
Additional parts needed:
- 2 prints of either of the "Thin TPU spring 0.6x17mm v2.stl" or "Thin TPU spring 0.6x18mm v2.stl" obviously printed in TPU. This replaces the springs in the original model.
- 1 print of TPU Bolt Plate printed in PLA. This is just a shorter version of the original bolt plate without the spring mounting slots. The original can still be used but use the shorter spring. This replaces the Bolt Plate in the original model
- 2 prints of the TPU hook v2. This replaces the Wire Hook in the original model.
I am currently using the "Thin TPU spring 0.6x18mm v2.stl" with the TPU bolt plate. I have used both "springs" with both bolt plates and all combinations work. It is just down to how you want the mouse to feel.
The two "springs" are mounted so that one twists the mechanism on one direction while the second twists it in the other cancelling out the rotational strain.
I hope seeing this in pictures helps to explain what I mean.
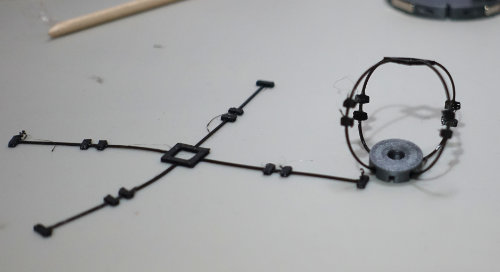
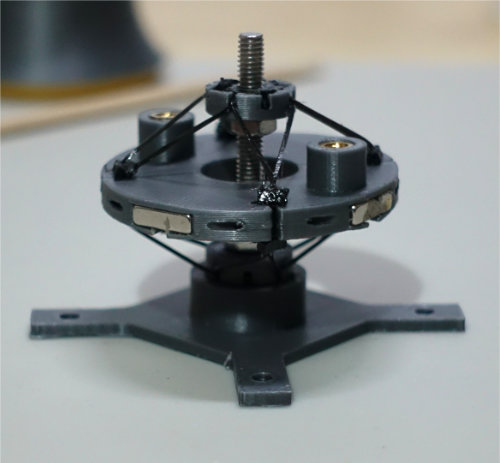
One “spring” is mounted as normal to the TPU hook plate.
The second one is also added to the same hook plate. I have mounted the first one with the end hooks on the bottom TPU Hook mount and the second with the centre on the mount. That is just how I did it and it doesn't really matter how it is done.
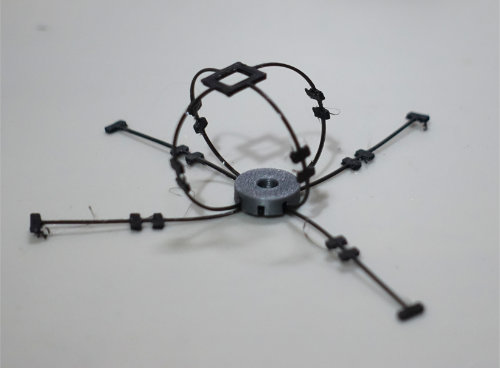
I then mounted this to the bolt plate using an M4 40mm bolt and an M4 nut. Note the spring is mounted so the ends are in the middle of the area that sits below the sensors. This is a different position to the original version.
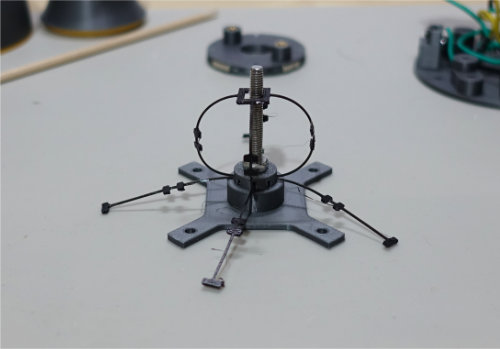
To add clarity, I have added the second TPU hook plate and magnet plate at this point but it should be mounted to the Arduino plate and passed through the sensor plate before these are added. The magnet plate is connected as normal to one of the TPU springs. i.e. stretch the centre part of the “spring” and push it into the slot on the magnet plate.

The second spring is now connected to the magnet plate but its mounts are connected to an adjacent slot to the previous spring. In my case I rotated the magnet plate slightly counter clockwise and located the spring in the next slot.
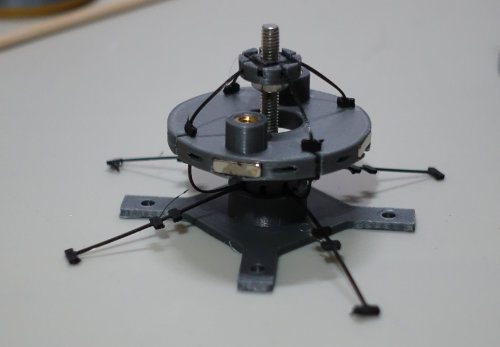
I then did the same again with the end of this spring when mounting it to the top TPU hook, rotating it counter clockwise so the end fits in the next slot along from the one that is vertically above the slot on the magnet plate I have just fitted the middle part of the “spring”.
The printed washer and final M4 nut go on top. The nuts should be tightened in such a way that each magnet is centered over a sensor pair.
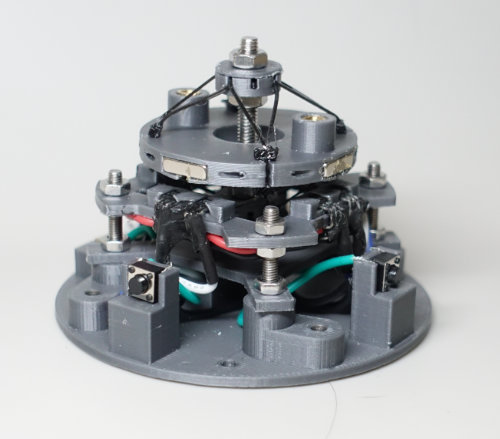
To complete the mouse, I have taken the idea from the build by Rares Paul (@RaresPaul_1317284) on the original version of this mouse and soldered the Vcc leads of each of the sensor pairs together and connected the Vcc of each pair together with a wire then repeated the same for the ground leads (rather than use the servo connectors used previously). While Rares Paul used hot melt glue to insulate the soldered leads, I used liquid insulation because I had some. The result, I think, looks quite neat. It is also more fragile and after breaking a couple of sensor leads I applied more liquid insulation to strengthen the joints and hold the leads in place.
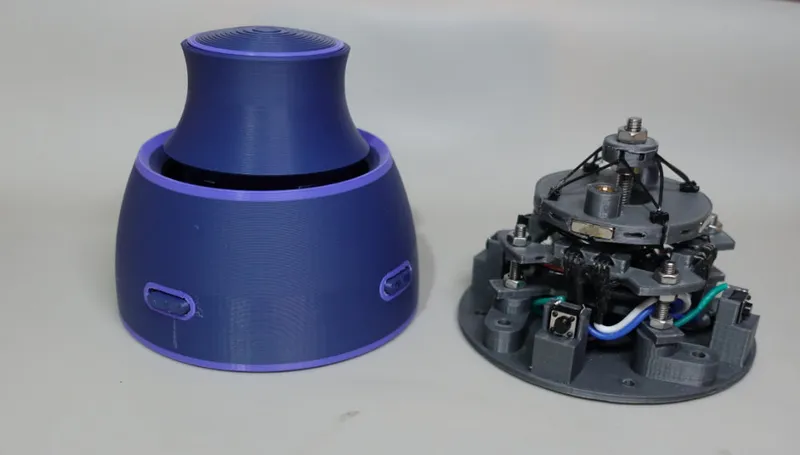
I am not using the base but I have added silicone non-slip feet to the Arduino plate as trialed in my video, https://youtu.be/bVAX9b2wB6A?si=tlR51EHB5Pdp-rGi - This holds it quite firmly to the desk. I have uploaded the template I used to the projects Github page should anyone want it. The final step is to put on the buttons, case and the knob.
Enjoy.
Update : 25-Feb-2025 - Smaller Case
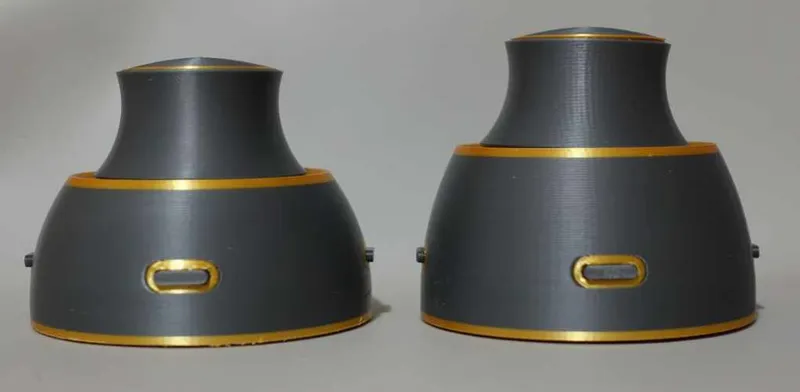
For those that would like a smaller version, I have a new knob that allows the bottom of the magnet plate to sit flush with the bottom of the knob and a new smaller case to go with it. The internal mechanism remains unchanged. Note: This is only for the TPU “spring” version.
Details available on the projects GitHub page. https://github.com/ChromeBee/Hall-Effect-Sensor-CAD-Mouse-Spacemouse/tree/main/Smaller%20Case
Tags
Model origin
The author remixed this model.

Differences of the remix compared to the original
If you have been following the story of my Spacemouse on Github, you'll have already see this.
It seems strange posting a remix of my own design but I'm putting it here to give it a wider audience.
I have replaced the difficult to get springs of the original with “springs” printed in TPU. This version uses two of these “springs” crisscrossed to eliminate possible oscillation with both the spring and previous single TPU “spring” version and improve centering.


