Magnetic Table Stand for Ultimulti-MMU (also attachable to Original Prusa Enclosure (OPE))

Description
PDFI wanted the fantastic Ultimulti MMU3 by @David standing on the top of the original prusa enclosure *. Therefore I had to modify the original frame clamp into a stand for flat surface that should not claim to much room of the limited top plate.
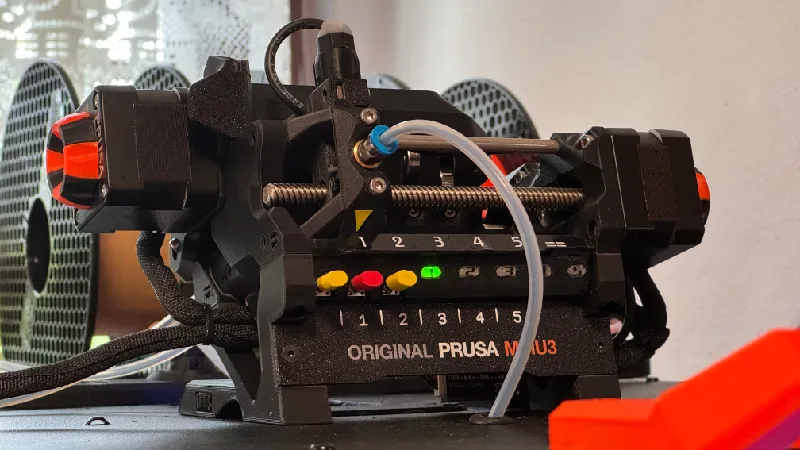
The stamd does not occupy not much estate as it is almost as wide and long as the MMU itself. For most versatile installation I made indentations for round 10x5mm magnets.
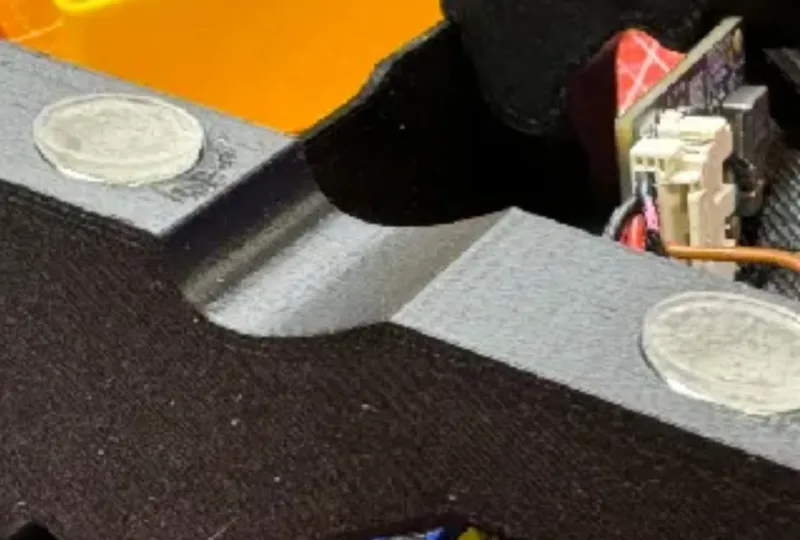
Together with flat anti slip rubberpads the magnets hold the unit really firmly on the iron top of the OPE but always being easily removable as well. Of course it will stand on all other flat surfaces without the magnets. To work properly the Ultimulti MMU3 has to be installed with a slight backwards angle. That why the MMU/Ultimulti leans back a bit.
And because I had the beautifully printed MMU3 label plate I made it fit flush with the front of the legs and MMU. More than this the labelplate Installation covers plugs and cables for a cleaner look. When you install all magnets they stick really strong, and I mean that strong strong, to the iron surface. To make lifting it up a bit easier i made a small indentation at the bottom part of each leg.
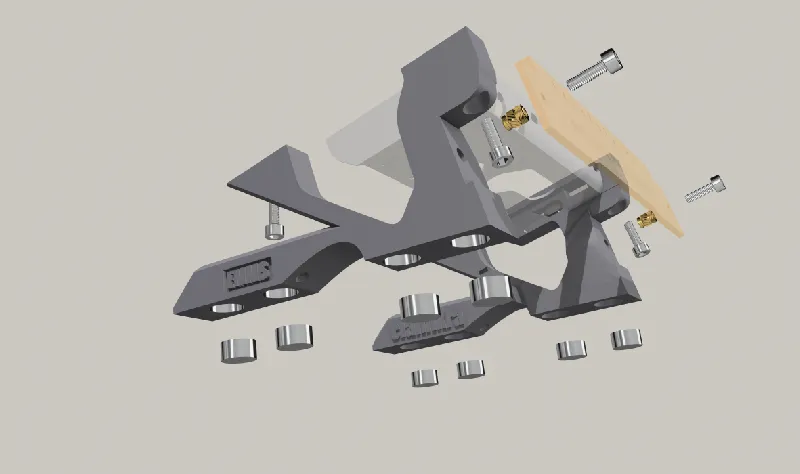
I printed in PETG with standard settings. Nothing special. The label plate is held by two M3 6mm hex screws sitting in M3 heat inserted nuts. You cans screw the longer bolts directly into the plastic or just take some superglue (but then the plate is united with the legs forever.
I secure the magnets with a drop of superglue to be safe.
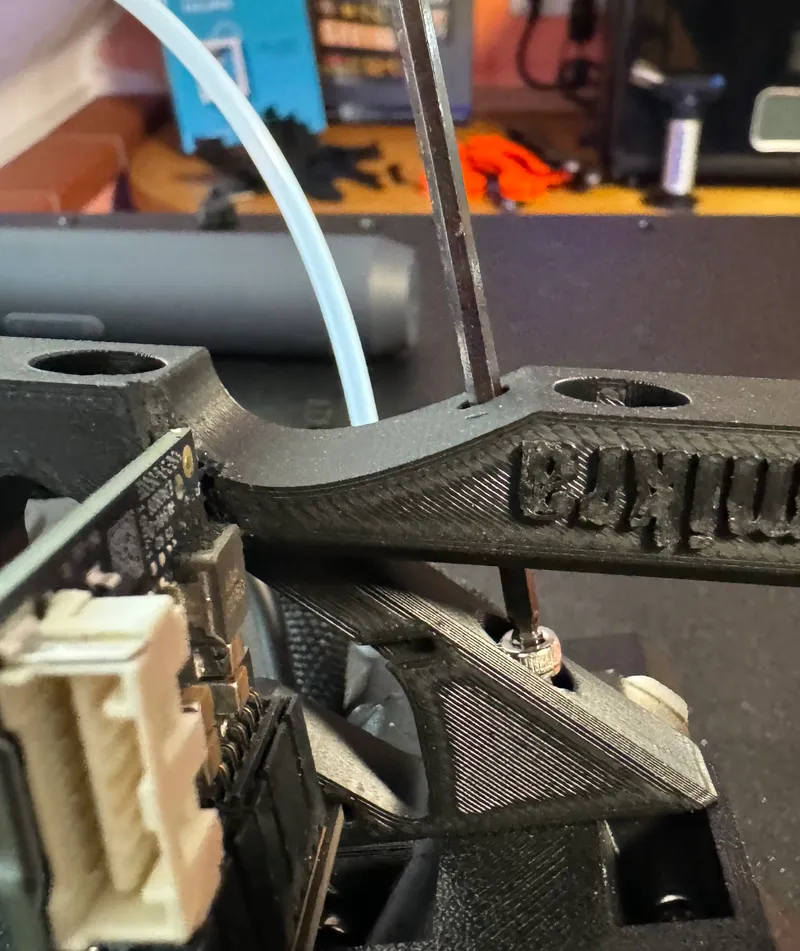
To make assembly more easy use the hole in the foot to fasten the screw in the back of the foot (see foto). Guide the allen keythroughb the Hoel to the score head.
After assembly you have to find the correct place onto of the OPE for the MMU. The best place ist exactly over the filament inlet of the extruder.
Drill a small hole of about 5-6mm and clean the metal edges to become less sharp (be careful that no metal debris falls onto the printer. Remove the printer when drilling or if removing ist not possible use a blanket and be careful when removing the blanket. I inserted a small rubber ring I found in a drawer into the hole to protect the edges. You may use this or this as grommet for the hole. You will have to downsize these models a bit.
UPDATE 30.6.24: Added a Mount system with maximum low profile to save length of the MMU-Extruder path (because the longer this path the bigger the filament buffer loop). The left leg has a slot for the add on PCB by prusa. It gives the PCB protection and secures it in the slot.
*Background of this design:
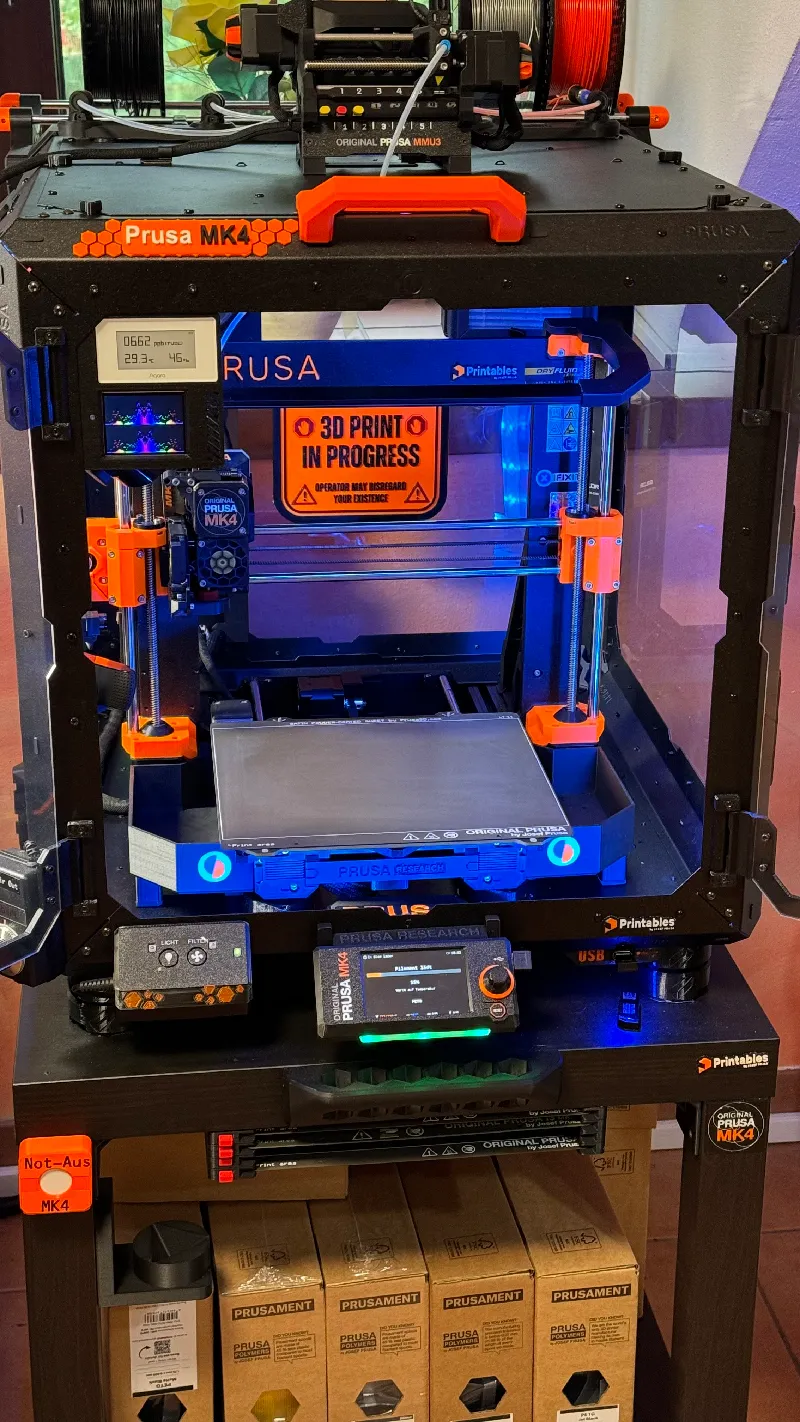
I am a survivor of the MMU2-machine which I heavily modified to make it work somehow reliably. Coming from this background easy access to the MMu-Unit was essential for me and the reason why I wanted the MMU to stand on-top and not inside the original enclosure. I designed a complete solution to mount 6 spool, a RMU buffer and the Ultimulti MMU all together on top of my prusa enclosure with a MK4 working inside. The Ultimulti was the final component and I have released this “EMMS (External MMU Mounting System)” here on printables.
I like that with Ultimulti Lee most of the filament path is visible without opening it. And when needed opening is quick and easy with the one and only spring loaded lever. And it looks cool. Finally the underslung electronics board is great. And so much more!
Please show me your results and send me fotos of your makes. I like to see how you use this model. If you have ideas for improvement don’t hesitate to send them to me in the comments. I will try to incorporate your suggestions and will modify the model for special needs if you ask me to do so.
And of course a like ♥ or a rating ⭐ of the design are always welcome.
happy printing, clamikra
Addendum:
The external MMU Mount System for Original Prusa Enclosure (OPE)
This magnetic stand is part of a bigger project “EMMS (External MMU Mounting System)” I have published recently and which I am still working on. The aim of the project is to have the whole MMU system, based on the Ultimulti MMU mod by @David outside the enclosure for better access to all MMU components (which quite often require manual adjustment).
It consists of several newly designed components:
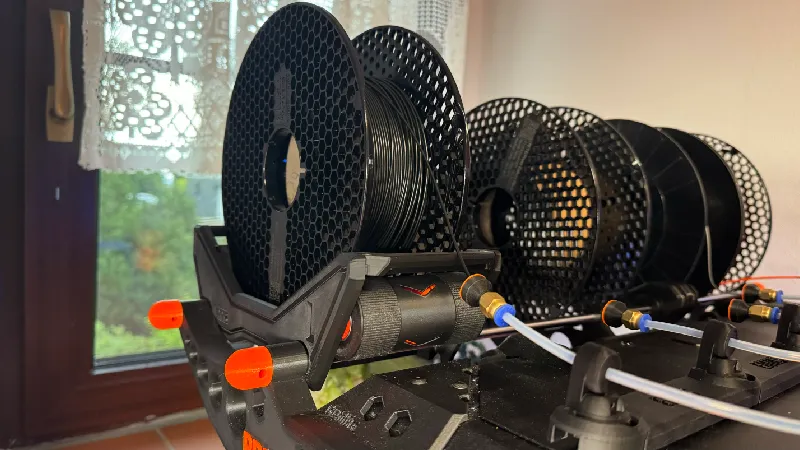
- external 5x filament holder mount
- Buffer system with a modified version of auto rewind spool holder for RepRack by @Jerrari.
- Mount the MMU on top of the lid of the OPE with cable extension and deutsch DT 12x connector that is attached magnetically to the side of the OPE
Attached are some fotos of the actual stage of the project. I am optimizing it at the moment.
Some images of the work in progress:
a spring loaded autorewind system with special spool holders that sit on the two 8mm smooth steel rods. The autorewind spool holders can adjusted freely along the two smooth steel rods. The air buffer you see here is a preliminary test version. Up to five spools can be mounted with this system:
The cable for the MMU has to be extended. I put a 12-pin connector in the middle of the cable which is inside the OPE and cannot be seen from outside (See next pictures). I used a 12pin DT Deutsch connector but you may use any other 12 pin plug.
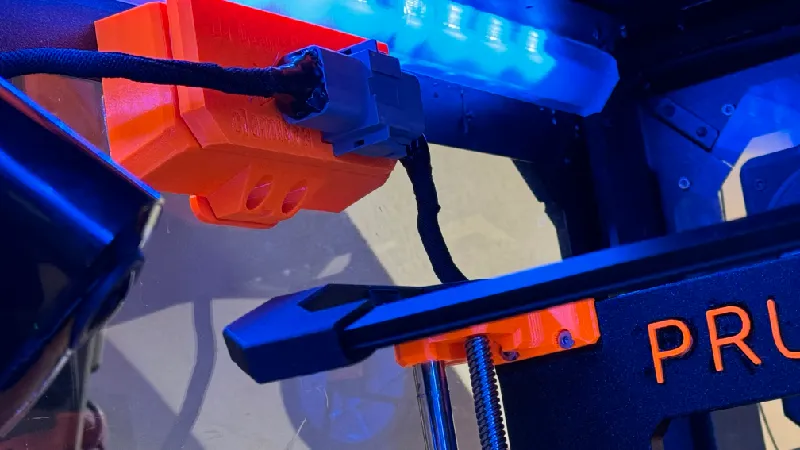
Connector in place with a magnetic mount at the backside of the Prusa handle. I extended the cable out 50cm. I had a test version that was even longer, but with about1,5m cable the mum didn't respond reliable (strangely)
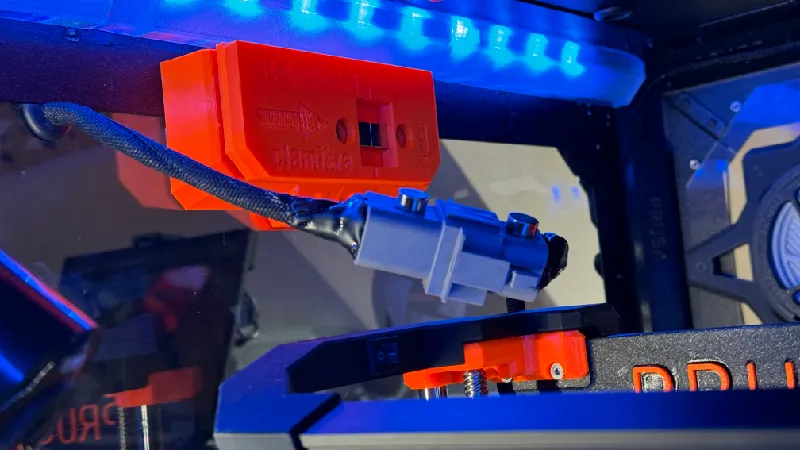
The DT Deutsch connectors with two 10x5mm N53 Magnets and the corresponding magnetic mount attached to the OPE handle's backside.
The system runs fine in my daily routine.
some things you have to consider before building this:
- you have to extend the MMU cable which requires some crimping or soldering skills. The extended cable should not be longer than 1,5m
- the MMU to Extruder PTFE tube is almost 1m long which means longer loop when retracting wich requires a “bigger” buffer
- you need a 12 pin connector for the MMU extension cable (I recommend buying a spare MMU MK4 cable from purse and modify this and keep the original cable as spare).
Tags
Model origin
The author remixed this model.

Differences of the remix compared to the original
- Newly designed legs that only use the original upper part to connect and fix the ele-board.
- Meant to sit on a flat surface
- compact design; does not occupy more space than the MMU itself (small footprint)
- Option for iron surfaces; round 10x5mm magnets can be inserted
- can hold the original MMU3 label plate (the plate hides the cables and plugs from sight. Cleaner look.
- exchangeable with regular clamps if you should go for traditional installion on MK4 frame some time in the future


