K1 Max/K1/K1C - Bullseye filament feeder

Description
PDFIf You find this design useful, Please consider sharing a Make or leaving a comment. It's always good to see my efforts in use by others out there and it often inspires me to make improvements where I can. Without feedback I just draw a line under a design and move on to new projects.
-------------------------------------------------------------------------------------------------------------
This little print makes feeding filament quicker and easier.
Print times on a K1 Max:- 8 Minutes Fast at low quality. 25 Minutes Slow at High quality.
*TLDR - Instead of feeding filament directly into the PTFE tube through a tiny hole? This quick print gives you a large hole to feed the filament into with the inner cone then perfectly aligning the filament with the tube. To say it as simply as possible? Push filament in the big end and it goes straight into the PTFE tube at the small end.
-------------------------------------------------------------------------------------------------------------
Update November 22nd 2024 :- Added a drier box variant to the set. Some driers (like the easedry) can be fiddly to feed at the best of times, this addition makes it a lot easier. This Bullseye variant is shorter than the regular Bullseye at 20mm instead of 27mm. It also has a shorter thread depth to account for the width of the drier box shell reducing the depth the PC4-M6 coupler can enter the print (regular thread length would introduce an unwanted gap between the print and the PTFE tube).
Also provided in the file set are 4 printable washers sized in different heights to allow for firmly fitting the Bullseye to thinner shelled driers if required. Note:- The Drier box Bullseye variant is 20mm in length. Some drier box feed locations may make the use of this version more of a hindrance than an aid. Check before you do any irreversible modifications to your drier.
Although marked as for use with the creality K series printers, it will obviously also work with any other ‘Reverse Bowden feed’ style printers that use the ‘feed the filament into a piece of hanging tube’ method.
Using a pneumatic coupler screwed into the print and then affixed to the K1/max feed tube, the hole to feed the printer becomes the cone of the printed part and is a significantly larger opening that is far easier to feed filament into. You could genuinely do it with your eyes closed and never miss.
The print itself is threaded at one end to accept a PC4-M6 (6mm) pneumatic coupler. There is also an alternate version for an ECAS04 coupler. If your last printer was an ender 3 you probably have a bucket full of PC4 couplers. The non threaded end is obviously the conical filament feed aperture. The cone itself was designed to narrow down the large feed area into a 2.1mm tunnel through the last bit of the print and aligns filament directly with the PTFE tube in the coupler.
UPDATE:- I have added a a pair of modified variants (of version two) with larger 2.4mm through-holes for those wanting a larger aperture at the PTFE end. See notes further down this text for more info.
There are 2 primary versions. One with a slim feed cone, the other with a wide feed cone.
Version 1 with the smaller feed cone works well with all filaments. The feed cone is still large enough to make feeding filament into the printer quicker and easier than stock while still constraining flexible filaments enough in the cone to enable it to be pushed easily into the extruder at the opposite end. If you print a lot of TPU then this is potentially the better option of the two.
Version 2 works perfectly with the more rigid filaments. But depending on the shore rating of flexibles, it can make some filaments like sub 80 shore TPU harder to push through into the extruder. The larger cone access and extra volume inside the print potentially allows a little too much flex with softer TPU. That said, if you rarely print TPU then having the version 2 for everything else is worth the 2 seconds it would take to remove the bullseye feeder (if necessary) for the time the softer TPU is in use.
I mostly use 90+ Shore TPU and haven't needed to remove the print for feeding. I created and use a magnetic coupling at the extruder end, so feeding even the softest TPU is even less of an issue for me. V2 is the one I use myself.
If you print a lot of very soft flexibles? Version 1 may be the better option for you. Personally, I would suggest trying version 2 first and only use version 1 if you find it may be the better option for you with flexibles. With stiffer filaments? Version 2 is definitely the best.
It's a small print and could easily be seen as a minor upgrade, but after using it? I wouldn't be without it on any printer with a similar feed design. The printed part itself is 25mm in length making it both small and light while keeping the feed from the roll unaffected by the prints presence.
It just works. You never miss the hole anymore.
Note:- I added 2 new options to the Version 2 Variants. Both of these are marked with an X at the start of their file name to more clearly identify them. The only difference is the through hole which has been expanded to 2.4mm from the original 2.1mm. These were added after feedback from one individual who needed to run a drill bit through to clear the hole on his particular print. Given that perhaps not everyone has a 2mm (or 3/32nd) drill bit to hand, I added the option for a wider hole variant.
I personally still prefer the option of gripping a 2mm drill bit with a pair of pliers and hand chasing the 2mm versions hole through if needed as this gives the best alignment with the coupler. But whichever you choose, I would be appreciative of any feedback.
--------------------------------------------------------------------------------------------
Print info:-
Print with the part standing up vertically and the cone facing the bed. Both parts have a small contact patch with the bed (version 2 especially) so consider using a brim. Printing in high quality (around 25 mins) gives the best threads and the smoothest bore. Printing at speed (around 8 minutes) and sacrificing some of that smoothness in the print, still produced good results but in my case I had to chase the hole through with a 2mm drill bit when using the faster print option, not something I had to do with my slower high quality print tests.
I designed these specifically with at 2mm through/exit hole to remove any issue with potential filament drag, but also to allow for a 2mm(3/32) HSS drill bit to be used to chase the hole through in the event it is printed out of tolerance. If you need to send a drill bit through, just hold the bit with a pair of pliers and enter through the cone end, then twist the print down onto the drill bit until it comes out of the coupler end. Drag it back and forth a couple of times to create a smooth hole. Try not to stab your hand with the drill bit when doing this as 2mm is pretty small so if you are up against resistance while sending the bit through you don't suddenly want to end up looking for a plaster when it comes through the print.
Once happy the hole is clear (run a bit of filament through the cone and out the other end to confirm it), fit the coupler, test it once more and then slide it into place on the K1 feed tube.
Additional notes.
Don't overtighten the pneumatic coupler. 3D printed threads can only take so much torque before stripping. Some couplers have longer threads than others, so be aware that when you feel it bottom out against the print (as it should). It then only needs to be finger tight.
For the ECAS04 version, I have found some suppliers ship the regular depth version, but I also got some in a more shallow depth. I designed the opening for the coupler to accept both types without issue. Depending which type of ECAS04 you have, the coupler will either fit the print virtually flush or will protrude by a millimeter or two. Both correctly fit flush against the PTFE tube and lock firmly in place. There are no additional benefits or detrimental effects from using either version and both work as intended. Simply put, Any ECAS04 will fit and work fine.
That's it. Fit it to your dangling PTFE tube and have easier filament feeding every time.
--------------------------------------------------------------------------------------------------------
Consider sharing your thoughts after printing and using it. I have printed both versions with no issues, but it's always good to hear how it worked out for other people. It also tells others whether it's a worthwhile print option for them.
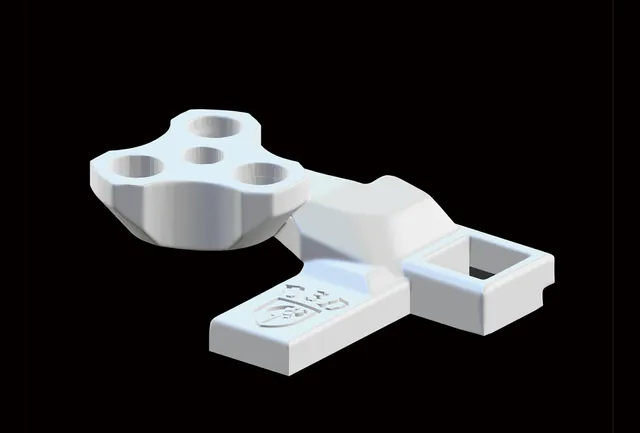
When I printed version 2 at the K1 max fastest setting. It was an 8 minute print. It surprised me that the threads were good enough to use even if the rest of the print quality wasn't perfectly smooth. Both pictured feeders were printed with the last remnants of a roll that would have been well served going through the filament dryer before printing. Despite the odds being stacked against them because of that they still worked perfectly.
Print times were based on a K1 Max in PLA. 8 minutes for a fast print and 25 minutes for a high quality slow print. For me? the slow prints gave a perfectly clear through hole on the 2.1mm versions. Fast prints of the 2.1mm versions may need chasing through with a drill bit.
Tags
Model origin
The author marked this model as their own original creation.