Magnetic PCB holder (OMNIFIXO compatible)

Description
PDFRevision history:
| 27/01/24 | added the STEP files, which may be particularly useful if you want to adjust the slots for the magnets inside the guiding rails. |
| 01/02/24 | added an alternative guiding rail version with cutouts for round magnets (10x2 mm) |
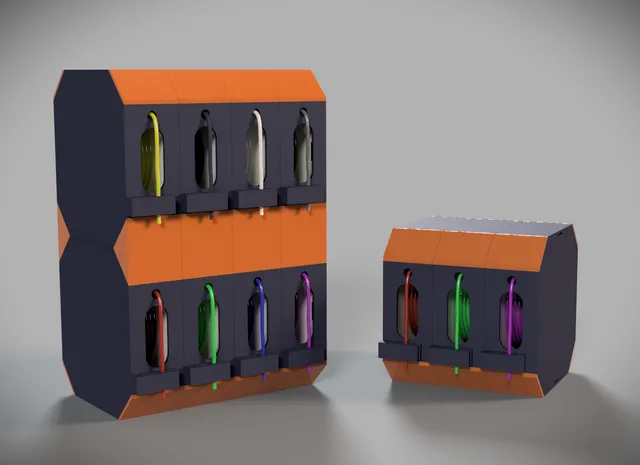
The PCB holder is suitable for PCBs up 115 x 90 mm and fits perfectly on a OMNIFIXO M4 base plate (which is not strictly necessary - you can use the PCB holder also standalone).
There is an extended version as well which holds PCBs up to 160 x 100 mm (euro format).
Required tools
- M3 thread cutter like the one below

- 3mm drill

BOM
| 4x | M3x10 Pan head screw |
| 4x | M3x12 Pan head screw |
| 2x | M3x16 Pan head screw |
| 1x | M3x35 Hexagonal bolt with thread up to the head |
| 1x | M3x25 Hexagonal bolt with thread up to the head |
| 1x | M2.5x8 Pan head screw |
| 1x | M2.5x4 Pan head screw |
| 4x | Neodym-Magnet 10 x 5.5 x 2.5 mm |
| 1x | Spring 17x4 or similar |
Make sure that the head diameter of the pan head screws does not exceed 6 mm.
Assembly
Assembly is fairly straightforward:
The design prints without any support on 0.2mm layer height and does not require any glue or nuts.
Instead the screws and bolts are screwed into thread cuts directly cut into the PLA (I suppose PETG should also be fine). This provides a reasonable amount of strength for the intended purpose (if applied with a reasonable amount of force...).
If you are using the STL files for printing, I suggest you increase the infill and add at least one perimeter on the clamp mounts for some extra strength.
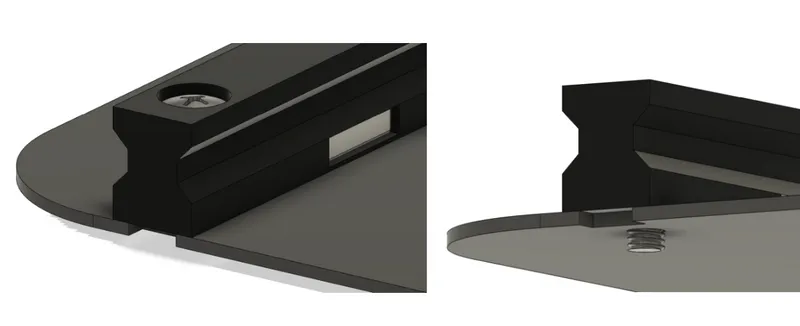
The PCB holder is magnetically attached to the OMNIFIXO M4 base plate by the four neodymium magnets inside the two guiding rails. The four M3x10 screws attached to the guiding rails only serve as centric aid and are NOT screwed into the OMNIFIXO M4 base plate:
You can therefore mount and remove the PCB holder from the baseplate in a matter of seconds.
If you're using the PCB holder without the OMNIFIXO base plate, I recommend screwing the guide rails to a small wooden board or similar. In this case the magnets are not needed.

The two clamp mounts are supplied with a 2.5mm hole. This has to be extended to an M3 thread (wide side) and a 3mm hole (narrow side):
Cut an M3 thread through the entire 2.5 mm hole, then drill the narrow side to 3mm. When drilling, place a steel ruler in the slot to prevent drilling into the M3 thread you have just cut on the wide side ...
Start by cutting M3 threads into the screw handles and fitting the appropriate screws, then prepare and assemble the remaining parts.
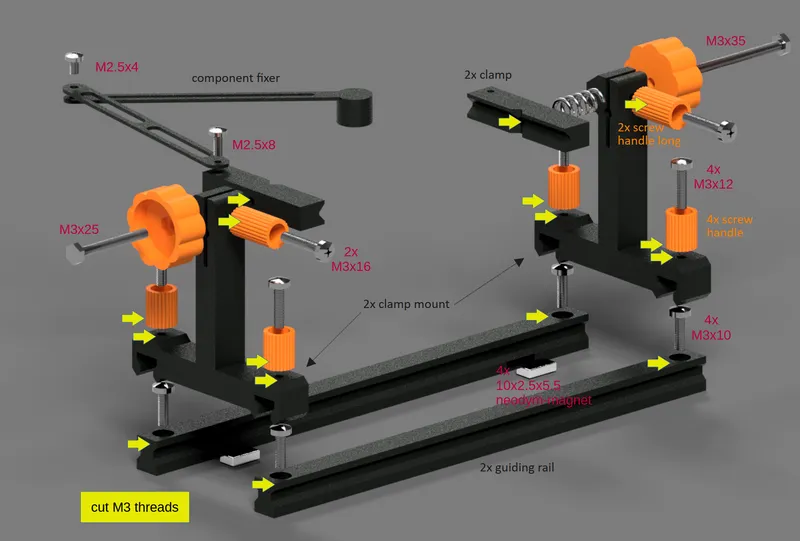
The two M2.5 screws (component fixer) do not require a thread. Gently tighten the screws until you feel a slight resistance when moving the component fixer parts. Finally, cut a piece of cork to size and place it in the small cup at the end of the component fixer. Done.
- enjoy -
Tags
Model origin
The author marked this model as their own original creation.