Modular Webcam Mount for Anycubic Kobra 2 / Kobra 2 Pro / Kobra 2 Plus / Kobra 2 Max

Description
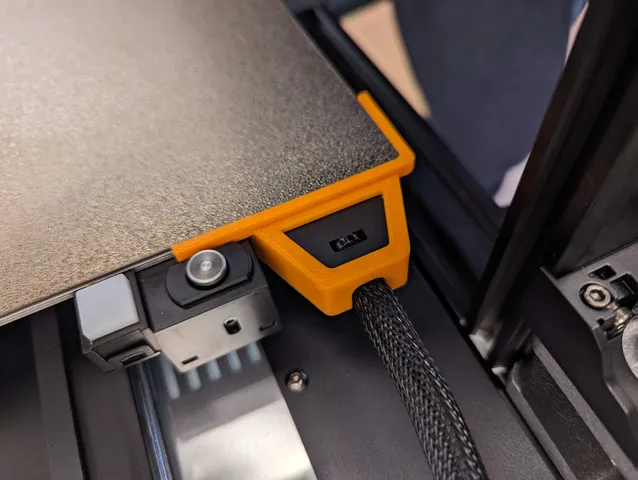
PDFThis is a camera mount that attaches to the X-Axis of an Anycubic Kobra 2 series printer. This way the camera will always be at the same relative level with the print head.
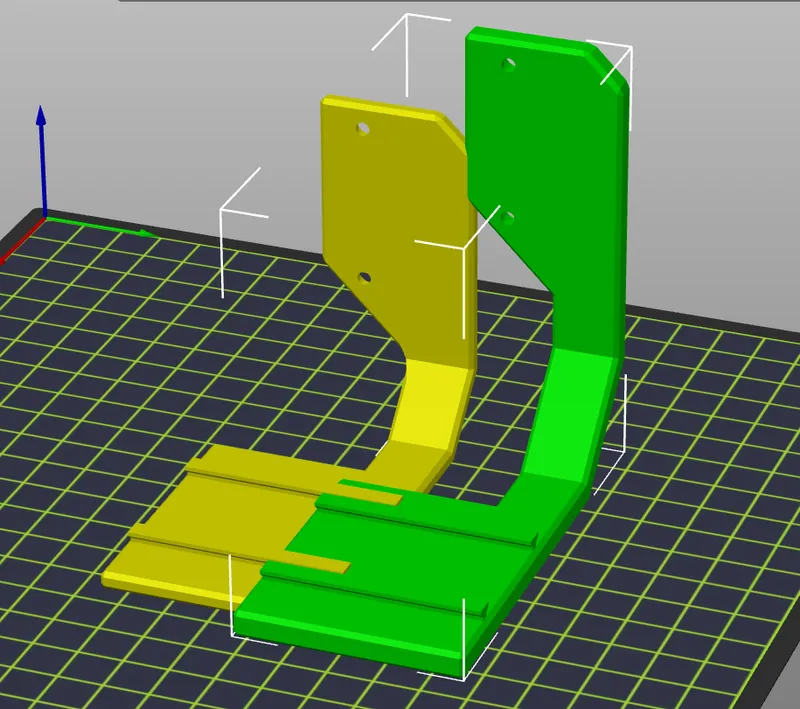
The mount is designed to be modular, allowing the usage of different cameras by simply switching out the webcam plates, which slide onto the base mount.
Installation
In order to attach the camera, remove the two M3 screws from the backside of the right cover of the X-Axis belt tensioner. Attach the base mount with the same screws or, for even more security, with 2 longer M3 screws (7-8mm long threaded part).
Supported Models
- Tplink Tapo C100 - this is the camera I have and use.
- Enable supports!
- NOTE: because of the particularities of this camera, when printing this plate, enable supports. It will be a bit difficult to remove them but with an X-Acto Knife / pocket knife it works.
- Wyze Cam v3
- UNTESTED! Based on the dimensions from the original mount by FreshPrintsofBelair. Please confirm in comments if it's working.
- Supports needed!
- Logitech C920
- UNTESTED! Based on the dimensions from a 3D Model of the camera I found. Please confirm in comments if it's working.
- Supports needed!
- Fold the camera together and slide it in the “bracket” on the plate.
- Generic Tripod Bolt
- UNTESTED! Based on standard ISO 1222:2010, 1/4-20 UNC tripod bolt
- If your camera has a tripod mount hole, then you could also try this plate.
- Supports not needed.
- Use Layer height 0.1mm.
- Flexible & Sturdy Phone Arm (Model 647794) https://www.printables.com/model/647794-flexible-sturdy-phone-arm-100-printed
- UNTESTED! Based on a screw that can be used to attach the phone arm to my base. Use a counter screw from the referenced design to secure.
- As this model is quite large, consider using the 6mm Base!
- Flexi-Arm Camera Mount (Model 25205) https://www.printables.com/model/25205-flexi-arm-camera-mount/files
- UNTESTED! Combined the “snap-mount” to a Plate. Build the rest as per the linked model.
If you'd like me to add plates for other cameras, please send me some photos, links, measurements and I will try and design them for you.
Alternatively, feel free to remix the design. I included an “empty” plate on which you can base your own plate.
Updates
14.01.2024
- added “Base (6mm) v2”. This version of the base is a bit farther away from the X-Axis / Gantry and also 2cm lower, towards the printer's base. Might be useful for taller cameras or wide ones (like the C920) which would thus fit below the cover of the belt tensioner. It is also based on the 6mm / heavy base as to reduce wobble. The included .3mf file has 2 parts. The base contains 15% infill, the part that mounts to the printer 60%. Might give it more stability.
- added a “Tripod Bolt Plate v2”. This version has a shorter bolt (5.5mm) for cameras where the mounting hole is not as deep.
21.02.2024
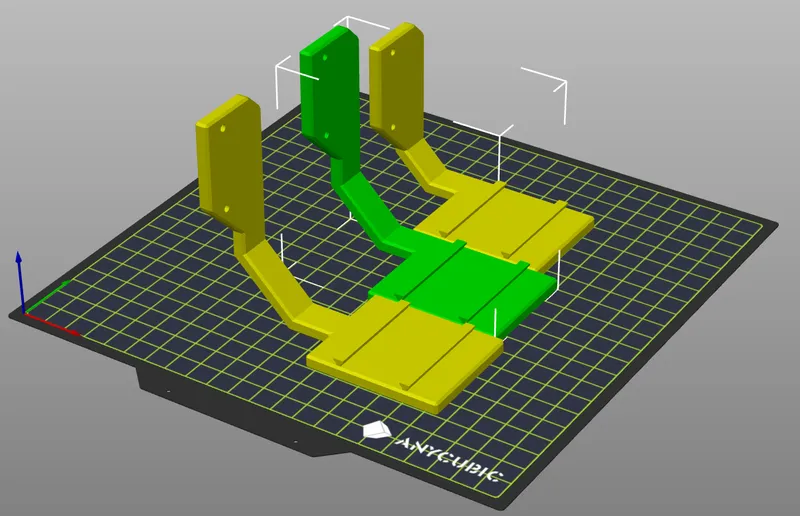
- added “Base (6mm) v3. This version is even further away from the X-Axis as well as having the attachment to the printer in the middle of the base plate. This allows for more distance to the print head (needed for example for wide / thick webcams). Here's a comparison between the different 6mm versions (v1 in the back, v3 to the front - the ”screw plate" is aligned):
Tags
Model origin
The author remixed this model.


Differences of the remix compared to the original
FreshPrintsofBelair's Model
This model is inspired by the one from FreshPrintsofBelair. The model was designed from scratch, based on my own measurements. Notable differences are:
- Modular design: a base mount that attaches to the printer + a webcam plate that attaches to the mount. This way multiple cameras can be used without having to print different mounts. You just need a new plate.
- The original screws can be used to attach the mount. If you want to be 100% safe, you'll need 2 new M3 screws, with a threaded part of 7-8mm long.
FunkyArt's Model
Combined the “FlexFrame Small Screw” to a Plate. This way the Arm can be used with my base.
mkoistinen's Model
Combined then “snap-mount” to a Plate. This way the rest of the parts can be attached to my base.