BMW - GS Adventure BOX USB 5v
Description
PDFI re-worked/designed this version of the GS Adventure Box for a co-worker. The changes to the lid and base are specific to his needs, but should be useful for anyone wanting to use this model or remix it for their needs. I was told that this will work on BMW R1200GS and GS Adventure up to 2013.
I will include the STEP file from my latest iteration and the CSV file with the values that were used in the design. Note, in the STEP file, the outer curve looked a little funky, so be careful if you try to import this into Prusa Slicer for printing. You can import the CSV parameters file into Fusion 360 using Parameter I/O from the Autodesk App store.
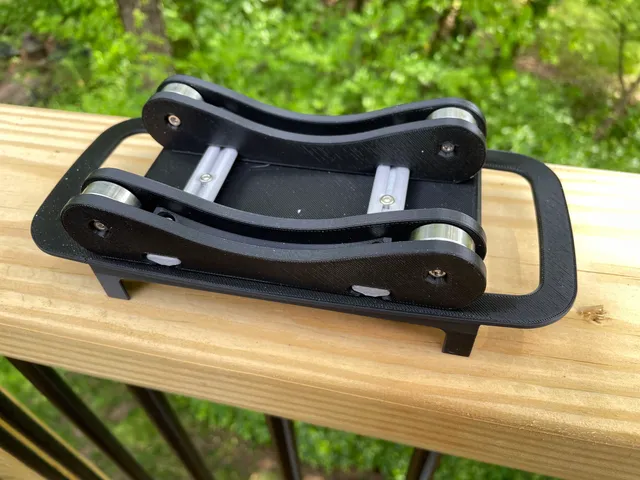
This model was printed in PETG on a Prusa MK4 with IS enabled, 0.20mm Structural and perimeters set to 3 (mainly to support the threaded inserts). The lid was printed with the outer side facing the bed.
The lid was re-designed to fit the following parts:
CNC Kitchen's M3 VORON threaded inserts were used to attach the lid to the base:
- CNC Kitchen Official Threaded Inserts: M3 VORON SET 100pcs via REPKORD
- M3 x 6mm screws were used to attach the lid to the base
A couple of helpful videos were referenced when creating this model:
- Teaching Tech's: Design like a pro with shadow lines - 3D design for 3D printing
- Learn It!: Parametric Box with Threaded Inserts - Lesson 11 Part 1 and Part 2
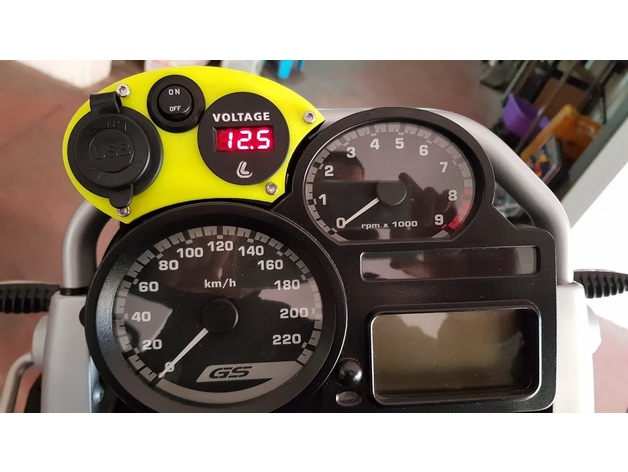
Note, the two larger holes on the base are the for the electronics wiring, while the smaller hole is for mounting the unit to the motorcycle. I posted some pictures my co-worker sent me showing the installation process. He did bend the contacts on the USB charger so the unit could be printed slightly shorter. These pictures show how the unit was mounted to his motorcycle. You will see a seam between the lid and base. That is a shadow line and was created with the help of Teaching Tech's video above.
If you find this item useful, please consider making a donation of any amount the Phelan McDermid Syndrome Foundation (PMSF) under AudienceOfOne:
Thanks, AudienceOfOne
Model origin
The author remixed this model.
Differences of the remix compared to the original
- Reworked the lower (speedometer) and right (tachometer) curves to have a tighter fit to the gauges.
- Added more screws to the top.
- Customized the top and bottom to suit the required needs.
- Reduced the depth of the enclosure.
- Designed to use CNC Kitchen's M3 VORON threaded inserts
- The zip tie slots were removed and a single hole was created for the mounting hardware
- My co-worker did the mounting portion. See pictures below.
- Probably a few other things that I can't recall at this point
(Really, the only thing that remained from the original is the top curve and the base dimensions)