Sword of Forge and Frontier (MTG)

Description
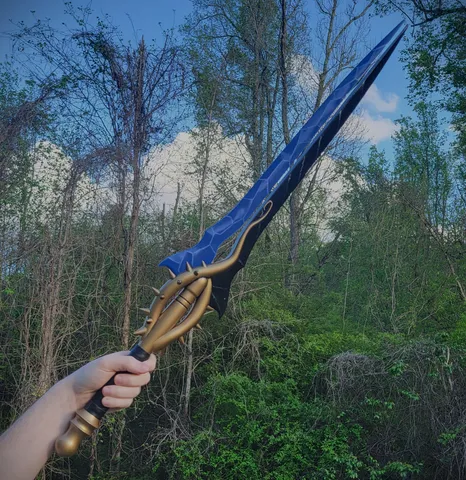
PDFAt full size the sword measure 900mm from tip to pommel. It is held together by two 8mm dowels, and Fifteen 3mm pins. The model is pre-sectioned into eleven parts so it can be built on smaller printers, an uncut version it also available.
Additional parts
- 1x 8mm diameter 430mm long dowel
- 1x 8mm diameter 410mm long dowel
- 15x 3mm diameter 28mm long pins
For the dowels I used carbon fiber tubes, as they are straighter and lighter than wood.
Assembly
Clean up all the parts before assembly and test fit all parts before gluing.
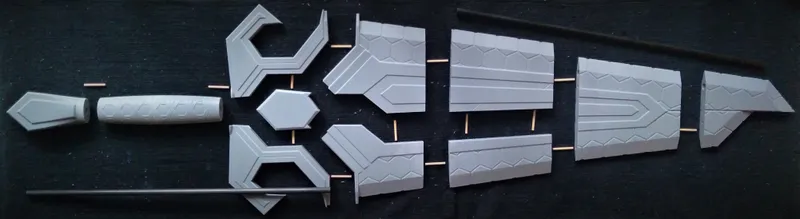
(I changed the pins and sectioning locations of some of the parts after this picture was taken)
Use two of the 3mm pins and one of the 8mm rods to keep everything straight glue Forge1, Frontier1 and Center together. Carefully slide the 8mm rod back out before the glue dries. Use the 410mm long 8mm dowel and one 3mm pin to glue the pommel and handle together, this time glue in the dowel. Next glue the first assembly to the handle and pommel using another 3mm pin for alignment. While that is drying use 2 more 3mm pins to glue Forge2 and Frontier2 together, do the same with Forge3 and Frontier3. Next using five 3mm pins and the 430mm long 8mm dowel glue the Forge2/Frontier2 assembly, Forge3/Frontier3 assembly, Tip1, and Tip2 parts together. Lastly use the last two 3mm pins to glue the two sections of the sword together.
Finishing
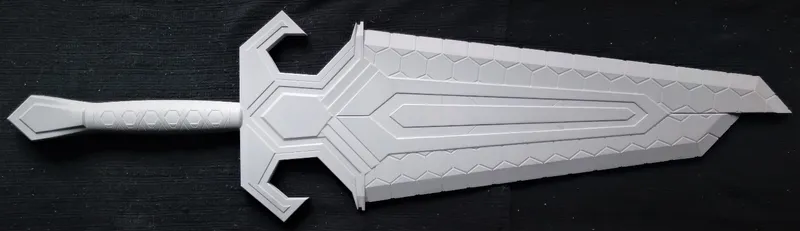
I hide the seams between parts by filling them in with superglue and then smooth them with 180 grit sand paper. Next, I used 2 coats of automotive filler primmer over the whole sword, and carefully sanded it smooth with 320 grit sand paper.
Painting
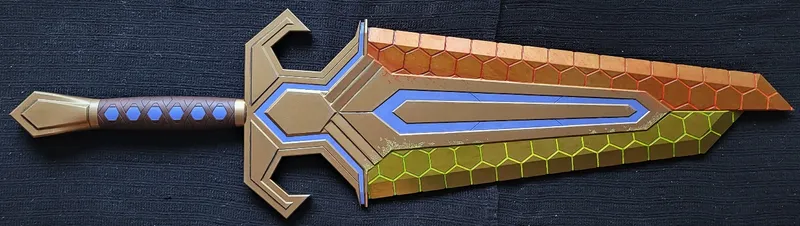
I started by painted the handle brown, then I masked off the handle and painted the pommel and blade with metallic bronze. Next, I masked round the stripes and panted them blue. Then I hand painted in between the hexes on the blades with acrylics blending from brown to orange on the forge side and yellow to white on the frontier side. I added speckling around the inside of the blades with more acrylics. The edges of the pommel cross-guard and center details were drybrushed with silver and gold to add highlights. Next, the handle was weathered with a few passes of black. I colored in the hexagons on the handle using the same blue I sued for the stripes in between the blades. Then I used inks to color the blades in red/orange and yellow/green, this let the metallic look show through some. I recommend you do this with a rag to leave less visible brush strokes. The final steps were to coat the sword in a clear gloss enamel, and use a mat hard coat for the handle.
Tags
Model origin
The author marked this model as their own original creation.