Magnetic Sliding Door Auto-Lock (i.e. for Glass Door)

Description
PDFWe have a glass sliding door in our kitchen. Our cats and dogs learned how to open that door with their paws but we don’t want them to go into the kitchen when we are not there.
That’s why I designed this magnetic autolock. With this installed, there is some initial resistance when opening the sliding door that is to strong for cats, dogs or small kids. If you need some even stronger resistance you may install two or three of these magnetic auto locks, but normally one should be enough. No drilling in the glass is necessary. It can be removed residue-free from the door. Only four small holes for the base have to be drilled in the wall. 
The mechanism consists of several parts:
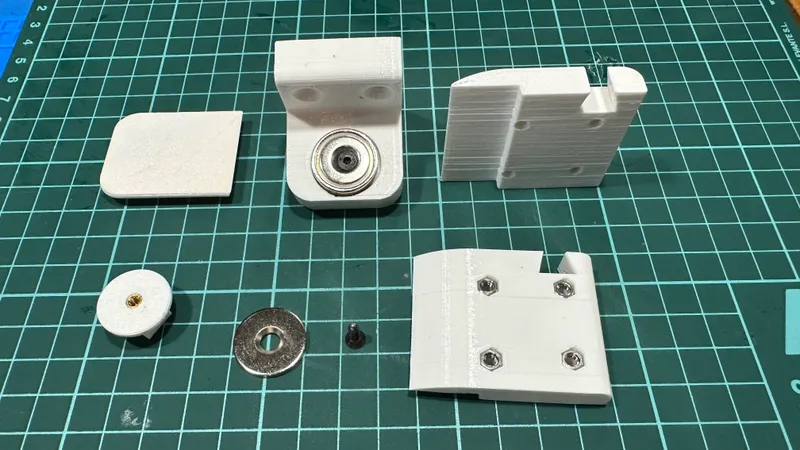
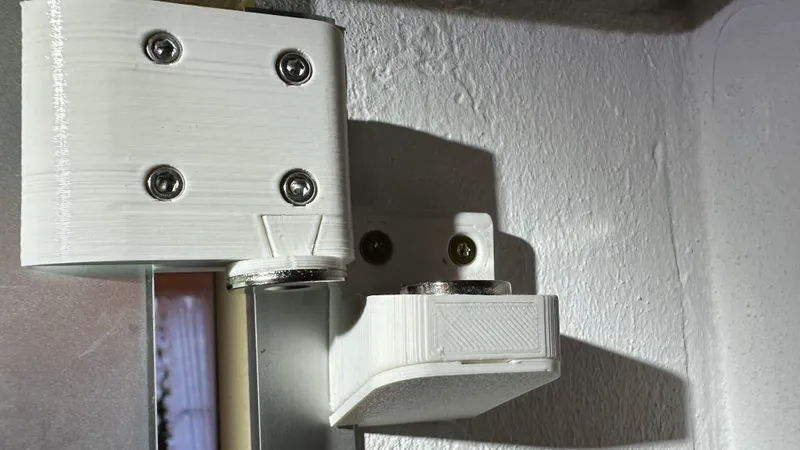
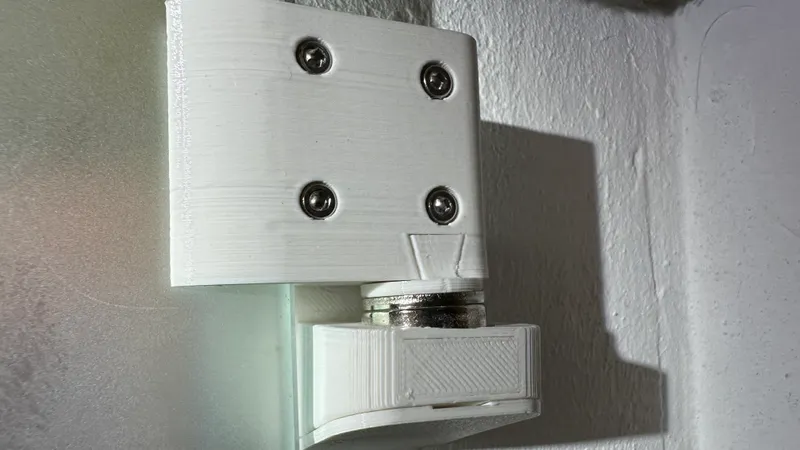
- The clamp (part A & B) Clamped to the moving part of the door. You will need
+ six M3 threaded inserts like these from Amazon.
+ four corresponding M3 hex bolts and nuts (length depends on thickness of the door)
+ two M3 grub screws. I used these ones.
- The metal plate holder, that slides into the installed clamp. Note that the sides of the trapezoid intentionally are not symmetric. They will fit only in one direction. The prototype seen in the fotos had not as good visible difference like the final model. If you see the 3D-models you will understand at once.
+ one 20x7mm magnet with a hole and 20mm metal plate like these. For the plate holder part you will need only the corresponding beveled hole metal plate. The 20x7 magnet is used for the base.
+ another M3 threaded insert
+ one M3 countersunk screw about 12mm long
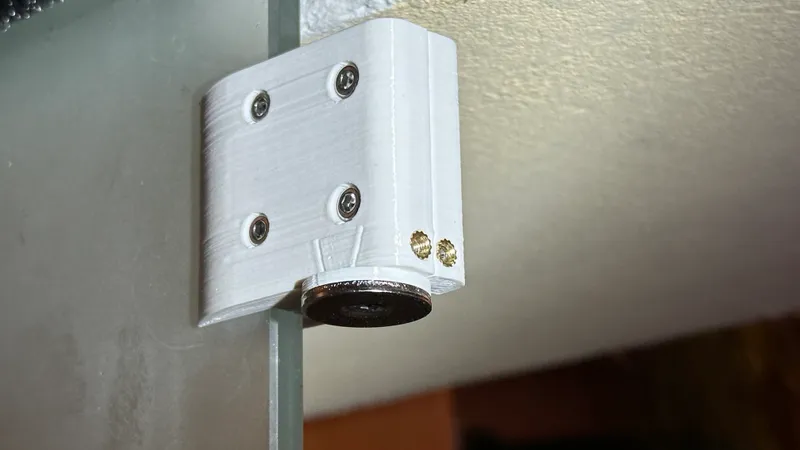
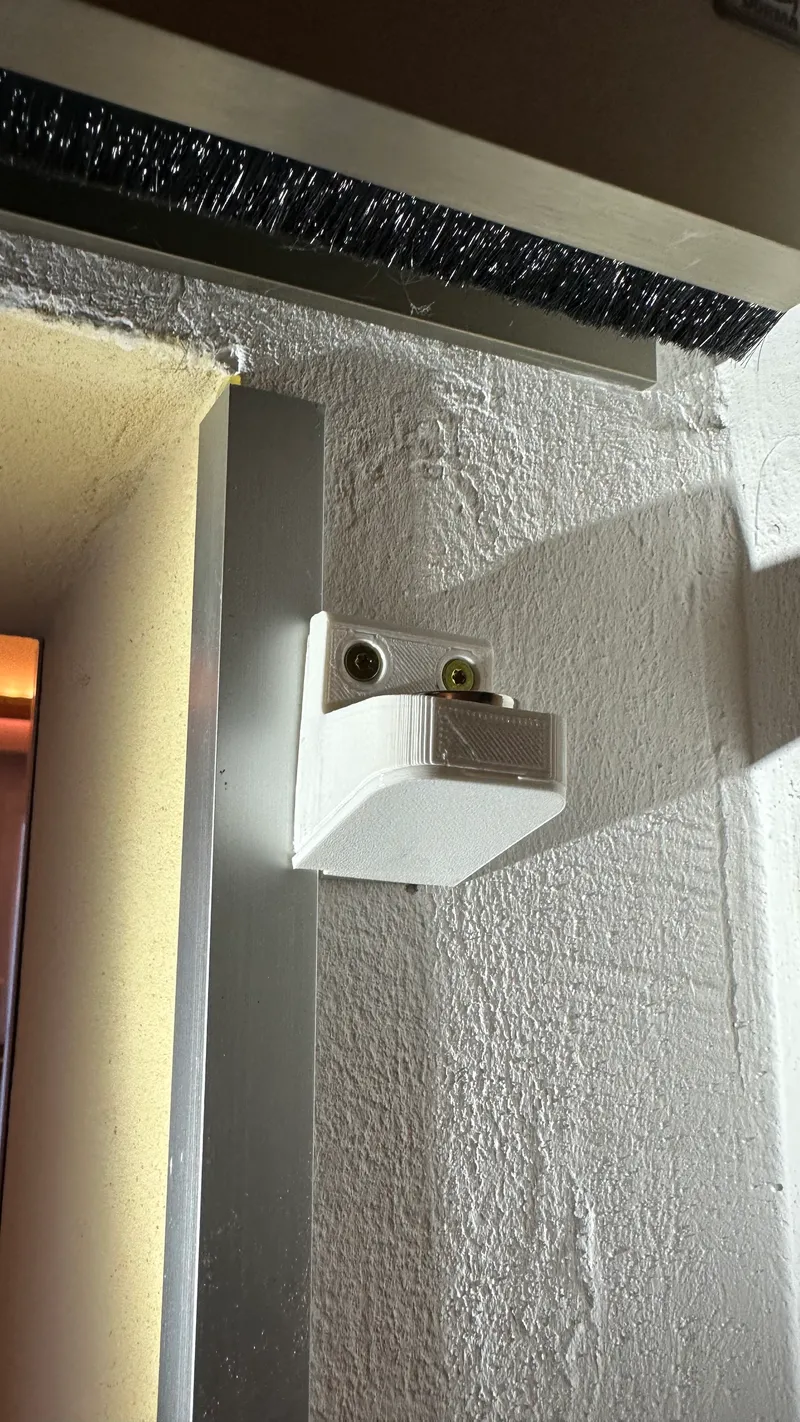
- The wall base. Here you need
+ the 20x7 magnet with the beveled hole. Note, that the magnet faces upwards. The beveled hole should face to the top.
+ one M3 countersunk screw and one M3 hex nut
+ four S6 dowels and four corresponding screws. Take care that the heads of the screws fit in the recesses of the base. The length of the screws depends on the material of the wall, but don’t choose screws that are to thick, as their heads won’t fit into the recesses of the base.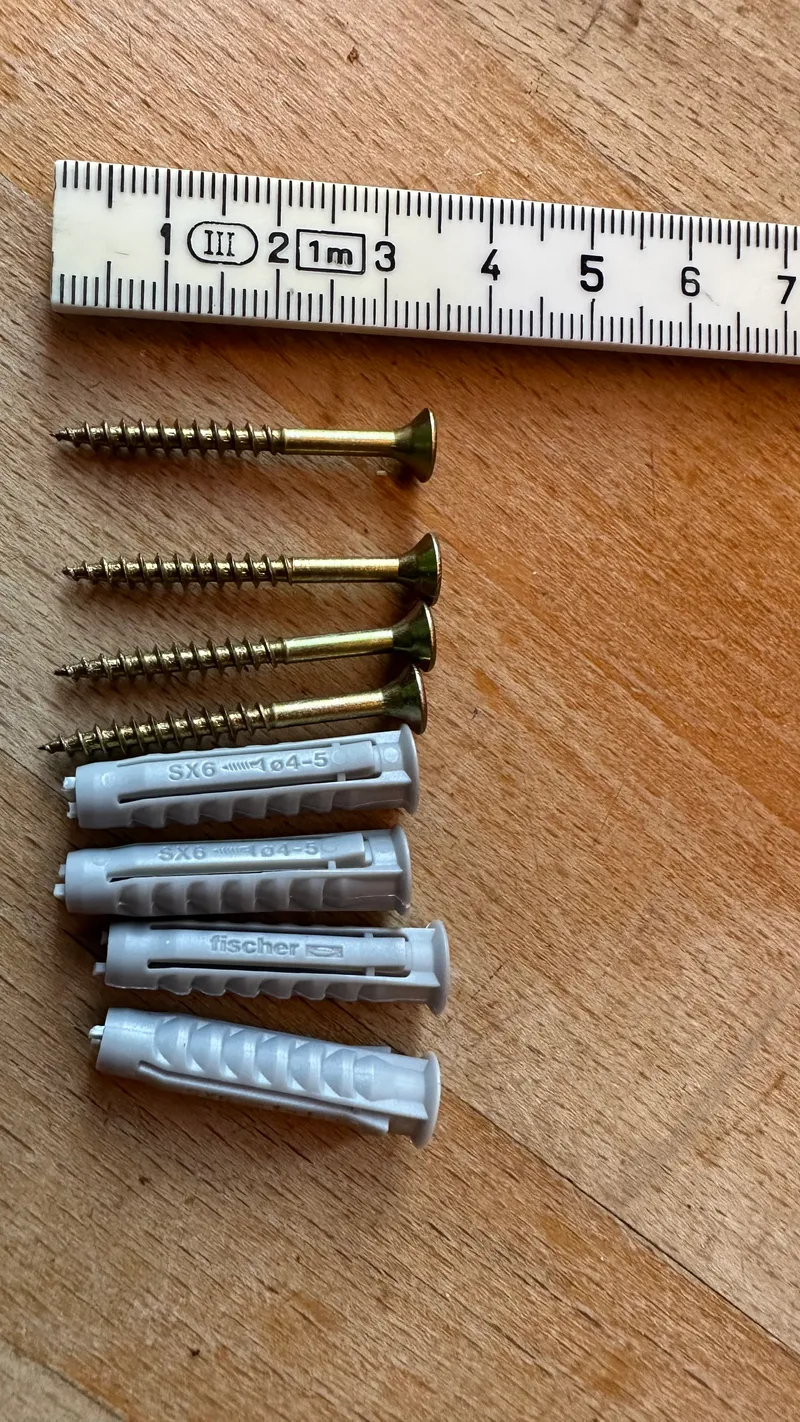
It is very important, that the round 20x7 magnet is not screwed in tightly to the base but with some play to move up and down. The magnet is intended to be loose so that it can move towards the metal plate when the door closes and that it can fall back down about 1mm when the door is open (see video). We need gravity here to let the magnet fall back 1mm into its housing.
- The cover. It snaps in the three holes with its bolts. No glue or screws required. Mount when everything is finished and tested.
- The drilling template. A helping device for drilling the holes in the wall to attach the base.
Instructions for Assembly:
- Print all parts and clean the edges. No supports are needed. I recommend at least PETG or ASA. I am afraid PLA is too fragile for this model. Standard 0,20mm layer height and 0,4mm nozzle will do the job. Choose at least 3 perimeters minimum. Insert all threaded inserts carefully with a soldering iron in the preformed holes. They all have to sit flush to the surface.

- Attach the two clamps to the Glassdoor (I chose to put them in the most upper part of the door). Don’t tighten them to hard, you will have to carefully adjust their position later on. Just enough that they don’t fall off.
- Assemble the metal plate holder with screw and threaded insert. Slide the plate holder in the trapezoid shaped slot. The final 3D models have a more obvious shape than the prototype seen in the fotos. Here you can adjust the plate to center with the round magnet of the base later. So do not tighten the grub screws now.
- Now it’s time to drill the holes in the wall for the base. You may use the drilling template.
- Set in the four dowels and screw the base to the wall.
- make a first test and adjust the metal plate holder in the clamp so that it sits centered above the magnet. When this is the case tighten the grub screws.
- Loosen the 4 screws of the clamp a bit and move the clamps with the metal plate about 1mm upwards so that the metal plate does not collide with the magnet when the door is closed. The metal plate should lift the magnet 1mm up out of its housing when the door is closed. When the door slides open, the round magnet should be able to fall down in its housing.
- when everything works as expected you can finally tighten the clamp screws and snap the cover onto the base.
I would be glad, if someone finds this useful, too. Our dog and cats now cannot enter the kitchen, when we don’t want them to but we (the humans) can use the sliding door as usual without any mechanism to operate.
Please show me your results and send me fotos of your makes. I like to see how you use this model. If you have ideas for improvement don’t hesitate to send them to me in the comments. I will try to incorporate your suggestions and will modify the model for special needs if you ask me to do so.
And of course a like ♥ or a rating ⭐ of the design are always welcome.
happy printing, clamikra
Tags
Model origin
The author marked this model as their own original creation.


