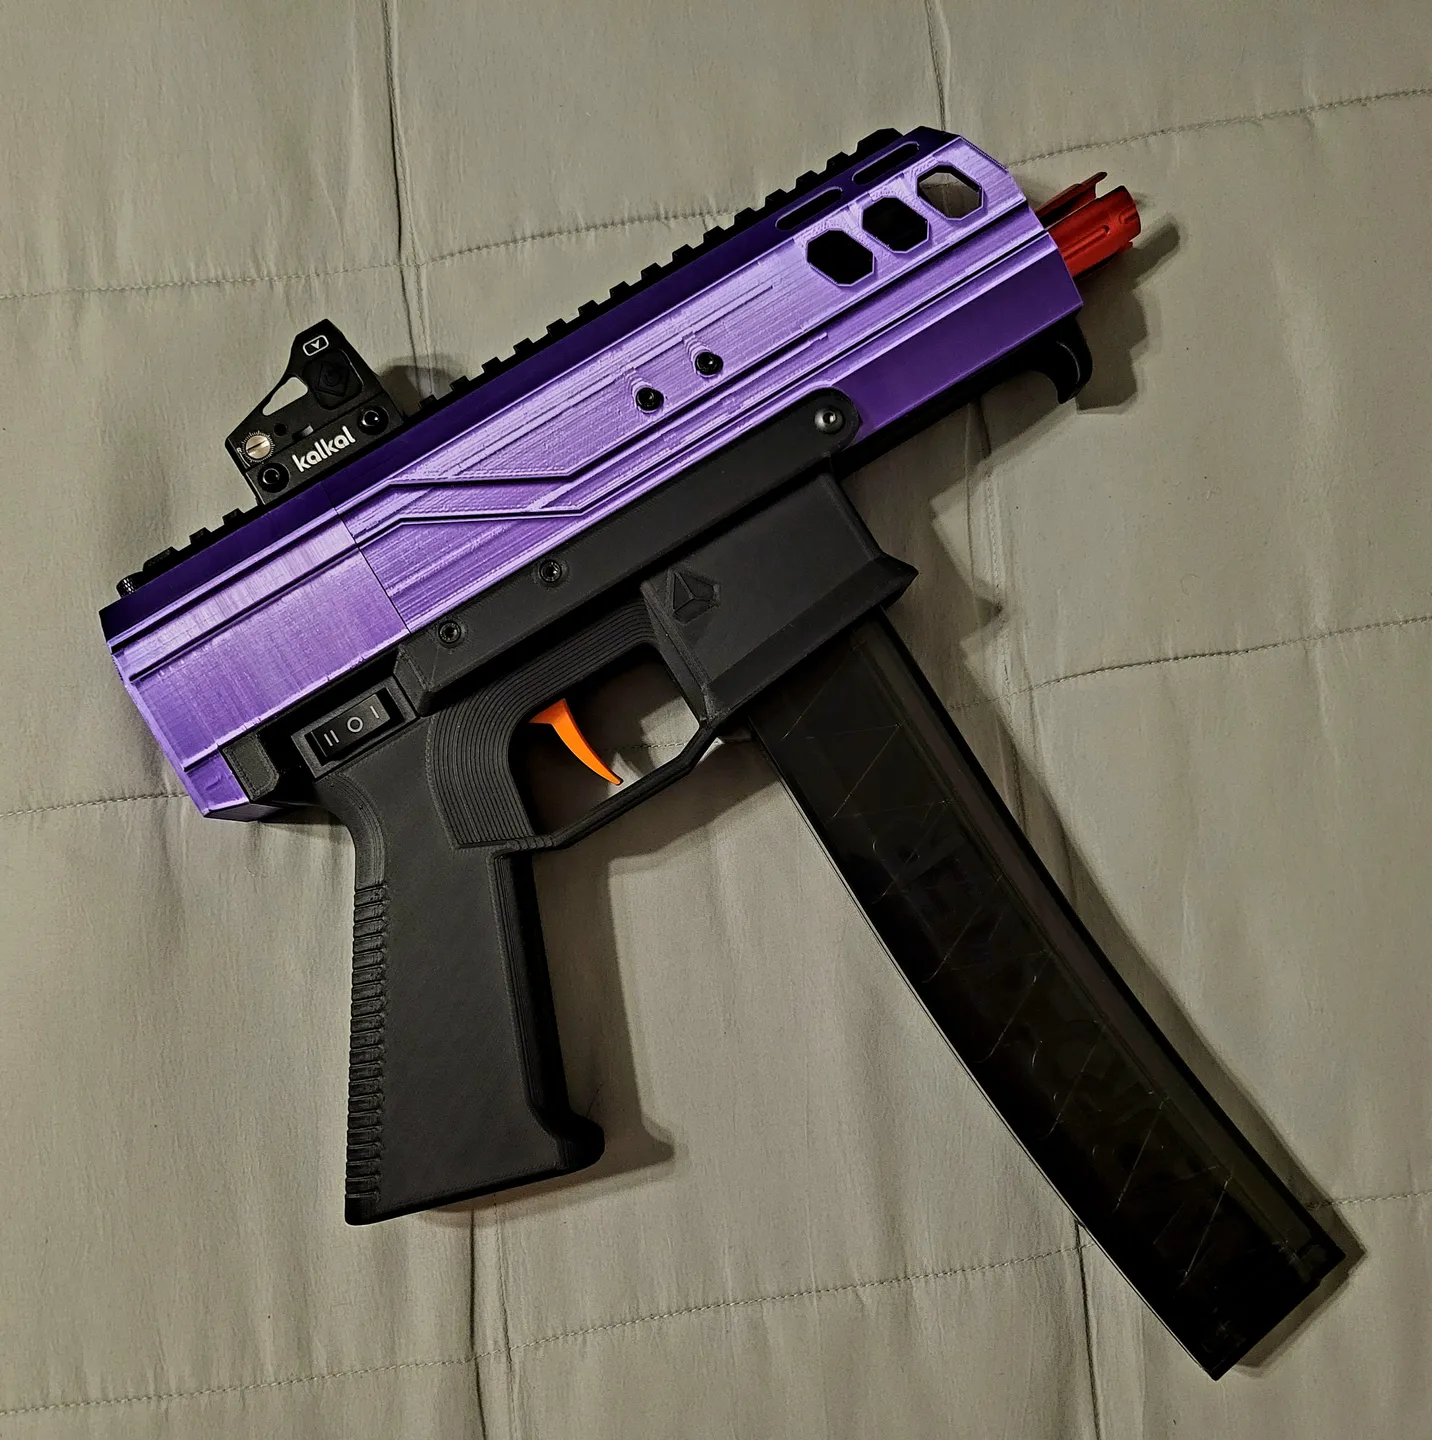
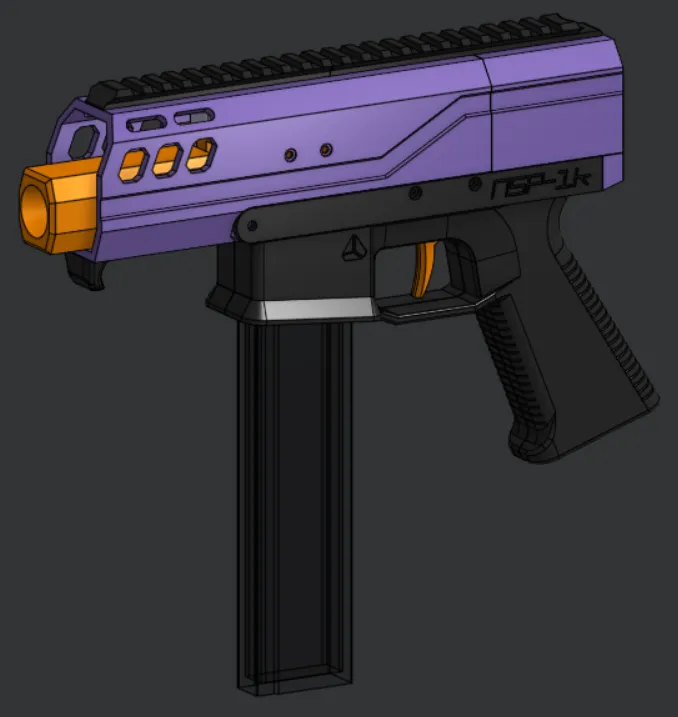
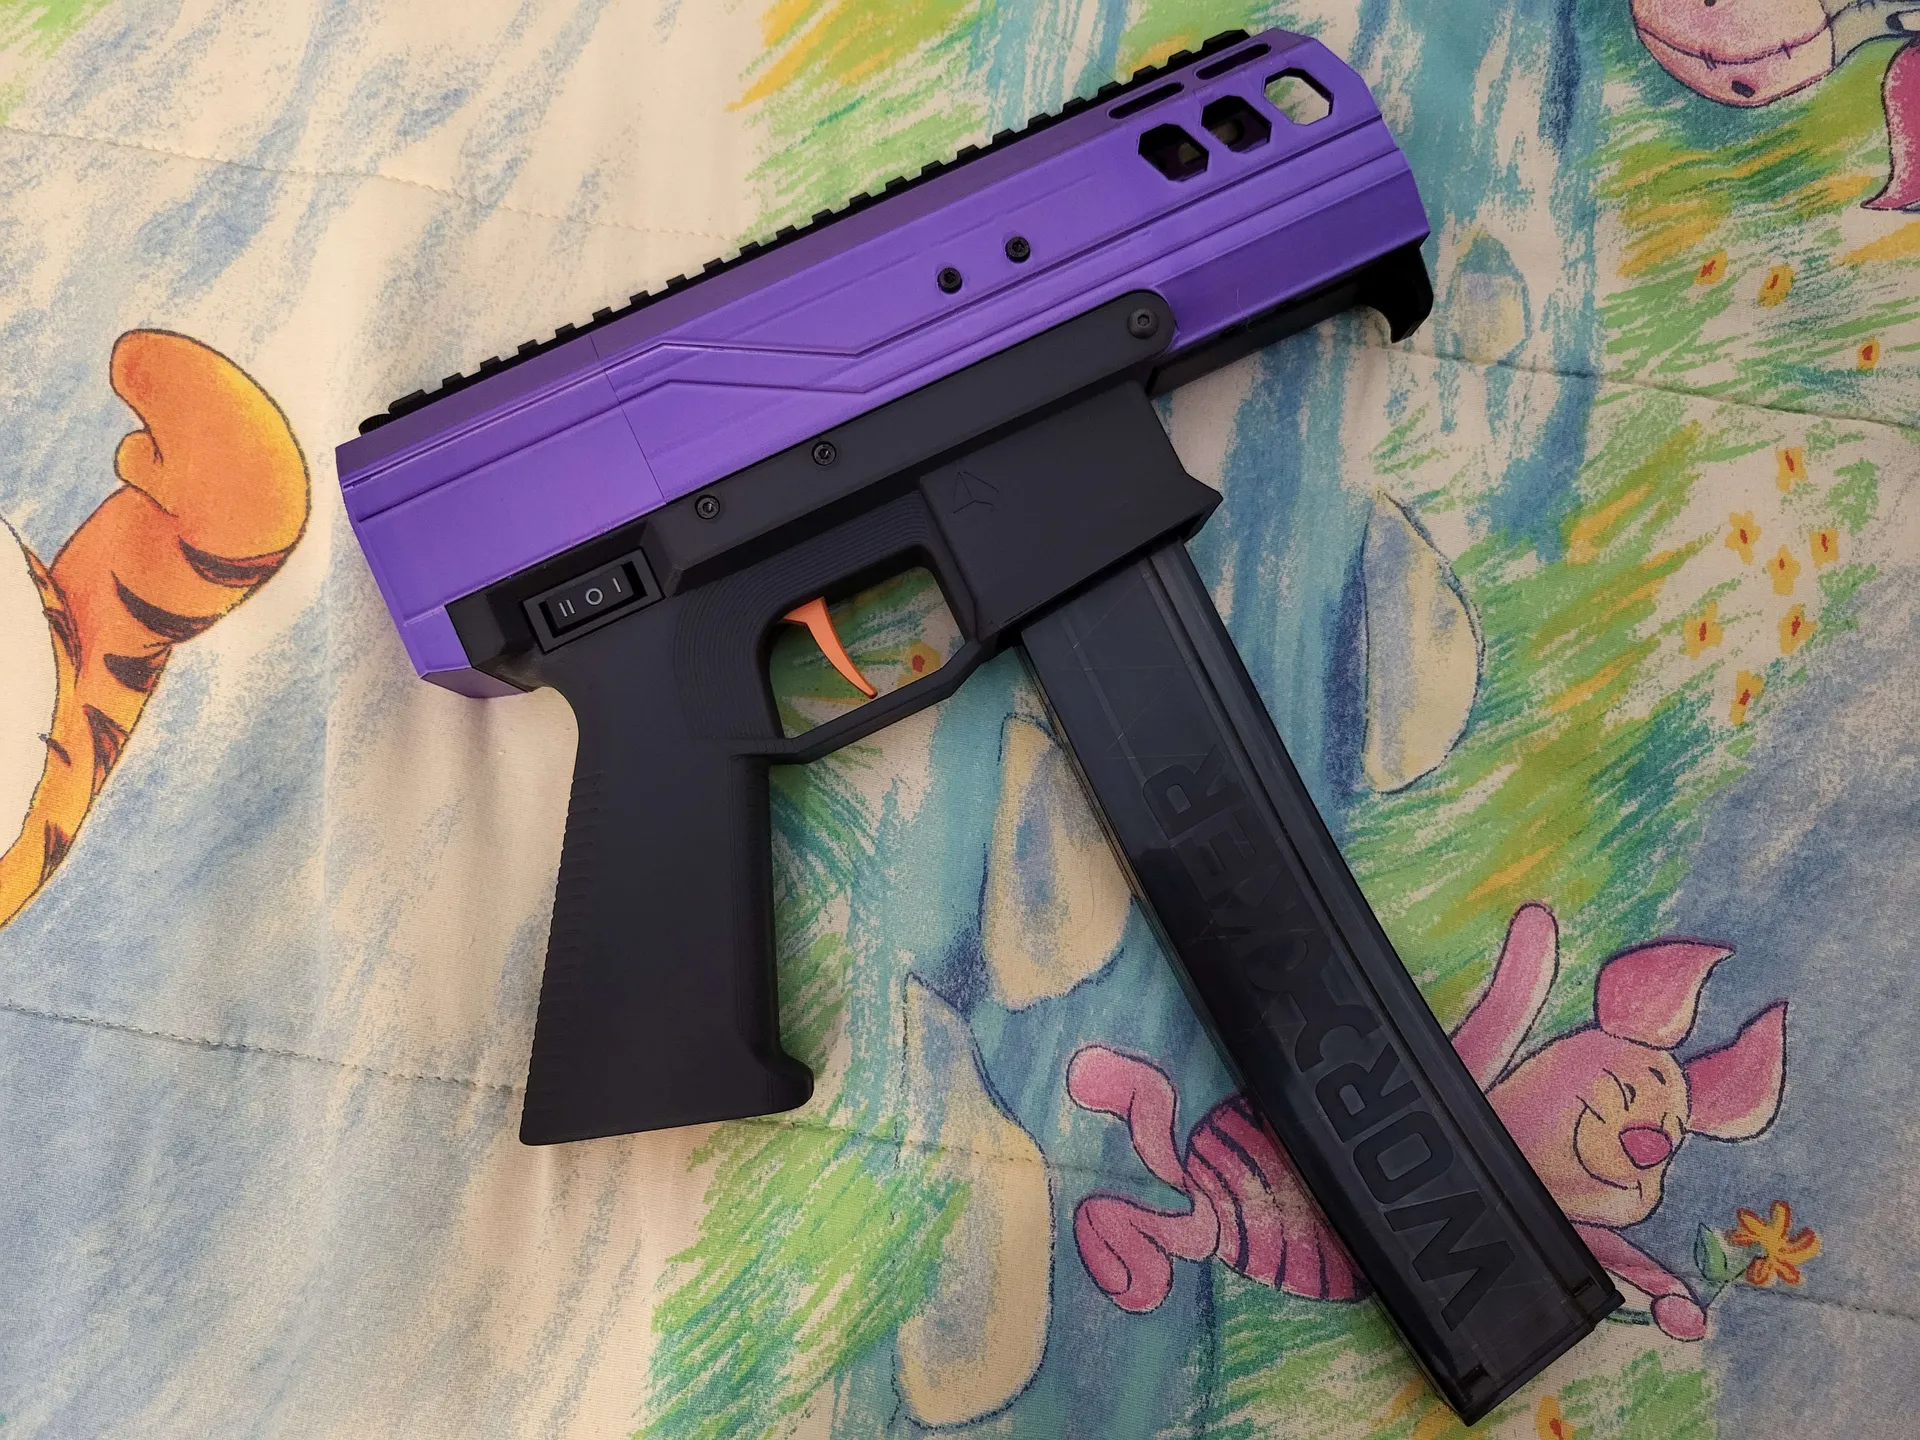
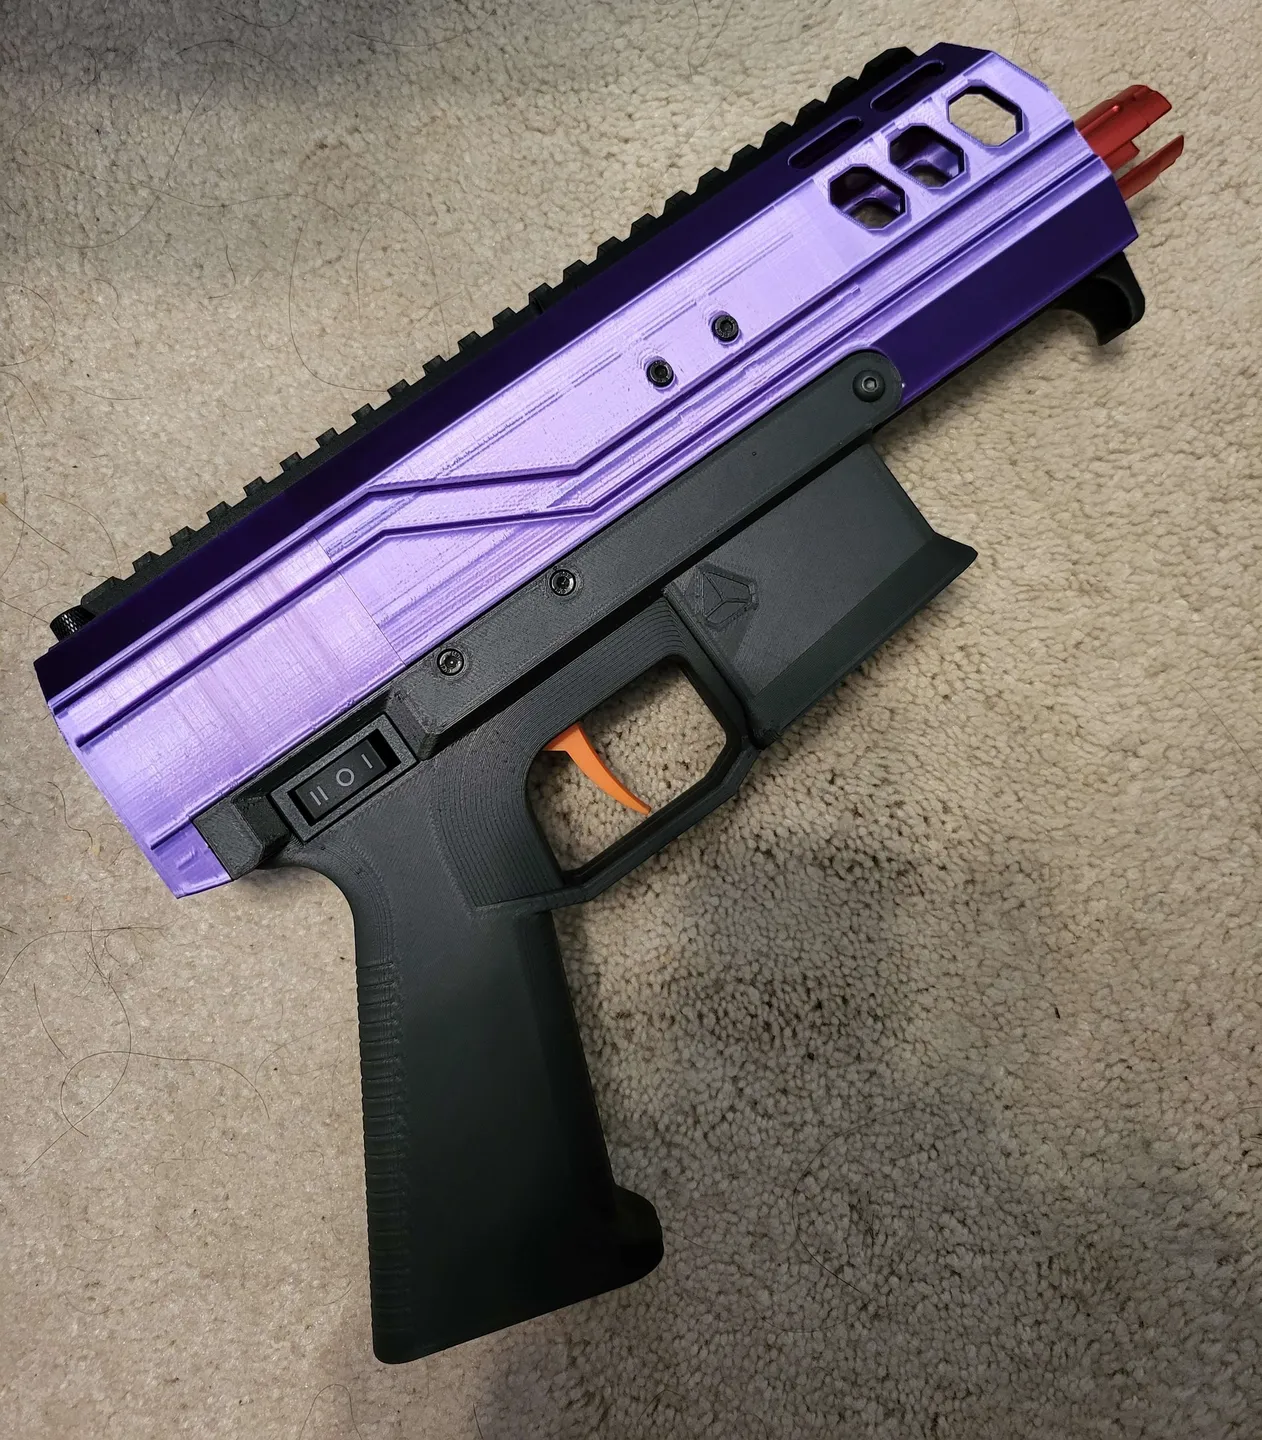
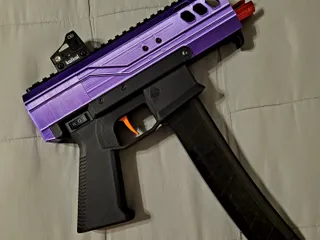
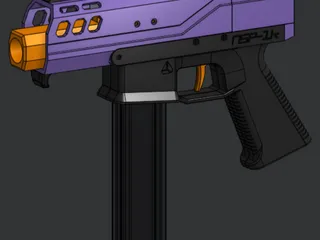
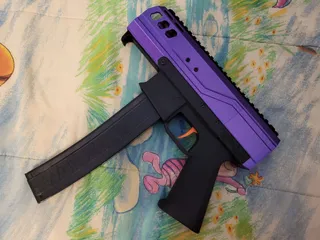
NSP-1k Foam Dart Blaster


Description
PDFUPDATE 2/1/2024: Uploaded and set better cover photo.
UPDATE 8/16/2023: Edited Contact Me portion of description to specify how to DM me. I will generally not be accepting random friend requests, so please join the /r/Nerf Discord server linked below for now.
UPDATE 7/20/2023: Fixed some spelling issues in this description, because apparently I only now realized I spelled “Metric” with an “x” as “Metrix”. No comment.
UPDATE 4/30/2023: Fixed spacing for the HOLDster bracket. I was under the impression that the spacing was 60mm, but it is now correctly 95mm.
BLASTER OVERVIEW
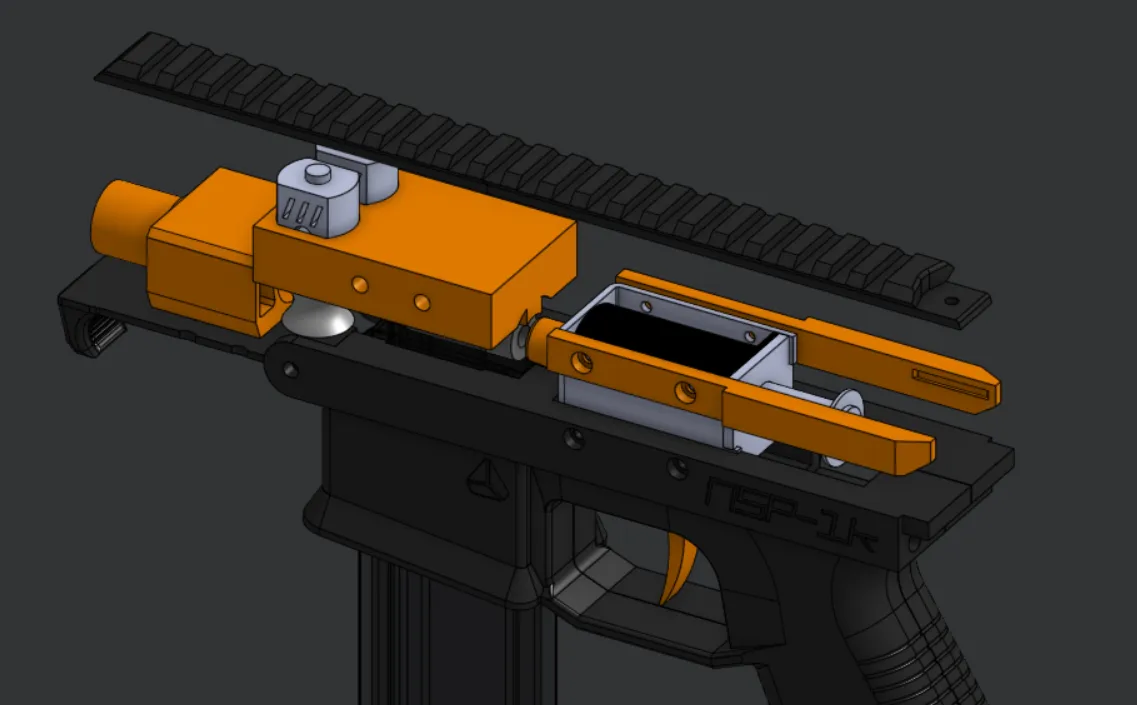
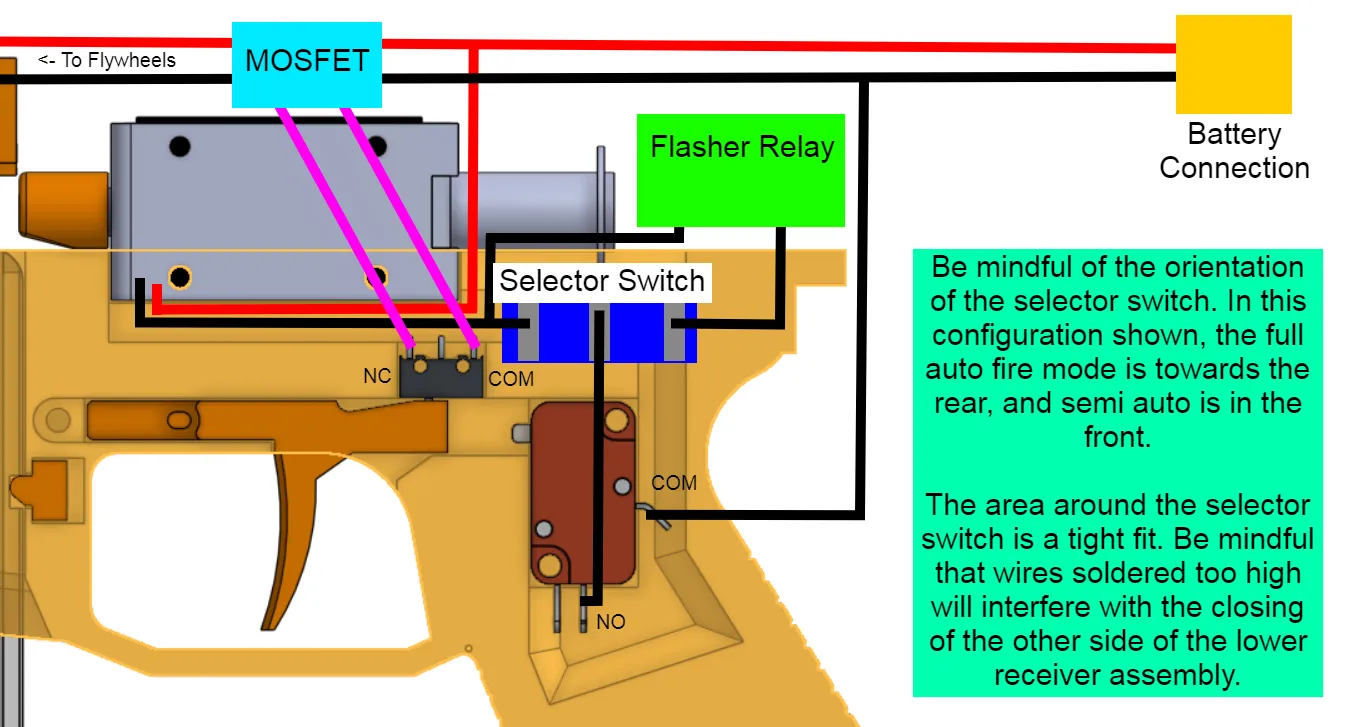
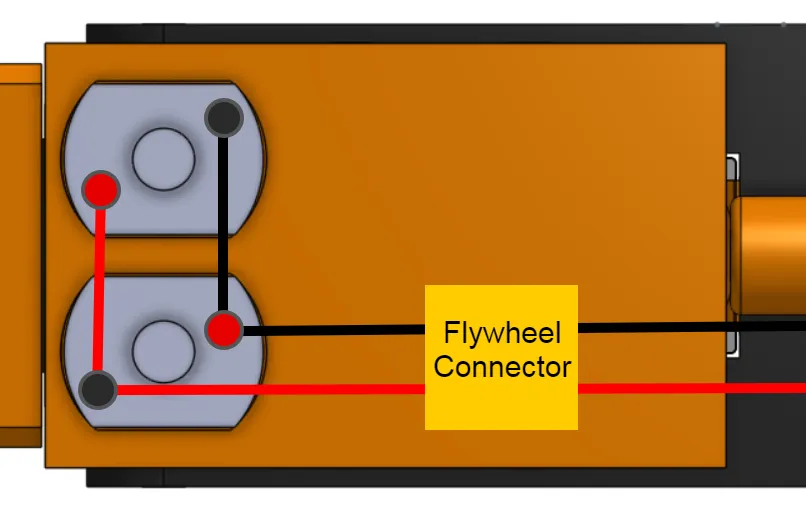
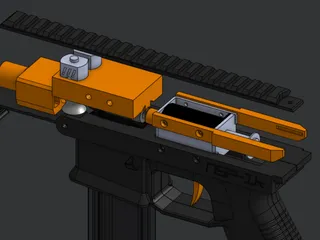
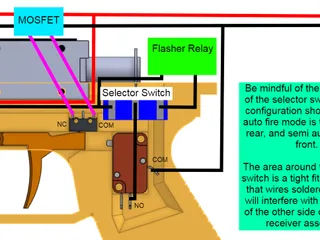
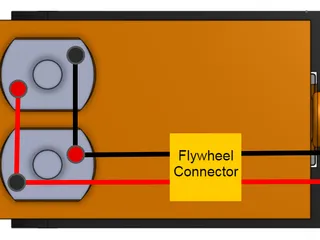
The NSP-1k is a fully custom select fire, Talon-fed, solenoid driven, nightingale flywheel powered blaster. It requires no Arduinos or programming to build, relying on an off the shelf relay to drive the solenoid in full-auto mode. I designed this with the sole intention of being a versatile blaster, whether it be as a primary or as a secondary to a high powered springer.
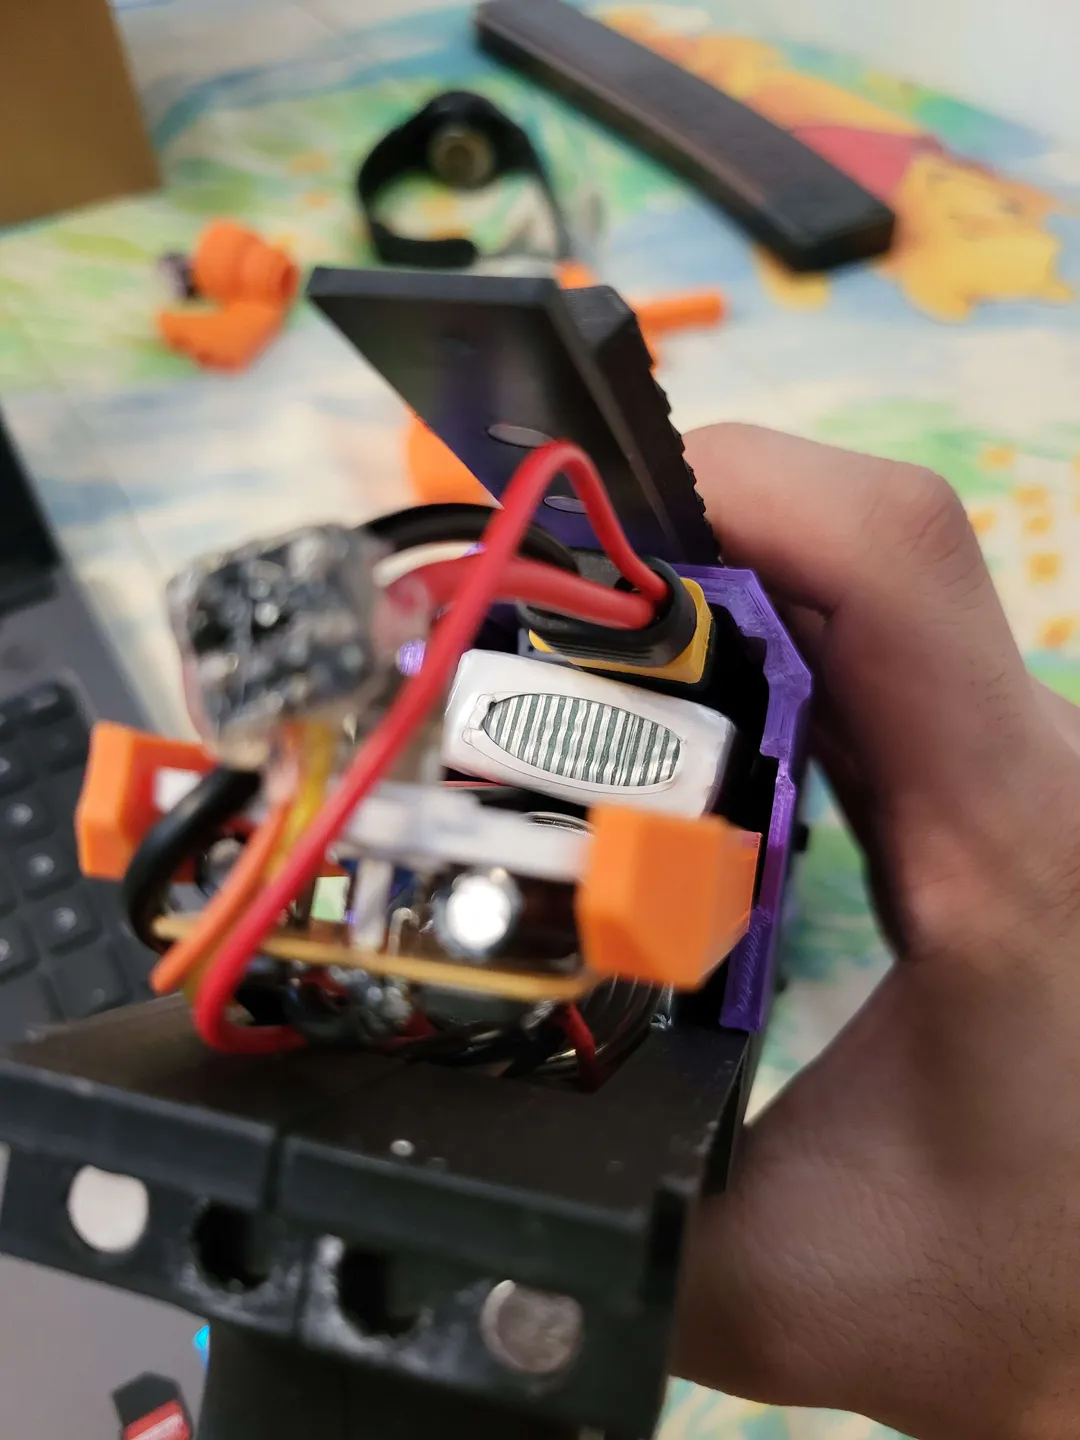
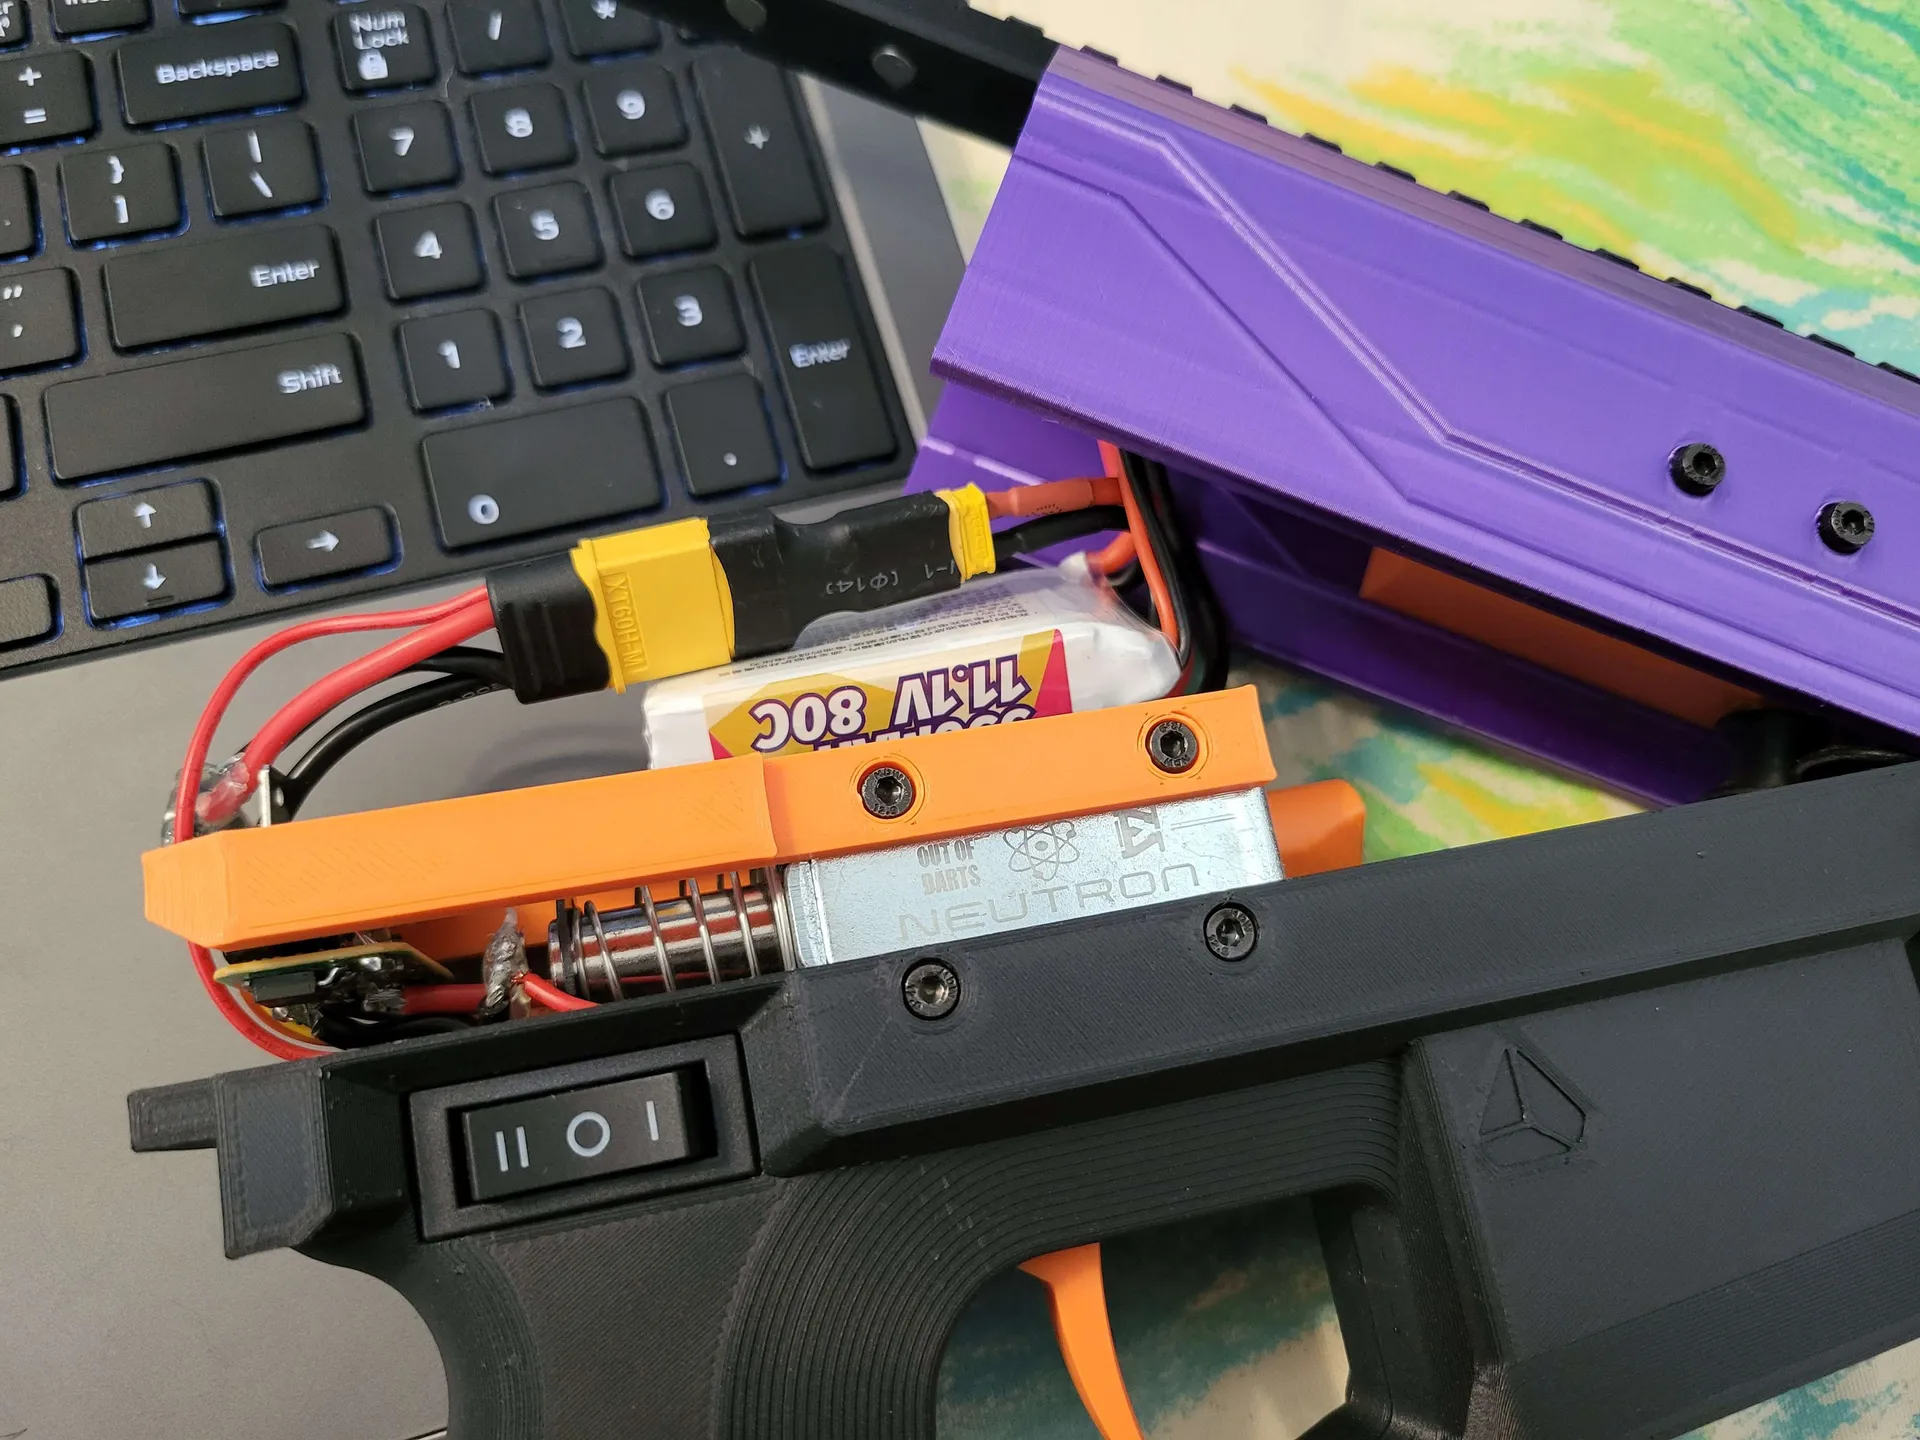
The battery it takes can be the same as a Nightingale. The battery compartment is about 28x38x100mm, but keep in mind the wires and connectors will make this smaller, depending on how you build it. I know that the 3S 550mAh 80C batteries fit, and in general should be enough to power this blaster.
It has multiple parts that can be easily swapped out to customize the blaster, and I have included STEP files as well so you can easily design your own attachments!
THIS BLASTER COMES DEFAULT AS LEFT HANDED. (cause, well, i'm left handed…) FOR RIGHT HANDED USERS, PLEASE PRINT THE RIGHT HANDED VERSIONS OF THE LOWER RECEIVER HALVES AND PAY ATTENTION TO THE WARNING IN THE BUILD GUIDE!
TOOLS REQUIRED
All you really need to build this blaster is a set of metric hex keys, a soldering iron, some cutting pliers, and a decently-tuned 3D printer that has a 220x220mm bed (so basically any Ender 3 class of printer). However, due to this being a 3D printed blaster, you may need to sand and trim certain pieces. A recommended set of tools is listed below:
- Cutting pliers
- Metric hex keys
- Soldering iron
- Solder
- Wire stripper
- 3D printer with a 220x220x250mm print volume
- Heat set insert tools for your soldering iron
If you purchase the linked heat set inserts, the kit will come with some tips that should fit certain soldering irons. Using them will make installing the heat set inserts way easier; trust me, you don't want to have to deal with crooked inserts.
HARDWARE
The NSP-1k requires very little in terms of specialized hardware; it uses readily available metric fasteners and heat-set inserts, which you can find on Amazon using the links in the included build guide's parts list. The springs used in this build are from a spring kit I got at Home Depot; I give approximate necessary dimensions for springs in the build guide's parts list if you don't have a Home Depot near you. The magazine detent spring is… literally a pen spring. You should be able to salvage a suitable one from a pen you own. (hopefully)
ASSEMBLY
The included build guide will guide you through assembly of this blaster. The build guide is a WIP, so if you have any suggestions or find any typos, please contact me.
Certain parts may require glue where it is not specified; for example, the relay brackets have a tendency to not click in perfectly, and may need to be glued to the relay.
3D PRINTING
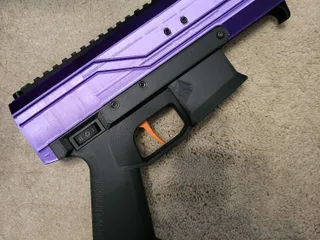
For the base blaster, there is only 15 parts you need to print. This will take you about 2 days of printer runtime and about 1kg of filament. I have grouped the files by color. Please print orange parts in orange and the rest of the parts in brighter colors; this blaster can be mistaken as a firearm if printed in dark colors!
All the main files come pre-oriented, so you won't have to mess with figuring out how to place things. This is the optimal orientation that I have found. You may be able to print most of this without supports, but it is near impossible to print the lower receiver halves without any supports. (if you manage to do this, I'd love to know how.) This entire blaster is designed to be printed with an 0.2mm layer height. Below is the recommended print settings for each part:
- ALL SECONDARY COLOR PARTS:
- 4 walls
- Octet infill pattern
- 50% infill density
- ALL PRIMARY COLOR PARTS:
- 4 walls
- Triangle infill pattern
- 30% infill density
- MAGAZINE DETENT, TRIGGER, PUSHER HEAD:
- 4 walls
- Lines infill pattern
- 100% infill density
- RELAY BRACKETS, BARREL, FLYWHEEL CAGE, GRIP STRENGTHENER:
- 3 walls
- Octet infill pattern
- 30% infill density
ACCESSORIES, REFERENCES, AND EXPERIMENTAL PARTS
I have included STEP files for the lower handstop and the barrel to make it easier to design alternate parts!
The barrel has an outer diameter of 19mm, with the intention of being compatible with Worker branded muzzle devices. Please note that due to the clearance between the barrel and the receiver, however, that not all muzzle accessories will fit. There are 2 included muzzle pieces in the files which you can print, but I'm just going to say I'm not very good at designing such a thing and personally have stuck to using an orange Worker muzzle break.
There are a few experimental parts included too:
- Pusher head with heat set insert
- The pusher head was originally designed to use a 6-32 heat set insert. However, due to the fact that not all heat set inserts are alike in dimensions, I designed the released pusher head to utilize the nut that comes with the solenoid. I use this variant of the pusher head, but I am not sure of what 6-32 heat set insert these are. I am pretty sure they're from Mcmaster Carr, but its been years since I sourced these, so I honestly have no clue. The file is included anyways, though!
- Rear trunnion with N-Strike stock adaptor
- I am a tad concerned with putting a large amount of force onto a part mainly held on by magnets, but it most likely should hold. This was designed because someone asked if you could mount a stock on it. I have no idea what the best way to print this is, probably with the stock attachment point flush on the print bed.
- Holdster magnetic holster attachment
- I originally envisioned this to use the semi-defunct HOLDster, the magnetic holster design you no doubt have seen videos of. Well, its not like you can buy ready made holsters for the system anymore, but you can still buy the Fidlock SNAP hardware that was used to make them! Thus, if anyone still owns an OG HOLDster, I have stuck to the (according to others) standardized 60mm spacing between the lugs. All you'd have to do is print this bracket, melt in the M5 heat set inserts (which I used on the assumption that you probably bought the kit I referenced in the build guide), screw in the Fidlock magnetic bolts, and then screw it to whatever side of the blaster you want!
SUGGESTIONS, QUESTIONS, OR ISSUES? CONTACT ME!
I can be found on Reddit and Discord, but I am most active on Discord. I can be found on the /r/Nerf Discord server, but if you need, you can DM me. If you do make this blaster, I'd love to know!
My Discord username is: @brooklyn_tony198
My Reddit username is: u/BrooklynTony198
Please note that I will generally not be accepting friend requests for DMs; to DM me on Discord, please join the /r/Nerf Discord server first and DM me through there.
IF YOU WANT TO SELL HARDWARE KITS OR PRINTED COMPONENTS OF THIS BLASTER, PLEASE CONTACT ME FIRST.
NONE of my files are to be used or sold by Frontline Foam, by downloading my files, you agree that you are not Frontline Foam and/or related to Frontline Foam or Derrikk Sun.
Tags
Model origin
The author marked this model as their own original creation.


