Bambu Lab P1P Enclosure with original Top Glass & Front Door

Description
PDFUpdated (03-31-23)
This is a remix of suit the "Bambu Lab P1P "Minimal" Enclosure + Door" (https://www.printables.com/fr/model/381777-bambu-lab-p1p-minimalistenclosure) which is an excellent design, and I own him all the credits for the work he did with a full detailed well explained procedures.
If you are interested to do this version, the first step is to look at complete detailed instructions from his model and adapt them to my parts. There is no change to the original procedure, just few different parts, so I will not overwrite it (look at the link above). He even recently added new features for the ones who will use acrylic or other stuff for the front door.
So at first, I chose his simple design because it was based on the addition of the original “Glass Top” and “Front Door”, which I had already bought before finding his model. In my opinion, there is nothing equal to glass for its shine, looks, and resistance for scratches. In my experience, as soon as you touch any kind of synthetic material (polymer, acrylic, lexan or other), you begin to scratch them, and usually, it's a no way back !
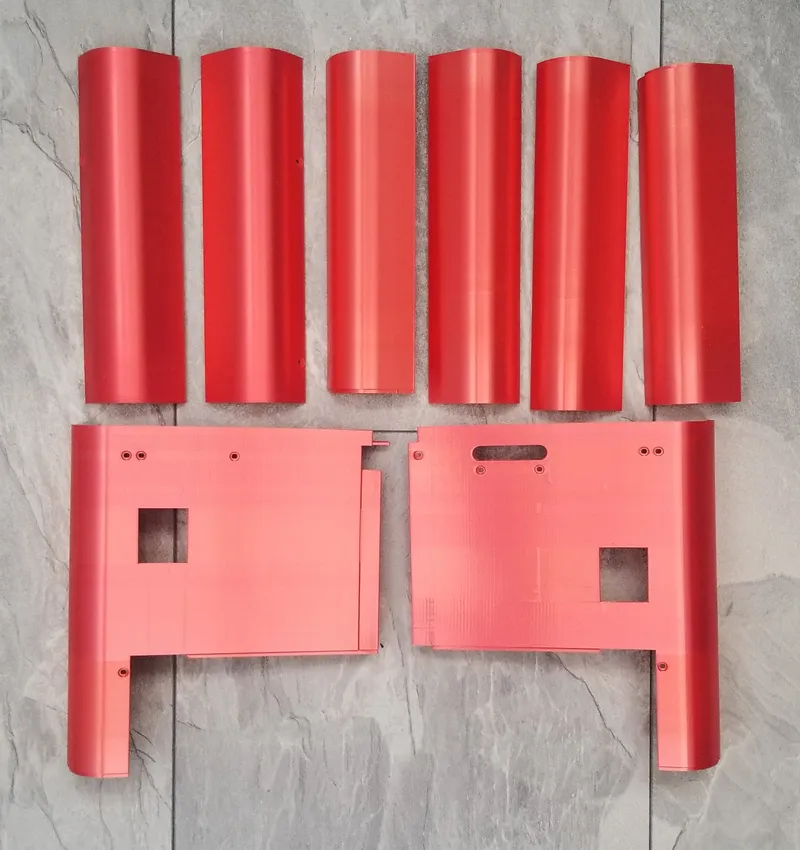
This model was not based on having the less material as possible, I wanted to have an enclosure sturdy enough to be quiet, so expect that It's almost a full spool of filament, but since I first was using the end of a spool, and had a couple misses, I could not tell exactly how much filament is needed !
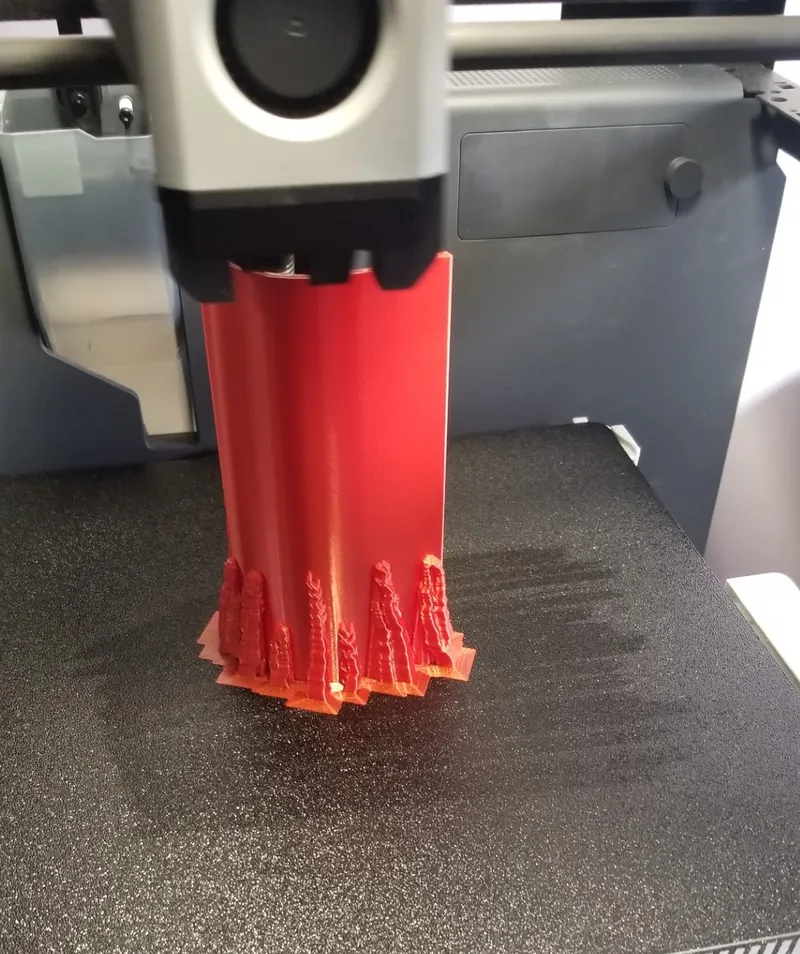
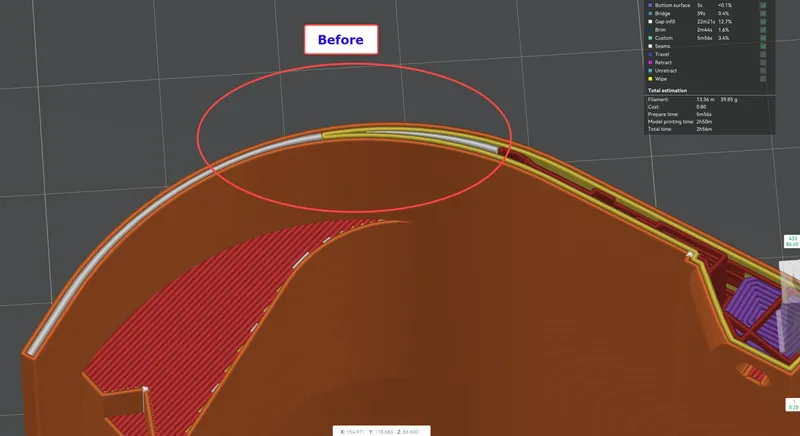
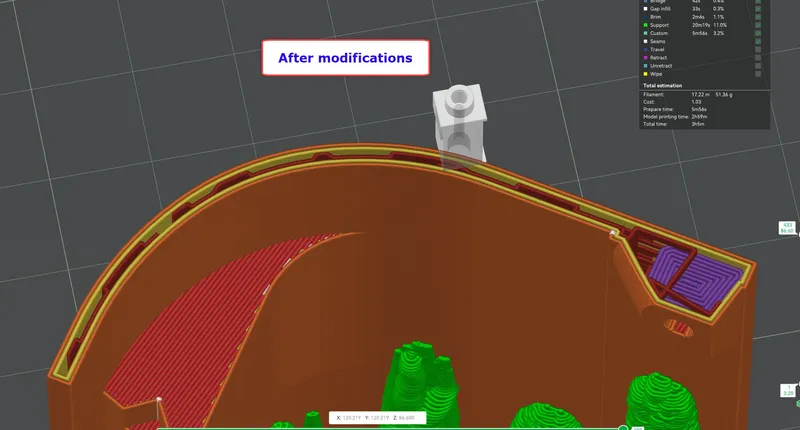
So the main mods are the thickness of the front parts, and it is not necessary to print with "Fuzzy skin" to hide some lines that were appearing (it happened on my first prints). So they are not visible anymore after the mod. The thing is that the toolhead was making a back and
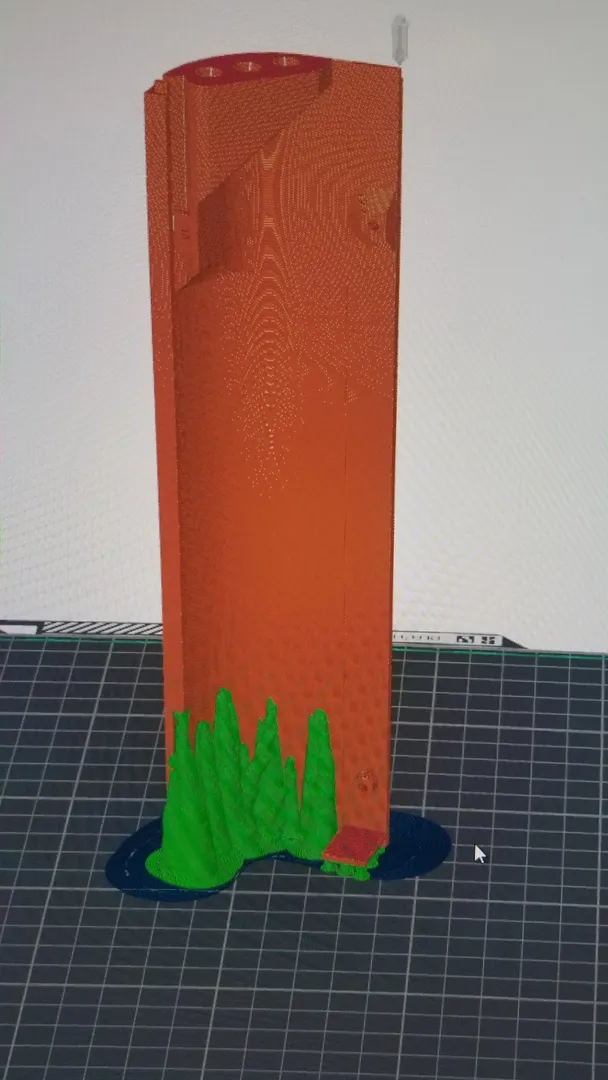
forth moove, thus creating a visible line. Also, as he stated, print the parts vertically with support (tree woks fine), I added brims and as after a couple missed prints, I put some glue on the bed which ended my printing issues right away. So this way, I was able to print in eSun Silk PLA with good results.
There is a slight difference from front to back because I ran out of the first spool of red, and it seems that the second spool was not exactly the same color. As you only see one side at the time, it's not noticable.
IMPOTANT NOTE:
Following 2 comments about the possibility of pinching a cable; BEWARE when tightening the upper screws to the frame, particularly with the “FLAT CAMERA CABLE”, specially for the ones who received their P1P with preinstalled camera. Mine did not have the camera installed (dec. 2022), so I knew it was there !
-------------------
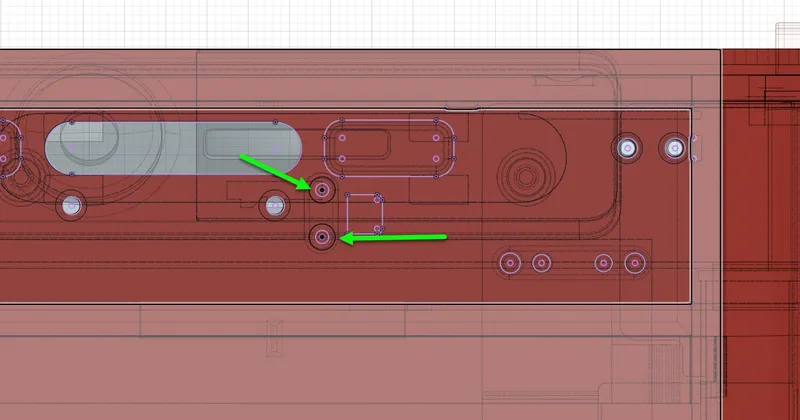
To fit the original Glass Top, I modified the back top parts to accept it without changing the original design. On the left one I added 2 holes in the case you use the "BBL Cable Chain""to access the 2 screws that secure the "AP Board Cover" included in the Cable Chain kit.
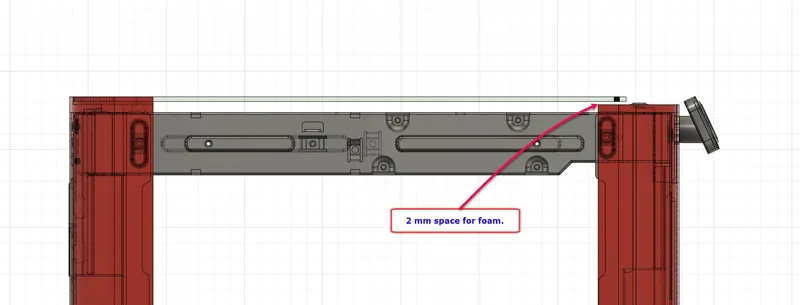
Also, consider that with this version, the "Glass Top" sits on a 2mm thickness foam glued to the frame parts (back and sides only), and the same kind of foam was applied directly to front of the glass to make a better seal. If you are going to use thicker foam or different thickness than the original Glass Top (3 mm), you will have to make the sides higher.
Maybe I could help on that !

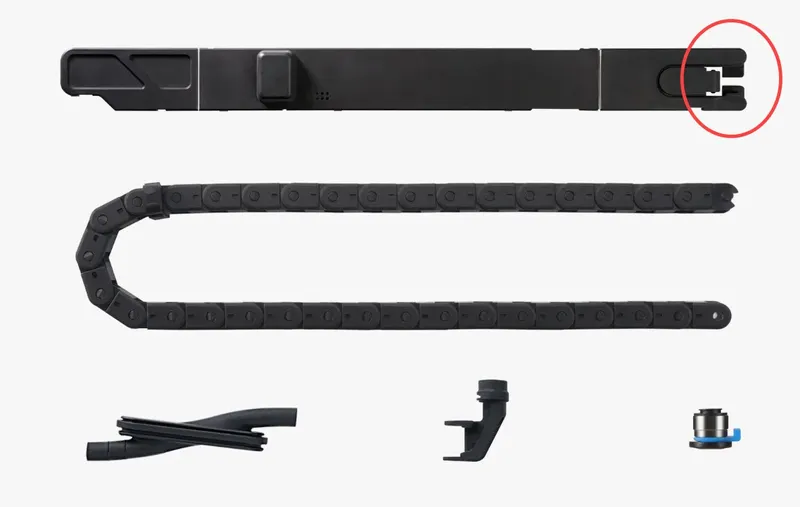
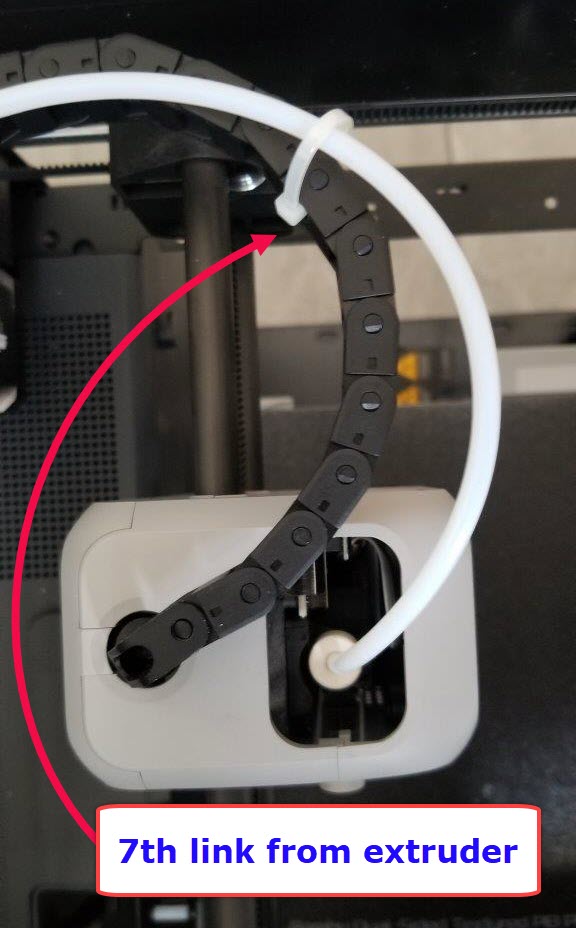
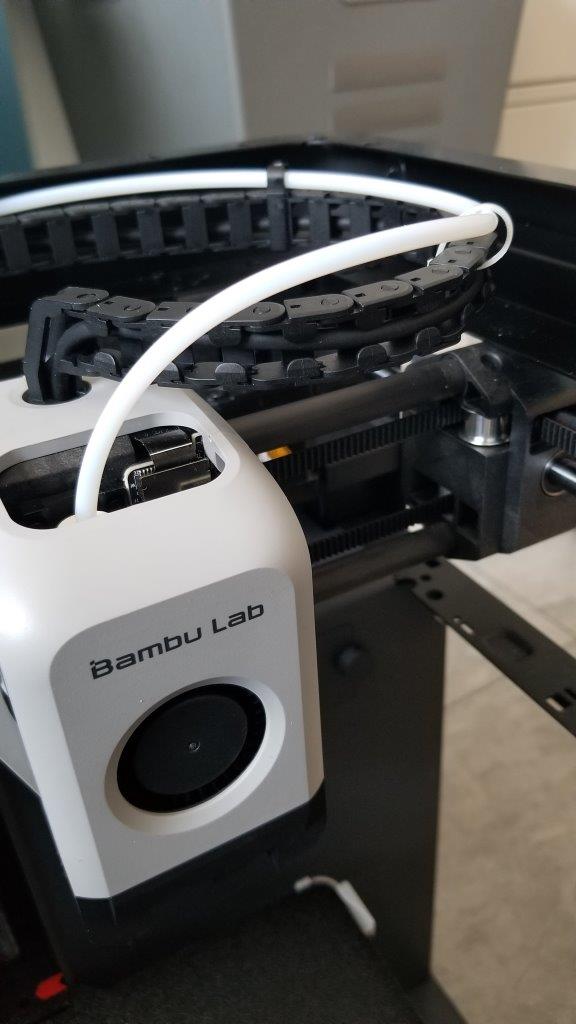
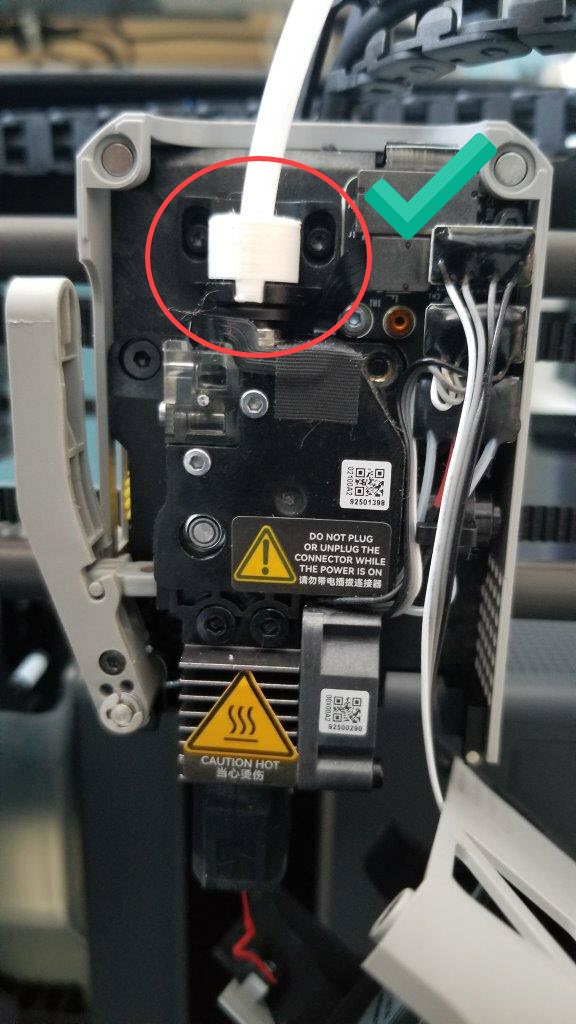
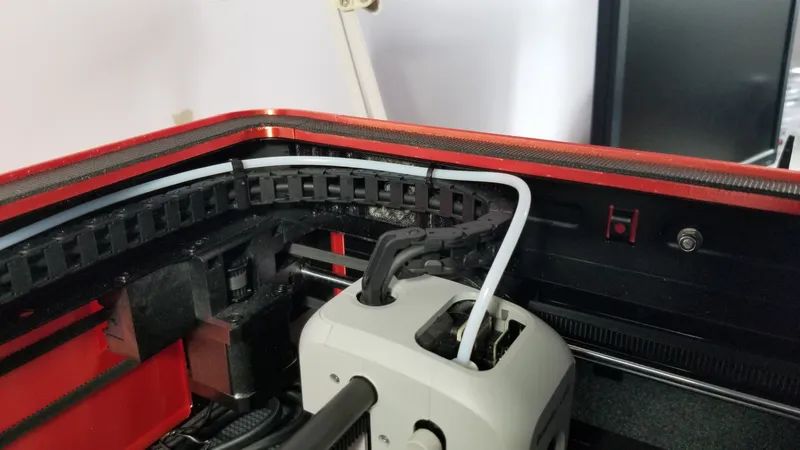
To prevent the PTFE tube from rubbing against the “Glass Top”, I added a little “loose” tie-wrap at the 7th link of the "Cable Chain" to have the best arc of curvature/clearance for the top, and added the best idea for the PTFE output from the extruder; The “Bambu X1 Bowden tube reinforcement / strain relief” (https://www.printables.com/fr/model/306323-bambu-x1-bowden-tube-reinforcement-strain-relief ). I have tried at least 3 other concepts, and this one is the smallest and the more stable one that gives the best curvature you can get with the "Glass Top".
The “Bambu Lab P1P Screen Faceplate Frame” (https://www.printables.com/fr/model/372243-bambu-lab-p1p-screen-faceplate-frame)

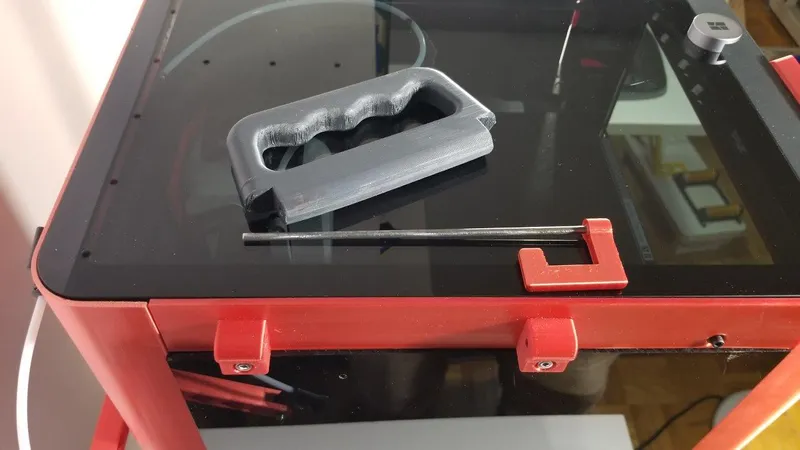
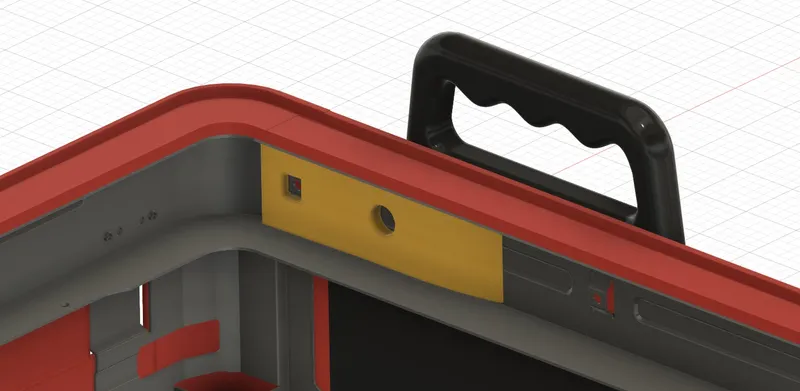
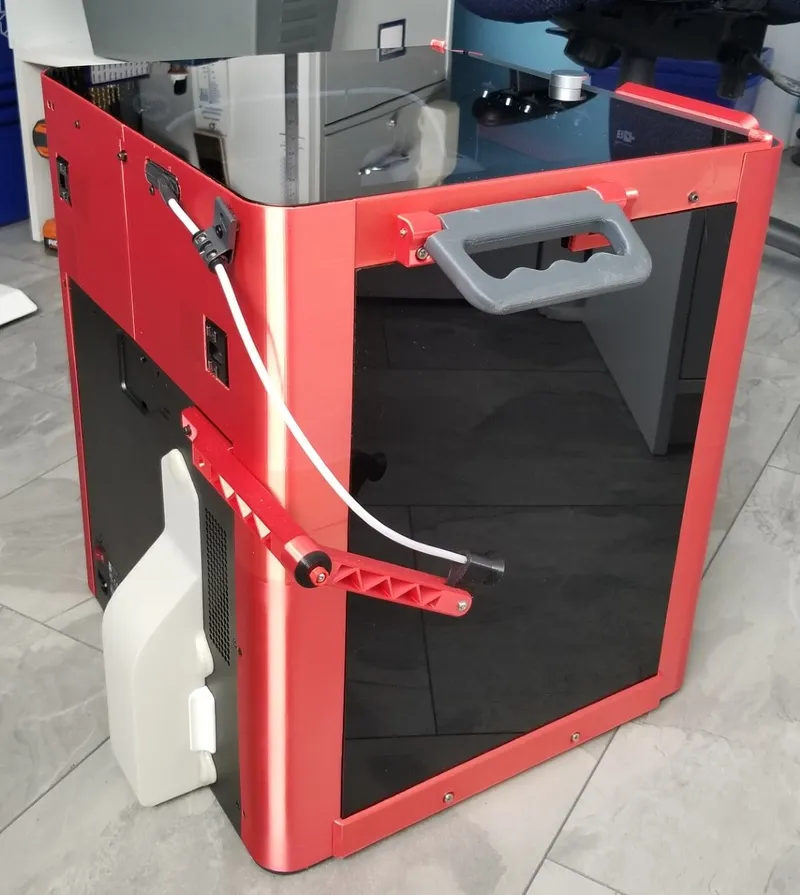
I added some handles to move the printer around, since before adding the enclosure it was really easy to grab it by the top frame to move it around (which I did a lot), but not easy anymore with the complete enclosure !
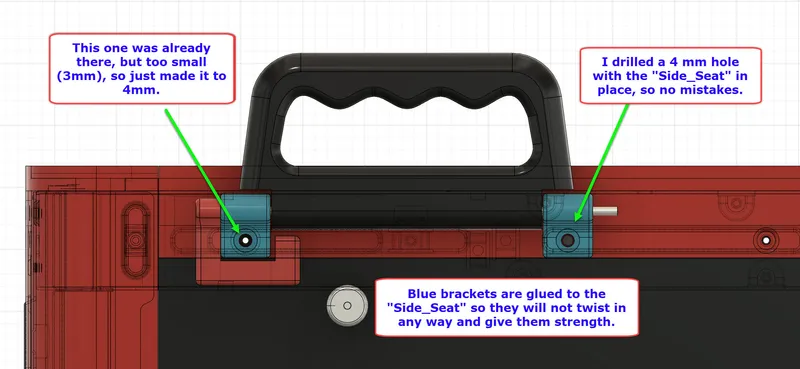
The handles are removable in 5 seconds and the way they are made, the pivot rods simply lock in place. The metal rods are 3.5mm diameter and came from motorcycle spokes. The "Handle brackets" are glued to the top "Glass top Side Seats", so they will not twist since there is only 1 bolt to hold them. The "Handle Brackets" use a 4mm bolts with a nylock nuts on the inside of the frame. For mine, the back hole is the existing 3 mm hole drilled to 4 mm and the front one had to be drilled straight through the frame using the "Side_Seat" as a guide where to put the front hole.
If you want the handles at a different place, or no handles at all, just use the "Side_Seat_No_Holes". But you still have to use 3mm screws to secure the "Side_Seat" on the frame. Note that there are no threads in the existing holes, so usually it's better to have a sacrificial bolt/screw to do the first threads and when ready to assemble, to put a new final one.
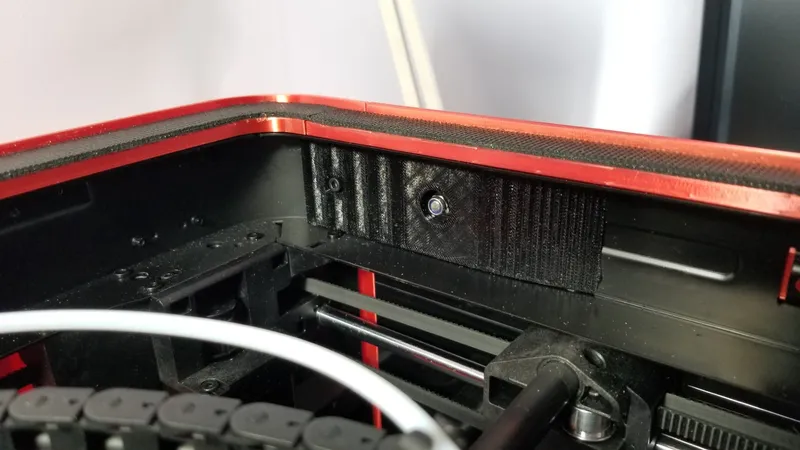
Since on the right side the nut inside the frame was coming in contact with
the "Cable Chain" when the toolhead is at the extreme back right position, I made a small "Protection_ Block" that prevent friction of this one with the protruding nut. Holes were made to have access with a box for the nut and also the screw for the back piece. It's held in place with doulble side tape, or glue.
When I placed my handles, the Front Glass Door was not installed and therefore, the C.G. was not at the same place, but I do not think I would see the difference (maybe the look of it). Again, up to you to change it.
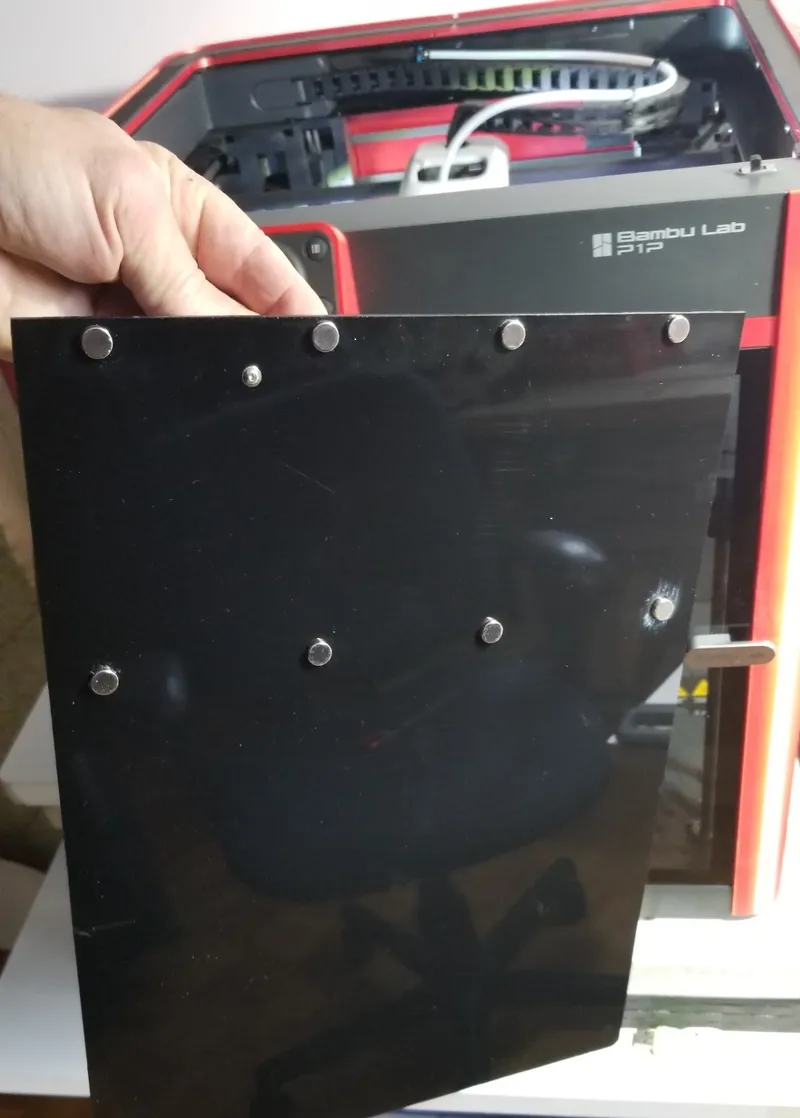
The side panels (3.2 X 284 X 394.5 mm) are made from some black opaque kind of acrylic that used to be on my fridge with magnet strips, so I used this stuff that gives a better finish and look than expected ! They go inside the "Side_panel_anchor" and I glued some 2mm foam to the anchor, so there is a snug fit when the side panels are inserted.
The top of the panels are held in place with 2 rows of 4 round magnets (10 X 3 mm) glued to the panel. The simple way to do it is to do 1 row at the time and put the magnet to the desired place on the frame, clean the magnets and the panel, put few drops of C.A. glue on the magnets, then move down the panel to its final place, and it's done. The same procedure for the next row of magnets. 😊
I included a knob for the Side panels if you want to use it at the
place you decide.
For the spool holder you can use the standard one if you want the spool in
the back or anyone else. I also made a PTFE tube guide for a spool on the
side of the machine, who is adjustable in height and output angle for the
best alignment to the spool:
https://www.printables.com/fr/model/431103-bambu-lab-adjustable-ptfe-guide
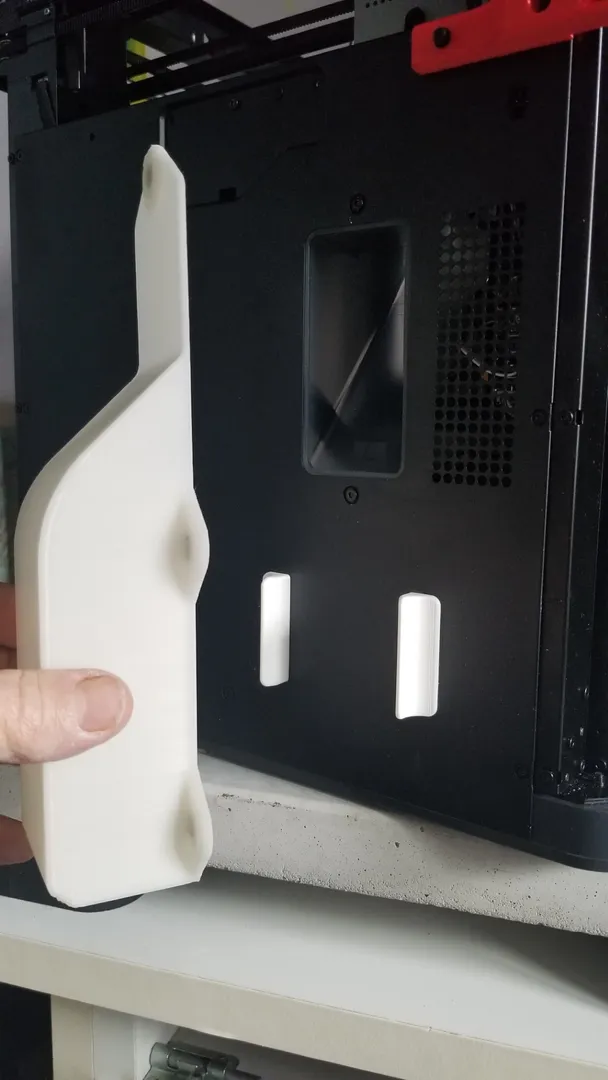
I made a small “Poop Chute” (with guides), that can accommodate the original spool holder or any other else. With the guides, no need to check the alignment of the chute with the exit hole. (https://www.printables.com/fr/model/431128-poop-chute-for-p1p)
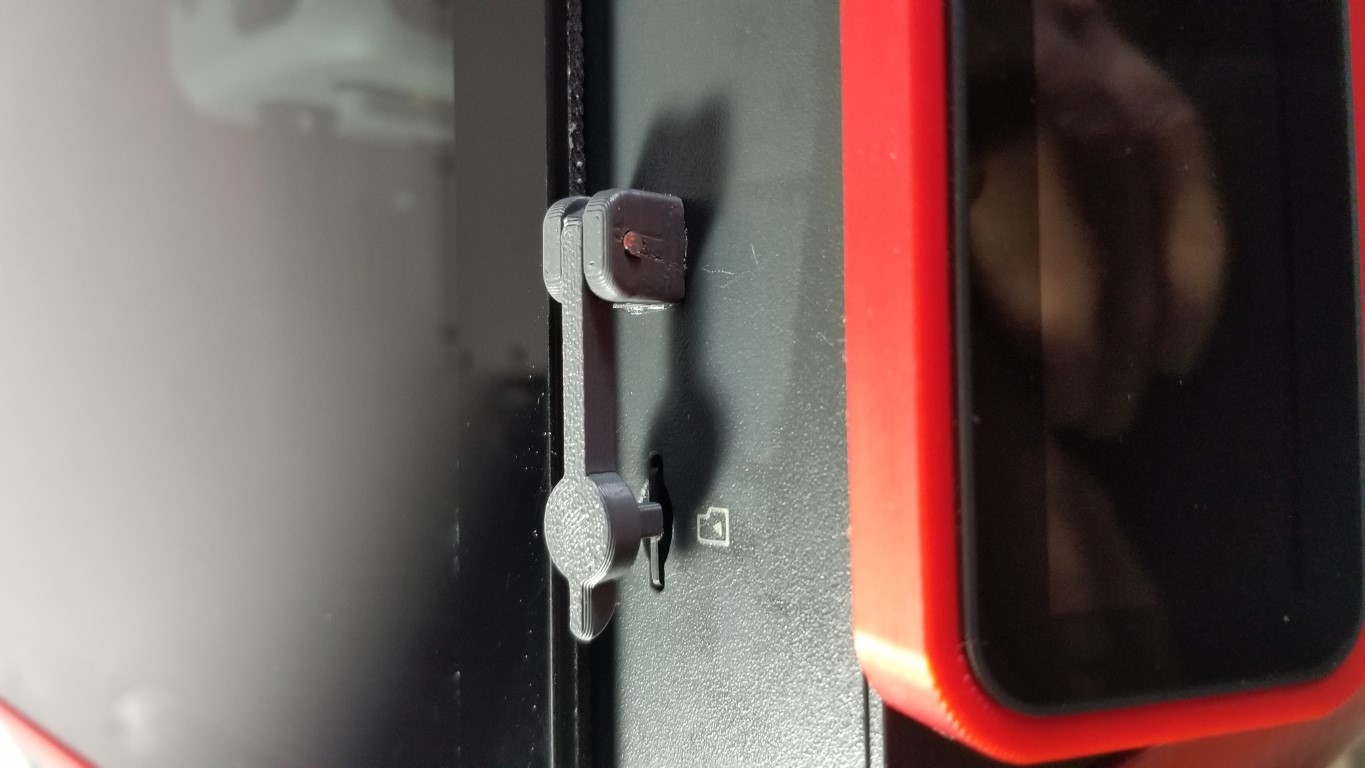
And as for the big fingers like mines, I made a Micro SD card pusher/extractor. It's the most fun thing to use with this enclosure. 
https://www.printables.com/fr/model/431097-bambu-lab-micro-sd-card-pusher

If I missed something, or you have a specific question, send me a PM, and I'll do my best.
Hope to see your final job !
Happy printing...
Tags
Model origin
The author remixed this model.

Differences of the remix compared to the original
Corrction on the license