Rogue Orbiter - V6 Orbiter 2 Tool Head - Ender 3 V2 Neo
Description
PDFRogue Orbiter
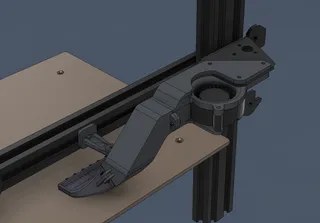
Tool Head design for the Ender 3 V2 Neo based on the E3D V6 mount (Revo Six, Dragon SF, HF, Dragonfly BMO) and the Orbiter v2.0 extruder.
Battle tested and heavily iterated.
This is my sixth complete Tool Head design for the Ender 2 V2 Neo, and other countless component iterations and cooling designs and tests.
I'm using this setup (Orbiter 2.0 + Phaetus Dragon HF + Bondtech CHT 0.4mm) with Klipper, printing at 250mm/s, 10000 mm/s2 acceleration with stock steppers, belts and wheels.
Features:
- Weight balanced compact and modular design using components as structural parts
- Print weight: 70g
- Three screws detach the entire front frame (BlTouch + fans) and give complete access to the hotend.
- Clears the Z uprights and doesn't require modifications for the endstops
Updates:
14-04-2023: Added support for the V6 Volcano type hotends
07-04-2023: - Updated RO Orange Blower Arm Support to better fit fans with narrower screw holes.
Minor update of RO Orange Part Cooling. Minor tolerance tweaks for better clearance against near parts.
24-03-2023: Updated Clamp Front and Clamp Main meshes.
Minor clearance for the M3 10mm screws that attach the Orbiter to the main mount. (If you already printed the parts you can insert a 1mm washer/spacer on top, or a shorter screw)
Print settings:
-PETG
-0.2 mm layer height
-3 perimeters, 100% infill
-Supports, 30 degrees Snug (includes sacrificial bridges, but some supports needed for safety; check examples)
-Classic perimeter preferred
Designed for 0.2mm fit tolerance (0.1 per side)
Please consult the F3D for assembly
Parts Required:
-E3D V6 Hot End / Revo Six /Dragon SF, HF / Dragonfly BMO
-Orbiter 2.0 Extruder
-5015 Blower Fan - (Tested on GDSTIME 5015 and Creality 5015. Others should work, check nozzle fit)
-4020/4010 Axial Fan - (Designed for a Noctua NF-A4x20. Others should work)
Hardware:
Button Head
-M3 x 25mm x2
-M3 x 8mm x6
-M3 x 5mm x2
-M3 x 10mm x4
-M3 x 15mm x5
-M3 x 20 mm x1
-M3 Hex Nuts 14x
Post Print:
- Remove supports and break through sacrificial bridges
- File flat joining areas for good fitting
- Test blower fan nozzle fit
- Insert Hex nuts (add a dab of superglue to help keep in place the nuts around the fan mounts otherwise the first time you take out the front frame they will fall)
- Assemble it in three parts:
a. Main carriage mount with hotend (the main carriage mount should be snug and require a bit of force to push it on the old hotend mounts), cable duct, carriage hotend duct mount (the hole on the duct side is for screwdriver access, the screw goes behind the duct wall).
b. Extruder
c. Front frame with blower fan, main hotend duct, axial fan and CR Touch. (The fan cables run in between the front frame and the hotend duct, towards the cable duct)
-Fit everything together, but don't overtighten the screws risking the hex nuts to break away from their fit and spin freely. The entire front frame assembly should fit onto the main mount by three screws.
- Consult images or f3d for screw lengths.
Probe Offset X-33, Y-9
Bowden Length for Phaetus Dragon HF ~26.5mm
Klipper:
[stepper_y]
position_endstop: -10
position_min: -10
position_max: 220
Notes:
The nozzle position will be offset forwards creating a ~9mm offset from the back of the bed on the Y axis.
The recommended Orbiter 2.0 Vref for TMC2208 and similar with an Rshunt of 0.11 Ω is 1.2V.
Ender 3 V2 Neo with the Creality 4.2.2 boards usually use an Rshunt of 0.15 Ω, which require a Vref of 1.65V. This should get your stepper to run at 0.85A RMS with a temperature around the spec recommendation of 65-70C.
Formula
STANDALONE MODE RMS RUN CURRENT CALCULATION
Enjoy!
Tags
Model origin
The author marked this model as their own original creation.


