Maker Coin
Description
PDFSummary cont.
There were a few constraints: The coins had to be made from an initial revolve resulting in a coin that is 6cm in diameter and 1.25cm in thickness, they couldn’t require any supports, they could have no moving parts, and they had to slope downwards towards the center in some fashion.
Lesson Plan/Activity:
The goal of this project was to create a Maker Coin which is a creator’s trademark. These coins are usually used to calibrate 3D printers, and also as a symbol to represent creators.
Design Choices:
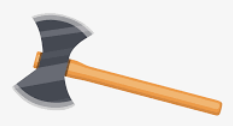
Before sketching my coin, I looked at a variety of previously made MakerCoins and online pictures to gain some inspiration. This is an image I found online to get the basis of my design.
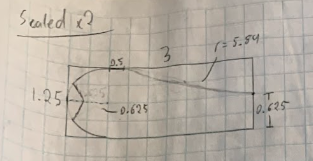
Once I had some ideas for the overall shape and design, I began sketching. The first sketch drawn was the initial sketch of the coin at a horizontal view which would be revolved 360 degrees along the axis of the right wall.
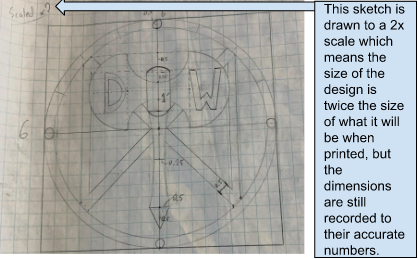
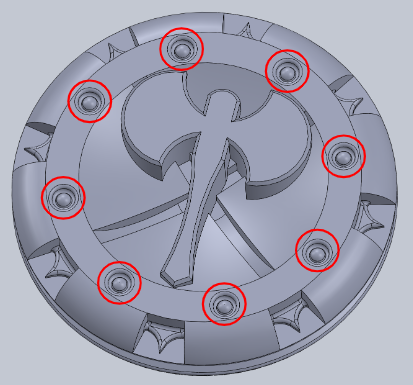
The next sketch was the top face of the coin which included all the designs featuring a battle axe with a cross underneath it, and circular shapes patterned around the outer edge of the circle.
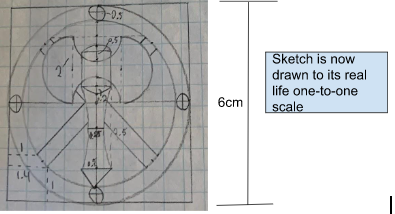
The last sketch was similar to the previous one, however it was drawn on a one-to-one scale with the coin’s dimensions. This sketch allowed me to see if any of the designs were going to be too intricate for the 3D printer to properly print out.
After these sketches were completed, it was time to move onto the computers and draw them in Solidworks, the 3D modeling software. Soon after sketching the initial revolve sketch I decided to change the bottom of the figure slightly by creating an inward facing arc shape so the coin rounded up from the bottom, as well as the top.

The outer rim of the circle needed some detail so I added some cutouts and sharp triangles to make it pop.
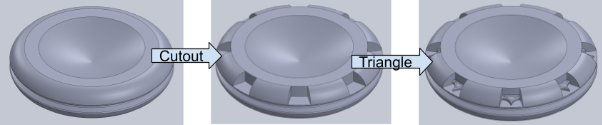
After the top designs were finished, the axe looked a bit bland and lacking detail. First I added more circle features on the ring design and created extrusions inside them which did not appear on the original sketches.
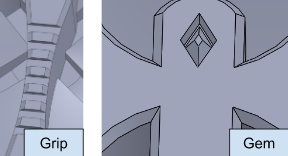
Next, I added a grip to the handle and a gem between the blades.
Then, I found a chart of Nordic runes and spelled my initials, DW, on the blades of the axe.
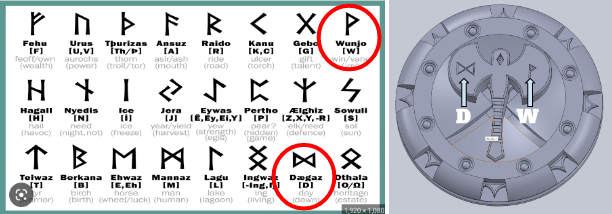
I decided it looked better with just the symbol for D on both sides for symmetry.

Finally, i was left with my finished Maker Coin.

Model origin
The author marked this model as their own original creation.


