Description
PDFThe Collection
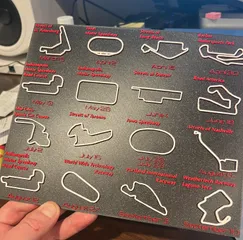
This is a collection of multi-color printed macro keys. Beginning with the “basic” flat keycap, I made two STL models for each key using OmniGraffle, a web-based PNG to STL converter, and Tinkercad.
How to prepare gcode
- Set PrusaSlicer to 0.25mm on Ultra Detail 0.7mm
- Print Settings:
- Layers and Perimeters: Quality: Detect Thin Walls: Yes
- Layers and Perimeters: Advanced: Seam Position: Nearest
- Speed: Modifiers: First Layer Speed: 5%
- Advanced: Arachne Perimeter Generator: Perimeter Transition Length: 100%
- Filament Settings:
- Advanced: Max Volumetric Speed: 13 mm³/s
- Printer Settings:
- General: Extruders: 2 or 3, depending on how many colors the model needs (most of these are 2-color, but the Earth key needs 3).
- Extruder 1: Preview: Color: Set color
- Extruder 2: Preview: Color: Set color
- Extruder 3: Preview: Color: Set color (if necessary)
- Import both the negative and the positive model into PrusaSlicer at the same time.
- Say “no” if asked to convert to inches
- PrusaSlicer will notice that the items appear to be a multi-part object. Say “yes” to the multi-part question.
- The STL will be in a list, showing the main object, and then the “positive” and “negative” stl underneath. Drag the “positive” stl object above the negative, so that it prints first.
- If desired, you can set the print colors of the extruders to match the filament colors you want to use in your print. Set the main “default” object color to the color you want the “positive” model to print. In the photo, the “positive” color is black in most of the keys, and the “negative” color is white in most of the keys.
- Set number of instances to 3 or 4. It's very likely you'll have an errant string of filament that can mess up the key. Print several at a time, and you are more likely to get a good one, or you can choose between a few to find the best print.
- Slice the model, and look very closely at how the positive model will print. If you see a gap in the preview, it's likely you will see a gap in the print. Some of these keycaps go down to the width of a single printed line of filament.
How to Print
- Use a 0.25mm nozzle
- Use a textured print surface
- Prepare print surface with a thin, even layer of glue stick or print adhesive
- Make sure your nozzle is clean, you aren't getting stringy bits, and be patient - this can take a few tries.
- Slow down the print on the first layer if you're getting bad definition
- Use very opaque colors for the positives. Translucent colors didn't look good for me.
How to Remix
- The simplest way to make another key is to create a small graphic or text, and save it as a PNG
- Use pngtosvg dot com to convert the image
- import the svg and the blank key into Tinkercad
- Size and position the graphic to look correct on the key. Center them, and set the height of the graphic to 0.1mm
- Delete the blank keycap in tinkercad, and export an STL of the graphic. This is the positive.
- Click “undo” in Tinkercad to restore the blank keycap.
- Change the graphic to a “hole” (negative object) in Tinkercad. Group the graphic and the key. You will now have a keycap with a “cutout” for the graphic. Export this as an STL. This is the negative.
- Import the two STL files into Prusa Slicer as described in the “How to Prepare gcode” section.
Model origin
The author marked this model as their own original creation.


