Visible Light Spectrometer Using Webcam
Description
PDFThis is my version of the optical spectrometer that is described by open source Theremino system. The excellent guide in the Theremino description uses a wooden enclosure painted black inside. I opted for a black ABS plumbing pipe with 3D printed ends for the slit and the webcam mounting. The pipe is labelled 1-1/4” (32mm). You could use a smaller diameter but this may have more internal reflections and it will give you less space to position and angle the webcam sensor. A larger tube may be better if you really need to see the extreme ends of the spectrum where the internal reflections start to show up. My tube is a bit long so I sometimes see internal reflections.
The cover picture shows a clear glass tube, this is so you can see the inside where the baffle is, don't use a clear tube. If you do, paint it black inside.
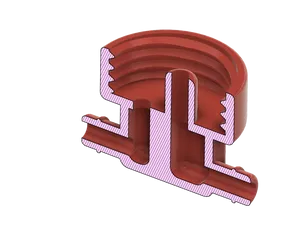
Printing: The coupling and the tripod mount should be printed with the cylinder vertical. This will give you maximum strength. The coupler needs supports for the overhanging face so print with the back side above the round tube side and use supports touching the buildplate. I didnlt use supports for any other parts. You can see the textured bed pattern on my prints in case you want to know which side was on the buildplate.
I designed the internal light baffle to interrupt internal reflections, Theremino describes this in their build guide. You can slide this into any position in the tube. It is loose for easy fit to the pipe which is not always perfectly round. To resize it so that friction holds it in position you can add some masking tape around the baffle or if you adjust the scaling in your slicer. If you still have internal reflections off the tube inner surface, you can print another baffle. You may also want to shorten the tube.
The plastic tube is black but still reflective, you can sand it lightly with a Scotch-Brite pad or fine sandpaper or you can paint it with matt black paint to reduce glare and reflections inside the tube. Look through it to see how well your black works.
To adjust the angle of the webcam I opted for a hinge so that you can use any angle and adjust it at any time. I found that the fine control offered by an adjustable hinge allows you to easily centre the image. Two screws (m3 should work) can be tightened to adjust the hinge retaining force. Mount the webcam so that the lens is as near to the middle of the tube as possible. You don’t need to be precise, as long as it can see the slit.
I made the hinge top (angled) part to fit my webcam and yours will most likely be different. You can try the one I designed or modify the STL to suit your webcam PCB. Adhesive “mirror” tape seems to creep slightly with time but hotmelt adhesive works quite well if your webcam PCB is too different. The hinge top has some features that you may be able to use to adjust it with a screw and spring is you want a fine adjustment. I find that the adjustment available in the Theremino spectrometer software, that allows you to calibrate from a CFL light, to be much more convenient.
Hinge bottom can be hotmelt glued down or I used 3 screws to hold it in the base. The exact location will depend on you webcam shape
I added a shutter to be able to adjust the slit for those bright sources but you could leave it out and use some adhesive aluminium tape (duct tape) to narrow the slit. I did this initially but constantly adjusting the slit is much more convenient with the shutter.
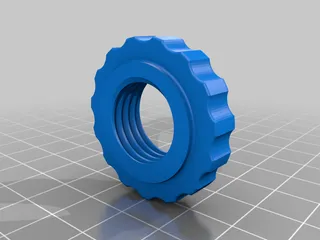
Diffraction grating can be from a sheet or from a DVD, as explained in Theremino documentation. I made a retainer ring that goes over the lens but the dimensions will depend on your webcam lens. Again, scale it in your slicer to suit your lens. You should do the scaling to both parts (x and y only not z).
I use the tripod mount to make alignment easier if the light source can't be moved.
Setup is well described by Theremino. I just focused the webcam on the slit (about 30cm away), turn the grating to be vertical with respect to the normal use of a webcam. The spectrum should be deflected across the width of the webcam sensor. If you can’t see the grating lines, shine a laser through the grating and two spots will appear next to the main spot. The grating will be perpendicular to a line drawn between the 3 spots.
Aligning the spectrometer and the light source is usually necessary, draw a line across the top of the tube to help. You can also add a thin tube to the spectrometer, look through it to aim or shine a laser pointer through it.
I've added some screen captures from Theremino Spectrometer software, various light sources I had around at the time. You can see the oxygen absorption notch at 770nm but not the water vapour absorption bands at 930, 820, and 730nm. 930 does appear if I turn the gain up (Theremino software allows you to adjust almost all features of the camera) but the other peaks become saturated. I did remove the IR filter but I don't know the full response of the webcam with its lenses.
A grow light spectrum looks OK for the LED lamp I purchased, there are a lot of questionable grow light available online. Shoplights don't look that good for plants, low blue, low red and lots of green. Maybe a lower colour temperature would be better.
Do a search for a plant light spectrometer to see what they cost, not a good number.
Tags
Model origin
The author marked this model as their own original creation.


