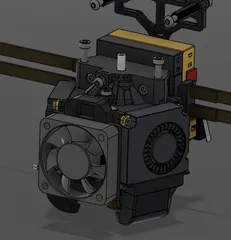
Sovol SV01Pro Linear Rail MGN9H/12H Upgrade for H2V2 Extruder
Description
PDFThis design was a remix of the H2 Rail upgrade for Ender printer and Vortex Shroud system for H2V2 on SV01Pro
All thanks to the excellent model of the H2 on Grabcad to make this change as well as the design of the Vortex from FLYN INDUSTRIES as well as advice from a Sovol Facebook group member
This modification will require some hardware adjustment to the existing system. If you are not comfortable, please DO NOT proceed. I will not be held responsible for any damage to your system
Bill of Materials
Printed Parts:
Please print all the parts in advance so you can get everything started right away
- Biqu_H2_Linear_rail_Rx(Depending on which rail you have, print that model – MGN12H will be updated soon) (R2a is for MGN9H, R2b is for MGN12H)
- Lid
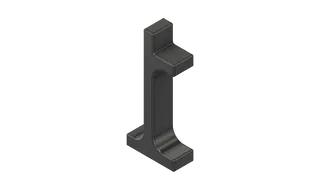
- X Motor Bracket R1
- 5015 Fan shroud (Vortex Fan Mount V1.3 +2mm.stl)
- OPTIONAL: Gantry Pi Camera Mount
- OPTIONAL: MPU/ADXL Accelerometer Mount
Screws & Fasteners:
- 6x M3x8mm Socket Cap (SC) screws and 6x M3 T-nuts for the Linear Rail
- 2x M3x16mm SC screws and 2x M3 nuts for CRTouch
- 2x M3x25mm SC screws and 2x M3 nuts for 5015 fan
- 2x M3x10mm SC screws for Endstop switch
- 2x M3x6mm SC screws and 2x M3x8mm SC screws for carriage Mount to bracket
- 3x M3x10mm SC screws and 2x M3x25mm SC screws for H2V2 extruder to bracket
- Linear Rail MGN9H or MGN12H 400mm
Extrusion Modification
NOTE: MEASURE at least 2-3 times before you proceed drilling the extrusion
When you drill, you don't need to drill all the way through. Just enough to take away the covered part of the 2020 extrusion (shown in picture). Use appropriate drill sizes based on the existing drill marks on the other side
Photo 1 to Photo 4
- Fully remove the top extrusion on the SV01 Pro by removing the 4x mounting screws on top
- Remove the M3 screw holding the belt tensioner with the gantry extrusion
- Once the belt tensioner is removed, slide the extruder off
- For holes 1 to 3, measure from the top edge with the following dimension
For hole 4 to 6, measure from the bottom edge with the following dimension
All holes will be spaced from the vertical edge of the extrusion about 10mm.- 17.5mm
- 77mm
- 97mm
- 48.5mm
- 29mm
- 3mm
Once you finished drilling the extrusion, put back the extrusion, leaving the open surface of the gantry outside so you can slide the rail in easily
X Motor Bracket Prepping
Photo 5 - 6
5. With 2x M3 heated inserts (in here, I'm using a 5mm OD heated inserts – Scale hole differently if your heated inserts are bigger), place them in the holes as shown
6. Using 2x M3x10mm SC screws to secure the X endstop switch
H2 Bracket Installation
Photo 7 - 11
7. Put in 2x M3x6 SC on the grooved side. Put in 2x M3x8mm SC on the other side
8. Turn the bracket the other side, secure the H2 extruder to the bracket with an M3x10mm. Install 2x M3x10mm screws on the top arm to hold the H2 extruder up tight.
9. Secure the fan to the H2 with 2x M3x25mm SC screws
10. Secure the CRTouch to the mount with 2x M3x16mm screws and 2x M3 nuts. Install the Accelerometer Bracket if you'd like
11. Once the assembly is complete, this is what you will have
Final Installation
Photo 12 - 13
12. Mount the rail to the front of the gantry as shown in the photo using 6x M3 screws. Loop the belt through the cut-out on the bottom once complete
13. Install the X Motor Bracket. Carefully loop the X endstop cable and connect it to the limit switch
14. Tighten the belt as needed. Gently lube the bearings on the carriage once complete
If you think the model is useful, please feel free to donate to support future development work
Revision:
- R1: Initial Release for MGN9H
- R2: Raised CRTouch mount by 3mm. Added another version for MGN12H
- R3: Adjusted tabs where belt goes.
Reference:
- H2V1 Model: https://grabcad.com/library/biqu-h2-dimensional-model-1
- Biqu H2 Rail upgrade for Ender https://www.thingiverse.com/thing:4919511
- H2V2 Vortex Shroud: https://www.printables.com/model/215739-vortex-system-for-biqu-h2-v2-sovol-sv01-pro
- Accelerometer Bracket: https://www.printables.com/model/336518-sv01pro-h2v2-vortex-accelerometer-bracket
- Gantry Pi Camera Mount: https://www.printables.com/model/300892-gantry-pi-camera-mount
Tags
Model origin
The author remixed this model.


