Adjustable chisel width upgrade for wood chisel sharpening guide

Description
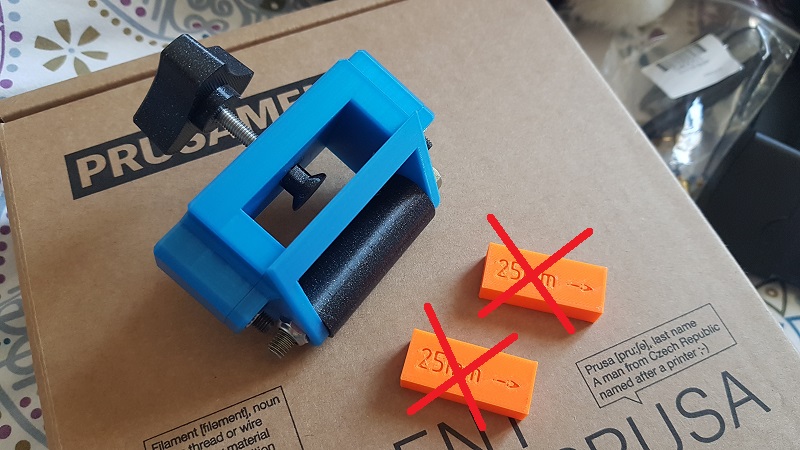
PDFWhen I published the 1st version of the Wood chisel sharpening guide I was already thinking about a way to adjust the guide to chisel width without 3D printing and replacing the removable spacers (in orange in the picture below)
Design
So I modified the top part of the guide (Fixing bracket) and added 4 screws that allow to move the 2 spacers to block chisel whatever its width is.
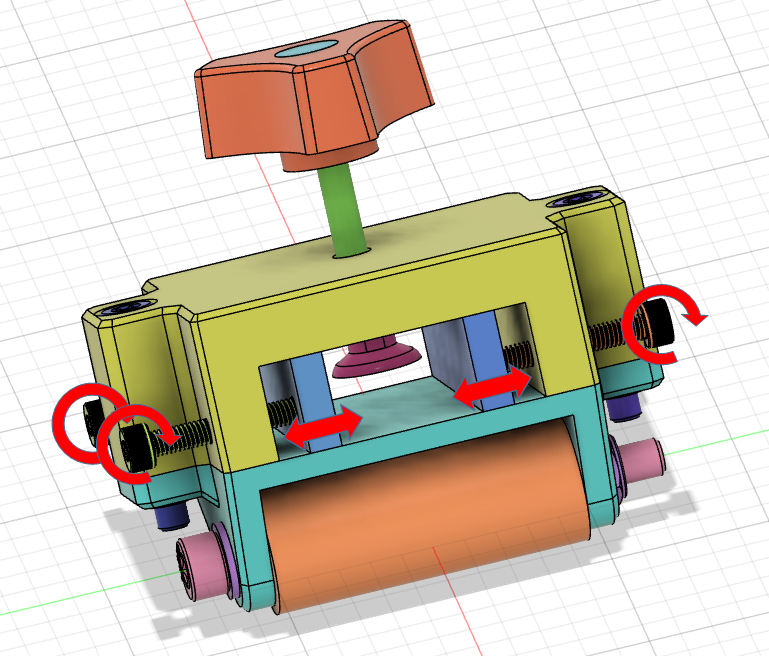
To avoid thread in the plastic and for for extra strength, I inserted 4 nuts inside the fixing bracket. The nuts are inserted after printing (See assembly instructions below)
There is no change on the other parts. So if you already print the 1st version of the sharpening guide, you'll have just to 3D print/replace the fixing bracket and the 2 moving spacers
You'll find here only the new fixing bracket and moving spacers print and model files. Other print and model files (Body, roll, knob, knob cap and clamping stop) are available from https://www.printables.com/model/142626-wood-chisel-sharpening-guide/files
Printing instructions
I printed parts with Prusament PLA. For better strength I set 3 perimeters and 25% 3D honeycomb infill. I used 0.6mm nozzle with 0.40mm and 0.20mm layer height. Other PrusaSlicer parameters remain standard
For the moving spacers, .gcode contains the 2 spacers printed in sequence
Material and assembly
For the upgrade, on top of the fixing bracket and the 2 spacers, you will just need
- 4 screws M4x30
- 4 nuts M4
Slide the M4 nuts inside holes (Picture 1), then place the M4 screws (Picture 2) and the spacers (Picture 3)
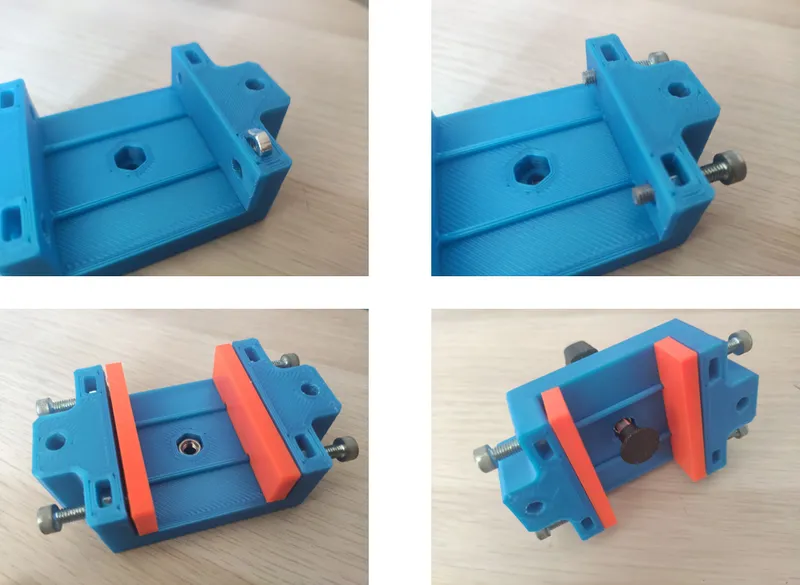
Same as previous version, place M5 nut on the interior part of the fixing bracket, insert M5x40 screw in the knob and screw them through the M5 nut. Then place the clamping stop and secure it with a number 7 spanner (Picture 4)
Then complete the assembly by fastening the fixing bracket to the body and the roll

Insert your chisel and adjust the moving spacer by turning the 4 screws. Then secure chisel with the knob

Your guide is ready to be used.
On top of .stl and .3mf files, I uploaded Fusion 360 .f3d file so you can modify the design and adapt it to your needs
As usual, feedback and comments (and for sure "likes") will be always welcome. Feel free to post also nice pictures of your makes
Enjoy
If you like this model, take a look also at my other designs
Tags
Model origin
The author remixed this model.


