Customizable and Stackable Miniature Shadowbox
Description
PDFThe original inspiration for this shadowbox came from Artis Opus. Their “Beautiful Display Cabinets for Miniatures and more” on kickstarter are beautiful (https://www.kickstarter.com/projects/artis-opus/cabinets). The kickstarter is closed now but it fails in a couple of things I wanted.
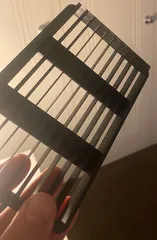
- Metal Shelves - my minis have magnetic bases, so metal shelves let me fix the minis in place, and they won't fall out.
- Compact Storage - I wanted something smaller, and something that could stack.
I've posted photos for large 200x200 boxes with either acetate or plexiglass windows. Each large box stores 8-10 32mm minis per shelf.
I've designed 3 sizes:
Large = 200x200mm outside dimensions and will fit 3x 185x3x50mm shelves
Medium = 150x150mm outside dimensions and will fit 2x 135x3x50mm shelves
Small = 100x100mm outside dimensions and will 1x 85x3x50mm shelves
Quick Video on opening the box here:
https://youtube.com/shorts/ZaX66PXekdE
INSTRUCTIONS TO MAKE:
consumables:
- 50x3mm galvanised steel bar (1 meter is enough for a large, medium and small box)
- acetate sheet or a cut plexiglass insert (use the 'lid_back_2dbase')
- 6x3mm magnets ( L=16, M=12, S=8 )
- 1 inch 5G wood screws (L=32, M=24, S=16 )
equipment:
- hacksaw and something to hold the assembled screw_jig vice, or a bolt cutter
- screwdriver
- glue gun
- paper printer to make a pretty background
print:
- ‘lid’
- ‘box’
- 'back' and
- 2x ‘screw_jig’
optional:
‘lid frame’ and cut some acetate out for the frame
OR
‘lid cutout' and cut some fancy acetate sheets.
box assembly:
- Cut the shelves to length and, just make sure it's within 5mm of the maximum length; L=185mm, M=135mm, S=85mm
- Glue in the magnets - dab of glue in the hole from the glue-gun and push in the magnets. Cut the glue off if you have dangly-bits.
- Insert the metal shelves from the back
- print, cutout and insert your paper background (I use glossy white sheets; but you could be much prettier)
- Fit the background and screw in the back
lid assembly:
- cut screws for the lid to length using the 2 screw jigs and your hacksaw, or trim using the bold cutter
- insert acetate and secure with lid frame OR insert plexiglass
- secure plexiglass/frame back with cut screws
TIPS:
The magnets and shelves should fit tightly
adjust the screw dimensions to use what you have lying around - don't waste what you already have.
IDEAS/TODO:
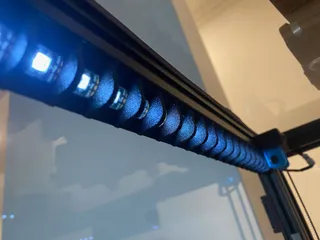
Make a recess for a LED - see Teaching tech DIY animated RGB logo box
(https://www.youtube.com/watch?v=kLtnRwV2jRk&t=12s)
What about using something cheaper - like the available LED underbench lighting? or
(https://www.amazon.com.au/dp/B085ND3GWM?ref=ppx_yo2ov_dt_b_product_details&th=1)
REVISIONS
Version 1: curved edge display box for slide in shelves
Version 2: reduced magnet size
Version 3: remodelled screw holes, slides, magnets and finger recess for support-free printing
- increased magnet from 5x2mm, to 6x3mm buttons to match 6mm countersunk screw head
Version 4: needs a lip recessed into the front of the box and out of the back of the lid/box
- this will cover the
- dropped magnet dimension from [6.3,6.5,4] to [6.2,6.5,4]
- removed mechanism size - now just using slotted shelves
- moved the screw positions in to 1/3 thickness to allow for the lip
Version 5: lip recess is all a flange to reduce the join defect
- reduce the lid screw depth (0.5mm cover)
- make a hollowed back insert so that acetate can be used for the cover (done)
- added a screw jig to cut the wood screws to the lid depth (done)
- fixed calculations for corner screw position (done)
- fixed calculation for shelf_gap (done)
- first fullsize set done
Version 6: dropped the sizes down, unable to reproducibly print 210x210 on Ender 3v2
- L=200x200, M=150x150, S=100x100
- added building function
Version 7: Changed back and frame inserts to rounded rectangle. Cutting the previous inserts was painful!
Tags
Model origin
The author remixed this model.


