Customizable Miniature Display and Storage Box
Description
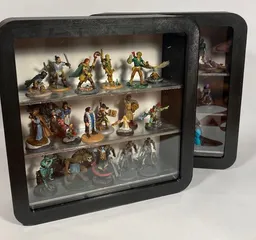
PDFKudos to Artis Opus! The “Beautiful Display Cabinets for Miniatures and more” are beautiful shadowboxes. The kickstarter is closed now but their kickstarter is here (https://www.kickstarter.com/projects/artis-opus/cabinets). Although it's a great idea, all my miniatures have magnets on the base to store them. I also wanted something smaller, and something that could stack.
I've only printed a few test pieces so far. I have yet to print a large or medium but thought I'd post and get to it. I've also ordered a plexiglass lid, so will update the project as it comes. My Ender 3 has a build plate that should accommodate the large box which is a 3 shelf unit.
I've designed 3 sizes so far:
Large = 210x210mm outside dimensions and will fit 3x 195x3x50mm shelves
Medium = 160x160mm outside dimensions and will fit 2x 145x3x50mm shelves
Small = 105x105mm outside dimensions and will 1x 90x3x50mm shelves
Also thank you to Yasashii Kyojin Studio for the owlbear cub in the proof of concept. My painting doesn't do it justice but it was the only mini I had small enough to fit the tester. The STL is available on thingiverse (https://www.thingiverse.com/thing:4960242) or think about supporting them on patreon (https://patreon.com/yasashiikyojinstudio)
INSTRUCTIONS TO MAKE:
consumables:
- 50x3mm galvanised steel bar (1m is enough for a large, medium and small box)
- acetate sheet or a cut plexiglass insert (use the 'lid_back_2dbase')
- 6x3mm magnets ( L=16, M=12, S=8 )
- 1 inch 6mm wood screws (L=32, M=24, S=16 )
equipment:
- hacksaw and something to hold the assembled screw_jig vice
- screwdriver
- glue gun
- paper printer to make a pretty background
print:
- ‘lid’
- ‘box’
- 'back' and
- 2x ‘screw_jig’
optional:
‘lid frame’ and cut some acetate out for the frame
OR
‘lid cutout' and cut some fancy acetate sheets.
box assembly:
- cut the shelves to length and please be accurate; tolerance is tight 0.2mm; L=195mm, M=145mm, S=90mm
- Glue in the magnets - dab of glue in the hole from the glue-gun and push in the magnets. Cut the glue off if you have dangly-bits.
- insert the metal shelves from the back
- print, cutout and insert your paper background
- fit the background and screw in the back
lid assembly:
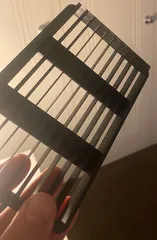
- cut screws for the lid to length using the 2 screw jigs and your hacksaw
- insert acetate and secure with lid frame OR insert plexiglass
- secure plexiglass/frame back with cut screws
TIPS:
The magnets and shelves should fit tightly
adjust the screw dimensions to use what you have lying around - don't waste what you already have.
IDEAS/TODO:
Make a recess for a LED - see Teaching tech DIY animated RGB logo box
(https://www.youtube.com/watch?v=kLtnRwV2jRk&t=12s)
What about using something cheaper - like the available LED underbench lighting?
(https://www.amazon.com.au/dp/B085ND3GWM?ref=ppx_yo2ov_dt_b_product_details&th=1)
REVISIONS
Version 1: Original; curved edge display box for slide in shelves
Version 2: reduced magnet size
Version 3: remodelled screw holes, slides, magnets and finger recess for support-free printing
- increased magnet from 5x2mm, to 6x3mm buttons to match 6mm countersunk screw head
Version 4: needs a lip recessed into the front of the box and out of the back of the lid/box
- this will cover the
- dropped magnet dimension from [6.3,6.5,4] to [6.2,6.5,4]
- removed mechanism size - now just using slotted shelves
- moved the screw positions in to 1/3 thickness to allow for the lip
Version 5: lip recess is all a flange to reduce the join defect
- reduce the lid screw depth (0.5mm cover)
- make a hollowed back insert so that acetate can be used for the cover (done)
- added a screw jig to cut the wood screws to the lid depth (done)
- fixed calculations for corner screw position (done)
- fixed calculation for shelf_gap (done)
- first fullsize set done
Tags
Model origin
The author hasn't provided the model origin yet.


