tutorial: how to make any cookie cutter with no design or modeling skills

Description
PDFBasic steps
Roughly, we will be following these steps:
- Find an SVG image that you want to turn into a cookie cutter
- Use a simple app to turn the image into a 3D object
- Set some settings in your slicer to create a cookie cutter
I will walk you through some examples and help you think about how to adapt SVG images you find into cookie cutters. All examples that we walk through are also attached here as STLs so that you can download them and slice them if you'd like.
Getting started
I don't actually know how big cookie cutters are supposed to be, so let's measure a store-bought one.

Let's say that this is roughly 100x80 millimeters. We'll also call it about 15 millimeters tall. All cookies are unique, after all, so we only need a rough measurement.
How to find SVG files
I can usually find anything that I am looking for on The Noun Project. It is a resource for web developers to find quality scalable icons for any object you might need. However, the use for SVG images go far beyond web development. On this site, you can type anything you are looking for. We are going to use “cat” as an example.
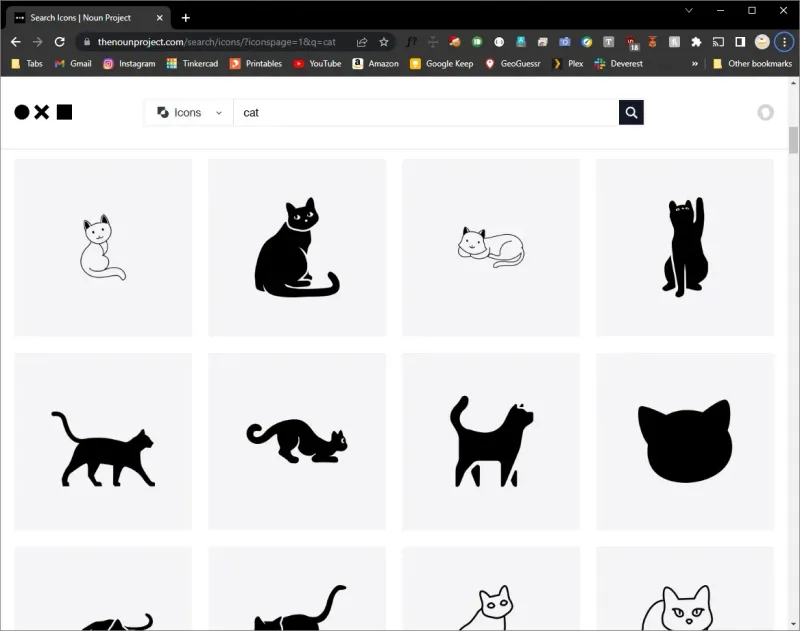
Now, for cookie cutters, not all images will work. You are looking for two things:
- minimal amount of details
- single filled image (i.e. not an outline, not a bunch of separate pieces)
In our screenshot above, the best one is the left-most image on the second row (i.e. the cat face outline). Row 2 column 1 could work, but skinny lines like the tail and legs are usually bad for cookie cutters. Row 1 column 4 could work as well, but the eye details are likely to look awkward in cookie form. If in doubt, you can try to use your desired image, and if the print preview (i.e. gcode preview) looks bad, move on to the next image.
It is important to note that most of these images are not royalty free (though some are). Most will be licensed under CCBY (i.e. Creative Commons Attribution) license, which still allows you to use them for any need you have as long as you attribute the original artist.
Importing an SVG into TinkerCAD
I am going to start with this cat SVG from the Noun Project.
1. I find it helpful to add the ruler.
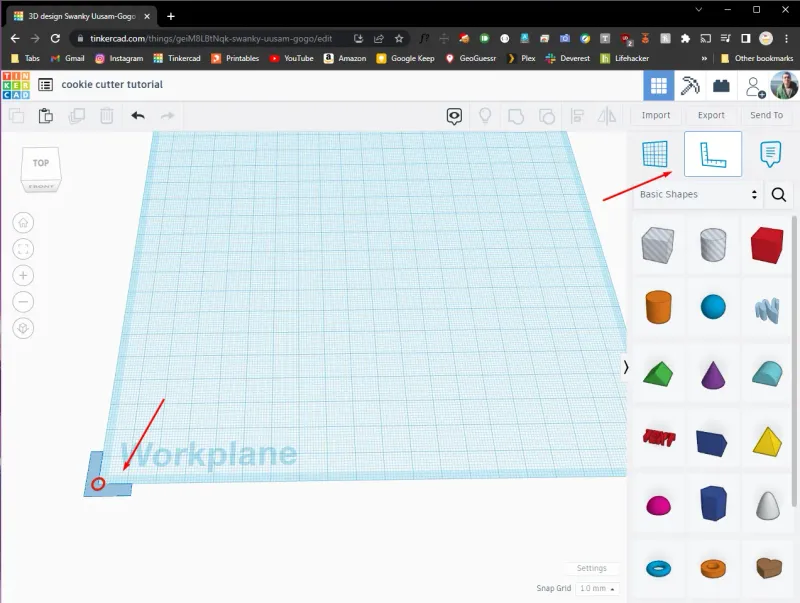
2. Click Import in the top-right, then select the SVG you downloaded previously. You should see the path from the SVG as a solid object.
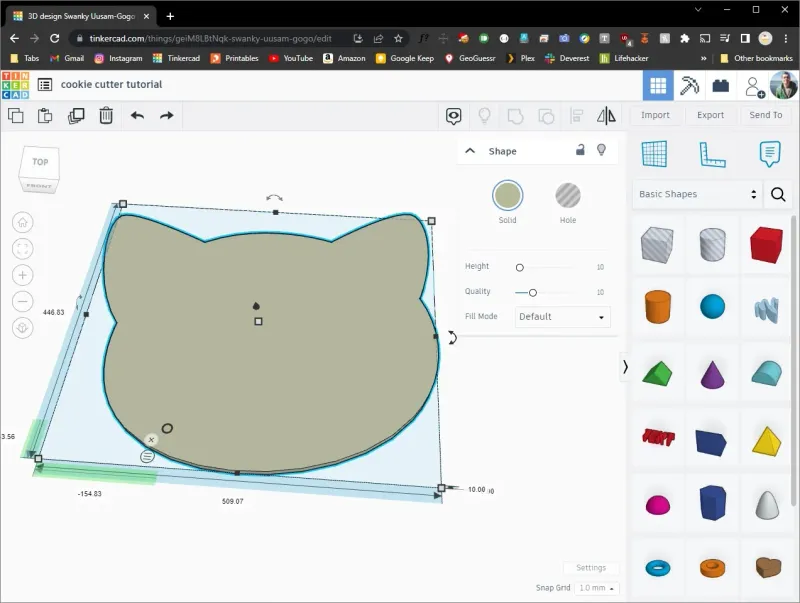
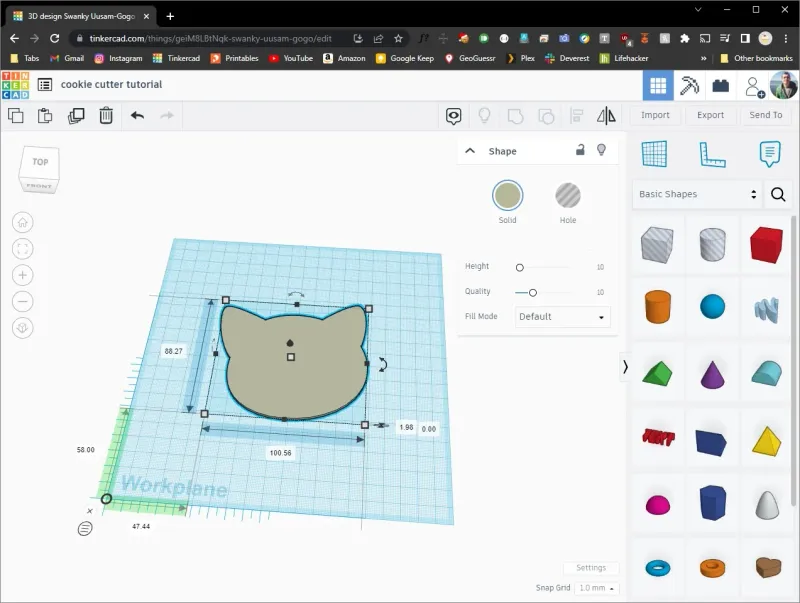
3. This will import a fairly large object, so we will resize it. Hold Shift on your keyboard (this will preserve the aspect ratio!), grab one of the handles in the corner, and resize it down to somewhere between 80mm and 100mm (or go crazy, use any size you want!).
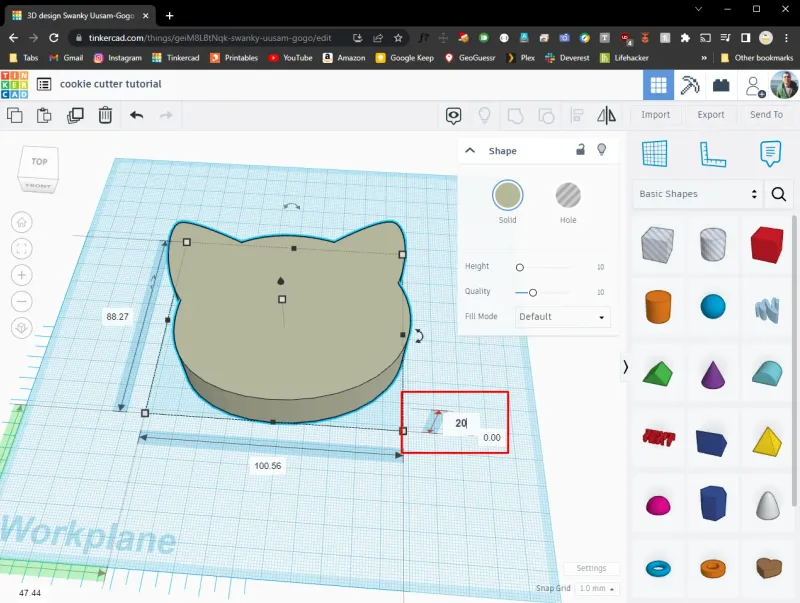
4. Click inside the height box and type 15 (Note: I typed 20 in the screenshot but then changed my mind, and am too lazy to go change it. I decided 20mm is waaay too big for a cookie, so why print a cutter that big).
Instructions: simple perimeter cutout cookies
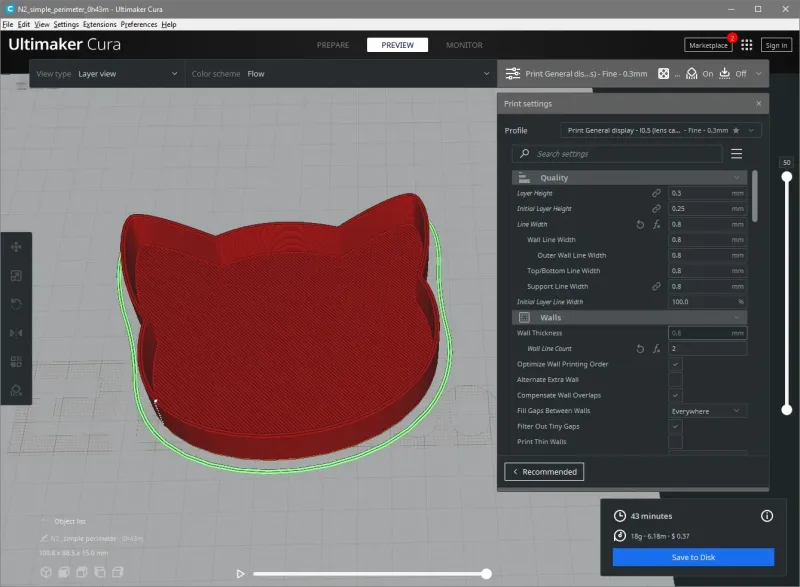
You are actually done. This is the simplest cookie cutter! Now let's slice it.
Download the cookie cutter you just made using the Export button. Export to STL.
I will use Cura, but the settings are very simple and should transfer easily to any other slicer.
- Layer height: set to 0.3mm, just to print it fast
- Line width: set to 0.8mm, for a strong perimeter. It's totally okay to do this even with a 0.4mm nozzle
- Wall count: set to 2 or 3. I am using 2 because my cookie cutters tend to be temporary anyway. Consider using 3 if you will be keeping them for a while.
- Bottom layers: set this to 4 (this will be 1.2mm total, which will matter later)
- Top layers: set this to 0! The open top makes this a cookie cutter!
- Infill: set to 0%
- Print speed: set this to 60mm/s. Not at all required, but it should be fine for cookie cutters on pretty much any printer. You can also keep this at your usual speed as well.
Instructions: perimeter with indent cookies
We'll need an SVG that has a cutout in it. Luckily, the same user as before also has a cat SVG with a nose.
1. Following the import steps, import our second SVG.
2. Create a cylinder using the orange cylinder tool. Resize it large enough to cover the mouth of our cat, or whatever else you want to use to make an indent.
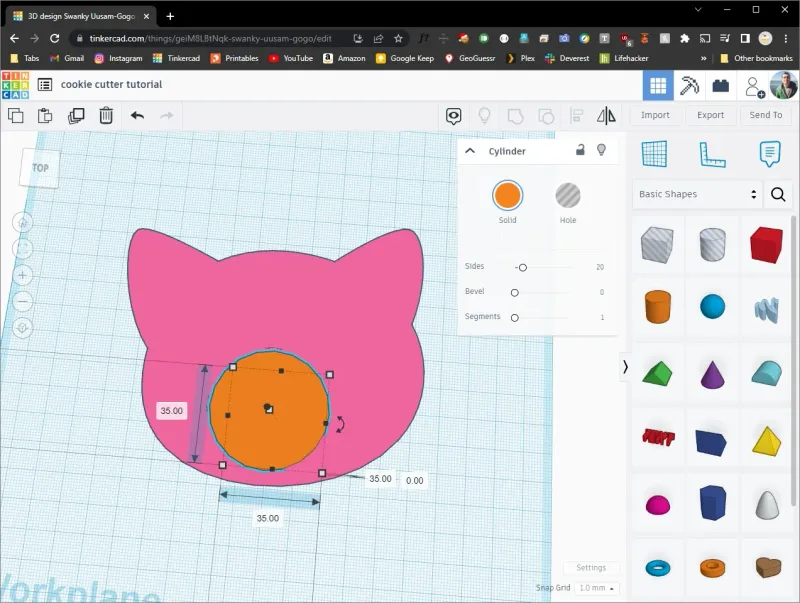
3. Select the height of this cylinder and set it to 5mm. Hopefully your cookies will be taller than 5mm, so that the indent will be visible. I like my cookies on the thick side, but if you prefer thin cookies, you could set this to 3mm or even 2mm.
4. Select all using Ctrl+A (or draw a big box with your mouse around both shapes), Select the Align tool from the top right, and align the two shapes at the top.

5. Finally, don't forget to mirror your design. It's not actually required for this cutter since it is symmetrical, but will be if you have any text or directional components. Since you are designing the cutter upside down, it will be flipped when you are actually cutting your cookies.
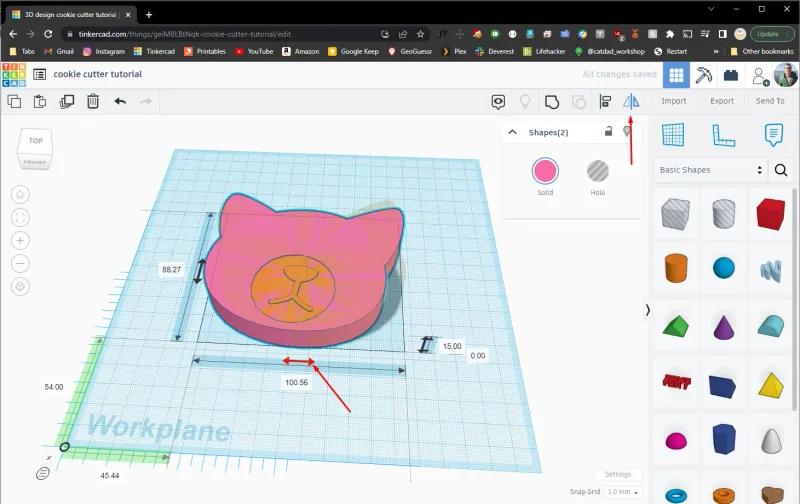
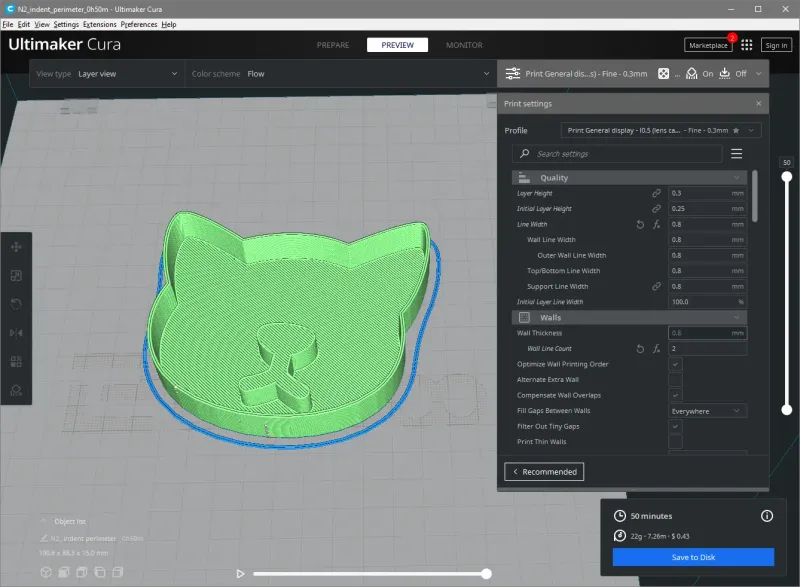
Export, and onto the slicer. You can actually use the same settings as the first model here.
- Use all settings from the simple perimeter example
- Supports: turn auto supports on, so that the your indent will print well
Instructions: (advanced!) how to make a brim
Having a brim and an open bottom is really more of an aesthetic choice that does not contribute to the actual function or the shape of your final cookie. But if you are worried about your friends laughing at your cookie cutters, or you just want to click way more buttons, let's walk through it!
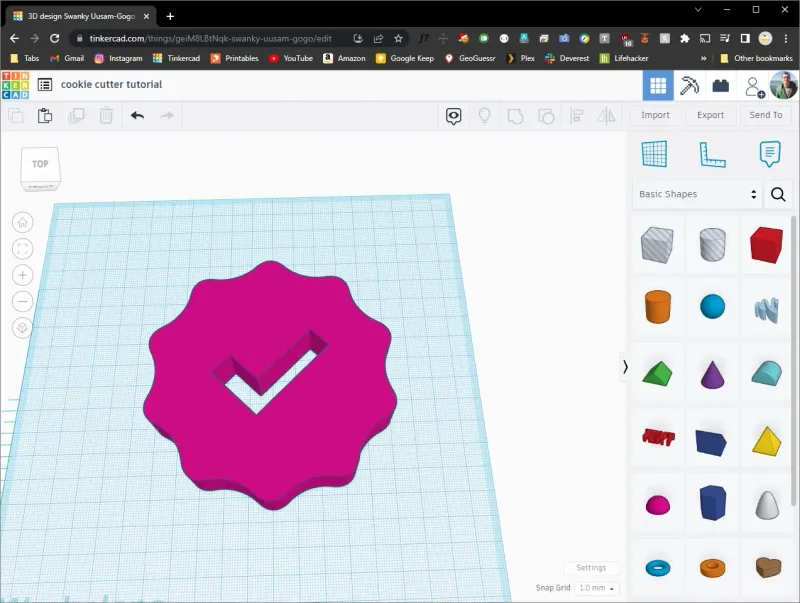
We are going to switch it up, and use a different SVG entirely this time. Twitter is a joke, let's make a verified cookie cutter using this SVG from the Noun Project.
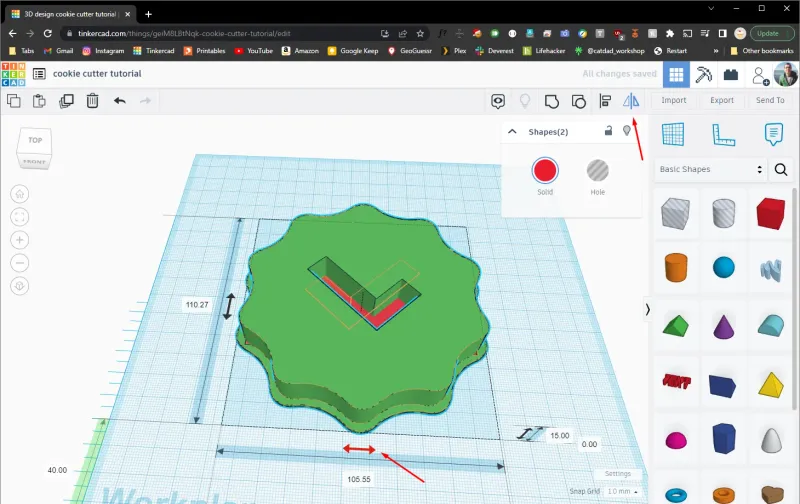
1. Follow the import steps, importing our third SVG.
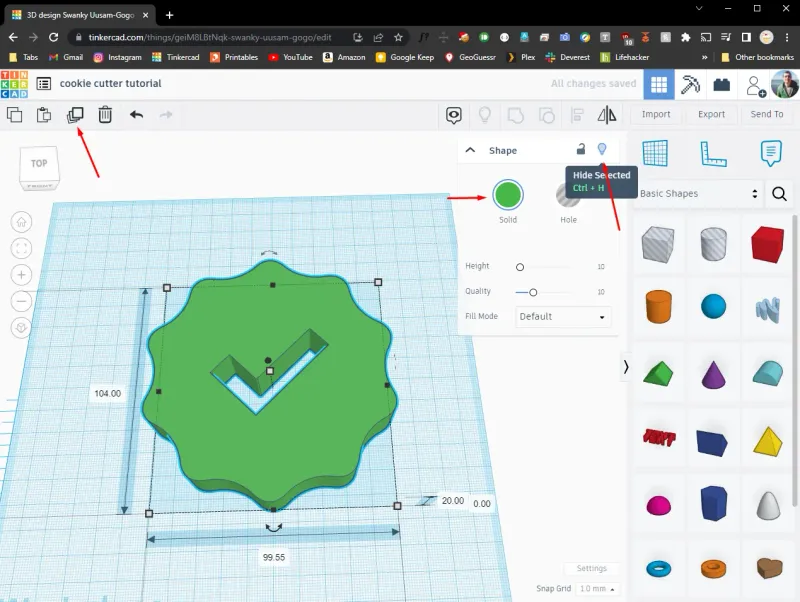
2. Make a copy with the Duplicate button in the top left. We will need it later. Change the color of this copy, then hide it using the gray lightbulb button on the Shape menu.
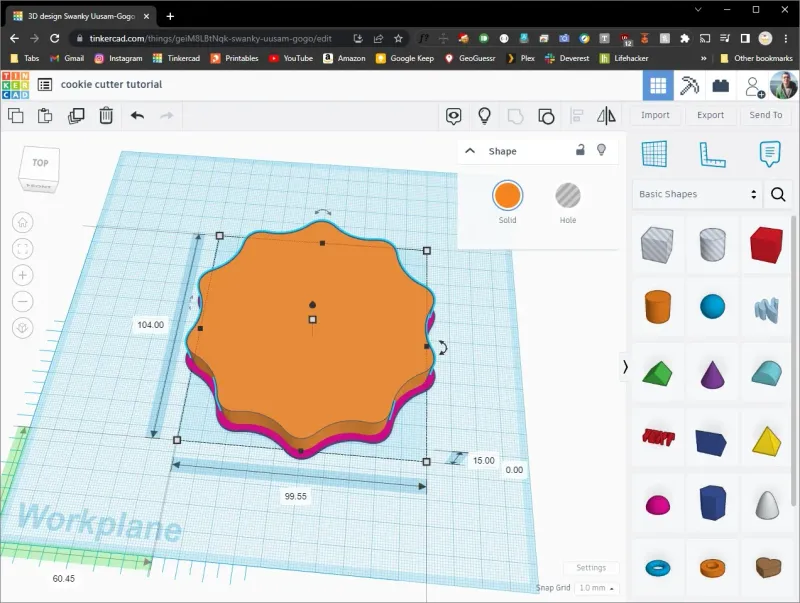
3. Use a cylinder to cover the cutout completely, with a height of 20mm, matching the cutter object. Select both and merge them using the Group button in the top right. We are making a single solid object.

4. Make two copied of this solid object. Resize one bigger by about 5mm. Resize the second smaller by about 5mm. Convert the second to a hole using the Hole button in the Shape menu. Set the height of both to 1.2mm. Select both shapes and align them to the center.

5. Group the two object, creating just a thick outline of the cutter. Set the height to 1.2mm.
6. Show the hidden object from earlier using the lightbulb button on the toolbar in the top right.
7. Now we are going to optimize the cutout. Make another copy of our original and hide it again for later.
8. Make another solid version of our cutter.
9. Ungroup the brim we created earlier (Ungroup button next to the Group button). Select all 3 objects now and Group them again. This will create a solid cutter with a brim and a brim-shaped hole in the bottom.
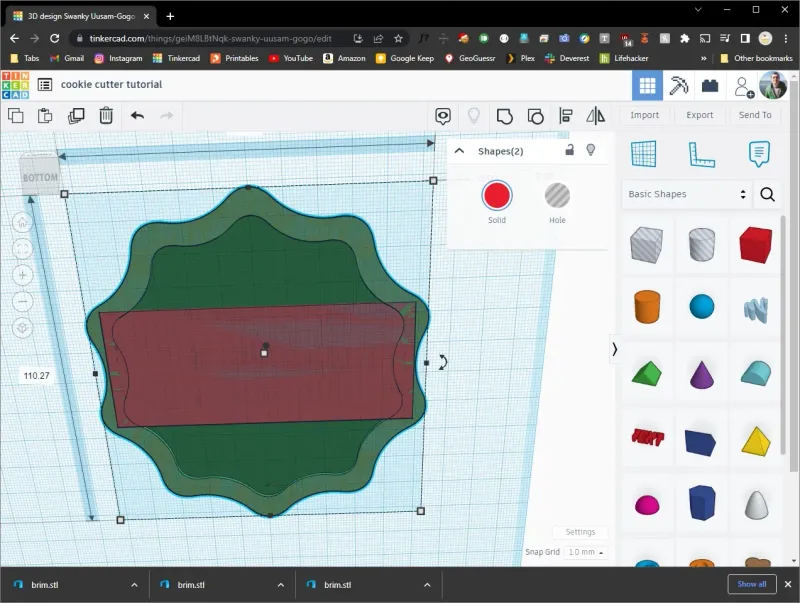
10. Using any of the shapes (in my example, just a rectangle), create a bridge for your cutout. Make sure this bridge is also 1.2mm in height.
11. Don't forget to mirror your model! Select all objects in the model, click on the Mirror button in the top toolbar, and use the horizontal arrow.
Note: I made this cookie cutter so that it completely cuts the checkmark out of the middle. This is technically how the badge works. However, if you want the checkmark to just be an indent instead of a hole, cover it with a 5mm oval aligned to the top of the cutter, similar to the previous example.
Export, and onto the slicer. You can actually use the same settings as the first model here. However, we will make some advanced changes.
- Use all settings from the simple perimeter example
- Bottom layers: set this to 0.
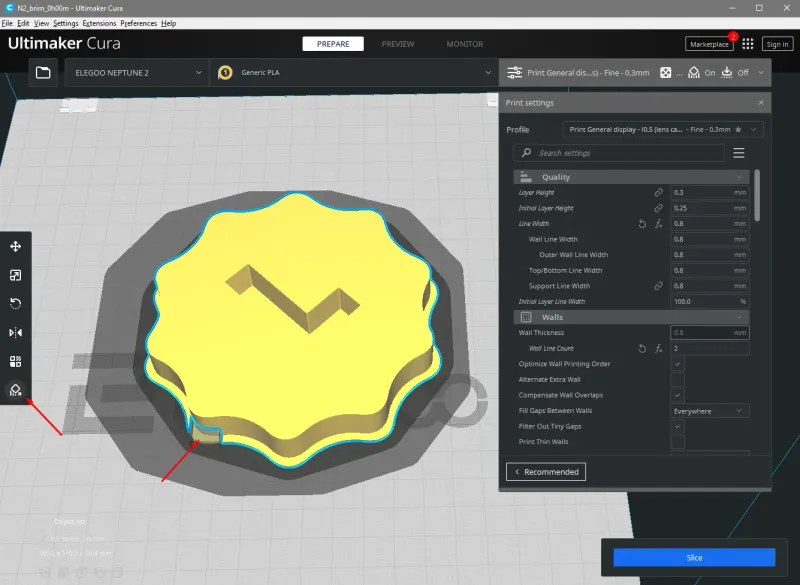
Now we will follow some steps in Cura (let me know if you want me to give you steps for other slicers!). With your model import it, select it, and add a “Support Blocker”. Select the “support blocker” tool from the sidebar, and then click anywhere on the edge of the model.
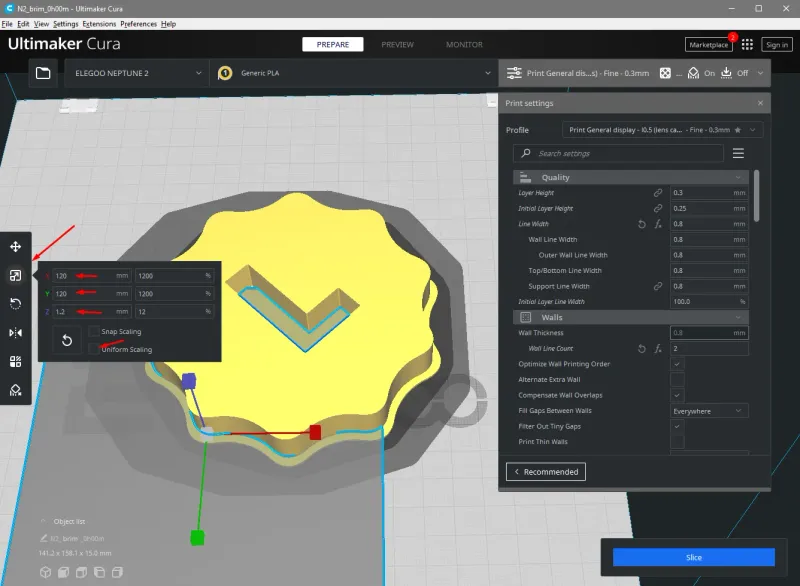
With the support blocker selected, go to the resize tool and size it to 120x120x1.2mm (don't forget to disable “Uniform Scaling”.
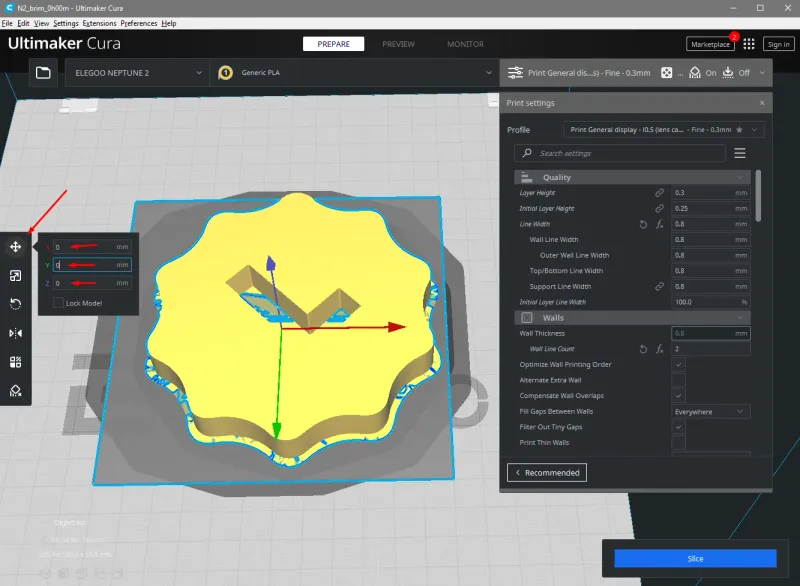
Move the support blocker to be centered on the model.
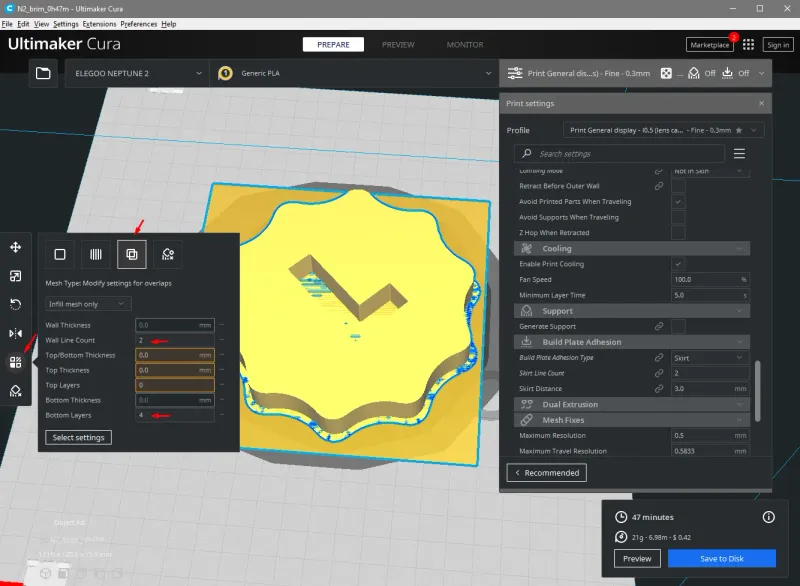
Next, go to the “Per Model Settings” menu in the sidebar, and change the support blocker to be in “Modify settings for overlaps”. In that menu, set Bottom Layers to 4 and Wall Count to 2. (Note: if the settings are hidden, you can show them using the “Select Settings” button)
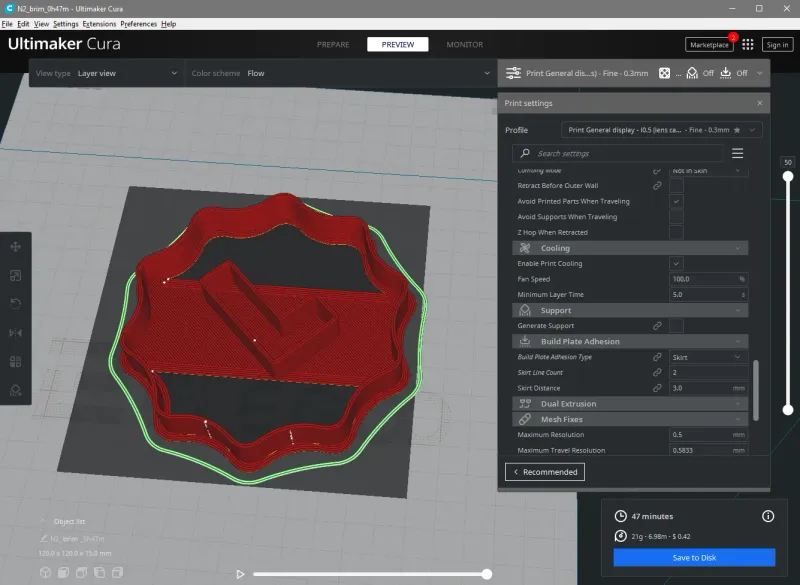
Now slice your model! Your preview should look like this:
Acknowledgements
- Cat by Ecem Afacan from Noun Project
- Cat (but a different one) by Ecem Afacan from Noun Project
- verified by Zach Bogart from Noun Project
Questions
Please ask any questions! I will try to answer, and maybe update this tutorial if I get some good questions. And most importantly, if you make someone verified cookies, remember to charge them $8.
Tags
Model origin
The author marked this model as their own original creation.