mid-century modern lamp

Description
PDFIt finally happened! The day every 3D printing enthusiast dreams about. My girlfriend walked into the room on Wednesday evening, showed me a picture of a lamp, and said “can you design and print something like this for me”. Little did she know, this week's contest is LED Diffusers, which can more broadly be understood as lamps I guess (I promise, I am using an LED bulb). The problem, however, is that I need to be on a flight midday Friday. And I have work on Thursday. Luckily, who can sleep around <gestures broadly at the world>.
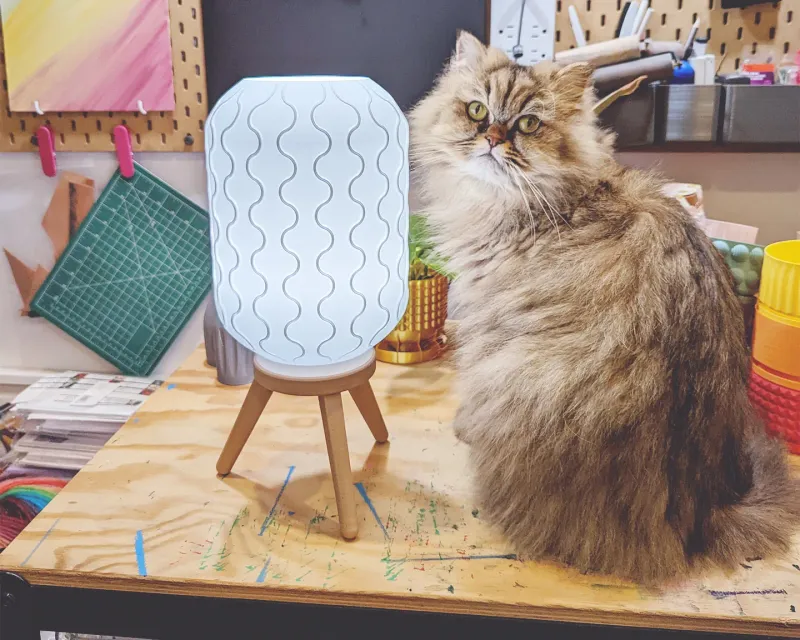
The following is what I designed, printed, assembled, and photographed in basically one day.
Also, as a side note, I think the cat is mad at me. She refused to participate in the photoshoot today. I should consider getting a banana for future scale needs.
Materials
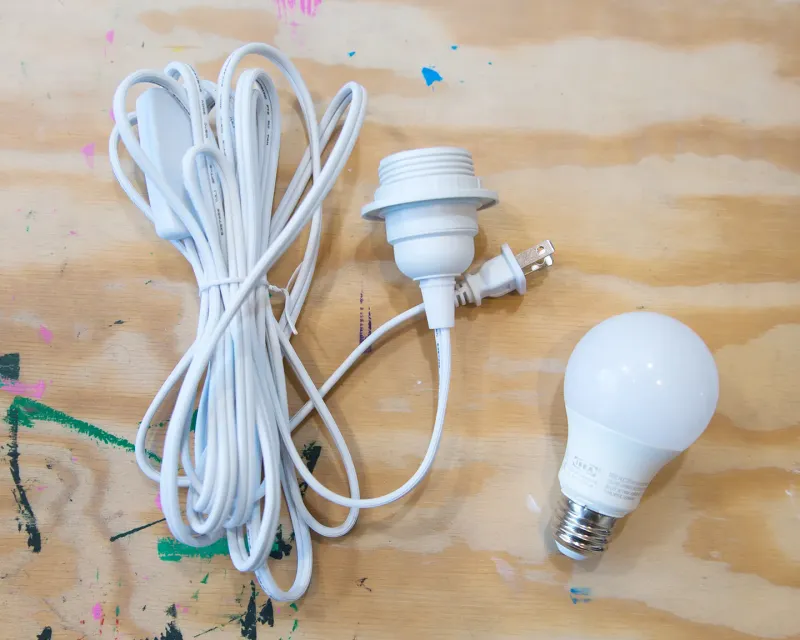
In addition to all the printed parts in this post, you will need a standard HEMMA 40mm light cord. Often, they are listed as “pendant light cord” or “hanging light kit” online. I purchased this specific one, but the dimensions match several other kits I have purchased in the past as well, so I am pretty sure they are all the same. This rope cord looks like it might be pretty cute with the lamp too. You will also need a standard light bulb.
Though optional, you may also want to have a deburring tool, a razor or x-acto knife, and some sandpaper to clean up the prints (cleaning up any elephant's foot will be essential for a good fit for this model).
Printing
You will need to print one of each part: the lamp shade, the insert, the base, and one of each spacer. All parts are designed to be printed on a standard, run-of-the-mill printer, with no modifications required. Here are the settings I recommend for each:
Lamp shade settings
Print this in vase mode. Unless you are going for some sort of visual effect, I suggest printing this in a white filament. My settings were as follows:
- Spiral vase mode / Spiralize outer contour (i.e. vase mode): turn this on, that's what this mode is all about
- Layer height: 0.25mm
- Line width / Extrusion width: 0.7mm (you can set this value even when printing with a 0.4mm nozzle!)
- Bottom layers: 3 (no higher than 0.9mm)
- Wall speed: 40mm/s (you can bump this up a bit if you are confident in your printer)
- Printing temperature: 10 degrees hotter than your usual temperature
Note: Cura 5 users, make sure to unselect “Remove all holes” when slicing this, since we do want the holes in the bottom.
Lamp insert settings
This model also prints in vase mode. I could have made it print in regular mode, but I like vase mode and it's also faster. Plus it looks neat! My settings were as follows:
- Spiral vase mode / Spiralize outer contour (i.e. vase mode): turn this on, that's what this mode is all about
- Layer height: 0.3mm
- Line width / Extrusion width: 0.8mm (you can set this value even when printing with a 0.4mm nozzle!)
- Bottom layers: 0 (leave the bottom completely open!)
- Wall speed: 30mm/s (you can bump this up a bit if you are confident in your printer)
- Printing temperature: 10 degrees hotter than your usual temperature
Lamp base settings
Really, this one can print with any standard profile, nothing special here. However, here were my settings anyway:
- Layer height: 0.3mm
- Line width / Extrusion width: 0.8mm (you can set this value even when printing with a 0.4mm nozzle!)
- Bottom layers: 4
- Top layers: 5
- Infill: 15%, gyroid
- Speed: 50mm/s
- Wall speed: 25mm/s
- Printing temperature: 10 degrees hotter than your usual temperature
Spacer settings
Like the base, the settings here don't matter much. What is important is that the entire piece is solid (which is easy to do, seeing as they are 1mm to 2mm tall). You can just slice them with the same settings as the base.
Cleanup and assembly
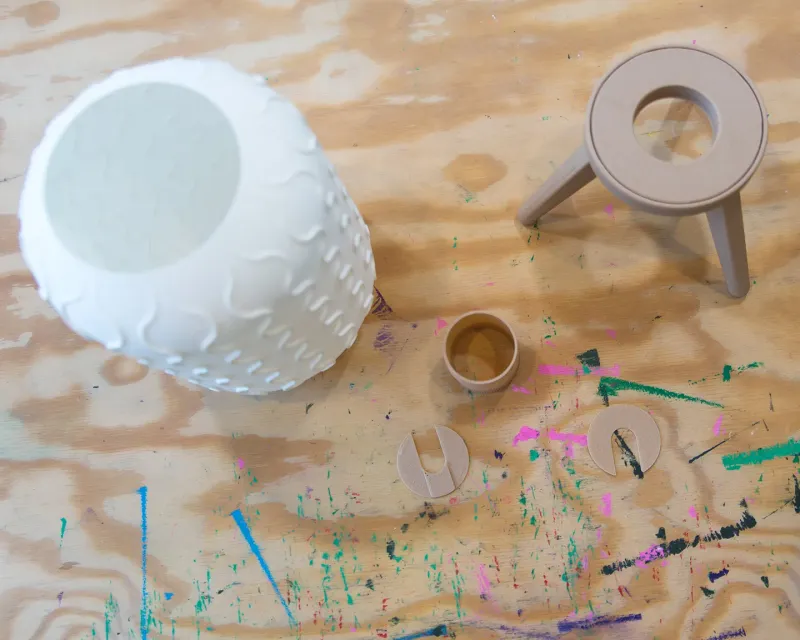
1. Deburr the hole in the lamp base where it touched the build plate (the actual top, if you place the base on its feet), the inside of the lamp insert where it touched the build plate, and clean up any potential imperfections on the bottom of the lamp shade. If they all printed perfectly, congratulations! You are very good at levelling your printer.
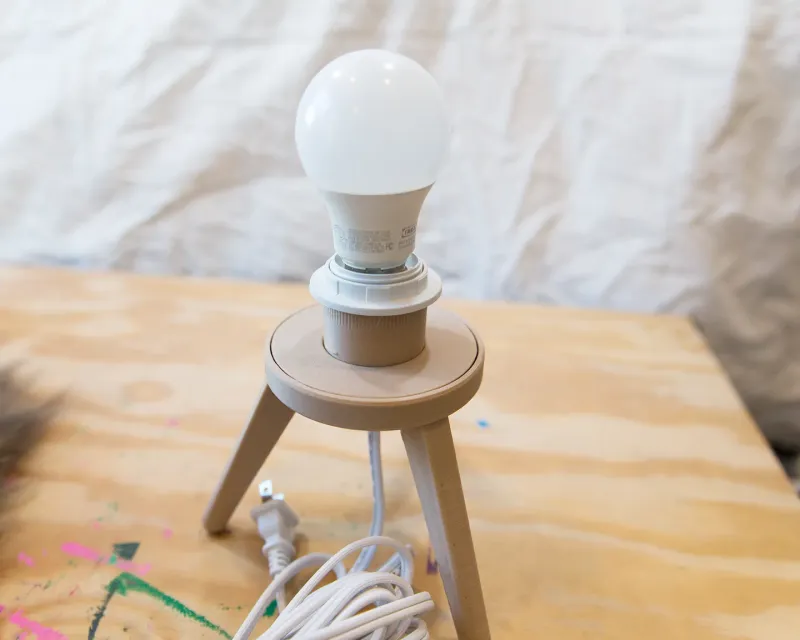
2. Unscrew the top of the light cord.
3. Place the top of the light cord through the hole in the lamp base, going in from the bottom of the base
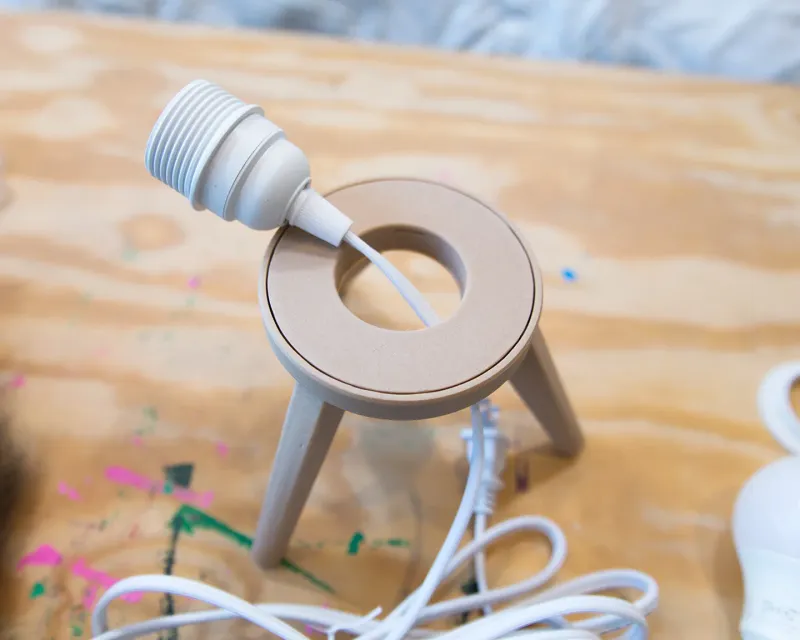
4. Place spacer 1 around the cord, between the lamp base and the light socket.
5. Place spacer 2 around the cord right above spacer 1, with the nub on spacer 2 pointing down. The nub should fit inside the cutout on spacer 1, forming more-or-less a flat surface at the bottom of the inserts.
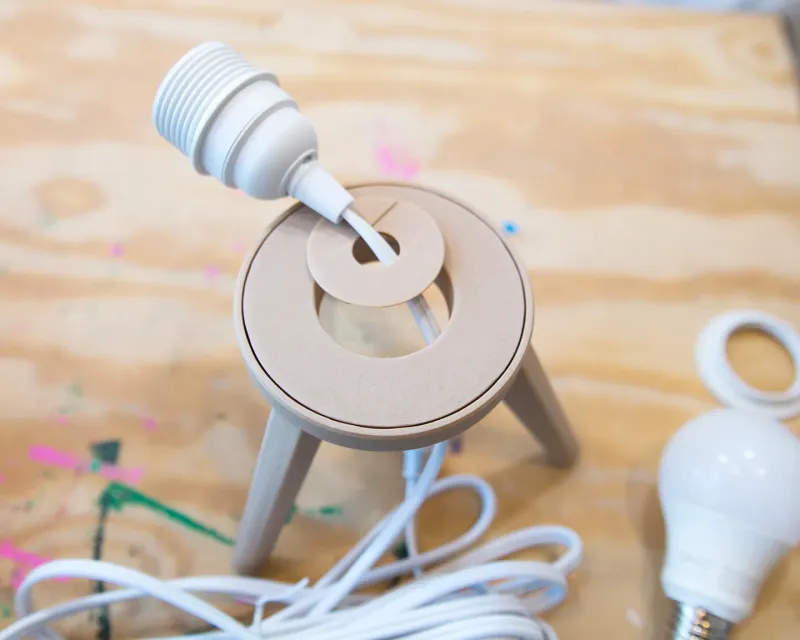
6. Push spacer 1 and spacer 2 together down into the hole of the lamp base, until they are more or less flush with the bottom.
7. Place the lamp insert over the light socket, with the threaded part coming out of the top of the insert. The light socket should catch on the top edge of the lamp insert and you should not be able to pull it all the way through. (Note: I screwed on the top of the cord just for demonstration, don't do that yet.)
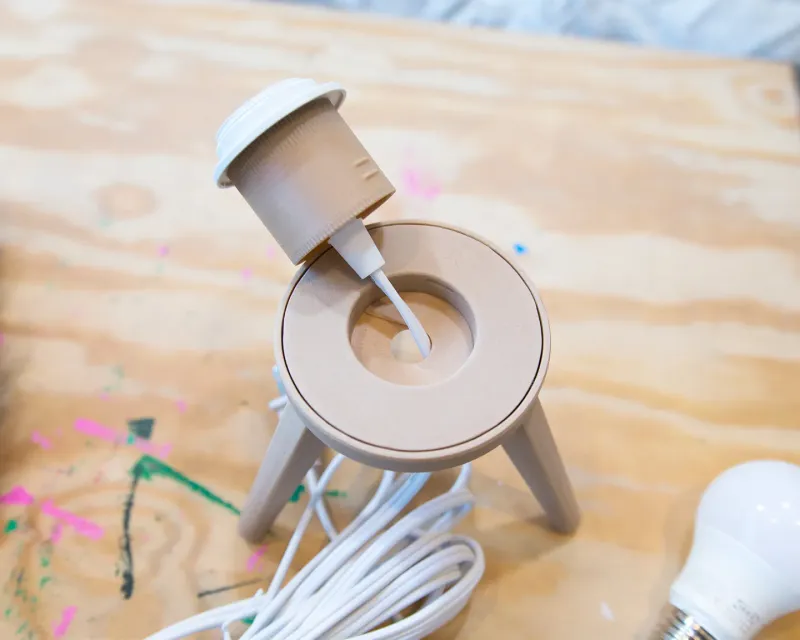
8. Push the lamp insert into the lamp base. The first set of tabs should go into the lamp base hole and you should hear a little click. The second set of tabs should remain visible above the lamp base. (Note: I put the bulb in just for demonstration, don't do that yet.)
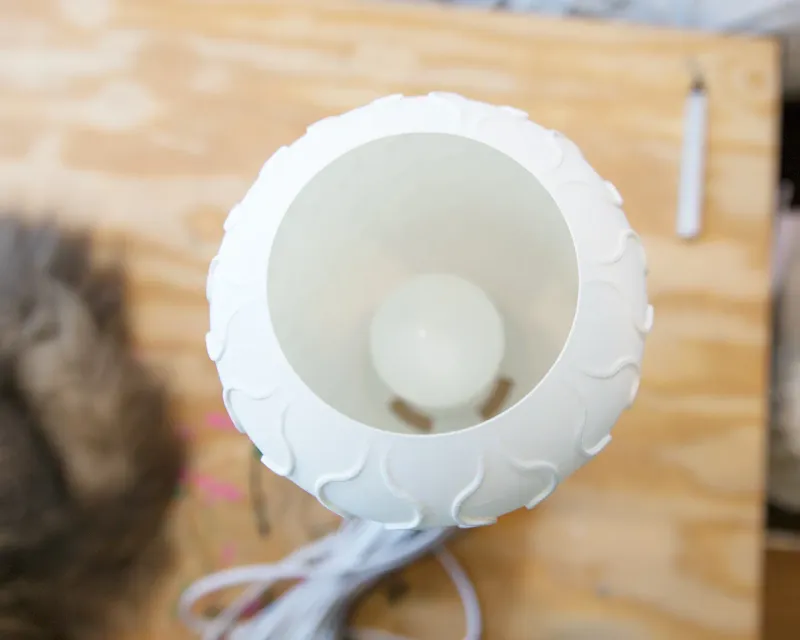
9. Look for the cutouts in the bottom of the lamp shade. Line those up with the two visible tabs on the light insert. Twist the lamp shade until it locks into place. Depending on your tolerances, this might be a bit loose. That's not really a problem, but if you'd like, you can add a bit of glue (note, however, that glue will make the lamp significantly less modular).
10. Through the top of the lamp shade, screw the top of the light cord back onto the light socket so that it is held in place. The light cord should be sticking out of the bottom of the lamp where you can hold it steady as you screw the top on.
11. Screw in your light bulb.
You are done! Enjoy your new lamp.
Update 2022-12-24: new lamp shades! (BETA)
I am travelling for the holidays, so I had some downtime that I used to design some more lamp shades. I intend to print these when I get back, so for now, consider these in BETA. The print previews look wonderful! All shades use the same attachment mechanism, so they should be completely swappable.
Finnish glass vase inspired lamp shade
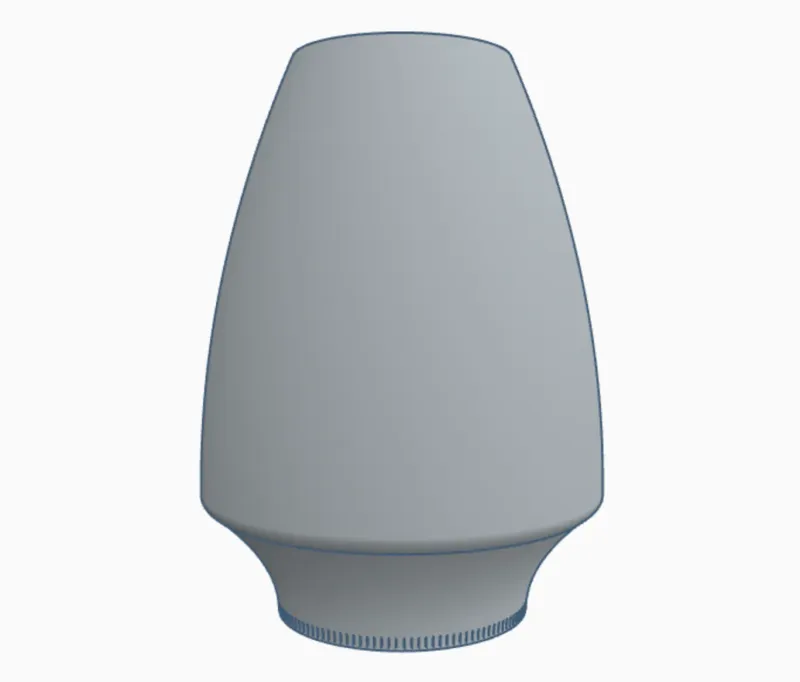
Does this shape have a name? I styled it after some vintage Finnish glass vases that I have been looking at. This one should give the lamp a real retro vibe. I recommend printing this with:
- Spiral vase mode / Spiralize outer contour (i.e. vase mode): turn this on
- Line width / extrusion width: 0.8mm (this helps with the overhang)
- Layer height: 0.2 to 0.3mm (this helps with the overhangs… you could use adaptive layers as well if you'd like)
- Fuzzy skin: turn this on, it could be fun!
Pumpkin lamp shade
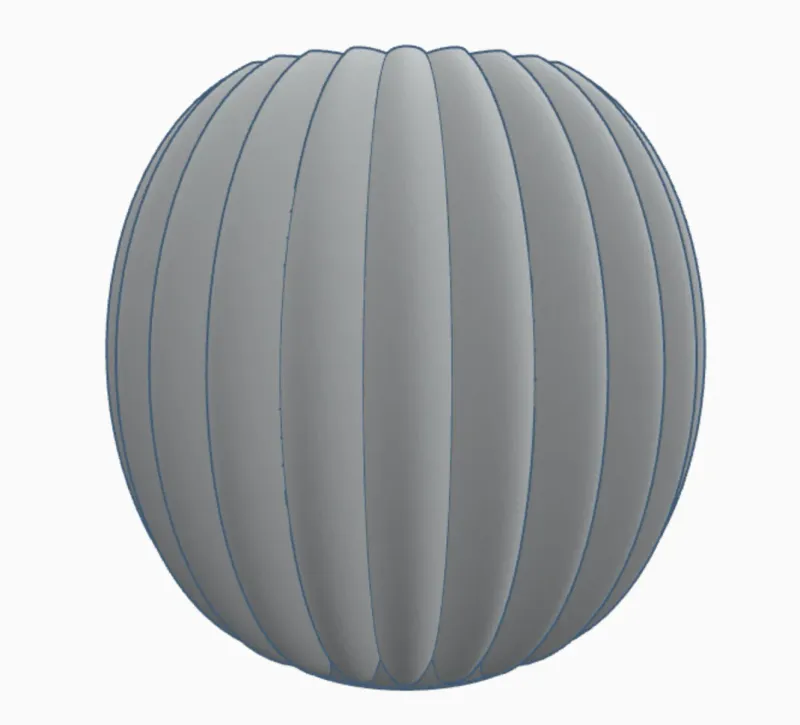
Does this shape have a name? I saw other lamp shades like this when I was doing my research, so I wanted to eventually add one as an option. I would print this with:
- Spiral vase mode / Spiralize outer contour (i.e. vase mode): turn this on
- Line width / extrusion width: 0.7mm
- Layer height: 0.2 to 0.3mm (this helps with the overhangs – though they really are not that steep in this model)
Update 2022-12-24: third shade option! (BETA)

I saw a lamp with a similar shade at Marshall's. Since I don't need a new lamp, I decided to design one instead (because printing a lamp clearly results in less lamps than buying lamps, right??). As I am still travelling, I have not printed this one yet, but have carefully reviewed the print preview. Consider this BETA as well.
The lamp that I saw used a transparent amber colored glass shade. I kind of want to print this shade that way as well. Looking around, ZIRO seem to make the only translucent yellow-ish PLA. If anyone knows another filament option, please let me know in the comments, I'd love recommendations.
I would print this with:
- Spiral vase mode / Spiralize outer contour (i.e. vase mode): turn this on
- Line width / extrusion width: 0.7mm, maybe 0.8mm
- Layer height: 0.2 (this helps with the top and bottom rows of studs)
With this model, I am a bit worried about the very top and very bottom rows of studs. The print preview suggests that they may not close up all the way and leave tiny holes at the top/bottom of the balls. Honestly, this could look good. But this also might be a model to play around with variable layers / adaptive layer heights in order to make those particular areas have a much shorter layer height. If you print this one before I do, feel free to leave your settings in the comments!
Update 2022-12-29: lamp shade remix kit
Since this got features on the front page, a lot of you have asked for specifications on the lamp shade, so that you can make your own. I'll do you one better, here's a whole kit!
There are 4 STLs in this kit (in the downloads of this post!):
- The negative volume I use to create cutouts in the bottom of the shade. You can generally use any correctly scaled solid vase object as long as you cut this negative volume out of the bottom
- The negative volume of just the mounting hole, without the extra cutouts around it (just in case you want it)
- A smooth version of the lamp shade, in case you want to add your own pattern to it
- A smooth version of the lamp shade, but without the hole (I don't know why you might want it, but it is there just in case)
If you need any other file, please let me know!
As for various dimensions that you might be interested in:
- The diameter of the bottom that I use is 94mm. You have a bit of wiggle room on this, obviously.
- I recommend a total diameter of the shade stay at or above 94mm. Many of my shades are 150mm to 200mm.
- I recommend a height of 190mm to 210mm. This should make the bulb roughly centered inside the shade, giving you even illumination.
The only other design consideration is that the top should be open, as you will need access to fully assembled the lamp.
Finally, I've also prepared a model on TinkerCAD that you can use as a starting point, or just to check on the individual parts.
Happy making! I am excited to see what you all come up with.
Notes
The lamp in the photos was printed on an Elegoo Neptune 2 with a 0.4mm nozzle. The shade was printed in Overture Matte White PLA and everything else was printed in Ranki woodfill PLA.
If you'd like some more lamps, check out this collection.
Tags
Model origin
The author marked this model as their own original creation.