Bosch Indego S500 rear wheels V2

Description
PDFUpdate 2024-11-11
I've created another wheel (V3) to counter some issues I've experienced during previous seasons.
Description
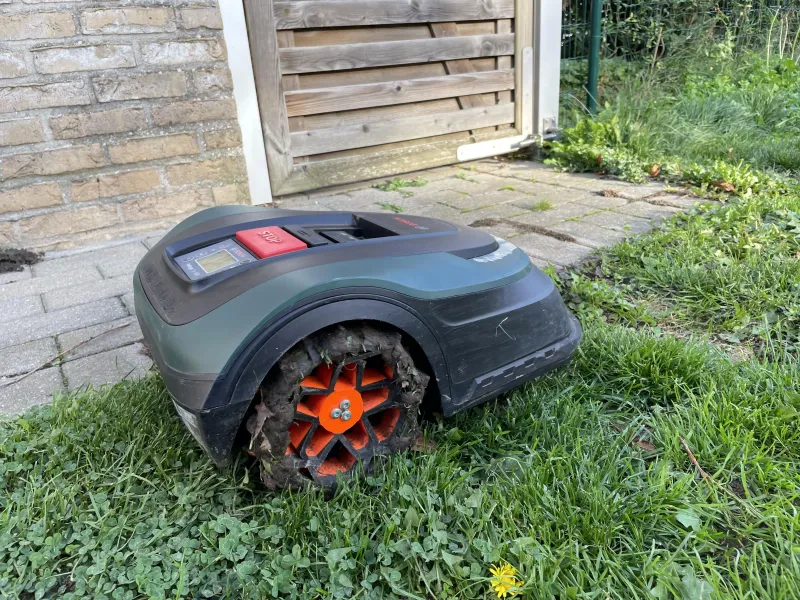
My V1-wheels solved most of my issues that I had with the original Bosch wheels but there was 1 problem that I underestimated and rendered my wheel design obsolete: pet waste.
We have 2 dogs and apparently the wheels could not cope with that amount off.. well.. shit.
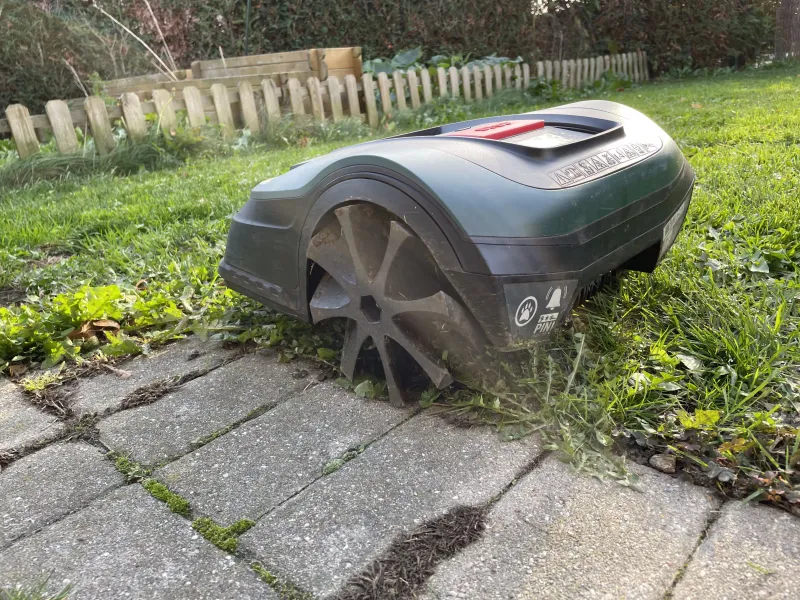
After some trial and error, I came up with a whole new design. It still has (for me at least) the same amount of grip as V1 but the pet waste doesn't seem to stick to it, leaving them less dirty and the amount of grip remains the same over time.
Even if the debris would stick, the wheel itself consists mostly out of spokes so it has a huge amount of room to fill before it saturates the threads of the wheel.
Other advantages of the new design:
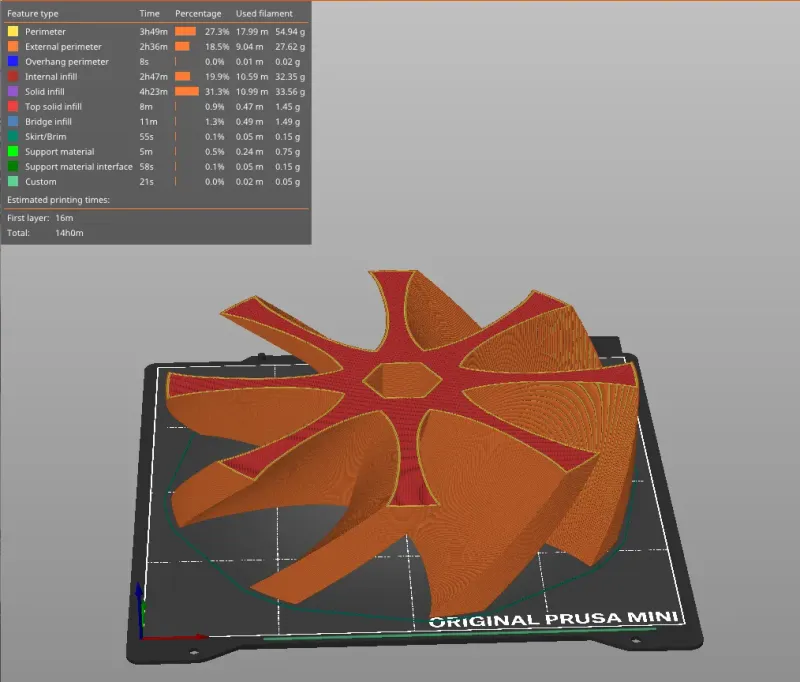
- it consumes 30 grams less plastic per wheel compared to V1;
- it prints 2h30mins faster on quality settings compared to V1;
- it drives smoother over hard surfaces like pavement since there should always be a part of the wheel touching the ground.
Visual comparison V1 vs V2
 |  |
V1 (left) and V2 (right) on the same run. I've tried it multiple times and the result remains the same.
Versions
There are 2 versions available.
- 18mm: a symmetrical mounting design. If a side of the thread has more wear, you can just reverse the wheel on the same axis.
This wheel has a wider stance (+1 cm) and does not fit the wheel well properly (see pictures). It sticks out some mm, but it works without any issues. - 28mm: an asymmetrical mounting design. The wheel is aligned properly in the center of the wheel well for optimal clearance.
Print specifications
Material:
- PETG (Prusament galaxy black in my case) to allow some flex and resist UV.
Print settings:
- Print it lying on its outside face (side that doesn't face the robot). It will consume the least amount of support material.
- Layer height: 0.2mm
- Perimeters: 3 seems to be sufficient
- Solid layers (top and bottom): 5
- Infill: Gyroid 10%
- Support material:
- Overhang: 25°
Assembly
The assembly of the wheel is pretty straight forward. Remove the old wheel and slide this one on. Just mind the alignment of the holes.
Tip: if your mower needs to cross or drive over pavement/stones, stick some EPDM to the ends of the spokes. It will improve its grip and noise massively on hard surfaces without impact on the performance on grass.
Support
I hope this design is useful for others that struggled with the same problem I have.
Like and post makes if it solved the same problem!
Tags
Model origin
The author marked this model as their own original creation.


