GhostClip

Description
PDFSummary:
The Ghost Clip is an innovative, groundbreaking innovation which involves a Ghost that doubles as a clip (and availability as a bookmark). Spanning 3 by 6.5 inches, the space-effective yet groundbreaking model will undoubtedly be flying off the shelves. Now, you may be asking yourself, how would one intend on utilizing the Ghost Clip? Easy! Simply hang it up as a fun decoration, or insert a given page in a book onto the mouth of the ghost for use as a bookmark.
This project was co-created by the Legendary Leo of Leaden engineering, whose ghost can be found at the profile Leos.
With compatibility as a clip, decoration, or bookmark, the possibilities are endless!
Constraints:
Our client demanded that our sketch begin with a constraint box and reference geometry, with fully defined smart dimensions. Additionally, as he was a particularly demanding client, he detailed that we should use manual relations, offset entities, and mirroring in various parts of our ghost clip. Of course, being the world’s Leaden engineers, we fulfilled these demands flawlessly. The constraints are listed here:
- The sketch must begin with a constraint box.
- Dimensions should be detailed but efficient.
- The sketch must contain zero error messages.
- The sketch must be fully defined when complete.
- Demonstrate efficient use of “Construction Lines” / ”Reference Geometry”.
- Demonstrate efficient use of “Offset Entities”
- Demonstrate efficient use of “Manual Relations”
- Demonstrate efficient use of “Smart Dimensions”
- Demonstrate efficient use of “Mirroring”
Assembly Instructions:
This design was developed in Solidworks. As follows is a description and list of the steps we used to design this work of art:
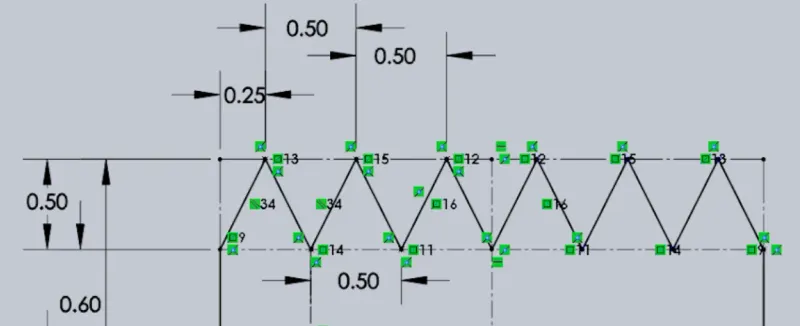
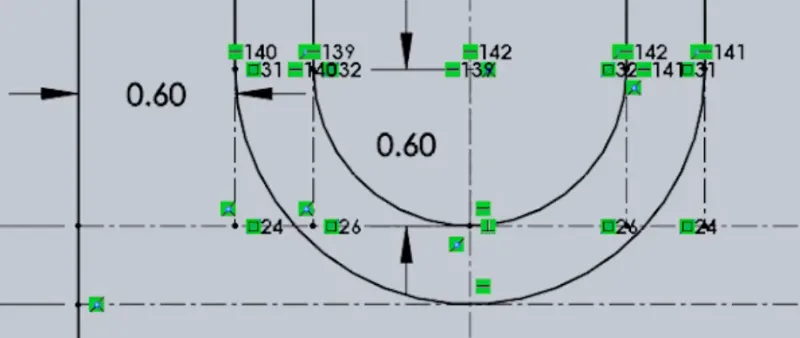
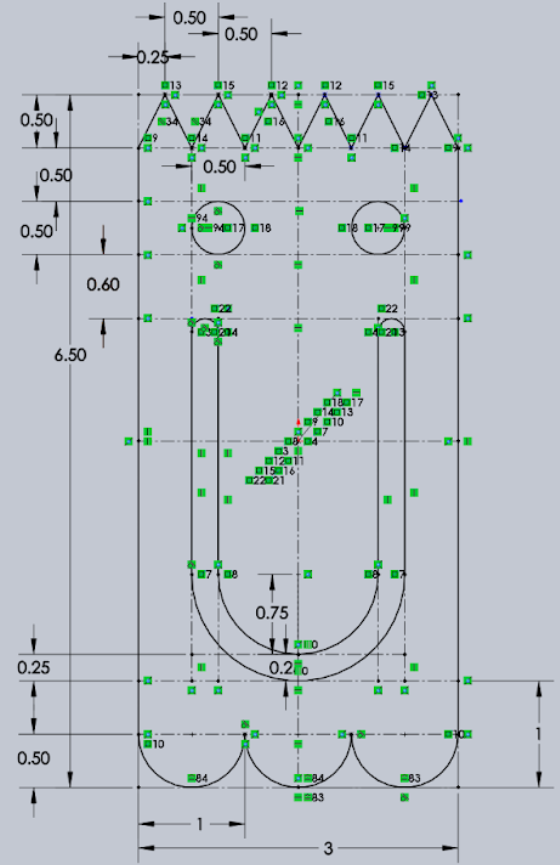
Using a center rectangle with reference geometry, we began plotting out anchor points for where our shapes would go. Drawing and dimensioning half of our triangles and eyes, we mirrored them about the midpoint line, in an effort to cut down on smart dimensions and manual relations. Additionally, we drew the bottom semi-circles using 3-point arcs. For the mouth of the ghost, we drew the parallel lines and top arcs, and mirrored them, to make the process simpler. Finally, to complete the mouth, we drew a centerpoint arc and offset it to create the beautiful smile we all know and love today. A more comprehensive summary is listed here:
- Using a center rectangle with construction lines, make constraint box around the origin
- Construction line the inner box (excluding the triangles and circles)
- Make a relation for the two side being parallel and equal
- Construction line increments where the shapes(eyes and mouth) begin and end
- Dolinsky Anchor Points for half of Triangles
- Plot points for the semi-Circles
- Fill in half of Triangles using the line tool
- Smart dimension half of triangles
- Mirror half of triangles about midpoint of constraint box to complete set of 6
- Fill in the Semi-Circles using the Arc tool
- Smart dimension one semi-circle
- Make all the semi-circles equal with a manual relation
- Midpoint for eye circles
- Do the eye circles using the circle tool
- Smart dimension the diameter for one eye circle
- Make the two eye circles equal with a manual relation
- Make constraint box for the mouth
- Make width for mouth
- Find midpoint for the semi-circles of mouth
- Do the semi-circle mouth parts with the arc tool
- Make the sides of the mouth be equal and parallel with manual relations
- Make the eye circles and mouth tangent
- Make sure everything is fully defined
How We Designed This:
Starting with a preexisting model, we physically measured its dimensions and sketched it at a 2x scale on paper using rulers and compasses.

After we were confident in our design, we booted up Solidworks and began replicating our drawing. It’s important to note that although our paper drawing was twice the size of the physical model, we kept the dimensions at the right scale to make replicating it in Solidworks easier. Additionally, my business partner Legendary Leo and I made sure to create identical models every step of the way.
Our first blunder was forgetting that our client demanded that we utilize the mirroring function, so in an effort to cut down on smart dimensions, we removed half of our triangles and mirrored them about the centerline.
Additionally, we took advantage of the offset tool of Solidworks to offset the ghost’s smile, as our client banged his fist on the table demanding we utilize the offset feature in our model.
Once all of our client’s demands were met, we focused on getting our design as similar to the template as possible.
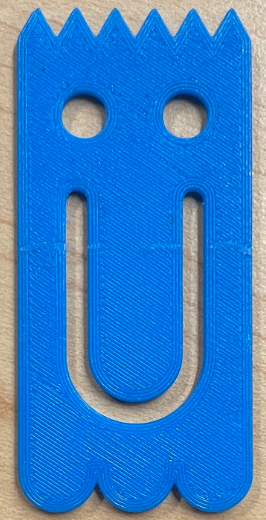
Upon closer inspection, we realized that our prototype’s eyes were too small, and that the width of the mouth was too narrow. We re-measured the blue template (pictured above), and realized it would be easier to redo both the smile and the eyes rather than work to modify the existing design. After widening our smile from 0.25 to 0.3 centimeters, and enlarging the eyes, we were finally satisfied with the result.
(Before and after Solidworks sketches)

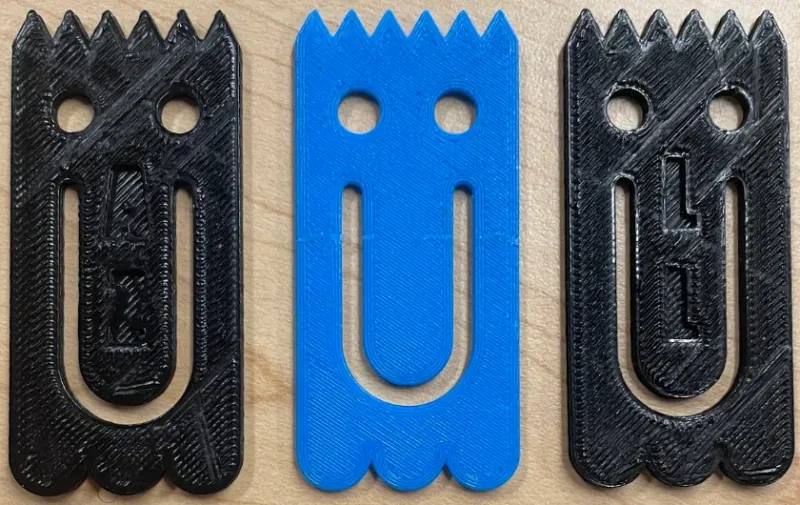
(Final models next to template model)
Model origin
The author hasn't provided the model origin yet.