X-axis upgrade with linear rail, belt tensioner and bearing clamping - Prusa MK3 / MK3s / MK3s+

Description
PDFIf you are looking for an upgrade for the X-axis of the MK3, you will find under the most popular the
"X-Axis Linear Rail Guide Upgrade" from "KalleKnall"
and the
"X-Axis revision with belt tensioner" from "Boogie".
But I wanted the best features of both.
So I combined the two upgrades.
And this is what you can expect:
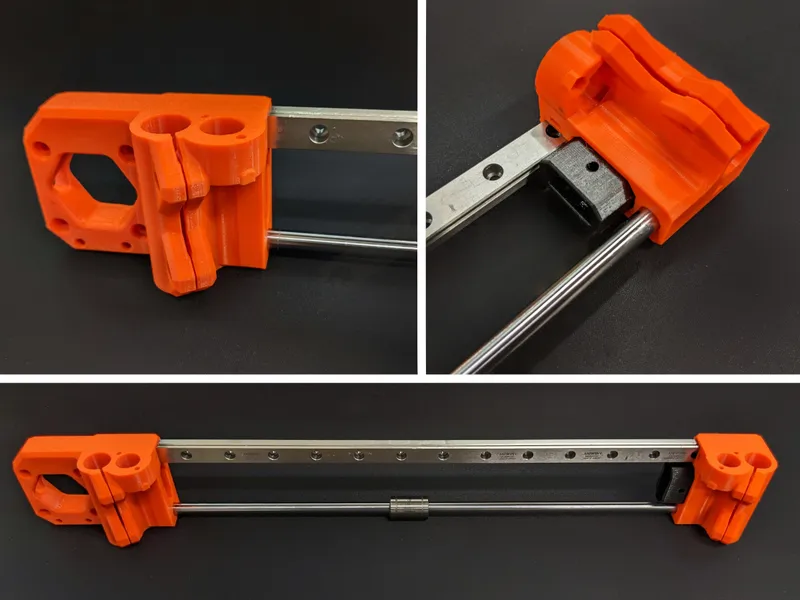
- Linear rail guide
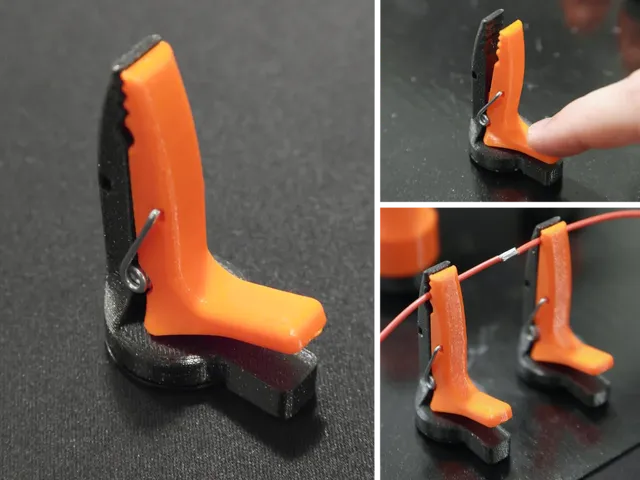
- Belt tensioner on the idler side
- Bearing clamps
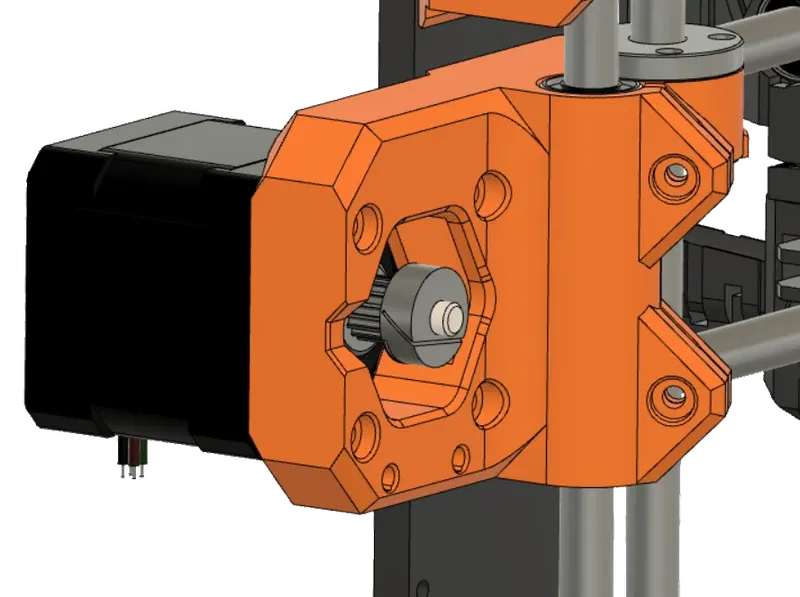
- Stiffer motor mount
- Stiffer X-axis
- Less noisy printer
What you need:
Print Files:
Print files by me:
1x X-axis-moter-side.stl
1x X-axis-Idler-side.stl
Print files by KalleKnall:
1x x-back-… .stl
1x x-front-… .stl
Print files by Boogie:
1x x-end_tensioner_boogie.stl
Additional Parts:
| pc. | Name | Norm | Info |
| 1x | 350mm MGN12 linear rail guide | hiwin only at the moment | |
| 1x | MGN12H linear guideway block | that is the longer one | |
| 4x | M3x12 countersunk | ISO 10642 | for guideway block |
| 2x | M3x14 socket head screw | ISO 4762 | for rails in printed parts (M3x16 would work as well) |
| 2x | M3 square Nut | DIN 562 | for rails in printed parts |
| 2x | M3x18 socket head screw | ISO 4762 | for belt tensioner |
| 2x | M3 hex nylock nut | ISO 10511 | for belt tensioner |
| 1x | 3 h7 x 15 dowel pin | for belt tensioner alternatively cut to lenght M3 screw | |
| 4x | M3x10 socket head screw | ISO 4762 | for bearing clamp |
| 4x | M3 hex nut | ISO 4032 | for bearing clamp |
And you will need most of the screws from your existing X-Axis.
Print settings:
Material: PETG
Infill: 30%
Perimeters: 4
Layer height: 0,15 mm
Support: no
Some parts for the extruder base have a sacrificial layer, push the Allen key through and clear the hole. Make sure that all holes are clear.
Info:
I have tested the print with the MK3s, theoreticly it should work with the MK3 and the MK3s+ aswell. Please leave a comment so that I can update this.
Before installing the linear guide, clean it properly with alcohol and re-grease it.
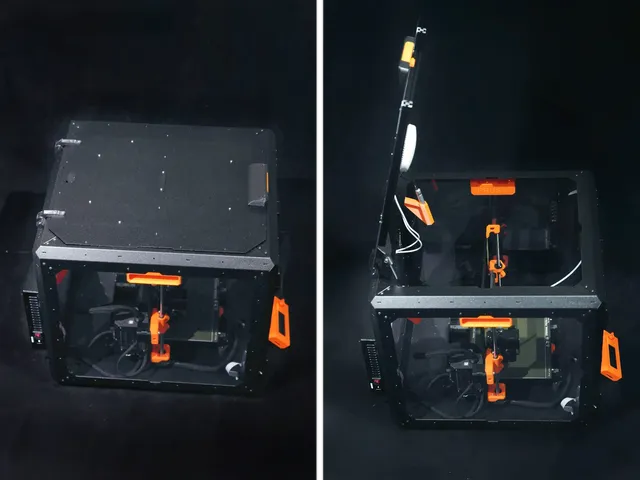
To disassemble the axis, loosen the upper end bracket, the screws of the trapezoidal nuts and the screws for the z motors. Now you can remove the entire X-axis.
You do not need to disassemble the entire extruder, just remove the two rear plates and the cooling fan.
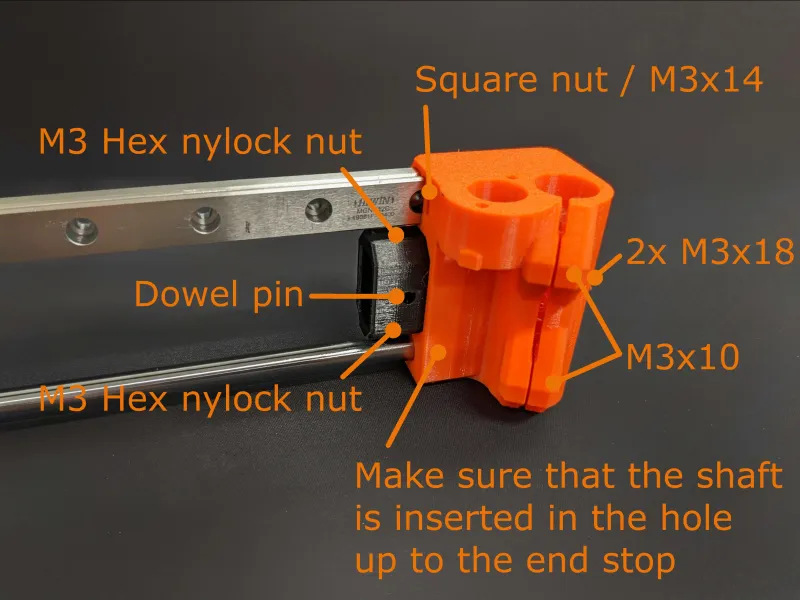
The hole for the linear guide is very narrow, I used a soft-face hammer to drive it in there.
Just be careful when you want to pull the guide out again. Canting can lead to breakage of the printed part.
If you also still have the MK3s where the fan-shroud is made of PETG, check if you should reprint it first.
And the tension meter comes in very handy.
After mounting, you need to do at least the Z-calibration. However, I did the first-step calibration just to be on the safe side.

If you do not use a Hiwin linear rail, make sure that the hole pitch is matching.
For more information, please check out the details of the other two prints.
Happy Upgrading.
*** Update ***
04.03.2023
I reworked the motor side, it now has a cutout to have better access to the pulley with an Allen key.
Tags
Model origin
The author remixed this model.


Differences of the remix compared to the original
Made both versions into one