sharpie blender for Elegoo Neptune 2

Description
PDFI found Devin Montes’ sharpie blender about a year ago, and I found the idea quite interesting. The stripes that can be achieved are really fascinating and quite pretty when done well! But unfortunately, this design has a flaw. It is designed for a direct drive printer, as it is designed to sit upright, with the filament going through it vertically. My printer, however, is the Elegoo Neptune 2, an Ender 3 style bowden printer, with the filament being fed into the extruded horizontally.
For a while, I tried to figure out ways to make it work, designing various holders and mounting jigs, all of which didn’t work all that well. Eventually, I decided that I need to design a blender that allows the filament to run through it horizontally. I tried several different iterations that are kept generic, so that any printer can use them, all of which failed for one reason or another. I finally gave in and designed one specifically meant to mount onto an Elegoo Neptune 2, on top of the filament runout sensor. But I didn’t want to post it because who even has this printer?
Then I saw this design by Diggle. This design had something new that I had never considered for some reason — holding the markers in with pressure, allowing the blender to be mounted in any direction. This meant that I can just let it dangle off the filament in any arbitrary direction. However, as you may have guessed as soon as you saw “pressure fit”… the print didn’t last very long, split easily, and didn’t end up holding the markers firmly enough to transfer enough color. I tried several derivatives to no avail.
So back to square one then. I will keep trying to come up with a generic design for a bowden printer. But in the meantime, I’ve seen a decent amount of folks who now have the Elegoo Neptune 2, so I decided to finally post this design.
Print with any settings you’d like, just remember to include supports. They are very much necessary. It is also helpful to include support blocks for the filament channel, since those would be very annoying to remove and are not necessary. (Don't worry, if you don't know how to do that, pre-sliced gcode is included)
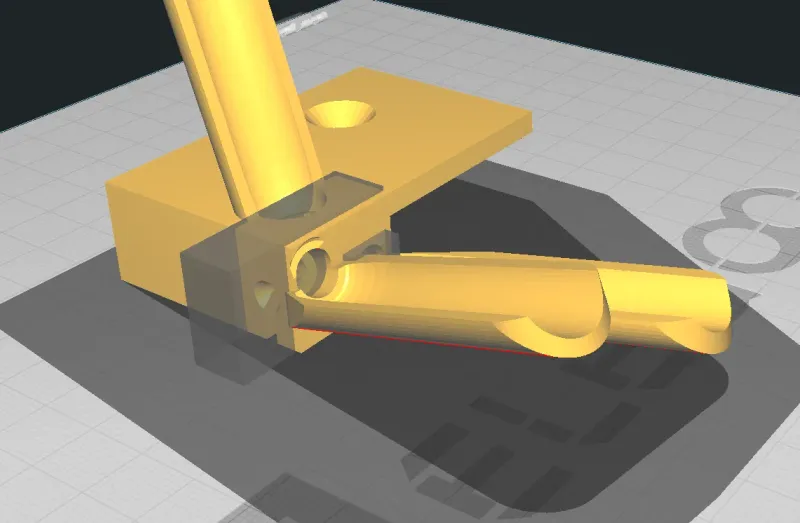
For mounting, I just used a spring clamp. It was important to me to have it easily come on and off. You can improvise this part if you'd like.
And if you print something cool, I’d love to see it!
Tags
Model origin
The author marked this model as their own original creation.