Customizable Vertical Card Box for Board Game Organization

This fusion 360 file uses parameters to allow for customization. You can quickly make custom boxes for your games.
29
73
1
839
updated July 11, 2022
Description
PDFThis is a parametric box that's designed to help you create custom storage solutions for your board games - especially the more obscure ones.
Please leave a comment if there are other box types you would like.
Steps:
- Download and install fusion 360 personal, make an autodesk account, and login. https://www.autodesk.com/products/fusion-360/personal
- Download the file attached to this project, and open it in 360.
- In fusion, navigate to MODIFY > Change Parameters
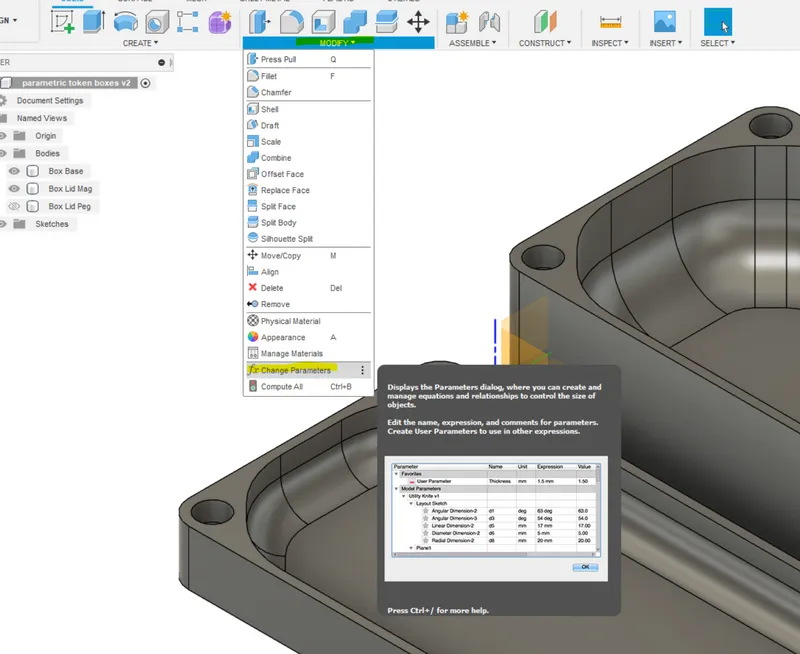
- In the parameter window, change the expressions to match your desired proportions
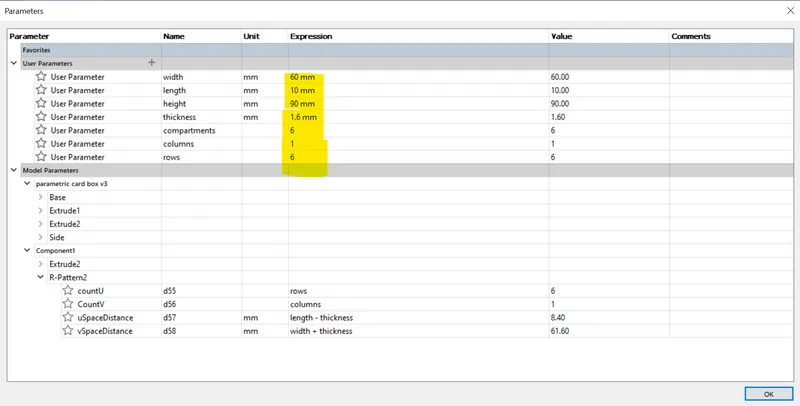
- The parameters are:
- length - how long (in mm) the box will be on the Y axis
- width - how long (in mm) the box will be on the X axis
- height - how tall the box will be on the Z axis
- thickness - thickness of the walls. I recommend making this a multiple of you nozzle size. I use a 0.8mm nozzle, so I make my walls 1.6mm to get two layers and a much quicker print.
- columns - the number of card compartments you want in the x axis
- rows - the number of card compartments you want in the y axis.
- hole - the size of the finger hole.
- When you have set your parameters, click ok.
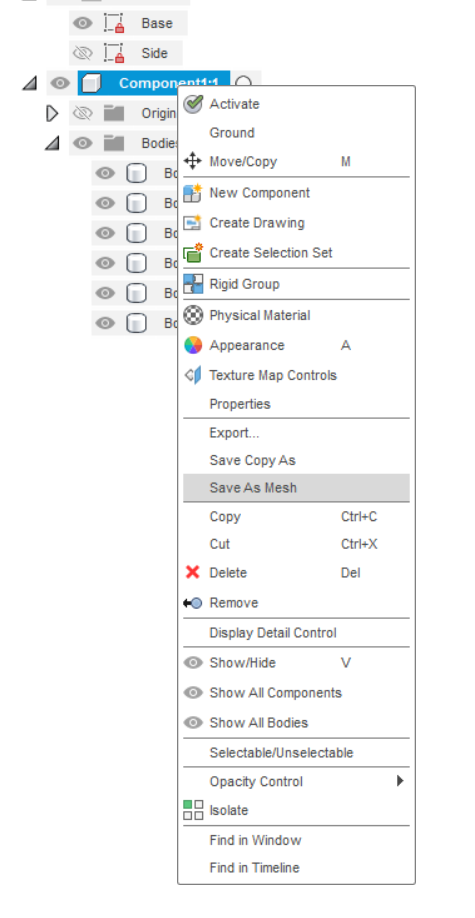
- On the left side of the screen, you'll see an item called Component1. Right click that component then click Save as Mesh.
- In the popup, change the format to STL. You need to do this because each box is a different body, and STL combines them. If you don't do this (or combine the bodies in fusion) you may get issues when you slice the model.
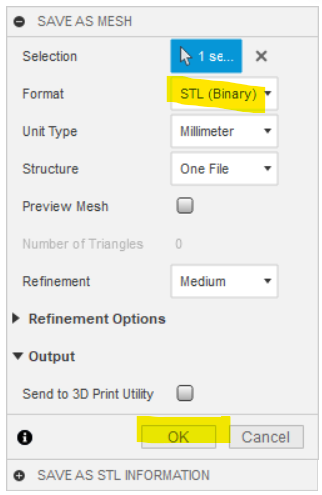
- Open the meshes in your slicer, slice, and print.
Please leave a comment if you have questions.
Model origin
The author hasn't provided the model origin yet.


