large deco planter lite (vase mode)

Description
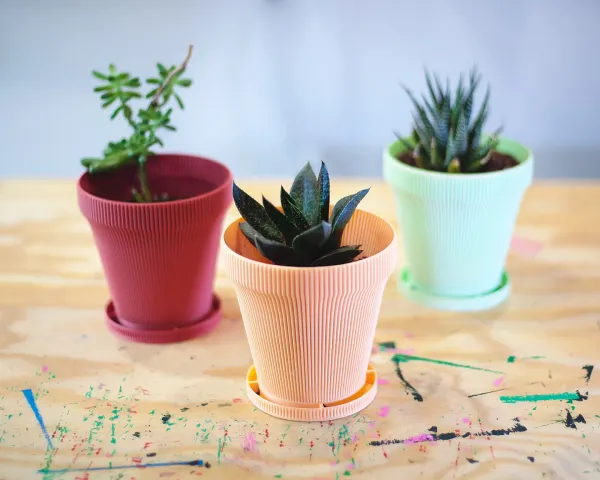
PDFI realize that the picture I used makes it not so obvious, but these planters are large. The begonia is just larger. In fact, these planters are the same size as my previous large deco planter. It is available in 6, 7, and 8 inch versions.
These planters are an update from the original design. They will use around 15% less filament and save about an hour of print time. The trade off is that they are slightly less sturdy as a result, but still plenty strong to hold your plants and allow you to move them around with ease while feeling secure. I have had several plants in these for months now.
These planters maintain the original design language and functionality. They have the same built-in drainage system, and use the same decorative vertical offset lines to add rigidity to the pot.
About the design
I wanted to design practical yet accessible planters for folks who are just as serious about plants as they are about 3D printing. I wanted to defy typical expectations about large prints (e.g. they take multiple days to print), as well as typical expectations of vase mode (e.g. it's a fun impractical toy that produces flimsy parts).
These planters are quite sturdy. They can be printed in well under half a day (9 hours for the largest one). And best of all, they are accessible to almost every printer on the market. You can print them on an Ender 3 style printer, right out of the box, with the standard 0.4mm nozzle. In fact, that is exactly what I did!
Print instructions
Unlike your typical vase mode prints, these models don't really scale. Each model was specifically optimized to be printed at 100% scale. But then again, these models are really unlike your typical vase mode prints in many ways!
Though they can be printed with a 0.4mm nozzle, if you want, you can go all the way up to 0.8mm with the same level of success.
For best results, use the following settings:
- Spiral vase mode / Spiralize outer contour: turn this on, this is how the whole magic works
- Layer Height: 0.3mm (not required, but I like printing fast)
- Line Width: 0.8mm (this is important, and yes, you can do that with a 0.4mm nozzle, just trust me)
- Bottom Thickness / Bottom Layers: 1.5mm or 5 layers at 0.3mm layer height
- Printing Temperature: +10 to +15 degrees your usual temperature (I print PolyTerra at 200, but print these vases at 210 to 215 depending on my mood)
- Flow / Extrusion Multiplier: 110% to 120%, or 1.1 o 1.2 (this will help with making the models more watertight, among other things… if you are unsure, add a bigger multiplier)
- Wall Speed: 30mm/s (you can play with this... slow it down if you have extruder issues)
Special note for Prusa Slicer: Under Print Settings > Advanced, there is a "Slice gap closing radius" setting. You need to set this to 0. This is very important.
Drainage
Good pot drainage is important for most plants. You should be skeptical if a planter model did not have a good plan for drainage. In this model, I use a bit of an unconventional method. The bottom of the planter is open on the sides, allowing extra water to spill over to the side into an empty drainage area. This is, of course, largely due to the limitations of vase mode. I am constantly experimenting to see if I can improve upon this.
I was skeptical of this style of drainage at first, so I decided to put it to a test. I compared this side drainage style vs. putting some rocks at the bottom to lift the soil up on this same side drainage planter vs. a conventional planter I purchased at the store (gross). All six plants (2 in each style) seem to be healthy 11 months later, so it seems the side drainage is doing a good enough job.
If you think you'd still like to lift the soil up from the bottom where it drains, rocks a good idea and you can get them really cheaply at your local plant store. User Bluegooglueygley also designed a Soil Drainage Puck you can print and use for this purpose.
Bridging
The “original flavor” version of these planters have bridging on the vertical supports overtop of the drainage area. I've been told that when printing PETG, this bridged area sags a lot and is difficult to get it to succeed. However, this was easy enough to design out. If you are worried about the bridges and just don't want to risk it, there is a “no bridging” version included in the STLs. This version trades a bit of time and filament in order to remove the bridging.
Notes
The print in the photo is the 6 inch version, printed on an Elegoo Neptune 2 with a 0.4mm nozzle in PolyTerra Watermelon PLA.
Tags
Model origin
The author marked this model as their own original creation.