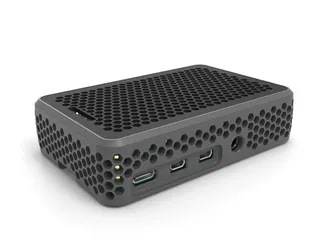
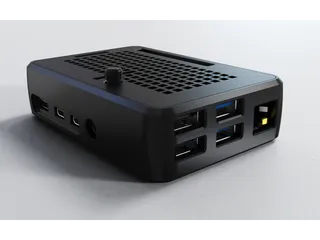
Pi4 Case + FanCover w/Camera Slot
Description
PDFScrewless Snap Assembly.
Start with base or bottom case, remove ssd and drop Pi4b board into bottom case so that it rests in provided IO openings correctly. Fit should keep board in place even with a little shake. Place fanframe-w-standoffs.stl or ScrewlessJack.stl onto Pi 4B board matching posts with screw locations. Top will snap onto the base, holding the screwless jack onto the Pi 4B board and keep it in place.
There are 2 top versions, Domed and Flat Each top has relief and boss locations on the RJ45/USB ends, top parts are not flipable and must be assembled in the correct orientation. There should be an even part line between top and base.
There are 4 Standoff versions for different fan options and non fan uses, screws and boss combinations with 40mm or 30mm fans.
To dissassemble the case, first remove the SSD card! You can use a hex wrench or paper clip/ finger nail to pry up the top near the USB/RJ45 IO area.
Screws. There are 4 screw boss located in the base if you want to use a hat board
M2.5 (a set of 4 screws and nuts needed... 4 standoffs and another set of 4 screws for Hat Boards) . The platform for the MLB is a snug fit, so it is possible to skip the screws).
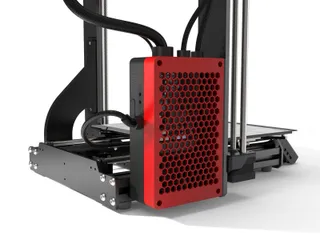
This case fits into frame bracket mount. https://www.printables.com/model/15722-flipable-bracket-for-prusa-i3-and-pi-cases
Parts for optional assembly
Dupont connector for GPIO connections.
10mm (Brass/AL or plastic) standoffs for fanframe-no-standoffs.stl and 30mmmfanframe-nostandoffs.stl.
Compatable models on Printables.com
Case for Noctua 5V 40x10mm 4 pin Fan...
Compatable with "Raspberry Pi 4 B Case (SnapTop)" and FlatTop Solid Case
CPU takes 9mm tall (9.4mm) Heatsink...
Fan fits into fan frame snugly, no screws required. M2.5 screws needed on bottom of case to secure Pi4B board to standoffs.
Case also fits into
Bracket For Case (Raspberry Pi 3B and 4B) Cases
FlatTop, etc
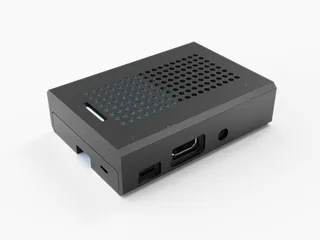
Case cover snaps on, also fits other Raspberry Pi 4B case... (SnapTop). See Black and white version render.
Fan connects to GPIO pins and can be controlled via PWM.
Possible to connect to 3.5V pin and keep fan quiet, performs well.
https://electronics.stackexchange.com/questions/446128/5v-4-pin-noctua-a4x10-on-raspberry-pi
Also look here...
https://blog.pimoroni.com/raspberry-pi-4-thermals-and-fan-shim/
Noctua Fan...
NOCTUA NF-A4x10 5V PWM, Premium Quiet Fan with USB Power Adaptor Cable, 4-Pin, 5V Version (40x10mm, Brown)
Camera Cable Mounting
There are 2 slots for ribbon cables, the rear facing slot (on the Dome cover) works well for the camera. With the fan and fan stand removed, insert the ribbon cable into the CSI mount for the camera, insert the fan stand and then fan. The ribbon cable will need to slide through the rear slot on the cover, mount the fan cables to the gpio pins and place the cover on. The ribbon cable will make an S shape in order to align itself 90 degrees to the io side of the pi (slight angle). The camera can now be attached to the ribbon cable, and will likely need a mount in order to direct to the extruder.
Print instructions
Please NOTE! Remove the MicroSD Card before assembly and disassembly!
Added PLA, PETG gcode and PSlicer 3mf
3MF has variable layer height and support enforcer...
Prints in ABS...
Supports are required and much time and effort was put into finding the correct supports that could be easily removed and develop a clean part...
Use a thin Shim printed from ABS about the size of a flat razer to detach supports...or use a flat razer...
The gcode file for the top cover has this support and it can be removed by fitting a flat razor or thin piece of metal and prying up on the sides... the entire support can be removed in a single piece, requiring very little cleanup.
The Bottom Case has prefabbed supports which pop out.
Wiring:
Warning! Follow these instructions at your own risk.
I wire the Noctua 5V, 4 wire PWM 40x40x10 fan directly to (Pins 4, 6, 12, and 18).
Red wire to 5V (4)
Black wire to ground (6)
Blue wire for PWM to GPIO18. (12). (NOTE : Must edit python script-it is set to 14!)
Green wire for RPM to GPIO24. (18)
Python script (FanProportional.py) from Michael Klements
https://www.the-diy-life.com/connecting-a-pwm-fan-to-a-raspberry-pi/
Stress Test: ~62C
https://core-electronics.com.au/guides/stress-testing-your-raspberry-pi/
Tags
Model origin
The author marked this model as their own original creation.


