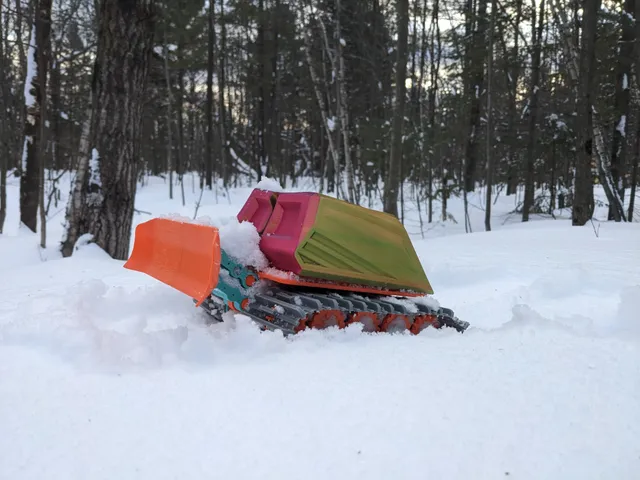
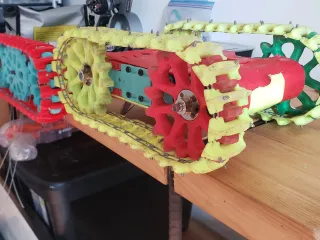
Fast Rc Tank


Description
PDFDemo and design process: https://youtu.be/OYxdLfMX5yY
Updated summer version:
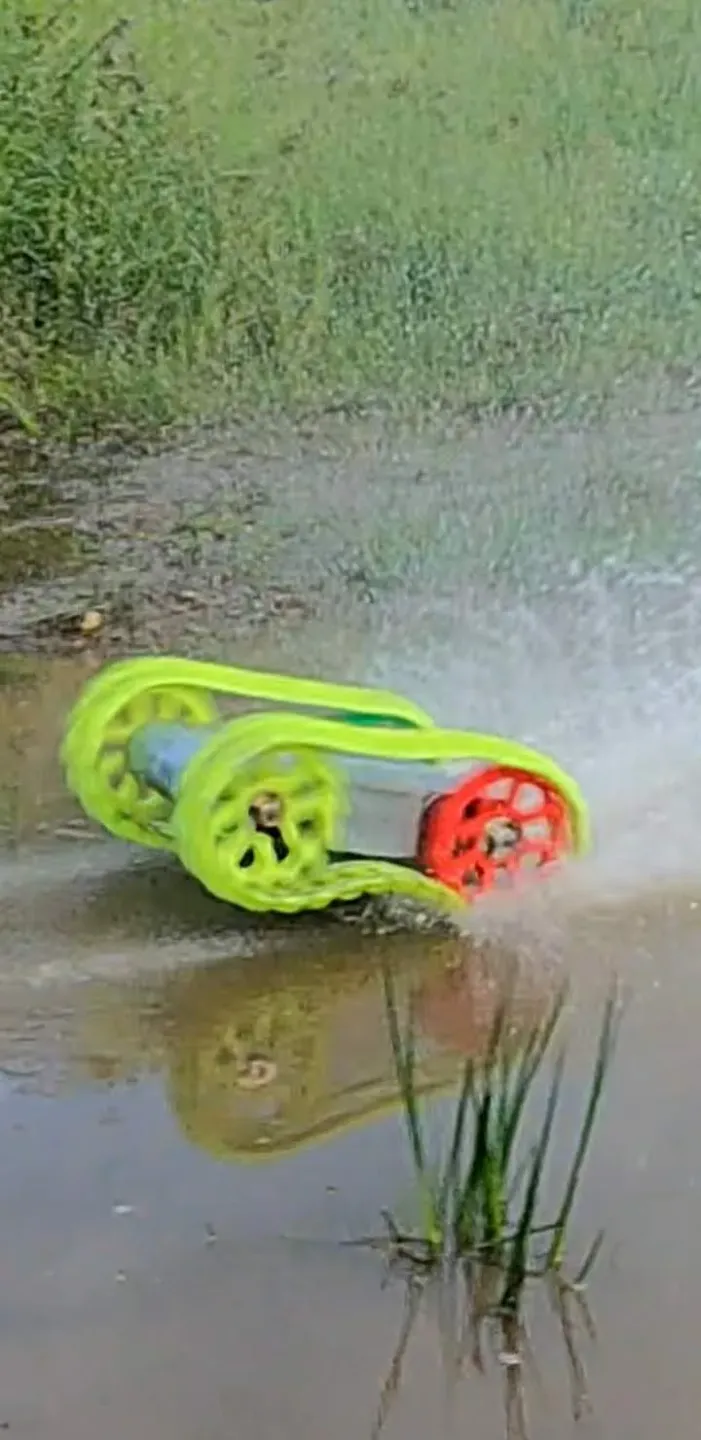
Hi, the main goal of this project is to create a fast and fun to drive tank.
This is not a beginner's project. You need to know how to mix and wire the motor and esc already. The mechanical assembly is not so complicated.
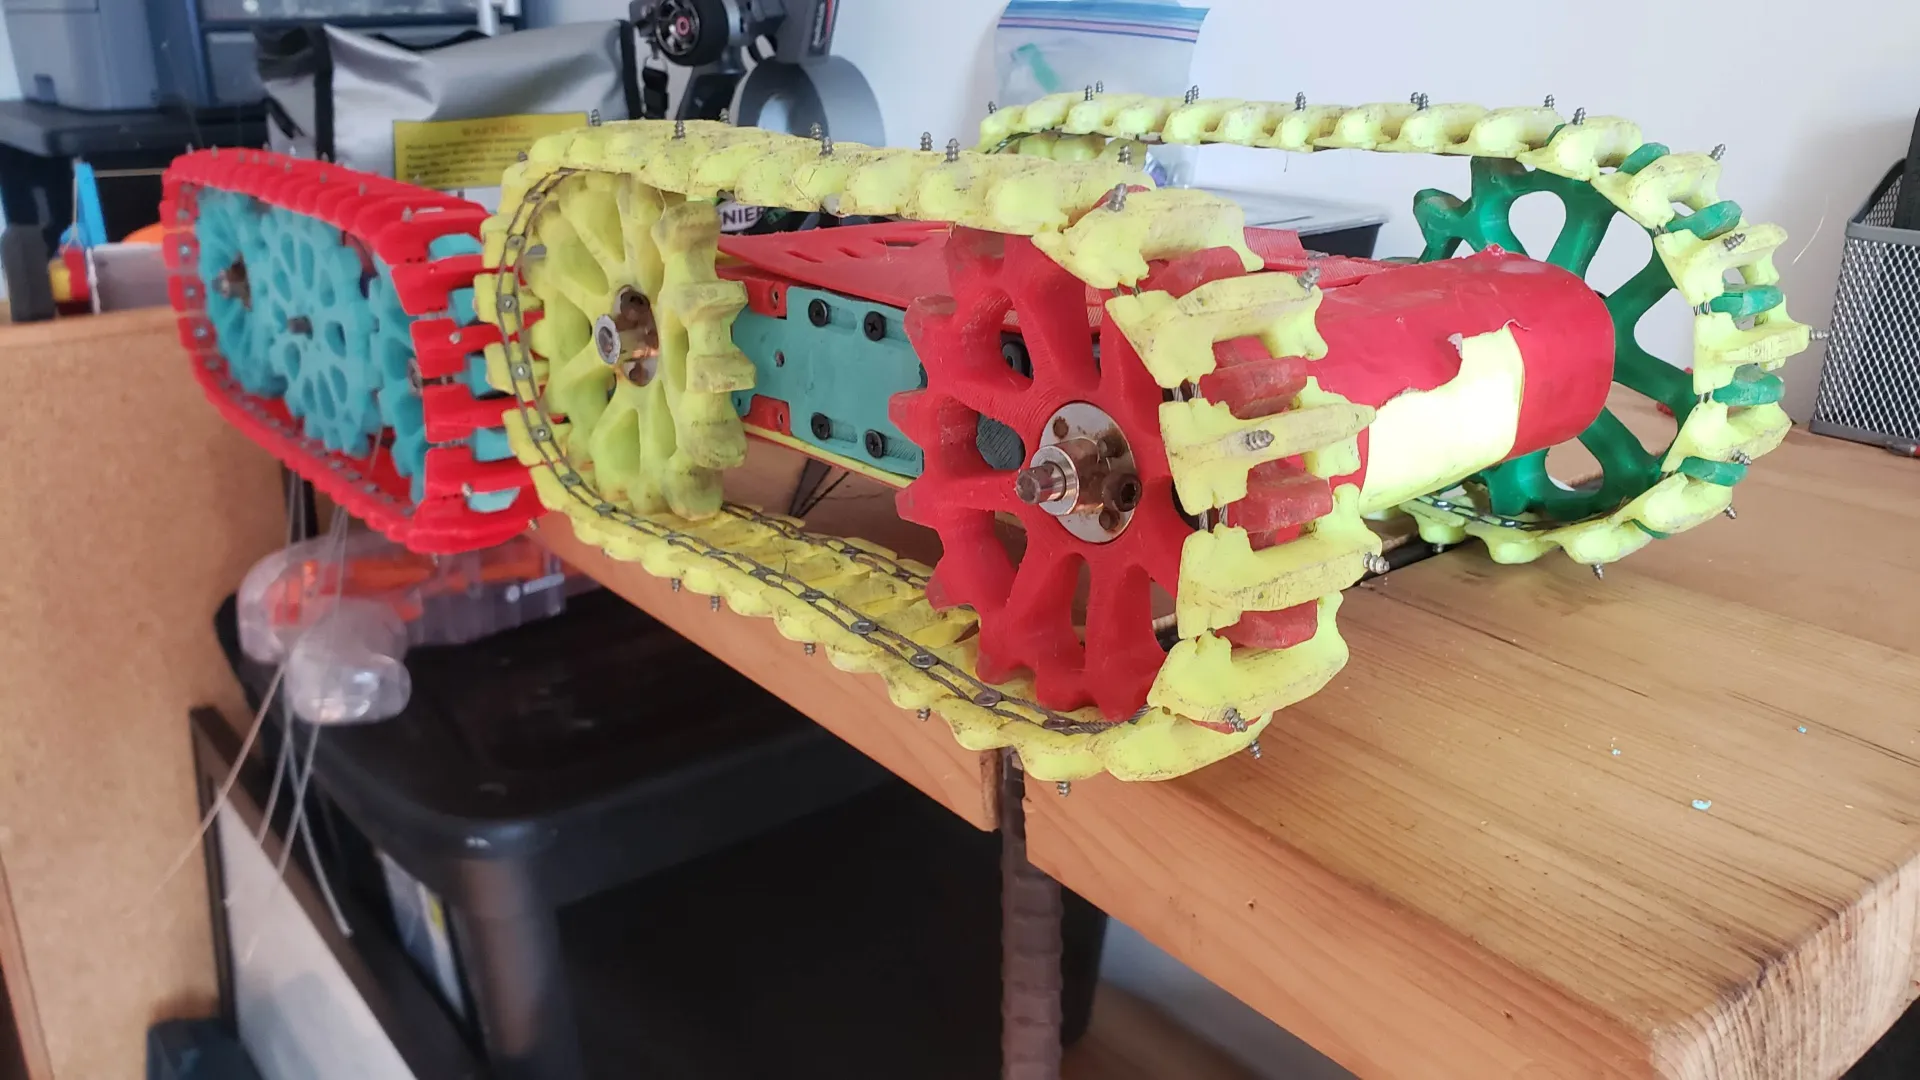
I don't have an assembly tutorial for this project now, but I've put some pictures of the robot disassembled to help understand how it's built.
If you have any questions about the project or the assembly process, feel free to ask them in the comments section.
Enjoy
Parts and quantity to print:
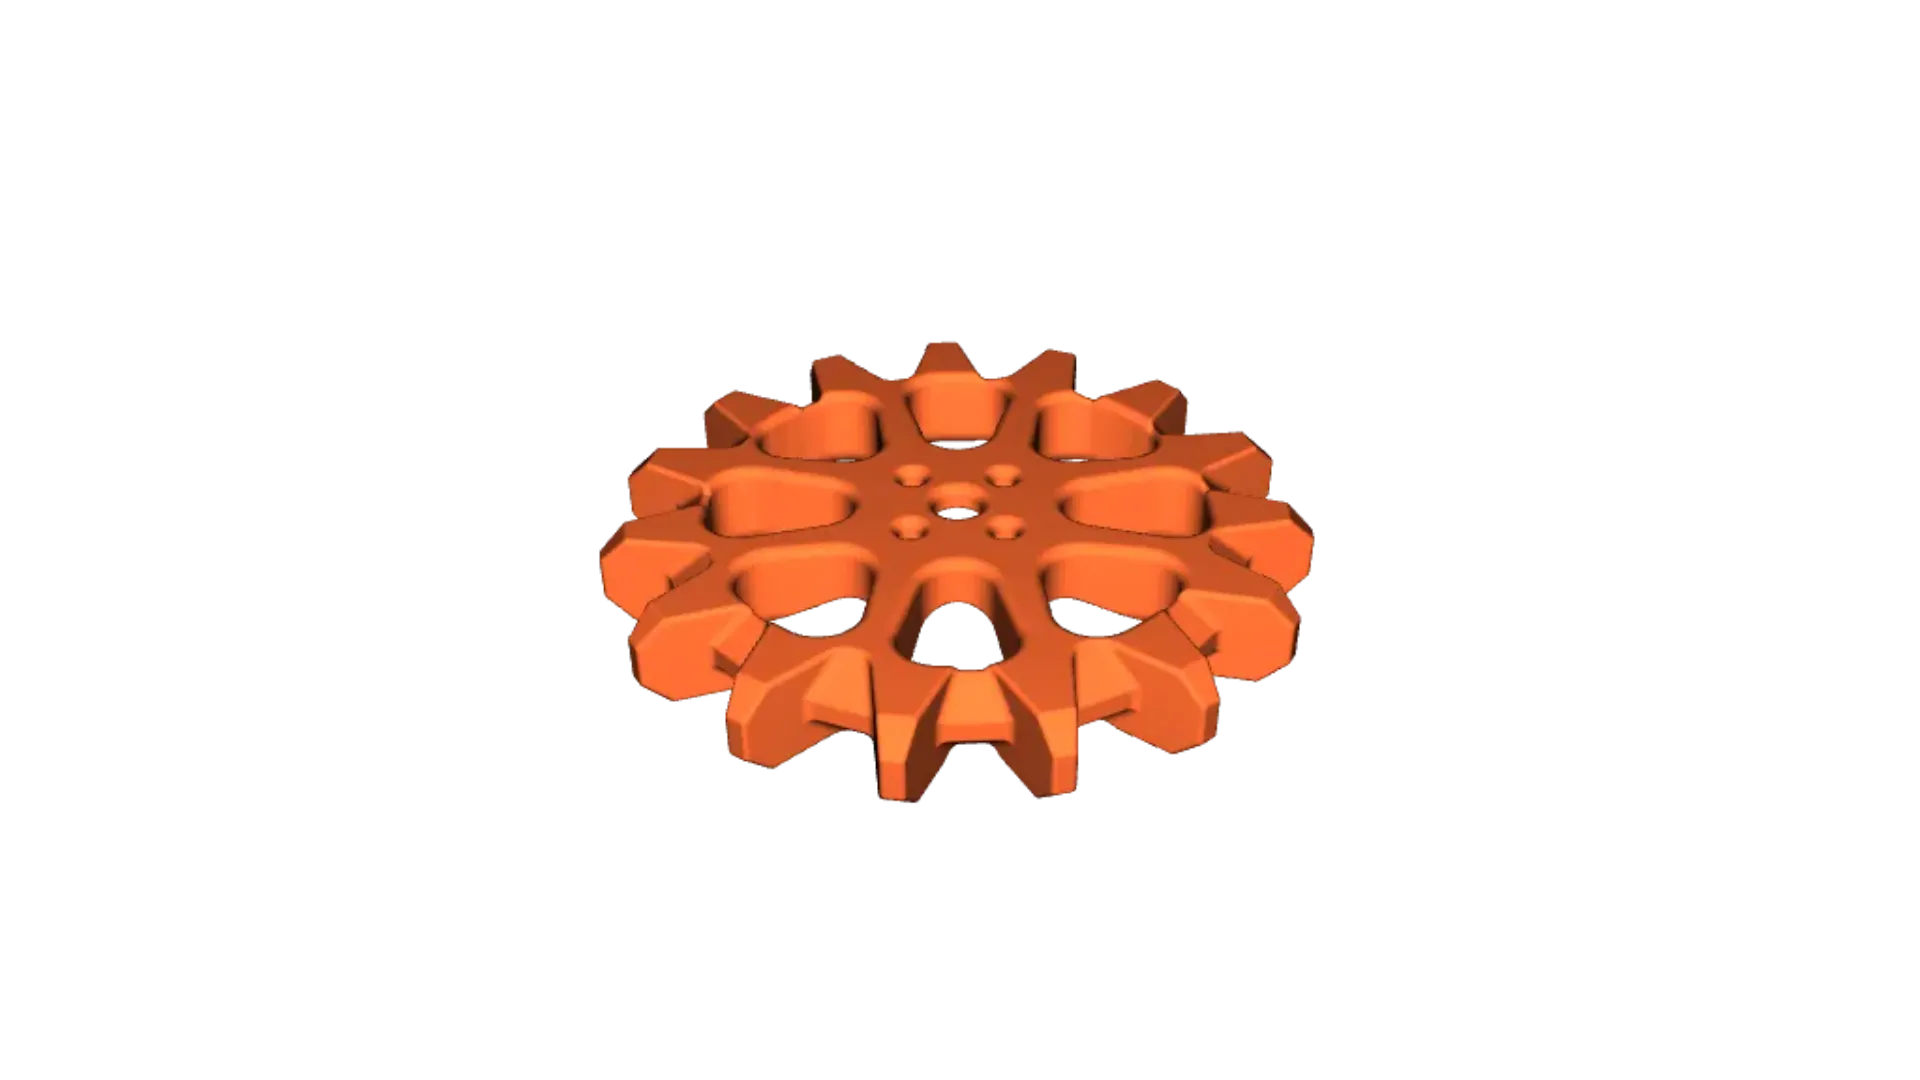
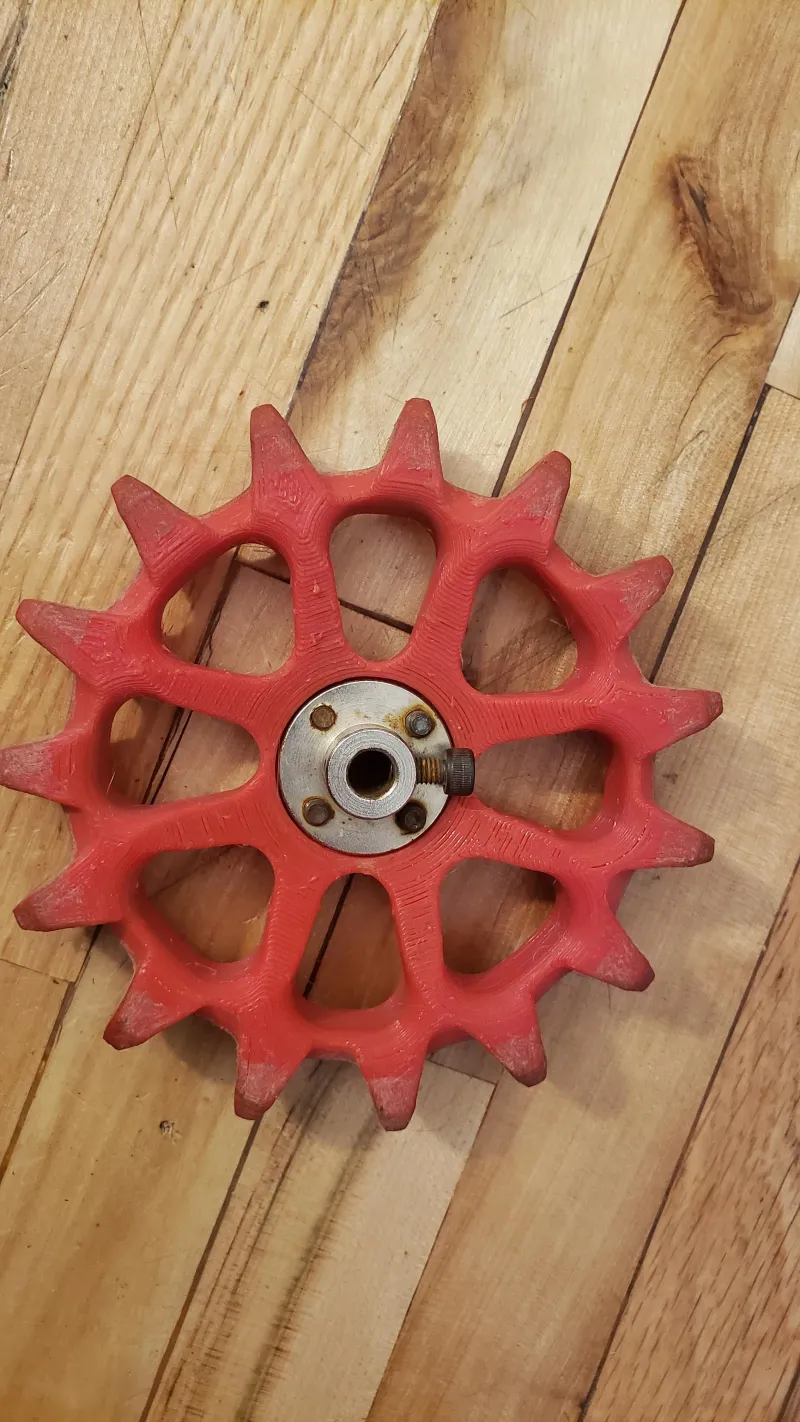
- 4x drive_cog-v2
- 2x side_full-solid-76mm
- 4x supp bearing-ext-v13
- 2x supp GB and bearing-v10
- 2x supp moteur n bearing-v8
- 2x top_plate-enclose-7_5in
- 2x bumper
- 2x helical gear_3_23t_out-v2
- 2x helical gear_3_inp-no_core
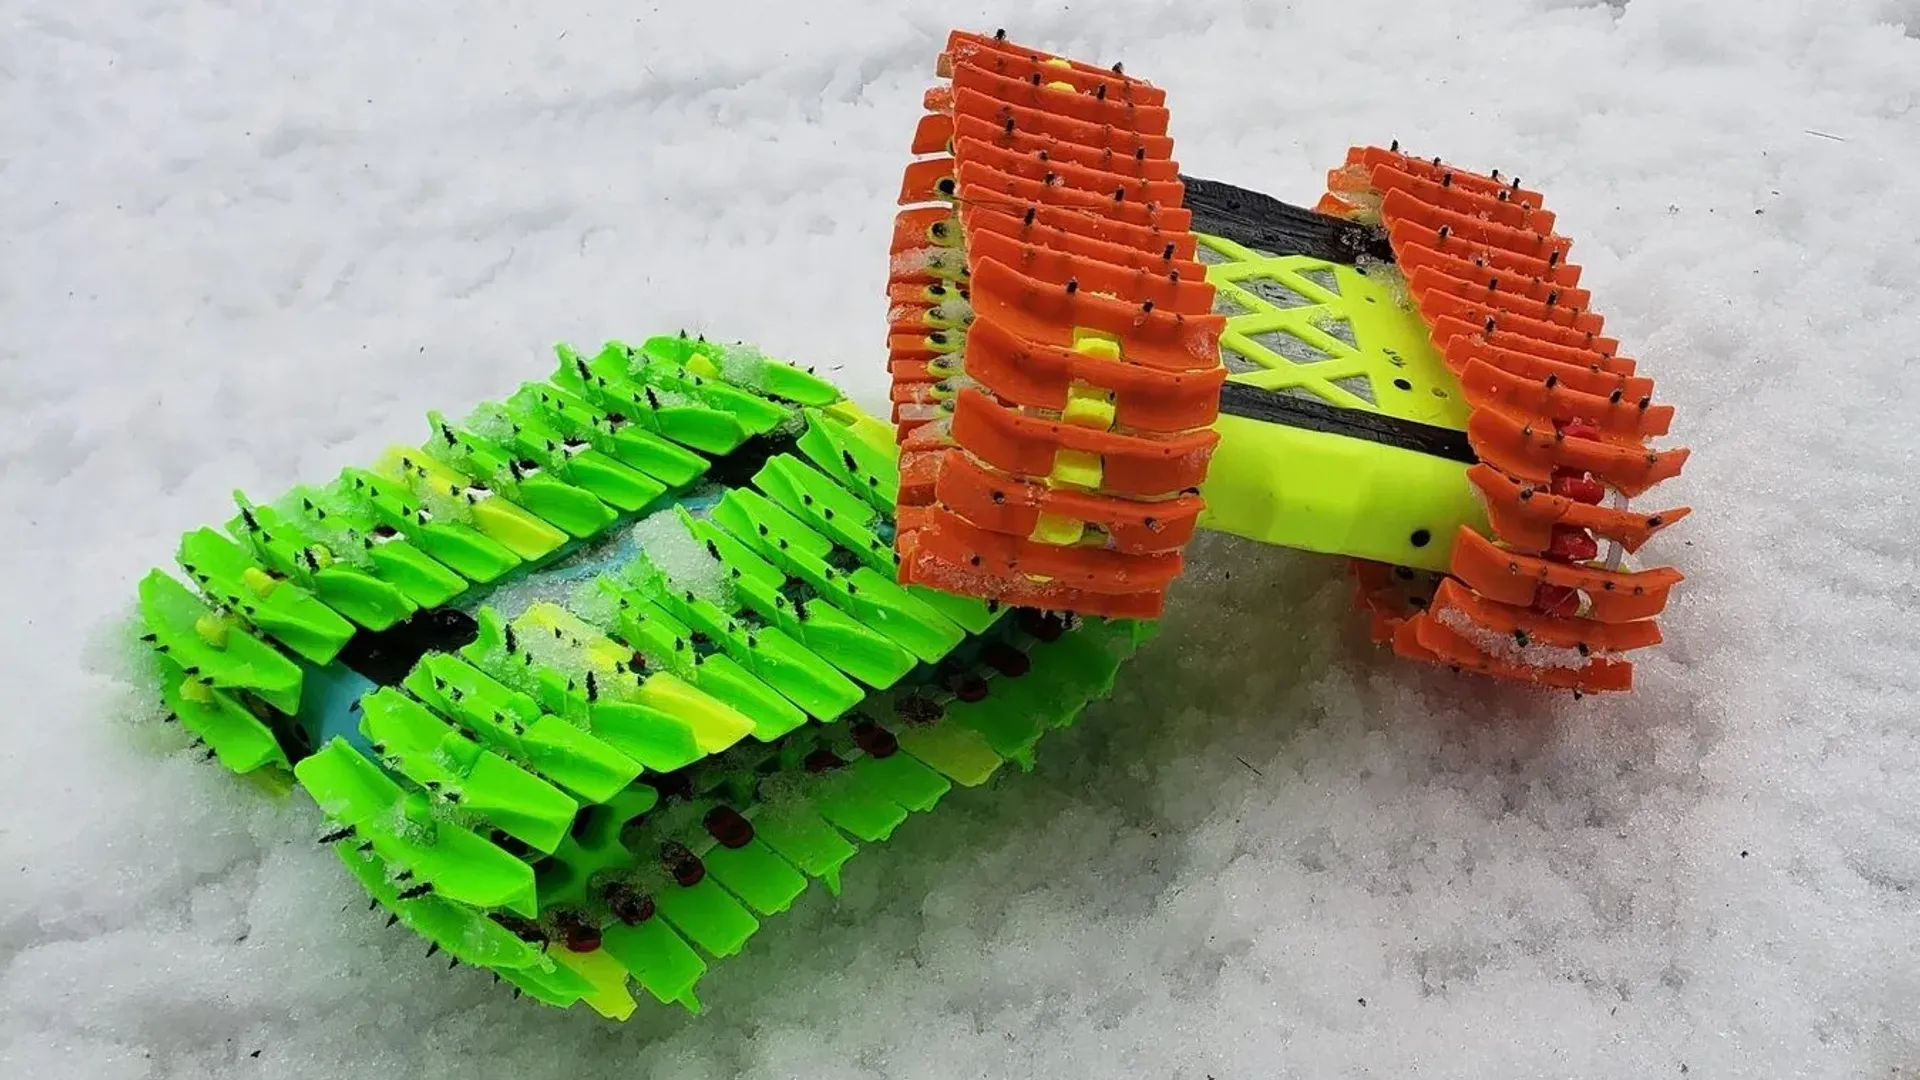
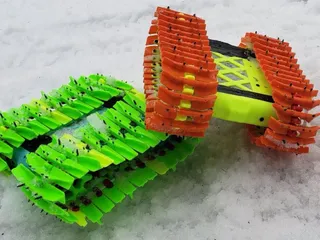
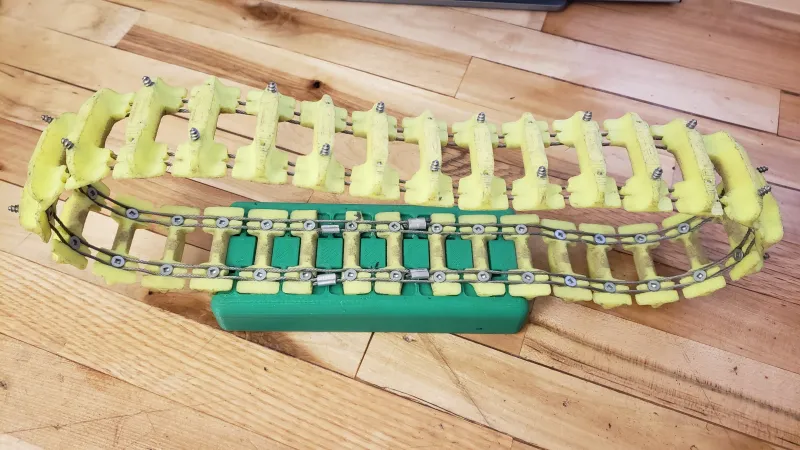
- A set of track. Chose between narrow sumer track or wide snow track:
- Sumer track
- 64x track_link_summer-v4
- 1x jig summer track
- Snow track
- 56x Snow_track_cable_link-WC2
- 8x Snow_track_cable_junction-WC2
- 1x jig_snow_cable_track-WC2
- Sumer track
Optional:
- longer side piece (to make the track tighter)
- 2x side_full-solid-78mm
- Shorter side piece (to make the track looser)
- 2x side_full-solid-74mm
- Compliant wheel ( Print in TPU)
- 4x drive-cog_compliant
Link for parts:
( I put amazon link of product that have the same spec that the one I use in this project. You can probably find some of those part somewhere else for cheaper and in the right quantities for the project)
- 1x stainless steel wire 1/16in and crimp– amazon
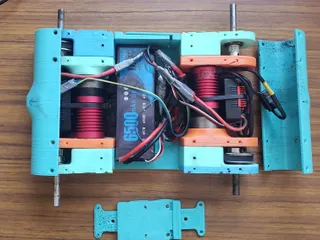
- 2x motor and ESC (540 - 36mm diameter - max length 50mm – 4300KV) – amazon
- 2x Planetary Gearbox (D90 17:1) – amazon aliexpress
- 4x headless set screw m3 12mm - amazon
- 8x Bearing (6200-2RS) – amazon
- 1x 8mm shaft (need to be cut to size (4x 70mm)) – amazon
- 6x 8mm hub – amazon
- 2x 8mm bore gt2 puley - amazon
- 1x Battery(2s or 3s) – amazon
- 1x Rc controller and reciver (chose the one you like. I use radiolink T8S) – amazon
- 64x #6 screw 0.5in length (to assemble the track)
- 16x #6 screw 1.5in length (To assembled the drive pod)
- 28x #6 screw 0.75in length (To assembled the top plate and bumper)
- 36x M5 screw 10mm length (To fix the gear and the wheel on the hub)
- 16x button head m3 screw 10mm length (To fix the gearbox)
- Xx Wire and connector to plug 2 esc in one battery
Tool:
- M5 tap (and a 4mm drill bit)
- M4 tap (and a 3mm drill bit)
- A drill (optional, but its faster then drilling and screwing by hand)
- Metric allen key set
- Square head screwdriver
- Metal file
- Saw with a metal cutting blade
- Plier (to cut the steel wire and crimp)
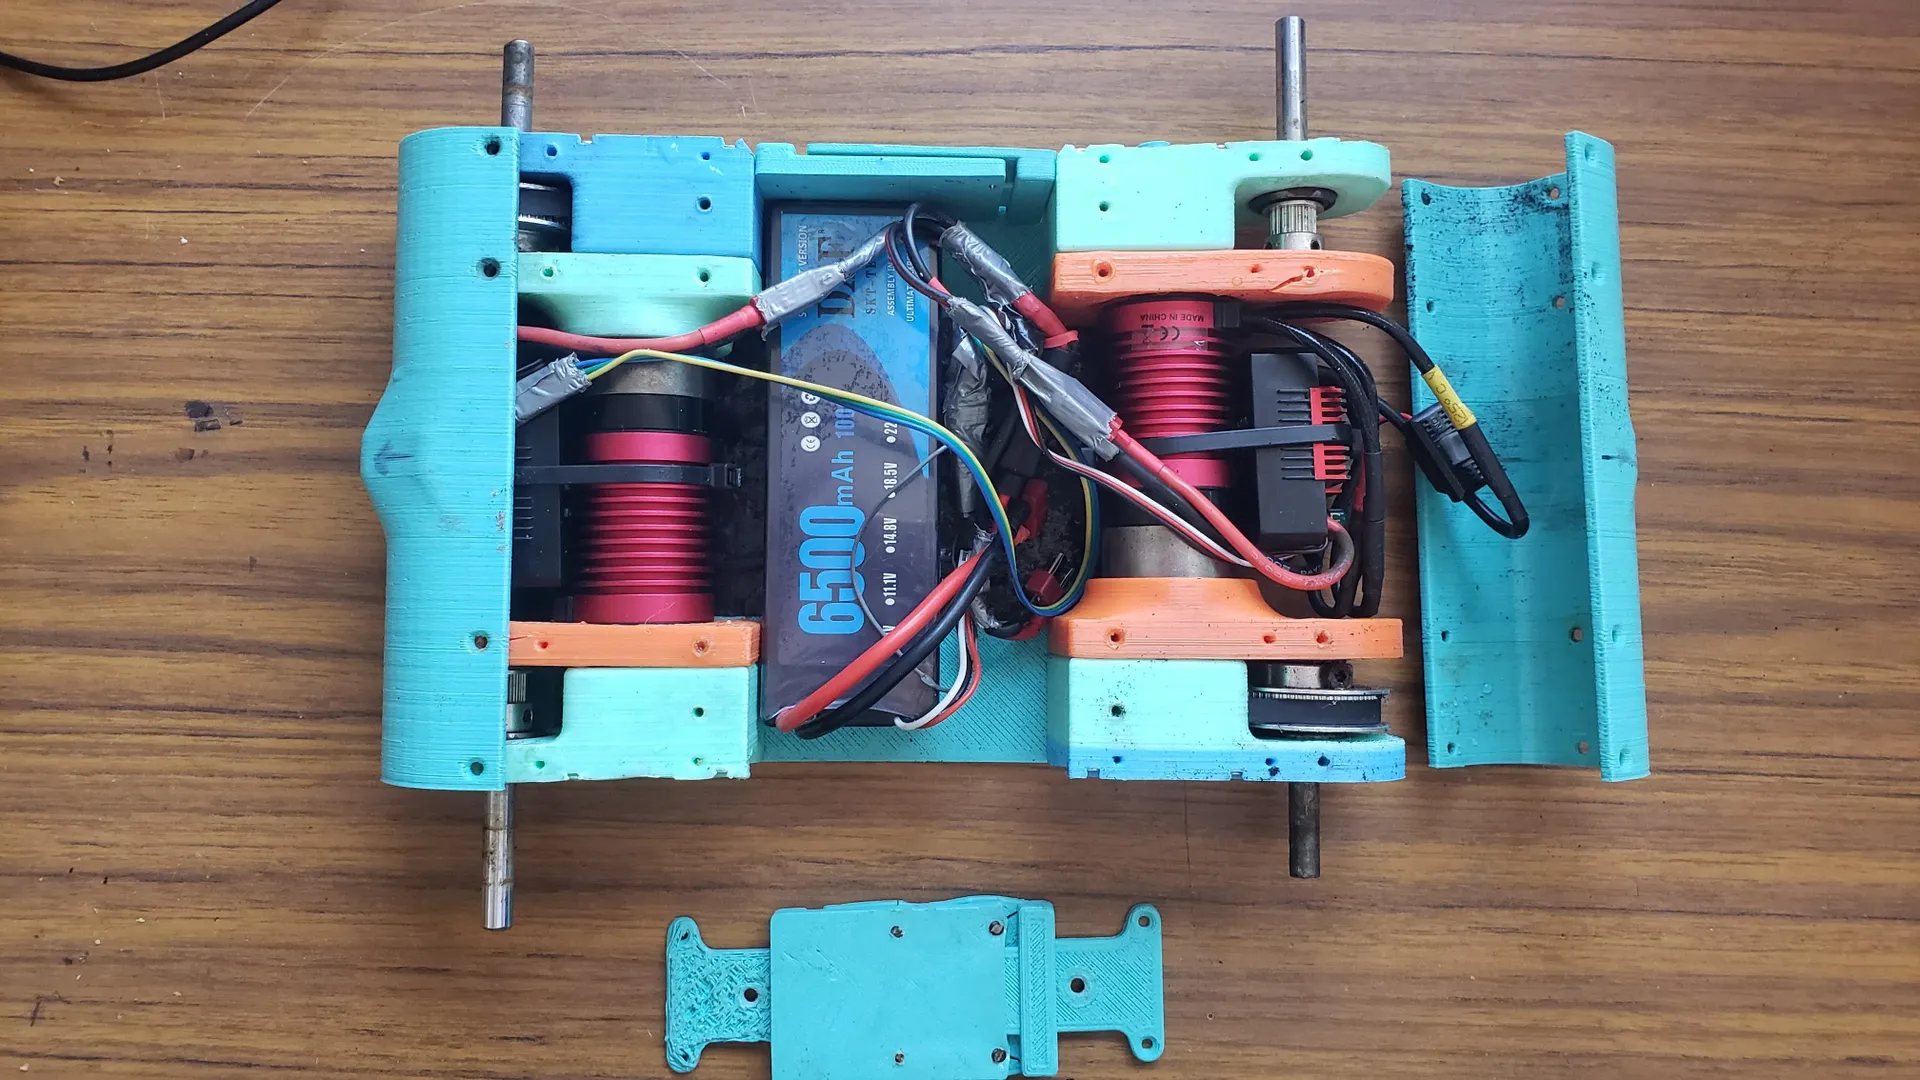
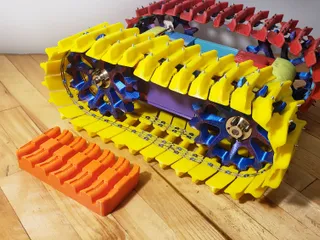
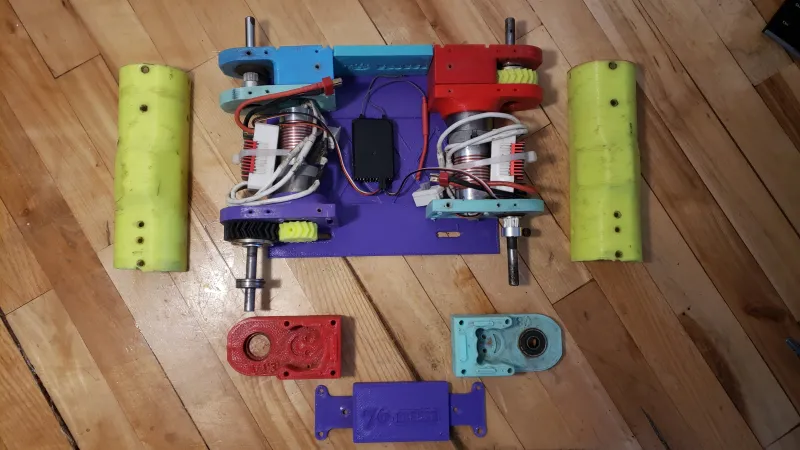
Frame assembly:
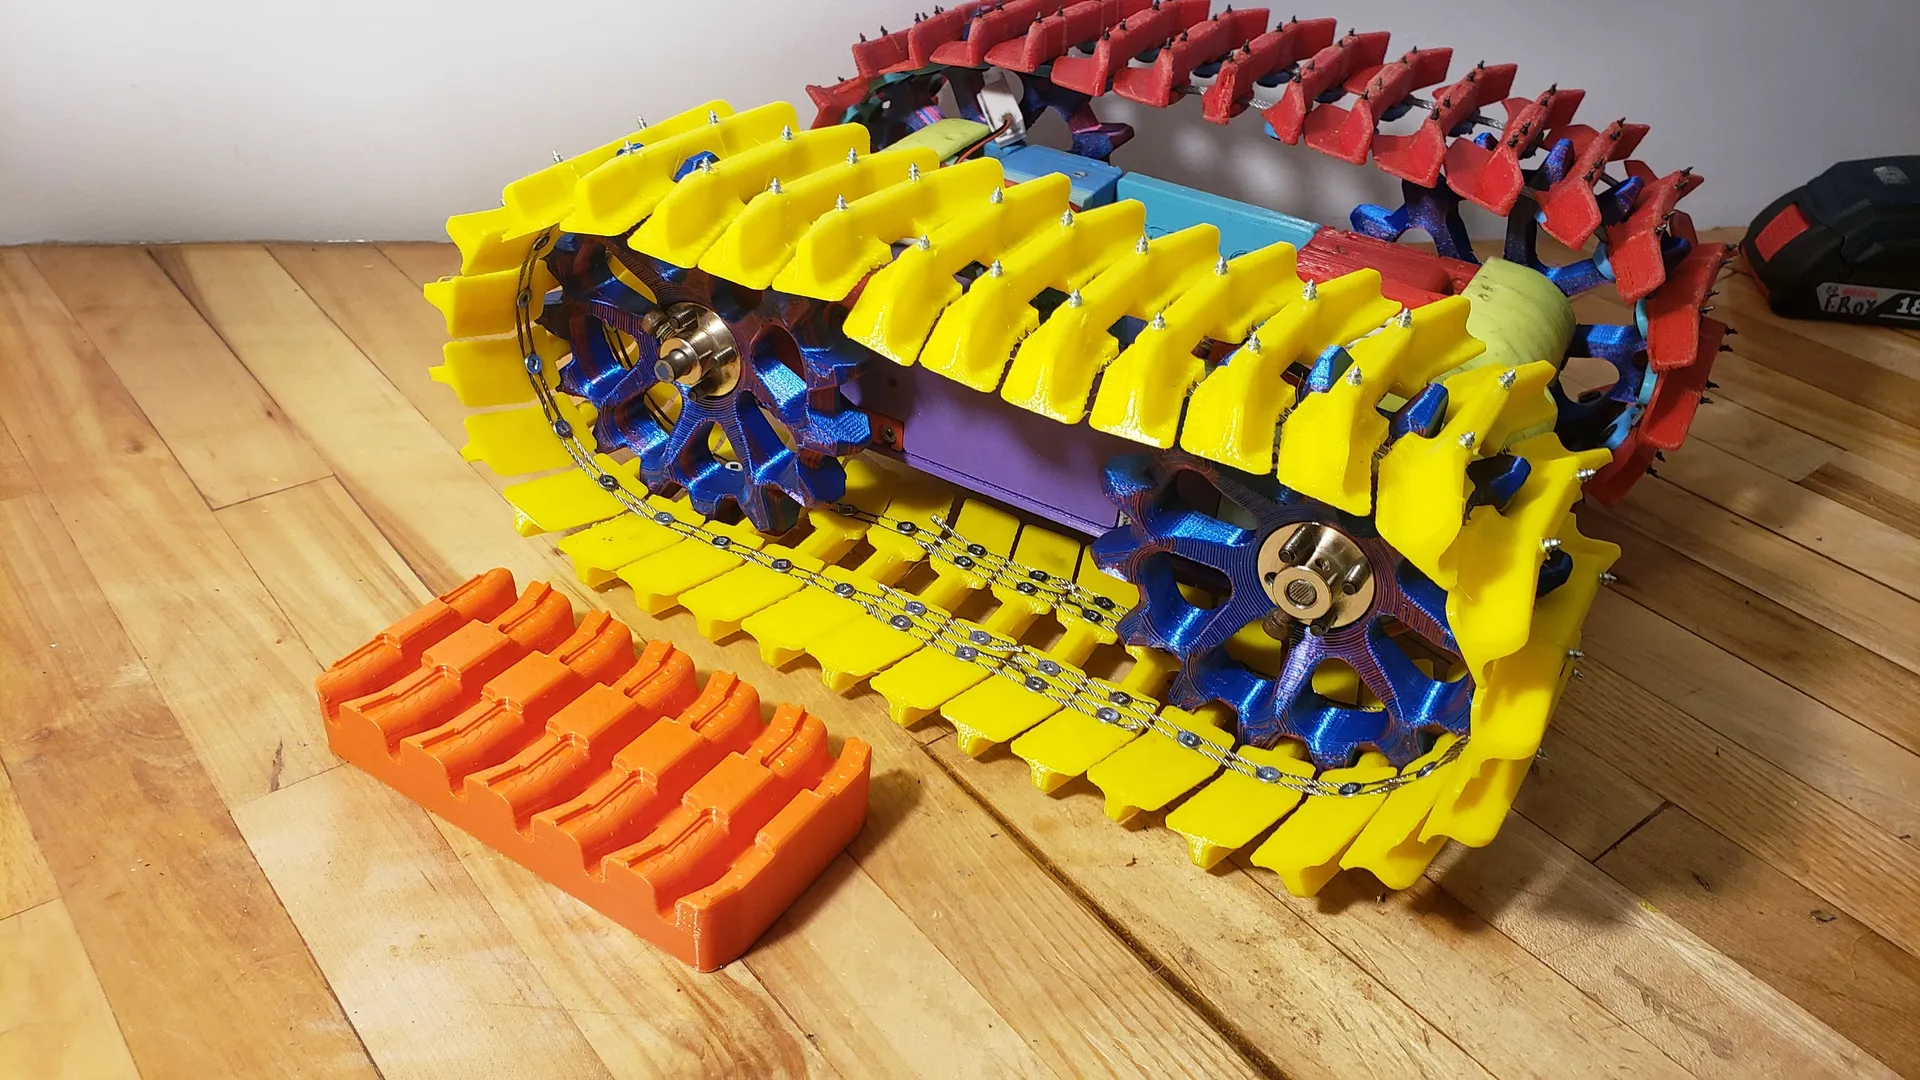
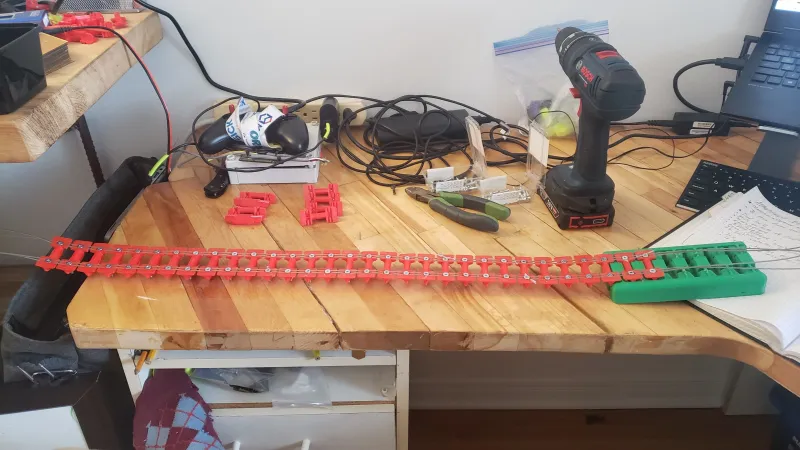
Track assembly:
** The track are dangerous with the 3/4inch screw sticking out. You can make them a little bit safer by only using 1/2inche long screw to assemble the track. In any case, NEVER run this robot close to human or animals please.**
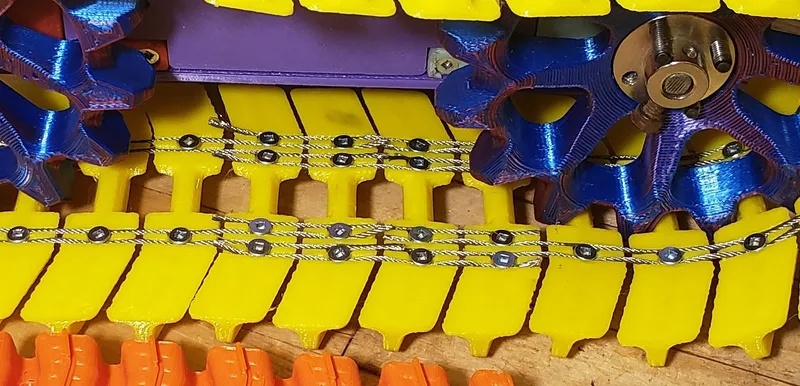
Use the jig and keep the steel wire thight when you screw to make sure all the link have a precise spacing.
Track Junction for summer track:
You need to cut 4 of the link to make space for the crimp as see in the next picture.
Use the assembly jig to make sure that the link close to the junction have the same pitch as all the other link. Wen i make the junction i keep a good extra length of steel wire to held everything in place will i crimp. I then cut the extra length of cable close to the crimp. (This step can be hard, i will try to get rid of the crimp with some special junction link in the next upgrade)
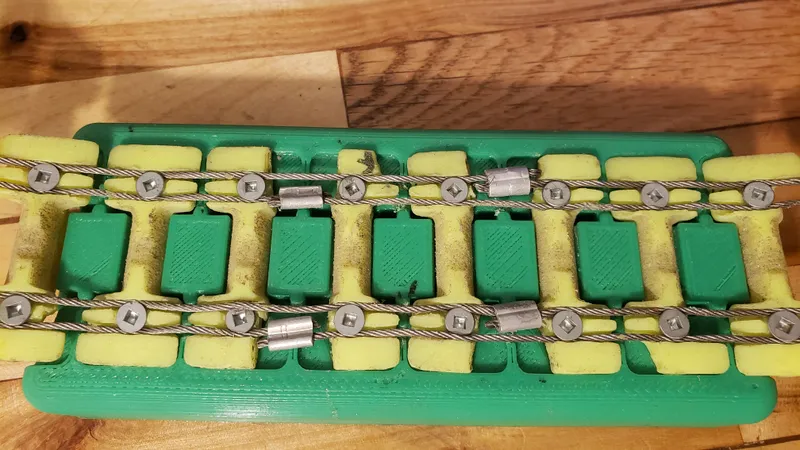
Track Junction for new snow cable track:
The new snow track now uses the same pinch concept as the summer track, but does not require metal crimping to close the track loop. When assembling the track, use 2 x ''Snow_track_cable_junction-WC2'' links at the beginning and 2 x ''Snow_track_cable_junction-WC2'' links at the end. Then close the loop by joining the 4 ''Snow_track_cable_junction-WC2'' link with 4 small steel wires.
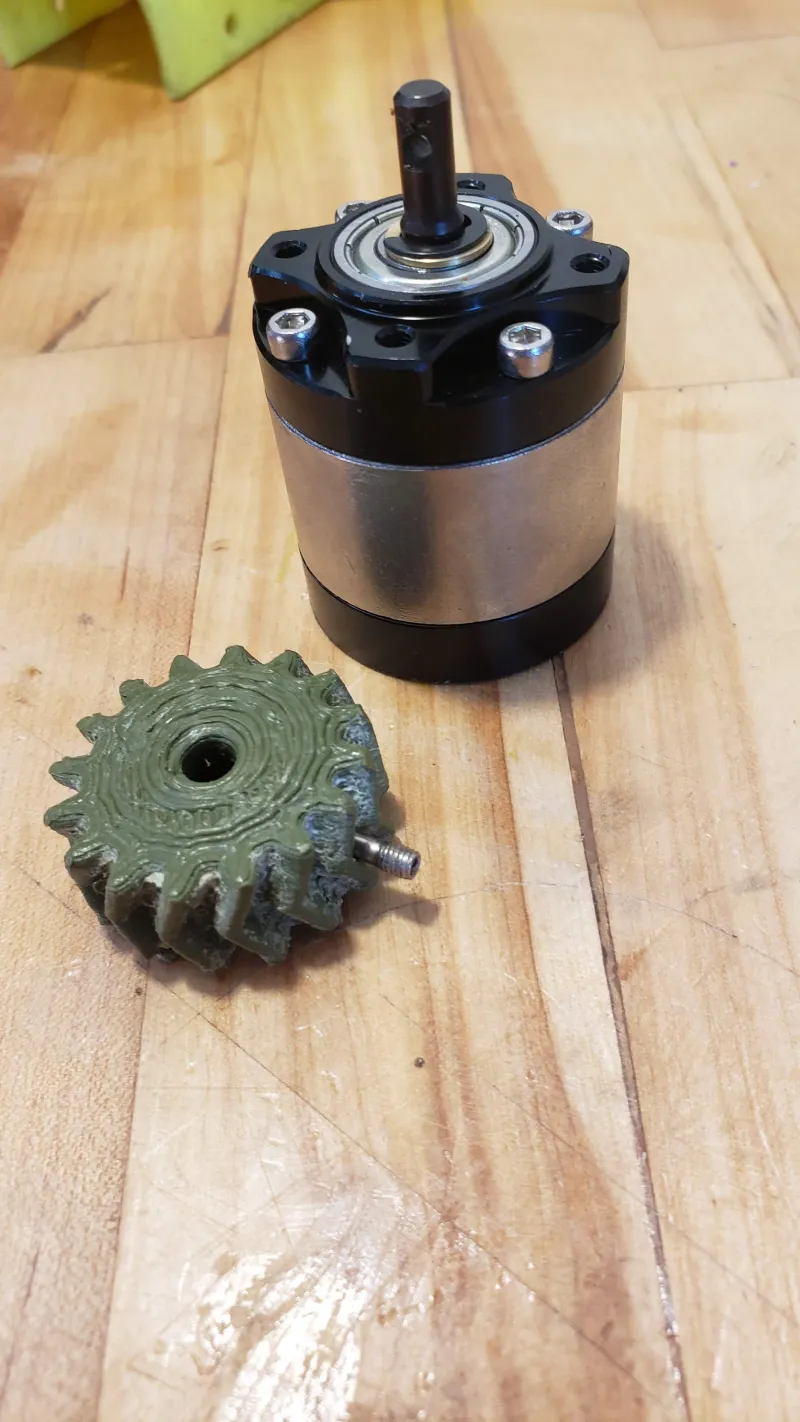
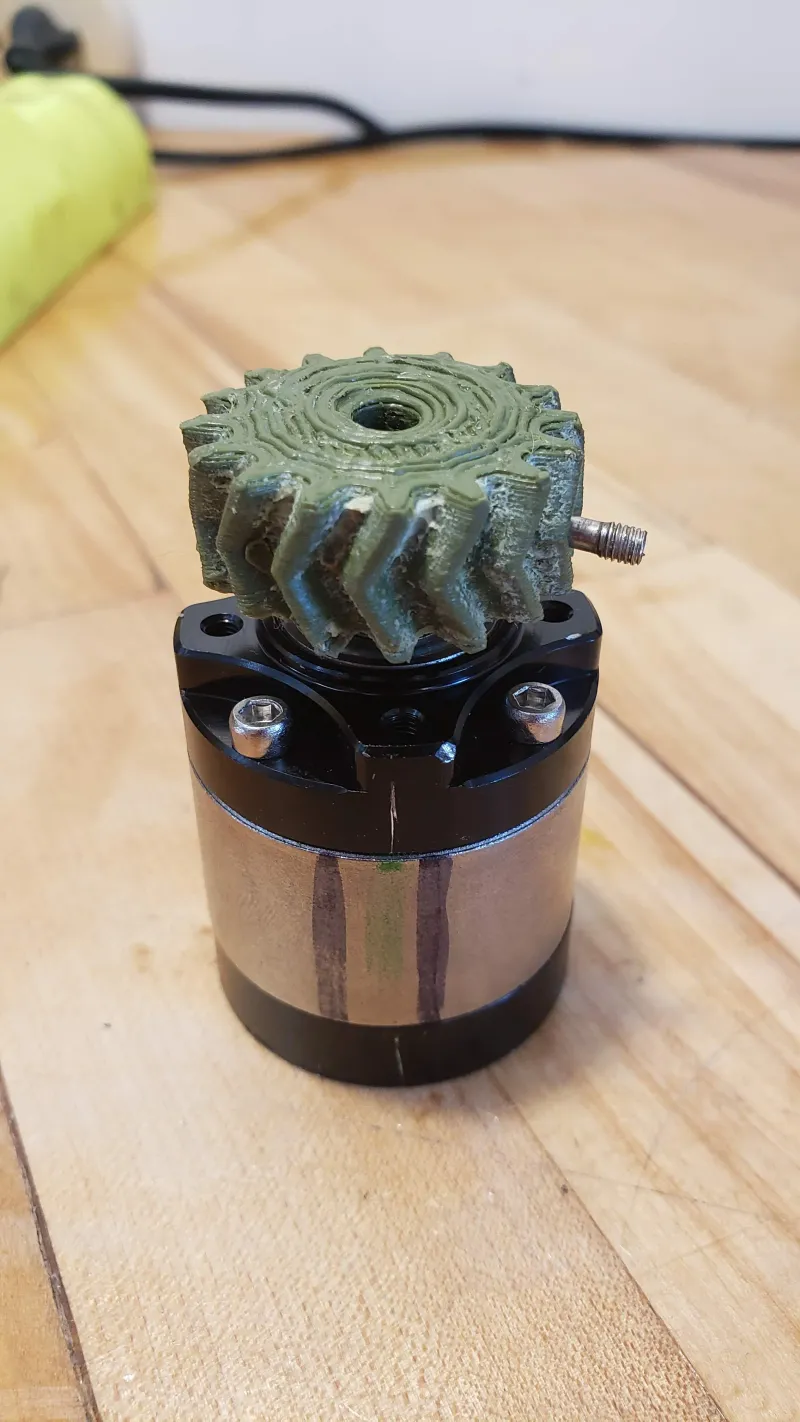
Gear and drive pod assembly:
To avoid the hub comming loose, I oversized an tapped the set screw hole to m4 and I used m4 flat tip stainles steel set screw and some lock tight. I also use a metal file to make a flat spot where the tip of the set screw touche the shaft.
The four(4) screw clearence hole in the hub also need to be drill and tap to M5 tread.
Then, fix the hub to the shaft.
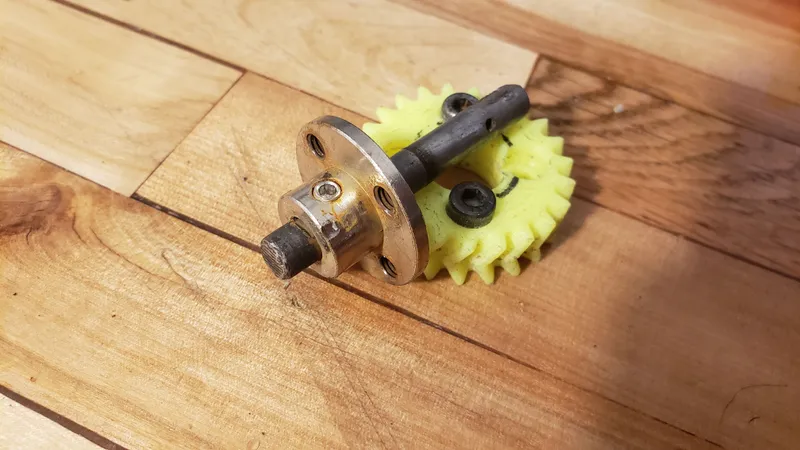
Fix the big gear to the hub. Then, slide the shaft ofthe big gear in the bearing and the small gear on the gearbox shaft at the same time.
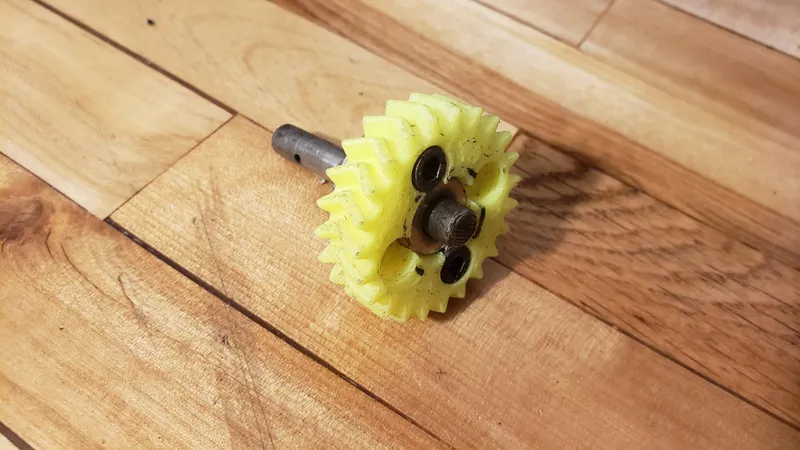
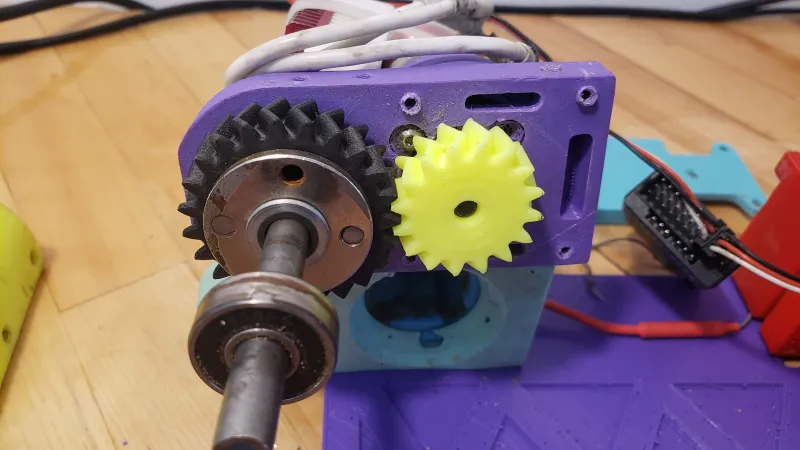
More picture on how to fix the small gear to the gearbox shaft using the headless screw.
The drive pod assembly should end up looking like this.

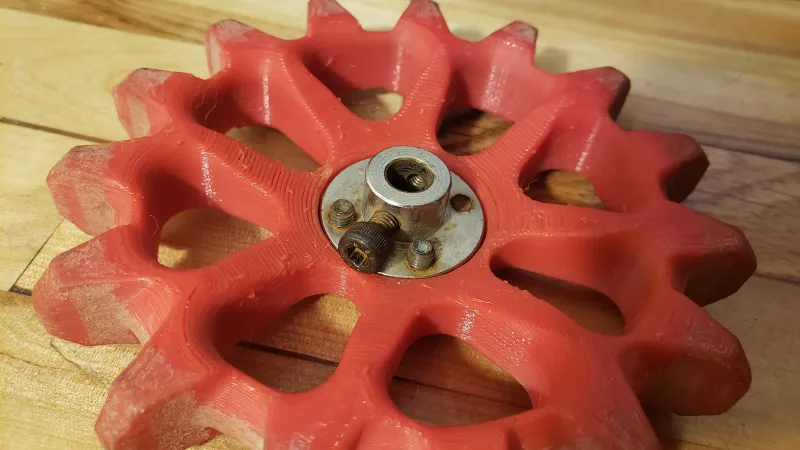
Wheel hub modification:
To avoid the hub comming loose, I oversized an tapped the set screw hole to m5 and I used m5 socket head screw and some lock tight. I also use a metal file to make a flat spot on the shaft where the tip of the screw will touch.
The four(4) screw clearence hole in the hub also need to be drill and tap to M5 tread.
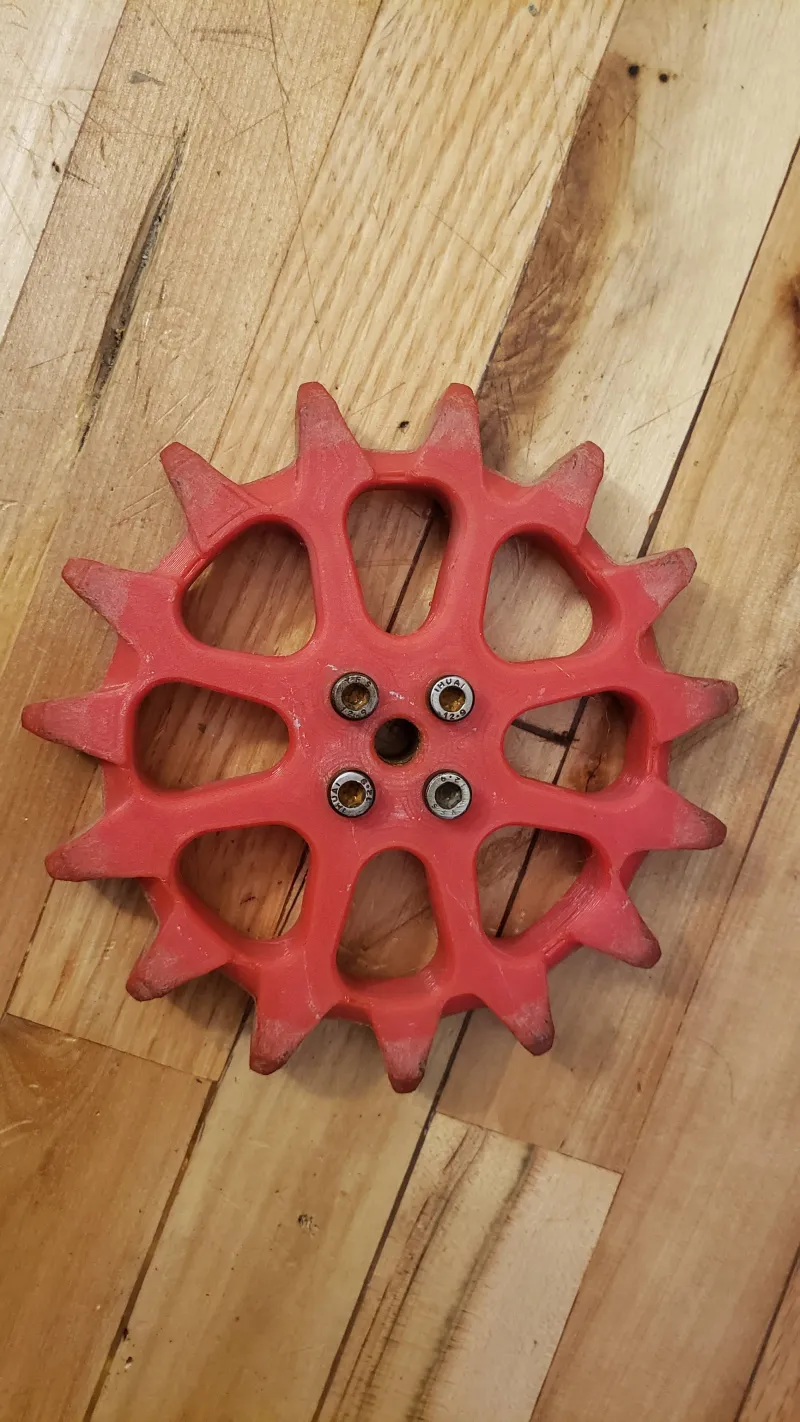
Wheel assembly with the hub
wheel fine ajustment:
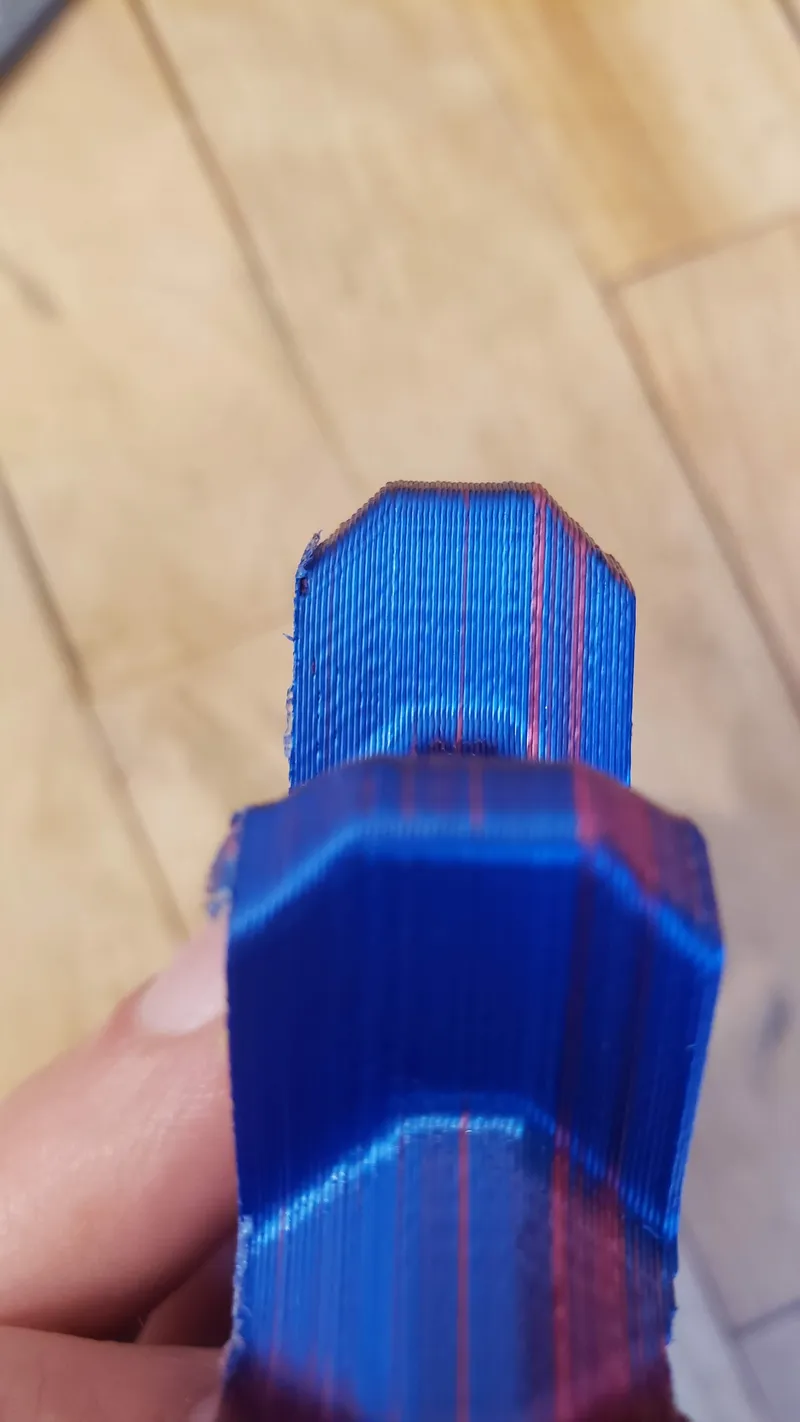
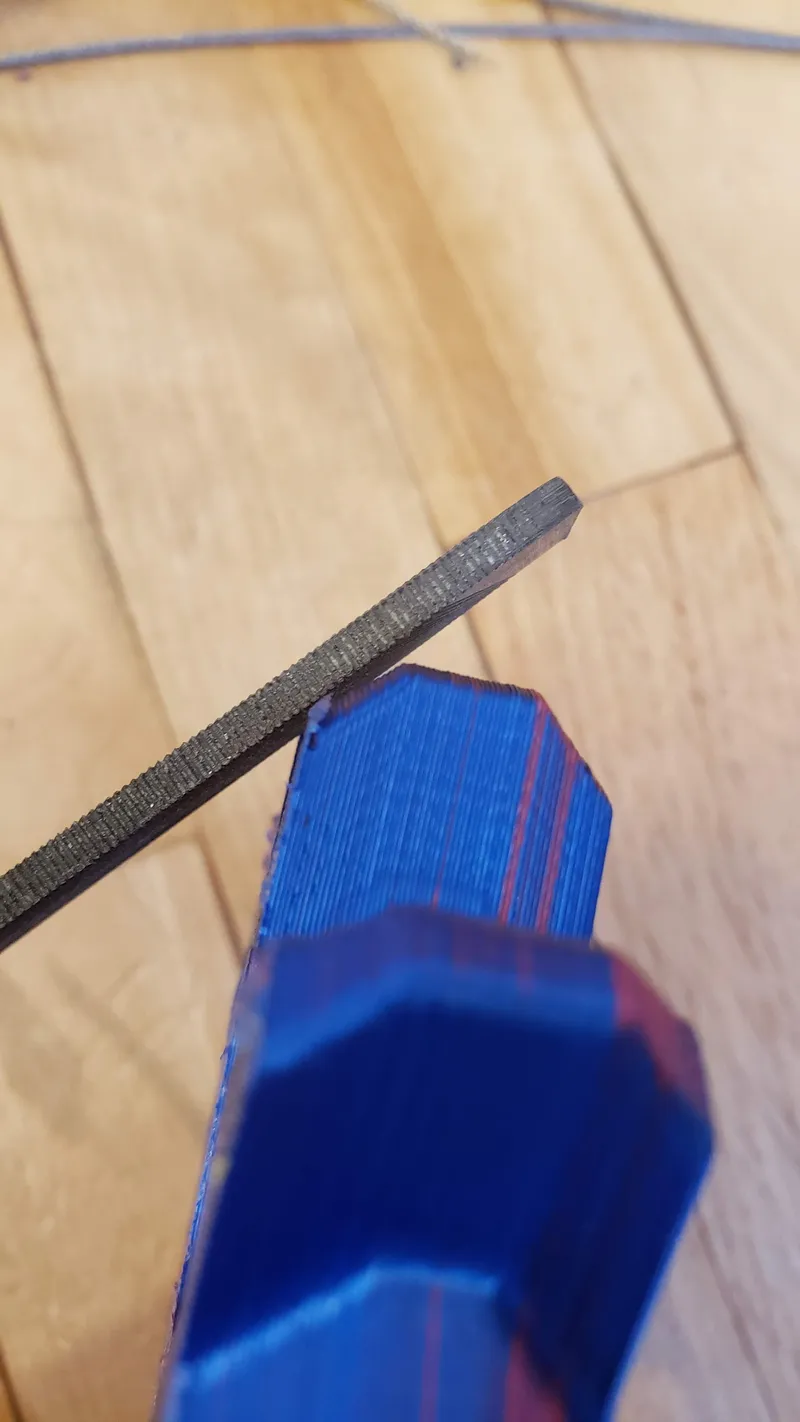
If the track dont run smootly, it sometime cause by little bure on the cog wheel. (elephant foot in printing). I use a file to remove the bure.
If the track look too tight or too loose
Usealy, the track run better when they are loose. Il the track look really tihght after the first assembly, try to manually make them do a couple of turn.
** Warning, next step can be dangerous if not executed carefully.**
If the tracks turn manually but still look tight, jack the robot in the air and clamp it on a desk in order to make the track turn with the motor witout having the track touch the ground. Use the controller to make the track turn a various speed forward and backward. That usally make the track ‘’wear in place'' and help them run smootly. Never hold the robot in your hand and make sure it clamp firmly when doing this. The inertia of the track can make the robot move event if they dont touch the ground. The track are very dangerous when spinnig (Especialy with the screw sticking out.) They can damage thing and cause cause serious injury.
If the track are still to tight or running ruff after all this, you can swap the ‘’side_full-solid-76mm'' parts by the shorter ‘’side_full-solid-74mm'' part in the optional parts. You may need to trim the top and bottom plate a little for them to fit cleanly with the shorter side plate.
If you have any question or need precision on some assembly step, feel free to to ask in the comment section. It help me to know where i should improve the assembly instruction.
Tags
Model origin
The author marked this model as their own original creation.