Y Axis Linear Rails Conversion for Sovol SV04

Description
PDFAbout
This is still a work in progress so any feedback and/or remixes that improve it will be highly appreciated.
It should fit similar machines with little to no modification, as long as the base plate for the bed is the same and the Y endstop is in more or less the same spot. I think it'll fit the SV01 and some old Creality machines for instance. Please let me know whether or not it works with your non-SV04 or post a remix if it doesn't.
Theory
Most Y axis linear rails conversions I've seen for similar machines place the rails on each side of the middle aluminum extrusion (where the wheels run in the stock configuration). The potential issue I see in that approach is that even a slight Z deviation along the rails will be greatly amplified when the rails are that close together. I'd be very interested in any thoughts on whether this is worth considering at all. The main downside of my approach is that it weighs more.
BOM
- 2x 500-520mm MGN12 rails (longer ones will work as well but might look silly)
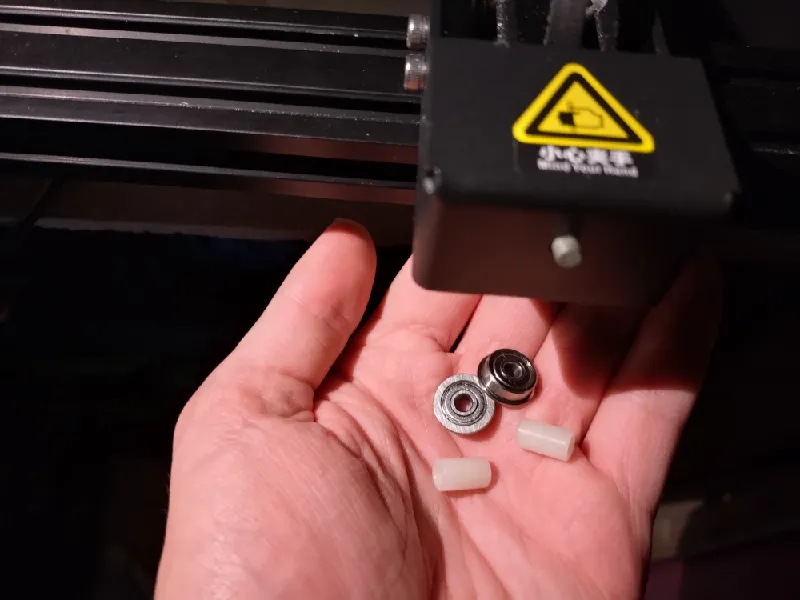
- 4x MGN12 blocks
- Enough bolts and T nuts to hold down the rails (you might get away with 4 but I'd suggest 6 or 8)
- 6x M5x12mm bolts (stock bolts may be too long)
- 6x M5 nuts (stock nuts should work)
- 3x M5 washers (stock washers should work)
- 16x M3x12mm bolts
- 310g of PETG (other filaments will probably work as well)
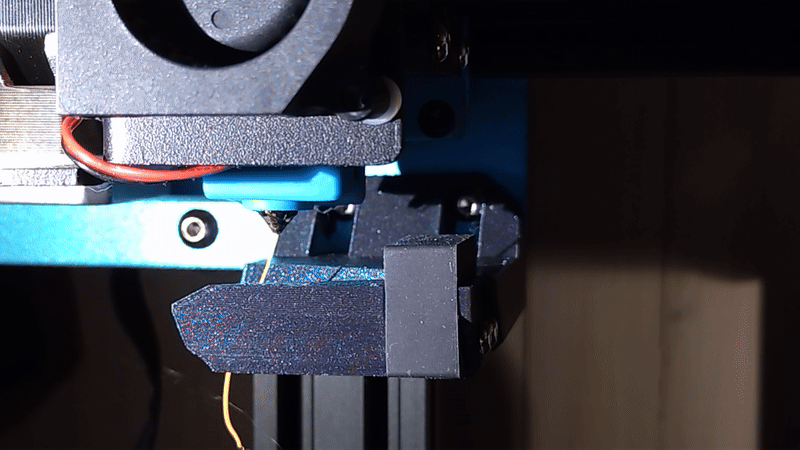
- Flatter nozzle cleaners
Assembly
- Print the thing. (Unless you have another relatively big machine, you'll wanna make sure it looks ok before proceeding.)
- Replace stock waste buckets with something like this. Stock buckets are violently incompatible with this upgrade.
- Remove the leveling screws and the heated bed. (This step is theoretically optional but I doubt you'll save any time by skipping it.)
- (Optional, can be done later.) Detach the Y axis aluminum extrusion, making sure to loosen the little screw with the T nut from the back. Don't forget to detach the motor and endstop cables if you want to move the entire Y axis freely.
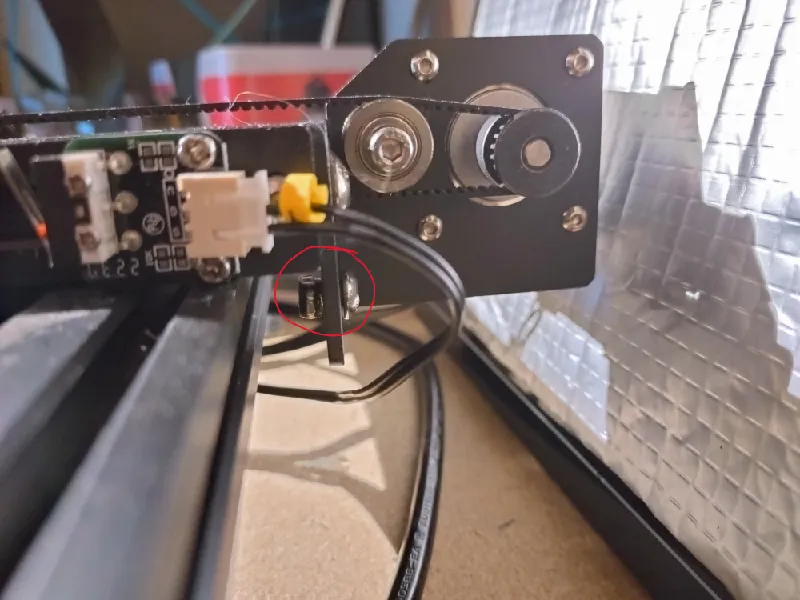
- Remove the Y belt tensioner, taking care to catch all the little bits that fall out.
- Loosen the belt from the motor gear to get enough slack or just detach it from the metal plate. (I did the former.)
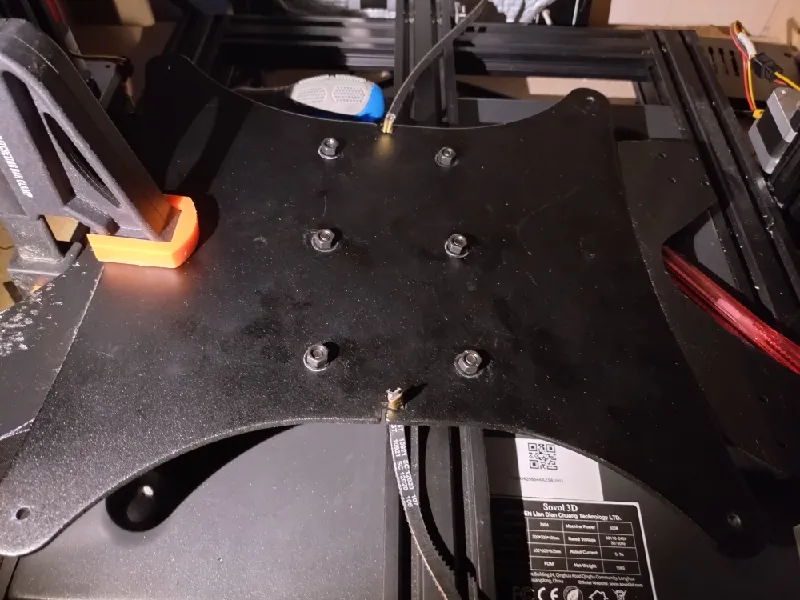
- Insert the M5 bolts into the mounting plate from below and place the mounting plate behind the metal plate (under the belt if the belt is still attached). (If the holes aren't tight enough to hold the bolts in place, I guess you'll have to insert them one by one later on.)
- Push the metal plate into the mounting plate. This might require some gentle persuasion. It should be a tight fit but if you can't get it in, you may have to sand and/or file down the mounting plate a bit.
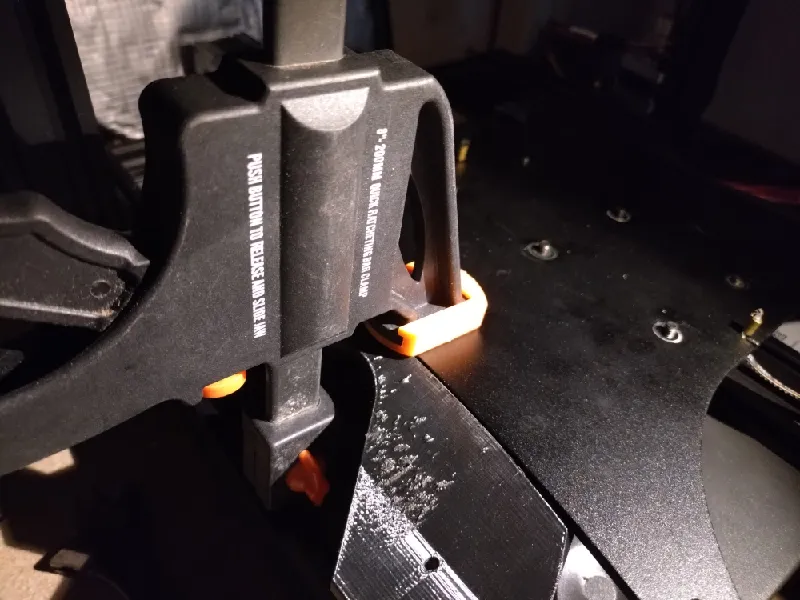
- Attach the nuts, using washers on the larger holes.
- Grease your rails if you haven't already.
- Attach the rails to the inner tracks of the outer aluminum profiles using bolts and T nuts but don't tighten the bolts yet.
- Add the blocks if they aren't already on the rails.
- Attach the mounting plate to the blocks using the M3x12mm bolts. Don't tighten them yet.
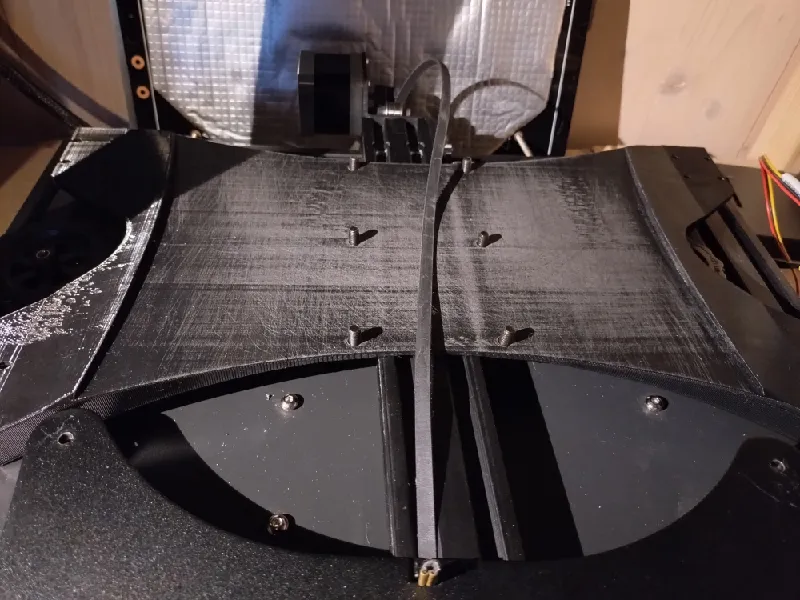
- If your belt is still attached, put it back on the motor gear and reassemble the tightener so the belt won't catch on anything when you move the carriage.
- Be careful not to run the blocks too far outside the rails or you may lose bearings.
Tighten all the bolts previously left loose while moving the carriage back and forth. My intuition tells me it's good to tighten one side down completely before doing the other one but please correct me if you actually know what you're talking about. Make sure the rails are aligned to the back of the rear blocks when the mounting plate hits the endstop.
I found that my SV04 is so uneven that I had to leave some of the screws loose at one end of one of the rails in order to allow somewhat smooth motion (see Known Issues below). I also loosened the corner screws of the base frame and tightened them while moving the Y carriage back and forth. Not sure if that helped. - Double check that you actually reach the endstop. I can't imagine this being an issue when upgrading a stock SV04 but this is important for untested machines.
Make sure both the motor and the endstop are connected. Power on, home Y and run it back and forth to make sure everything works. If you need to home Z before moving, just trigger the probe with a hard object to avoid collisions. - Reassemble everything that's left.
Klipper Config
You paid for the entire bed - why not use it?
I intentionally placed the endstop trigger 17mm ahead of where it's supposed to be. This allows the Y axis to travel all the way to the front of the bed before it triggers. However, this means that the firmware won't let you anywhere near the back of the bed. This is an easy fix if you're running Klipper (which, in my opinion, you should). Everything will still work fine on Marlin but I don't know how to get that extra print area and it may feel a bit stupid to offset the entire Y axis like that for no reason.
If you're new to Klipper, don't worry, this is an excellent first step to modifying config files. Here's how to extend the Y axis:
- Open printer.cfg.
- In the [stepper_y] section, increase position_max to something like 335. Do not set your position straight to 335 after restart!
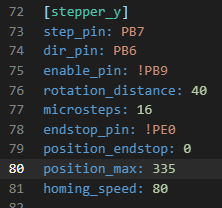
- Save and restart.
- Home and move Y to about 300. Carefully watching the blocks, move it in smaller and smaller increments until you are as far out as you'd be comfortable with at actual printing speeds.
- Change position_max under [stepper_y] to your current Y position (in my case 327).
- Save and restart.
Don't forget to update your printer profiles to match.
Please note that you have now extended the Y axis a little bit beyond the physical bed. While this requires some caution not to place objects too close to the edges, it also means that you are free to print overhangs that extend a little bit beyond the physical bed.
Known Issues
- The base frame of my SV04 seems a bit askew, which causes friction in one end of the Y axis. Maybe make the mounting plate more flexible?
- There's nothing physically preventing the blocks from going too far forward, potentially causing them to drop bearings. Easy fix but I haven't bothered yet since I'm not really worried about it going that far.
- I haven't bothered updating the screw positions in Klipper yet. Leveling works anyway but this should be another easy fix.
- I haven't looked into extending the Y axis in Marlin and I don't really plan on doing so. That said, if you provide instructions I'll gladly link to or include them.
Tags
Model origin
The author marked this model as their own original creation.


