Parametric Foldable Bottle Crate
Description
PDFI wanted to have a reusable beer crate that could be easily folded to be as compact as possible when empty and set it up to be parametric to suit every need.
In this description, I will guide you on how to make it your own, give you a few tips for printing it properly and show you how to assemble the final crate.
Design
In addition to the STL files of the crate (more configurations available in the zipped folder) you can find the .f3d file if you want to fully personalize your crate in Fusion 360. Of course, this is not a necessary step and if you are using the provided STLs, you can jump directly to the Setting & Printing part.
Parametric Values
The parameters in Fusion can be found under Design > Modify > Change Parameters.
A few key parameters are highlighted under the “Favourites” section, and all other important parameters should be commented as well.
For the moment, I will only describe the highlighted parameters that should be sufficient to easily personalise your crate.
If you are comfortable with Fusion 360 and want to go further, a PDF file attached will give you more information on the other parameters.
- NbBottle
- This parameter is fairly obvious: here, you can set the number of bottles/cans you want in your crate.
- BottleDiam
- Here, you can specify the diameter of the bottles/cans you are using. You can also add some extra room with the BottleClearance parameter. Both of them combined will give you the distance between each panel.

- BottleHeight
- This is the total height of a bottle/can. It is used to calculate the height of the panels including the middle one. After changing this parameter, make sure that the MiddlePanelHeight parameter is still within your bed dimensions!
- Clearance
- Here you can set up the space you want between each piece for them to move freely it will depend of your printer quality and filament used. A second parameter “TightClearance” is used when the pieces are supposed to be fixed after assembly and is arbitrarily set to “Clearance/2”. If you are not sure about your clearance, I would recommend splitting the bodies (either in Fusion or your slicer of choice) and test-print, with the intended filament, some of the key mechanical parts to find the right spot.
3 Versions
Hexagons
As seen in the thumbnail, three (3) versions of this crate are available. By default, when opening the .f3d file, the Hexagons version will display. The hexagon pattern is applied to each body in a parametric manner by using a “Split – Extrude – Combine” method. You can easily identify these steps in the timeline as the “Extrude” part is the only grouped feature.
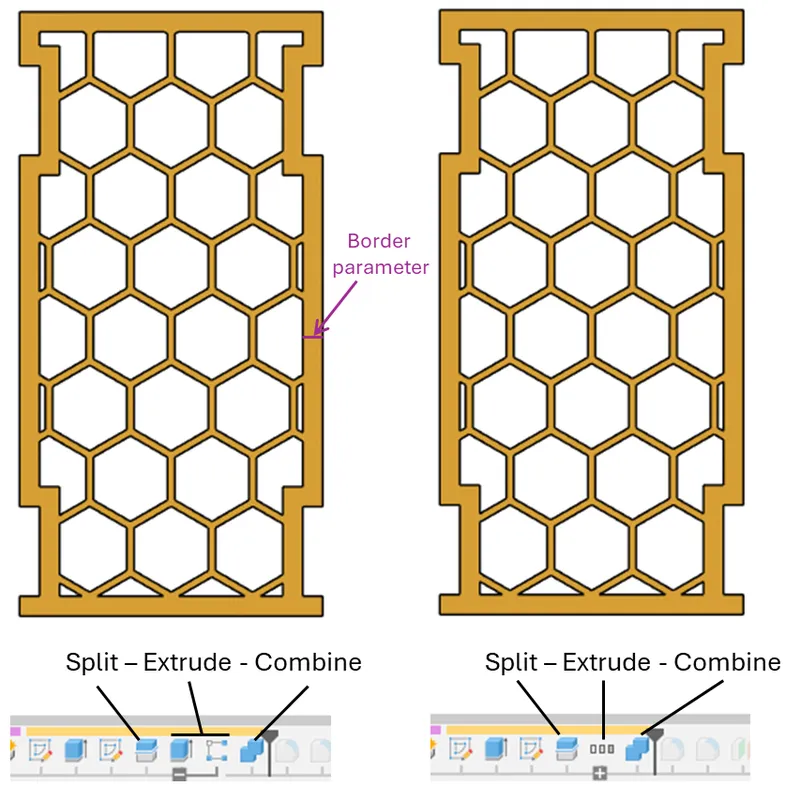
It is also worth mentioning that you can modify the size of the “Border” in the parameters table.
Embossed
The embossing plates on both “Front” panels are added in the last three (3) hidden steps behind the marker. The actual embossing can be done either in Fusion or in your slicer.
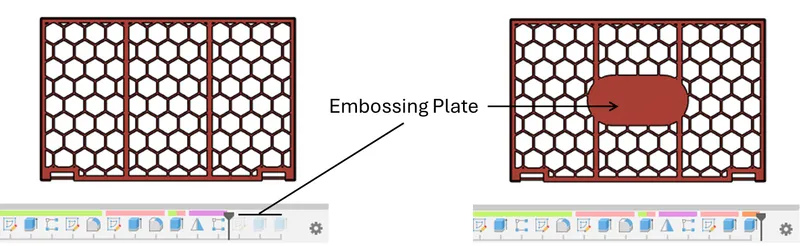
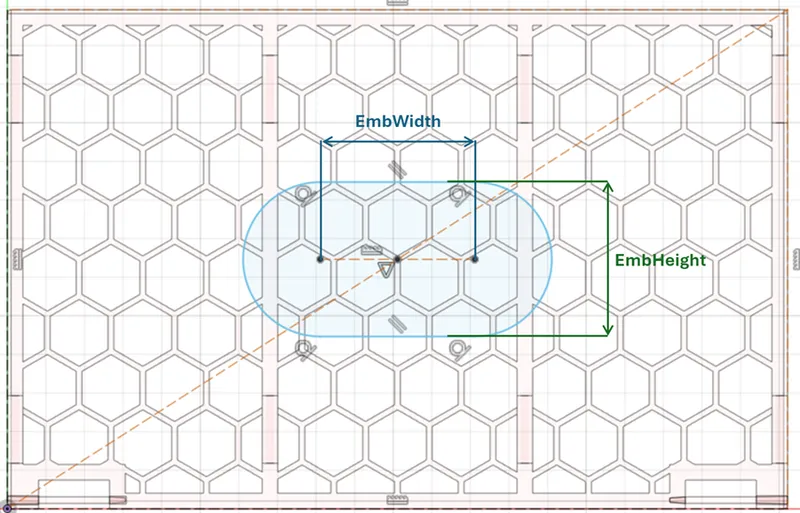
Here as well, you can modify the Embossing Plate dimensions using the parameters “EmbHeight” and “EmbWidth” as shown below:
Solid
Finally, the “Solid” version of the crate can be obtained by deleting the “Extrude” steps of the hexagon pattern. A selection set has been created to ease this process. Upon deletion, make sure to select the “Both group and its contents” option when prompted by Fusion as showed in the video below. A warning message may appear, but the errors caused by the deletion should not be critical ones.

Export
Before exporting the files and printing, test as much mechanism as possible in Fusion, it can save you several hours of print time.
Export all the parts one by one. As the crate is symmetrical, not all repetitions are needed.
You will need to export the following parts as individual “Body”:
- DividerPanel
- FrontPanel
- Pin (only one needed)
- MiddlePanel
- PTHinge (only one needed)
- SpringLock (only one needed)
- HingeBottom (only one needed)
Note: the hexagonal pattern may generate some rogue bodies that are not combined correctly, which may need fixing before exporting.

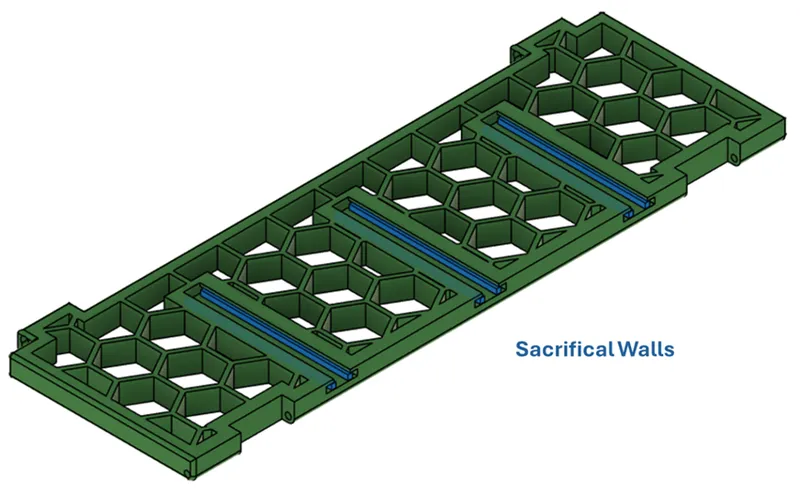
The last part, Bottom Panel, needs to be exported as a whole component. (It is made of the actual Bottom part as well as some embedded Sacrificial Walls used for proper overhang printing.)
Settings and Printing
Choose the filament and the profile of your liking; you will need to take into account the recommendations below but otherwise it should print smoothly.
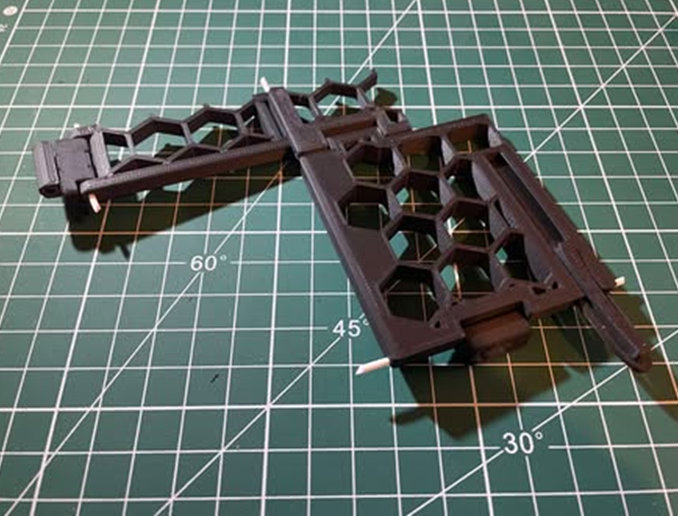
For most of the parts, orientation is quite straightforward except for the Pin and the BottomPanel pieces.

As shown above, the Pin as a small “indentation” to ease the insertion during the assembly so make sure that it is printed flat. For the BottomPanel part, it is recommended to print it upside down to have a better result on the Lock overhang. By default, the embedded sacrificial walls are spaced from 0.2mm from the rest of the print.
Finally, supports are necessary for the PushThrough Hinges:

Depending on your printer quality, supports can help have better results on some other parts but are not mandatory. Same goes for the brim – not mandatory but can be useful to prevent warping.
If you want to emboss or multicolour your crate in your slicer, now is the time as well. (Here is a link on how to do it in Prusa Slicer.)
Here is the total number of parts you will need for the assembly:
| Part | Number of Print |
| Divider Panel | Number of Bottle + 2 |
| Front Panel | 2 |
| Pin | 4 |
| Middle Panel | 1 |
| Push-Through Hinge | Number of Bottle + 2 |
| Spring Lock | Number of Bottle ÷ 2 |
| Bottom Hinge | 2 |
| Bottom Panel | 2 |
| Un-printed filament | Depends on the crate size |
Assembly
Of course, start by removing any Support and Brim that you may have set and extracting the Sacrificial Walls from the Bottom panels (a simple pair of pliers or tweezers should do the trick).
By default, no hardware is required for this crate, and I didn’t even use glue on mines. If you want to use some, I recommend to only do so when assembling the Pins and the Push-Through Hinges (during the push-through step, not during the hinge step).
The crate is designed to use Filament for most hinges. If you got the right Clearance, your filament hinges just need to be inserted, and friction will keep them in place. If they are a bit loose, use a soldering iron on the extremity of each filament segment to melt them into the panels.
As a good practice, I also recommend you to present your prints to see if everything fit before actually starting the assembly (gluing and melting irreversibly some of the parts).
Start by inserting the Push-Through hinges in the Middle panel. (Depending on your supports quality, you may need to sand a bit the hinges if they are too difficult to insert.) Check that they are inserted all the way with a piece of filament.

Once all Push-Through Hinges have been inserted, you can fix the Divider panels on them.
Warning: these panels are not fully symmetrical, there is an “up” and a “down”. Be careful in which orientation you are fixing them.
Simply align the Divider panel with the hinges now fixed on the middle panel and push some filament all the way as shown below.
Once all Divider Panels are mounted, repeat this operation with the Front Panels: align the hinges on the Front panels with the Divider Panels and insert filament all the way through.
Put this assembly aside and now focus on the Bottom panels. Start by sliding the Spring Locks in the dedicated slots of one of the panels.
Align both Bottom panels and add the two (2) bottom hinges between them before once again sliding some filaments to keep everything in place.
Once it is done, you should be able to lock both Bottom panels together by sliding the Spring Locks.
Finally, link the top and bottom parts using the pin. Start by presenting both assemblies and align everything then gently push the Pin into the dedicated slot without breaking it. Keep in mind that one part of the pin is slightly smaller to facilitate this step as shown below. I also find it useful to push the pin using a flat surface (like a bed scraper) rather than your bare finger.
Now that your crate is complete, you can use it to transport bottles/cans from Point A to Point B.
When you are done with it, un-lock the bottom panels by sliding the spring locks.
Ensure the bottom panels are up so the pin is in the hinge position.

And fold your crate for a compact storage!
Tags
Model origin
The author marked this model as their own original creation.


