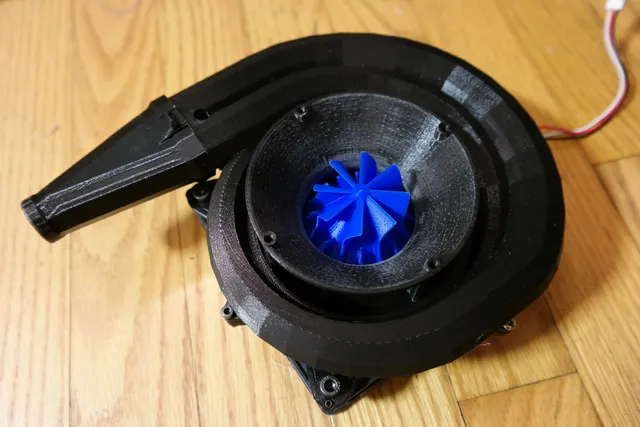
Kevlar Bowden Sheath System - INSTANT Print Quality Upgrade

Description
PDF👇 COMPLETE ILLUSTRATED INSTRUCTIONS BELOW 👇
Did you know 20-30% of a Bowden setup's Pressure Advance (PA) value is just compensating for stretch in the PTFE itself? And did you know that PTFE has annoying stretch properties (fast stretch, slow contract) that make tuning PA for really crisp corners hard to impossible?
No more!
This anchored sheathing system uses the magic of KEVLAR to nearly eliminate PTFE stretch, instantly improving print quality* on any compatible Bowden printer. It allows a lower PA value to be tuned, increasing acceleration headroom, and also stops PTFE wear within the fittings so they don't develop quality-wrecking play over time. It's easy to set up and surprisingly affordable.
(If this makes your life better, I can now accept tips at https://ko-fi.com/jamespray to help defray testing costs and make my spouse more amenable to further inventions!)
PRINT SETTINGS:
- 0.4mm Nozzle and Line Width recommended
- 0.1mm Layer Height recommended
- NO SUPPORTS
- PLA works (other materials are also fine)
REQUIREMENTS:
This is mainly intended for setups with PC4-M10 fittings (the big ones) on both ends of the Bowden. It's still possible to use if one or both ends don't use those, but you'll need to figure out your own anchor loops for the anchor lines. See the final section of these instructions for inspiration and an example!
MATERIALS:
- 1/4" Kevlar (Aramid) Braided Cable Sleeve (available on Amazon for $12 to 15 USD for 10 feet)
- CA Glue (Superglue)
- Scotch Tape
- Fiber Tape (e.g., for packages; narrow width like 12mm is most convenient)
- 0.6 to 0.8mm zero-stretch braided fishing line (Dorisea Extreme Braid works well; nylon-based line or thread NOT recommended due to creep!)
- Zip ties (1/8" / 3 to 3.5mm wide)
These material recommendations are very important for good results. Most alternatives to the Kevlar sleeve and zero-stretch fishing line are likely to creep and/or stretch as much as the Bowden itself, so they either won't work or will only work for a short time after being tightened. If you can't afford these supplies, you're much better off saving until you can.
INSTRUCTIONS:
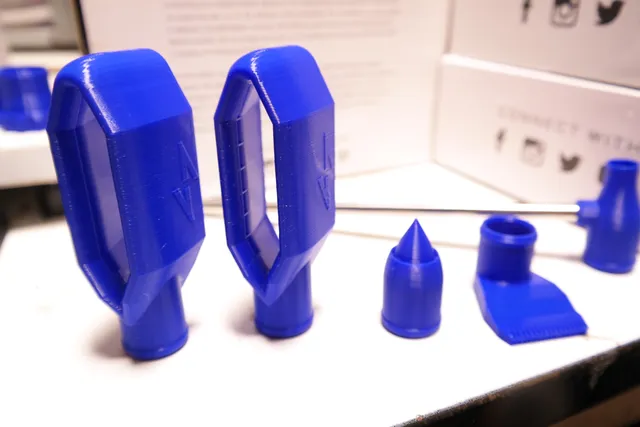
Print the parts: You will need 2x Inner Stoppers, 2x Outer Stoppers (your choice of 1-piece or 2-piece; 2-piece makes maintenance easier, but is bigger), and 2x M10 Fitting Anchor Clamps (if you have M10s).
Post-process the parts: If the small holes in the parts aren't clear, poke the end of a large paper clip through them (or ream with a 1 to 1.2mm drill bit).
Cut the sheath: Measure a piece of Kevlar sheath as long as the Bowden tube, plus 5-10cm. (If unsure, err on the long side.)
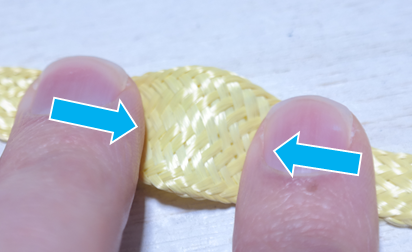
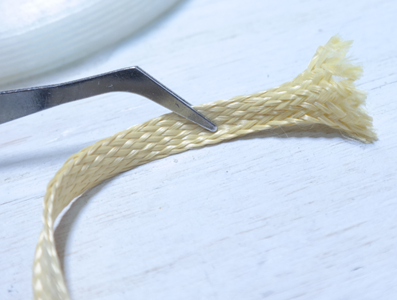
How to cut Kevlar: Kevlar has a deserved reputation for being hard to cut and easily frayed. Here's my favorite method for keeping it under control.
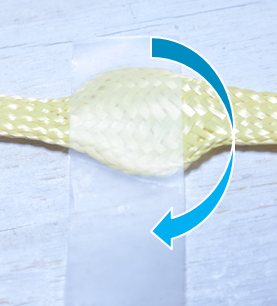
Pinch the sheath together to form a bulge that spreads the fibers apart.
Stick the bulge to a piece of scotch tape.
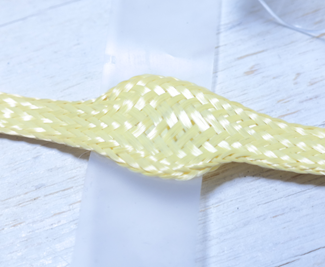
Fold the tape over or apply a second piece to secure.
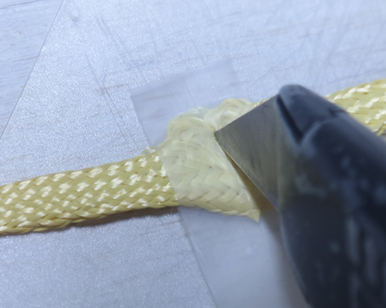
On top of scrap wood (or a cutting mat, but wood you can cut deeply is better), cut across the middle of the tape with a sharp utility knife (several cuts may be needed to fully sever the fibers). Scissors probably won't cut the sheath itself, but sharp ones should work to clean up any stray fibers if your knife wasn't sharp enough (as was the case for these pictures 😅).
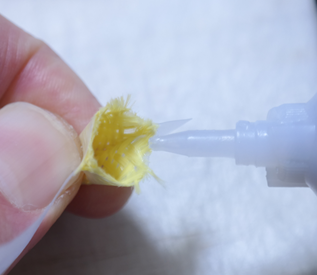
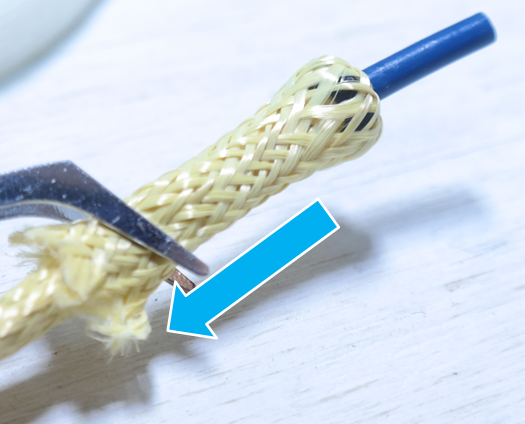
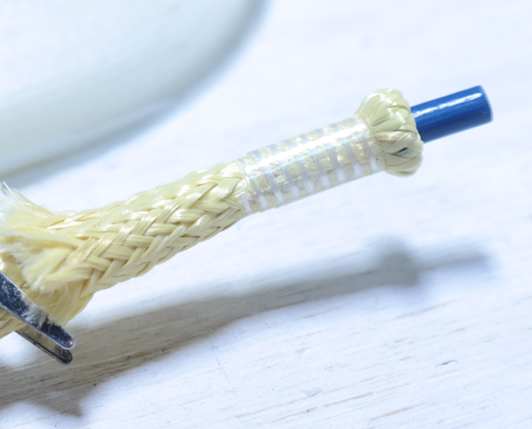
Pinch the tape corners to open the sheath into a cone. Apply CA glue to the fiber ends so they won't fray. Allow to dry THOROUGHLY (until you can't smell the CA anymore) – if the cone wants to flatten out again, prop it open with a scrap of PTFE tube so it can't get glued shut!
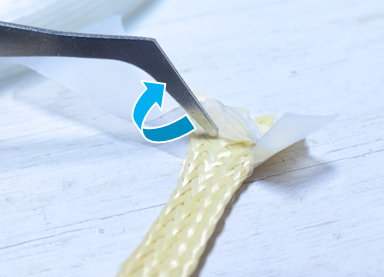
Peel the tape away CAREFULLY, starting from the edge OPPOSITE the cut end.
Secure the Stoppers: If using 1-piece Outer Stoppers, slide those on now, followed by the Inner Stoppers. Reference the picture carefully!
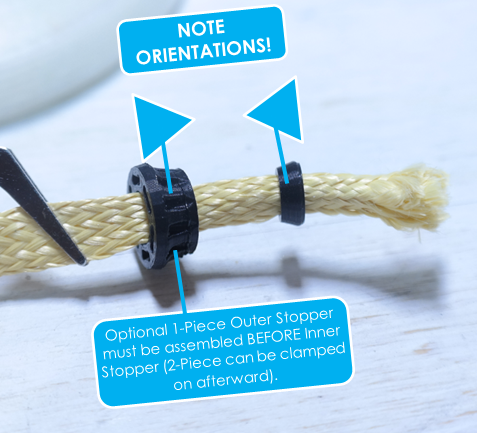
Slide the Bowden tube into the sheath. At each end, invert the end of the sheath back over the Inner Stopper.
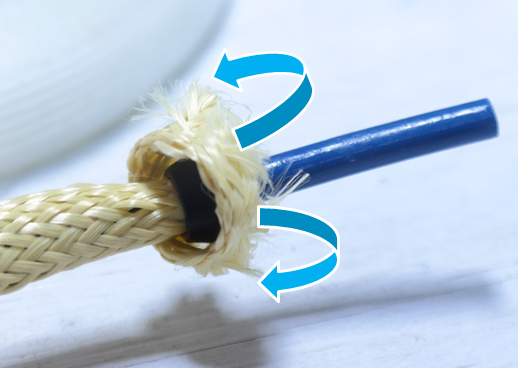
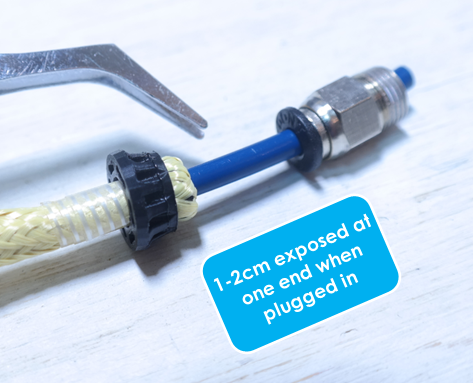
Adjust the length so that when the sheath is TAUT, 1 to 2cm of PTFE is left exposed OUTSIDE THE FITTING AT ONE END (you must have enough room to take up all slack later). (See also a few pictures down.)
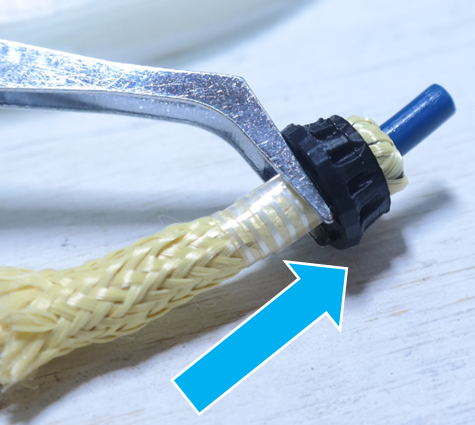
Secure the Inner Stoppers with a few wraps of fiber tape.
Slide the Outer Stoppers against the Inner Stoppers and make sure they feel secure!
Thread the Anchors: Cut 20-30cm of fishing line and antifray the ends. CA glue works for Dorisea since it doesn't seem to melt. You may need to cut the line end at an angle to make insertion easier.
Tie a knot 2-3cm from one end.
Starting from the OUTER STOPPER SIDE, thread the line from hole to hole between the Outer Stopper and the halves of the M10 Fitting Anchor, ending at the hole beside the starting one.
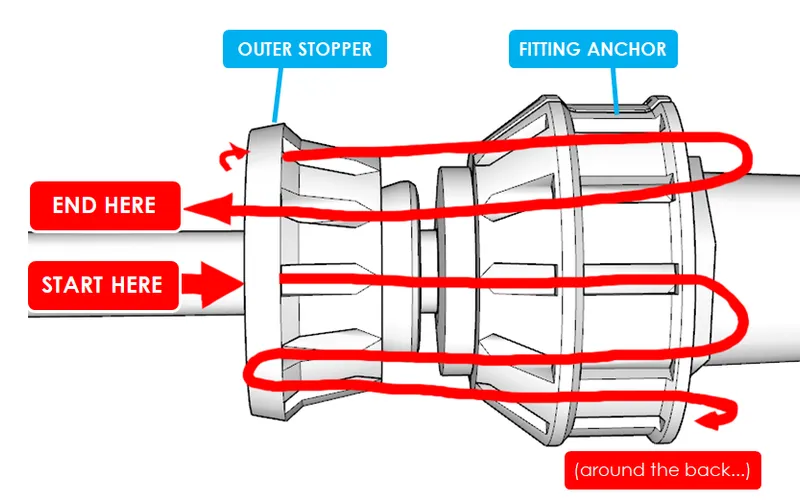
Once the line is threaded, knot the second end so it can't pull out.
(This does NOT need to be done on the printer, since you'll be able to clamp the halves together on the fitting afterward – unless you can't use the M10 Anchors, in which case you will have to plug in the Bowden and do this threading process with your alternate anchor loops to secure the Outer Stopper.)
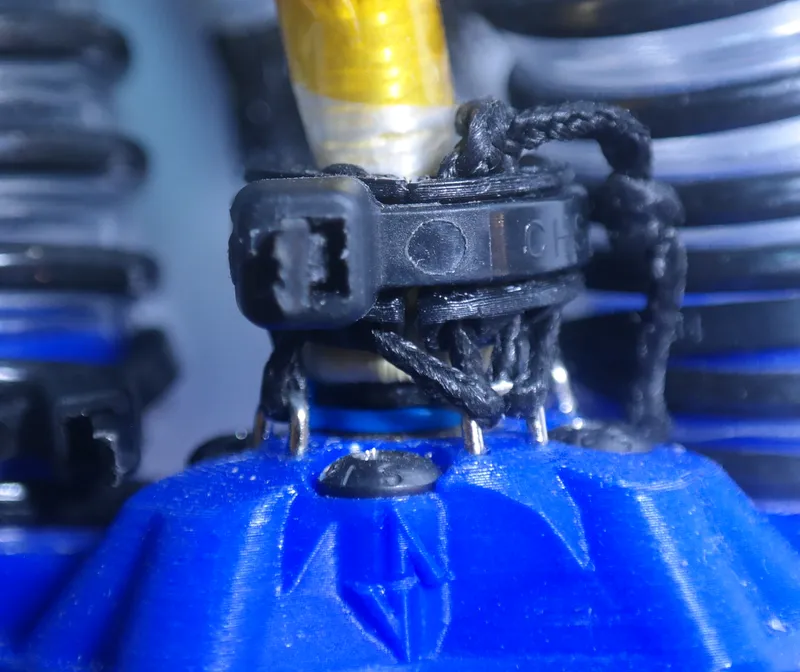
Mount and Preload: Plug the Bowden tube into the Extruder and Hotend. Clamp the M10 Anchor halves around the fittings and secure with zip ties.
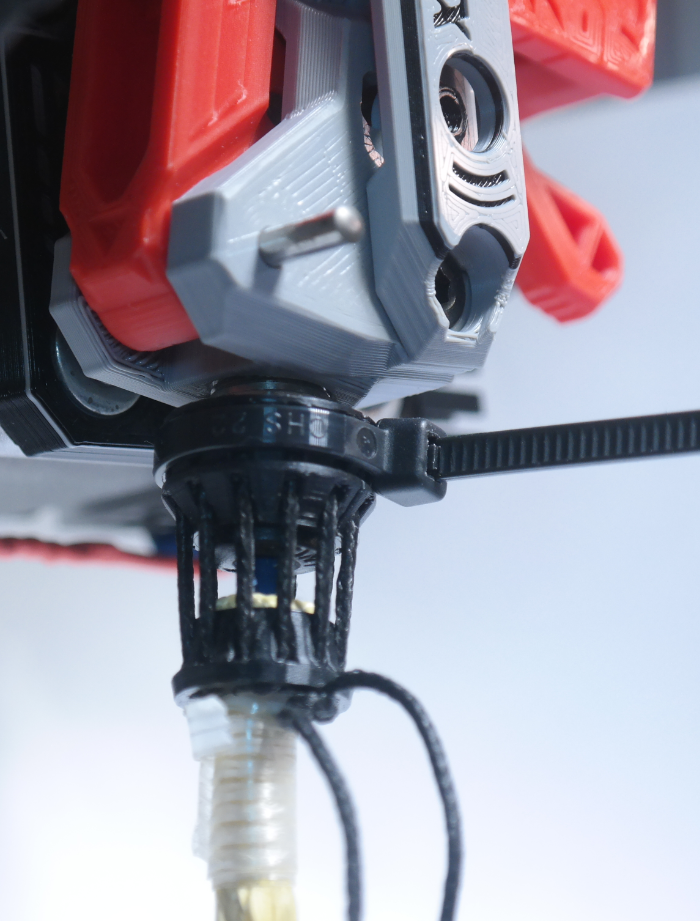
At one end, work all slack out of the anchor line by pulling on the two line ends as you twist and rock the Outer Stopper and/or pull on sections of the line itself to keep it moving evenly. Tie the line ends together and double-knot to secure.
At the other end, tighten the anchor line ONLY enough to remove all slack from the Kevlar. To test sheath tension, see if you can pinch a short portion of the sheath together to make a bulge; if not, or “just barely”, it's good. Tie the line ends together and double-knot to secure.
Check the sheath tension a few times over the first few days/weeks of use and re-tighten as needed. IMPORTANT: While over-preloading the sheath can allow very crisp printing, the effect will only last a short time, because the Bowden tube will creep shorter under the compressive forces, possibly deforming the ends and increasing friction. (If it's not clear, this is bad.)
Update Pressure Advance: Now you can re-tune PA and resume printing with better-quality results!
IF YOU DON'T USE M10 FITTINGS:
The anchor line can be looped to any structure(s) on the printer, although ideally these alternate anchor points should be near the end of the Bowden and evenly spaced around it. The setup shown below used 4 anchor loops formed from segments of heavy paper clips that were epoxy-glued into hand-drilled holes in the PLA print around the fitting. The embedded wire tails were 3-4mm long and lightly scored to increase surface area for glue security.
* Print Quality Claims are based on extensive long-term testing, but amount of improvement and final results depend on the quality of the rest of the extrusion system, configuration, and tuning. PTFE tube quality (yes, Capricorn helps), extruder suitability for Bowden-level PA (low gearing and high power are better), and overall Bowden length are just a few other major factors to consider.
Tags
Model origin
The author marked this model as their own original creation.