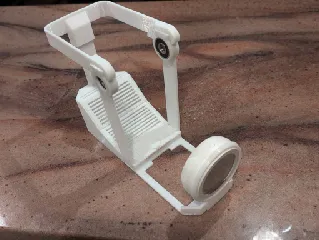
Reinforced Ankermake M5c camera mount with front view
Description
PDFM5c does not come with a camera. i wanted a way to make use of an old Wyze v3 but couldn't find an existing design that worked for me. my requirements are:
- closest view possible to printhead
- keeps the model in focus
- light weight and does not impact operation of the printer or accuracy in anyway
- cheap and easy to print/fix/replace
- not an eye sore
- works without having to replace it every few hours
Turned out that last point was hard to achieve.
The obvious spot to attached the camera is to the front of the build plate. I quickly found out there is a problem with sandwiching 3D printed plastic parts between two metal plates warmed to 80c+, hours at a time. No matter what i tried even PETG printed parts would start drooping within hours. they didn't melt exactly but softened enough to bent under their own weight. I suspect printing with higher temp resistant filament won't completely solve this problem either. So the only obvious answer is - use a support.
i decided the support should be In the form of two wooden sticks 27mm wide and 3.7mm thick, which just so happens to be the measurement of one of those “paint stirrer” sticks that can be picked up for free at any hardware store. if you are not in the USA you might not have those exact same sticks… but it doesn't really matter.
All you need is some stiff light weight material strong enough to support about 100 grams, about 3.7mm thick, wide enough to have a 8mm hole drilled into it and fits in the slot under the model's support arm. it doesn't have to be perfectly sized.
stack a few popsicle sticks on top of each other, mill it out of light weight airplane aluminum with your CNC machine… go nuts, no wrong answers.
You could also just print then stick everything on the printer without doing any reinforcement. it will work but you will regret it in a few hours.
To do it right, You will need:
- one paint stirrer stick or alternative cut into two identical pieces. if using the stirrer sticks, they will each measure 123mm long, 27mm wide and no more than 3.8mm thick.
- know how to drill a 8mm hole instead of printing one.
- for magnetic mounting Wyze V3 camera: one metal washer, 20mm wide, 2mm thick. standard washer for 8mm screw is perfect for this.
- optional, a few more 8mm washers or other thin material as spacers as needed.
Install:
- fit wooden sticks/support material into slot under the printed support arms. drill one 8mm hole on each support material using the printed holes as guides.
- on print bed: fully unscrew the two front screws and loosen two back screws using the Allen wrench from Ankermake toolkit.
- slid the holes on support arms over two front screw posts. sandwich the support arm in between the top and bottom print bed. - This is where thickness of that support material comes into play. There is exactly 7.8mm space in between the print beds. Too thick it will affect bed level, too thin will cause the camera to wabble during movement.
- tighten all 4 screws on print bed.
- secure the top and bottom of camera mount on each side of the support arms using the thumb nut.
- glue the metal washer on the camera base. wait for glue to dry before sticking the camera there!
- run an auto level before printing your next thing.
Notes:
- for the arms PLA might work, but use at least PETG if you can. other parts don't matter.
- 4 wall loops and 25% infill should be more than enough.
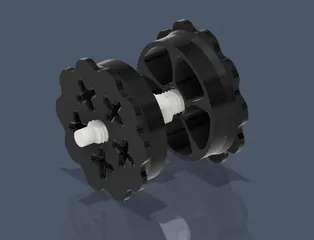
- if you have trouble with the threads try printing the thumb nut inside perimeter first. when printed correctly those threads should be fidget spinner loose.
- i made it as easy as possible to remix for other cameras. alternatively, you can just print a flat cube attached to your camera then glue the cube on top of this model. i don't recommend anything too heavy though. full-size SLR probably won't stay on very well and will mess up printer's belt.
Level up:
Now that you have taken the plunge by using Support IRL, get ready for the next step towards complete freedom from your 3d printer. Start by not printing the arms at all. instead, pick up the BIGGER free paint stir stick from that same hardware store you were just at.
that stick just happens to be the EXACT size you need to completely replace the printed support arms. cut the stick into two pieces about 123mm long, drill a 8mm hole center and about 16mm from one end (harder than it sounds). Glue the sticks to the printed base and use a few 8mm washers as spacers since the stick by itself is about 2mm too thin (want about 7.8mm thick).
There, you have just saved even more filaments. although it won't be as pretty because those sticks are not the same color as your prints.
Tags
Model origin
The author marked this model as their own original creation.


