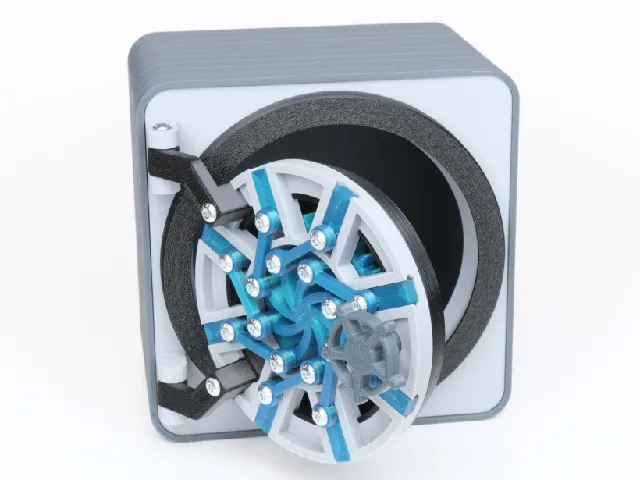
SuperMod Helping Hand Clamp (REV3)

Description
PDFWelcome!
Welcome to Revision 3 of my versatile, DIY helping hands! These models were entirely reworked for improved flexibility, fewer fasteners, and enhanced functionality. It is not compatible with previous revisions but offers a more streamlined experience.
You can find my SuperMod swivel clamps here: https://www.printables.com/model/719190-supermod-helping-hand-swivel-clamp-rev-2.
Revision 3 Key Features
- Fewer fasteners
- Modular design - every clamp slides along the base
- Printed springs or pen springs
- Two entirely new clamps
- Improved file organization (for real this time!)
- Gridfinity-ready bases
- Customize with step files
- No supports - designed for FDM printing
TLDR
(1) Pick a base, then (2) print the 3mf file for a specific clamp. You can print just one clamp, or multiple variations of each one. Clamps contain all of their required printed parts in the 3mf file. The one exception is the sliding swivel clamp.
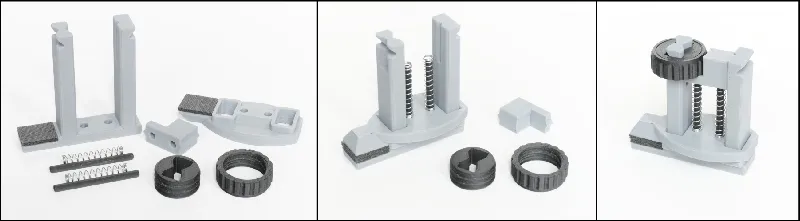
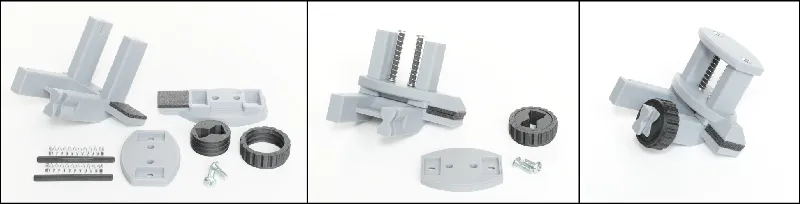
Sorting Through Parts
Choosing a base is straightforward. Sizes range from 80 to 240 mm. The 3mf file includes a plain base, and one with holes on the backside for accessories. All of the Gridfinity-compatible bases (42 - 252 mm) have been combined into one 3mf. Simply choose a size and ignore the rest.
Parallel clamps come in vertical and horizontal versions, and each one uses a printed spring or pen springs. (You can mirror the horizontal clamp tower in a slicer to make it slide the opposite direction.) Inside the 3mf, you will find four variations of clamp grips. Pick your favorite style and print two copies, one for the tower and one for the sliding clamp.
The file for the vise clamps contains alternate grip patterns for the sliding grip and stationary tower. Pick your favorite matching pair and ignore the others.
The PCB holder comes in a regular and tall version, and each one has two options for the central shaft. The standard version has a plain hole, and the shaft spins freely when the knob is loose. The friction grip version has small, springy levers that hold the shaft in place when the knob is loose. Use extra pressure to install the central shaft for this version.
I separated the swivel sliding clamp from the parallel clamps into its own 3mf. Why? I did not want confusion about grips that do not fit. The clamping surface is cut down to make room for the swivel mechanism, and the grips are a slightly different size and shape.
Springs
You can make your own springs for a fully printed project. PETG is the best choice, while ABS and Nylon should also work. PLA might work for a short time, but is not a good filament for springs.
You can also repurpose springs from a clicky pen. I designed for springs that are 25 mm (1 inch) long. If yours are too short then you will need to use the spacer. Scale the Z dimension to make a spacer of any height.
Printed Threads
The printed threads in this project were made with my template here: https://www.printables.com/model/989431-custom-threads-for-3d-printing-parametric.
Tune your seams! I have success printing threads with thin layers (0.1 mm), scarf seams, and random seams. Printing external perimeters first can also help.
Gluing and Clamp Grips
Grips for parallel clamps and the PCB holder are glued into place. If you are soldering with your clamps, I recommend using high-temperature filaments for grips. TPU could be an interesting choice.
You can try commercial products in place of the flat grips on parallel clamps. Look for grip tape or anti-skid pads used with carpet, furniture, tool handles, … I used this roll of high-temperature, adhesive-backed silicone: https://www.mcmaster.com/1411N201/.
Fasteners
When you need a metal fastener choose between M3 x 12 mm and #4-40 x 0.5 inch screws. Shorter screws may work for some parts, but these sizes are guaranteed to work. If a part or clamp requires a fastener, it will be in the filename. For example, “Accessory_M3_HexNut” uses an M3 screw and M3 hex nut for assembly.
If a filename lists a fastener type but does not list a nut or heatset insert, then the screw threads into plastic. For example, “Swivel_Sliding_Clamp_M3”. Use caution to avoid over-tightening these screws.
Base Accessories
The base accessory 3mf includes two parts. The plain cylinder is a spool holder and the threaded cylinder has 1/4 NPT threads, a common connector on flexible helping hands. For my clamps, I bought flexible coolant pipe and glued on alligator clips: https://www.amazon.com/TOPPROS-Nozzle-Flexible-Coolant-Orange/dp/B088QRKQYK.
Assembly and Final Notes
I highly recommend using a file to smooth the inside of the rectangular holes of the sliding clamps.
The only tricky part of assembly should be squeezing the springs as you slide the parallel clamps into the base.
Thanks for visiting, and enjoy!
Major update: Completely reorganized files and folders.
Tags
Model origin
The author remixed this model.

Differences of the remix compared to the original
Added new clamps and changed the mounting for sliding clamps. Added printed threads.