Adaptive purge for any 3D printer using slicer variables


Description
PDFOverview
Based on KAMP by kyleisah: https://github.com/kyleisah/Klipper-Adaptive-Meshing-Purging
Part of KAMP is to adapt various printer functions to suit each individual print, rather than a global constant. For example only ABL probing the region of the print instead of the whole bed. Relevant here is KAMP adding an extruder purge next to the model, rather than always in the same location on the bed. It works very well but is only available as a Klipper plugin.
The aim of this gcode is to add adaptive purge for any 3D printer, using the variables available natively to the slicer.
The technique is covered in detail in this video:
Compatibility
The output of this technique is plain gcode, so it should be compatible with any 3D printer. The repeated use of G92 E0.0 makes it compatible with either relative or absolute extrusion without any other changes.
The examples given here are immediately compatible with PrusaSlicer, Orca Slicer, Super Slicer and Bambu Studio. Unfortunately Cura does not provide the variables required and is currently incompatible.
How it works
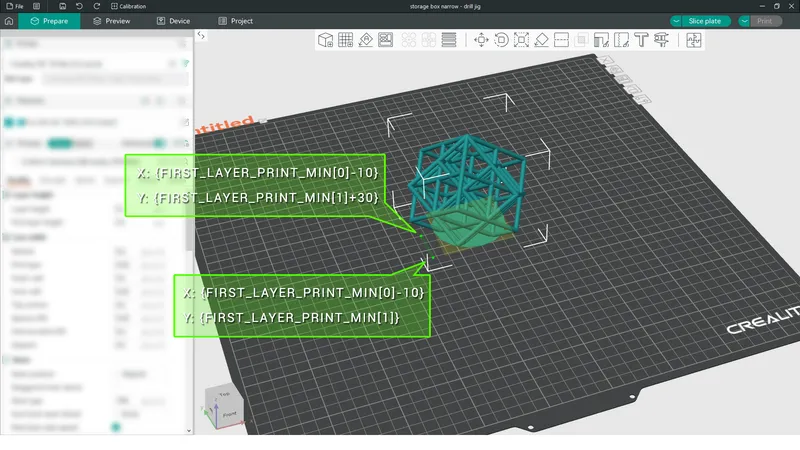
The slicer provides variables to track the footprint of the first layer. We can access these and then position our purge extrusion next to the object.
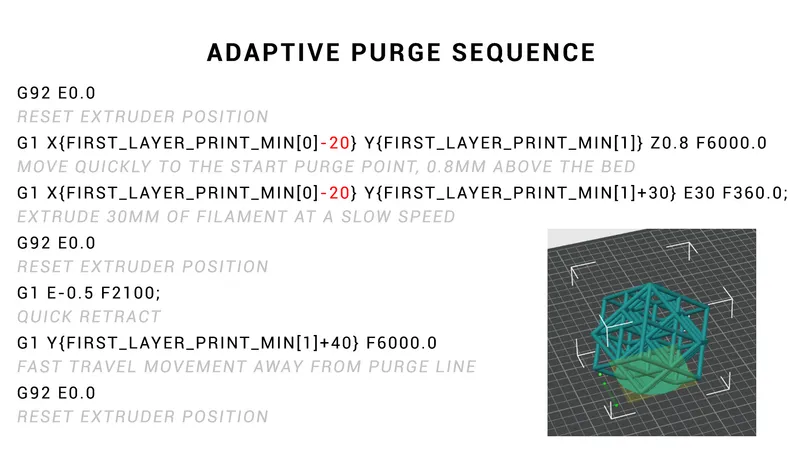
The two most useful variables are first_layer_print_min and first_layer_print_max. Each of these provides an X and Y coordinate, that are accessed by adding either a 0 (for x) or 1 (for Y) in [square brackets] after the variable name. Curly brackets surround the entire variable.
For example, the x position of the minimum corner (front left) is referenced as follows:
{first_layer_print_min[0]}
and the y position position for the same corner as follows:
{first_layer_print_min[1]}

We can then add or subtract values from these points to offset our extrusion as desired:
Where to insert the gcode
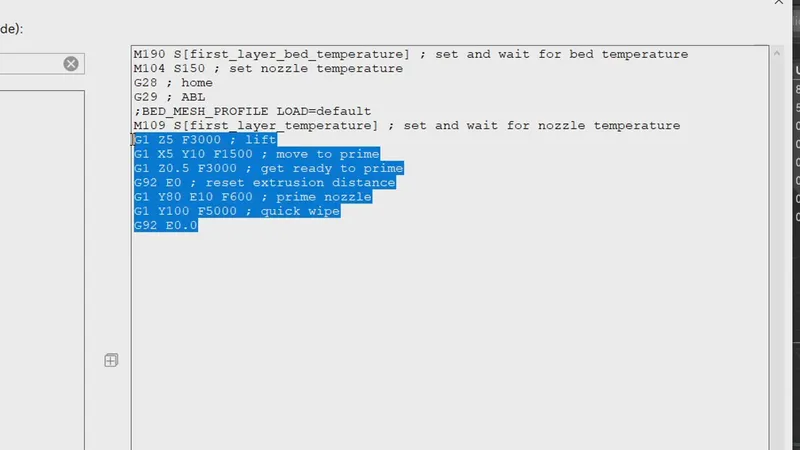
For most printers, the adaptive purge sequence should occur just after the final gcode command for the nozzle to reach printing temperature. This is usually an M109 S command.
Before (with previous purge sequence):
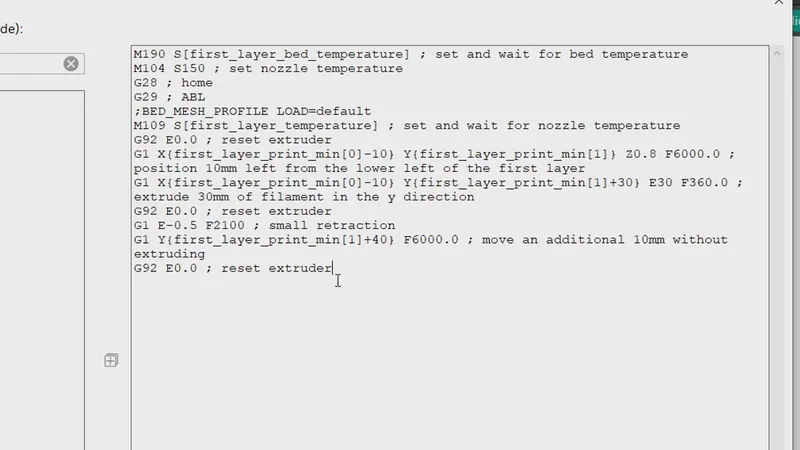
After (with adaptive purge):
As shown in the video, other printers with elaborate start gcode sequences can be trickier, but the same rule of thumb applies. Study the gcode preview after slicing to hone in on the correct location.
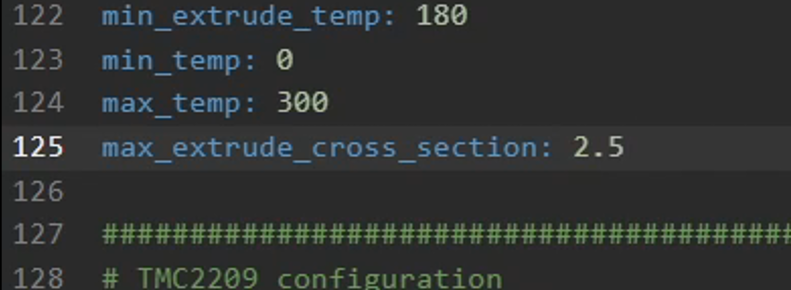
For Klipper printers only, like KAMP, the max_extrude_cross_section value in your printer.cfg needs to be raised to at least 2.5. This is found in the [extruder] section.
Advantages
The following list was created for the original KAMP implementation of adaptive purge. This version is simpler but has the additional benefit of the purge line showing in the gcode preview.

Customisation
KAMP uses a script to store purge variables, but here they are hard coded into the gcode sequence. Those that you will most likely want to tweak are as follows.
Position of the purge line relative to the first layer corner - By default this is 10mm. Change to another value throughout the sequence.
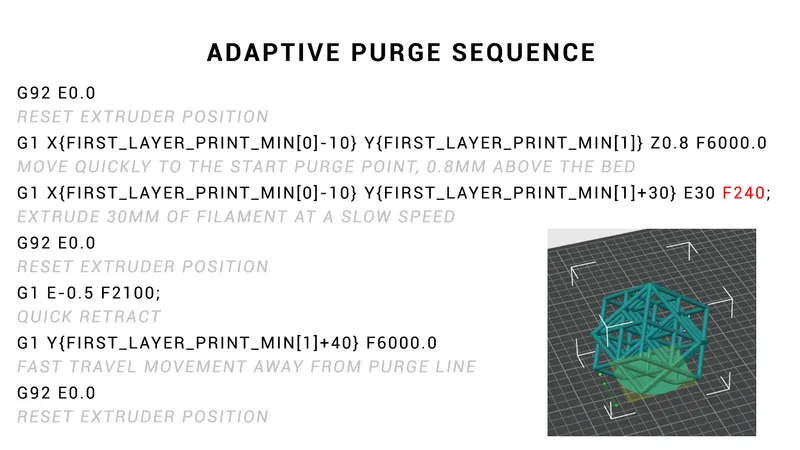
Feedrate of the purge. If the flow rate is too much for your 3D printer, reduce the F value as shown to slow the purge extrusion.
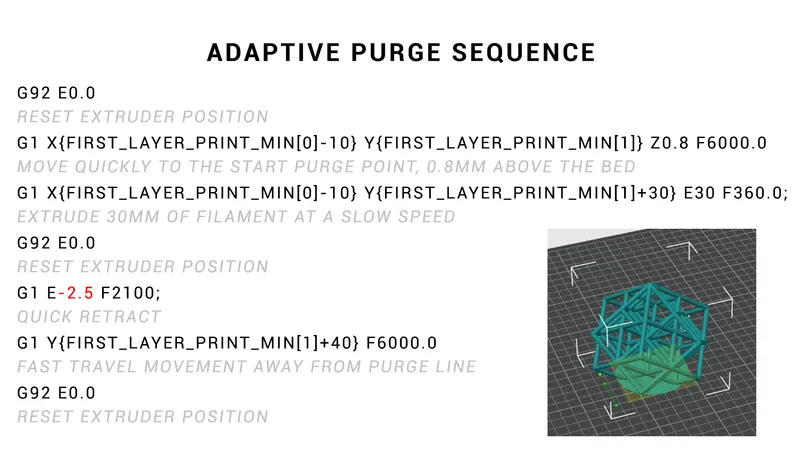
Retraction distance and speed. Alter the value after E for distance (must be a negative value) and the value after F for speed to match what you normally use for that printer. Alternatively substitute G10 for this entire line if you use firmware retraction.
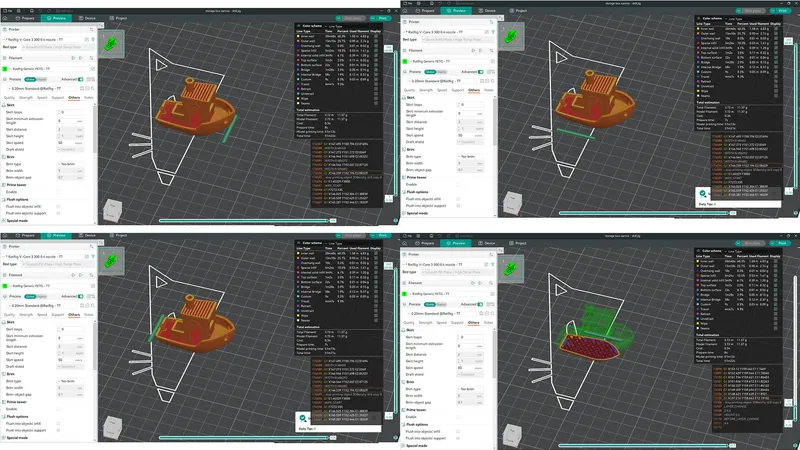
Variations
Multiple variations are included to demonstrate positioning of the purge line in various locations reative to the model. A variation is also include which extrudes a triangle pattern.
Tags
Model origin
The author remixed this model.
Differences of the remix compared to the original
This gcode is a recreation of the LINE_PURGE macro for Klipper found in KAMP, altered to run from slicer variables.