K1 / K1 max E stepper fan mount

Description
PDFYou may not need this “active cooling” mod!
I have two easier suggestions below you could try first. Take a look.
The issue of "Heat Creep"
The Creality K1 & K1 Max extruder stepper motor generates a LOT of heat. This heat builds up and softens the filament where the drive gears make contact. This is called “Heat Creep” and it can cause some very bad filament jams. Like this one… (Picture provided by @Alex_cf_Siu_597074)
This issue happens a lot when people print PLA with the lid and doors closed. Other users report repeated heat creep issues at about the 9 hour mark during long prints. I have had this issue happen several times after adding the 3D Chameleon to my printer. The chameleon added drag to the filament so my extruder had to work harder to pull the filament. Most of my PETG prints were failing after 45 minutes.
Simple Solution #1
The easiest solution: Firmware setting
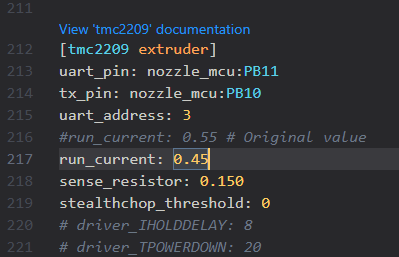
Heat Creep can be solved many different ways. The first thing you should try is to lower the Current your extruder motor is using. By default, the K1 printers are set to use 0.55 amps for the extruder. For most users this value is WAY too high. Only the crazy users that are pushing their machine to the limit in terms of speed need to have it set this high. Therefore, most users can solve their heat creep issues by simply changing this setting from .55 to .45.
Here is how: If you have rooted your printer and have the full Fluid or Mainsail interface, you can simply edit the printer.cfg file. Edit the extruder run_current like this image. Click save & restart to reboot your printer.
Simple Solution #2
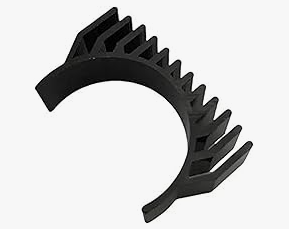
You could try a passive heat dissipation solution like cooling fins that you snap onto your extruder motor. This search on amazon has four options on the first page as of October 7, 2024. You want an aluminum heat sink for a NEMA14 stepper. With an internal diameter of 36 mm. It should look like this…
These two simple solutions may be enough for you but if not then you will need active cooling.
Here is the active cooling mod.
There are a few other models/remixes that are similar to this one. This one adds the least amount of weight to your extruder while maximizing airflow around your motor. In my opinion this one is the best.
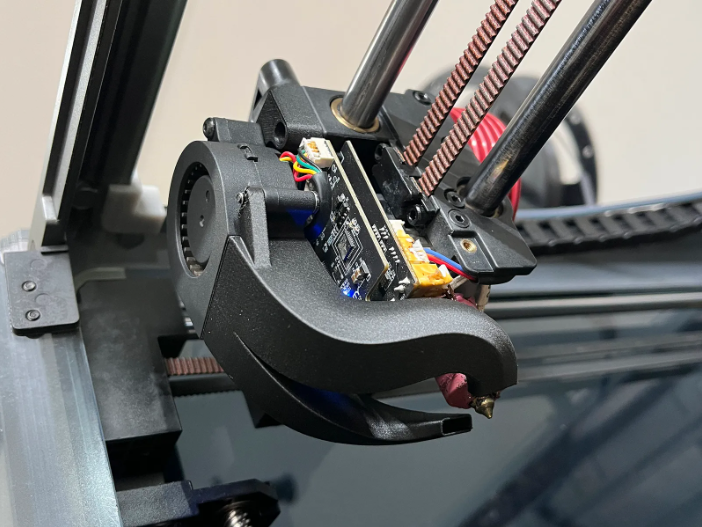
How to wire up the fan?
You will need a small 3010 dc fan. The voltage depends on how you choose to wire the fan up. You have three options.
Option 1:
Splice the wires to share power with the existing 24v dc fan used to cool the extruder. This option has the most risk and reward. It is risky because you might damage the wires to the existing fan. But if you do it right then your printer will turn on both fans when the extruder is hot and turn off both fans when it is cooled down.
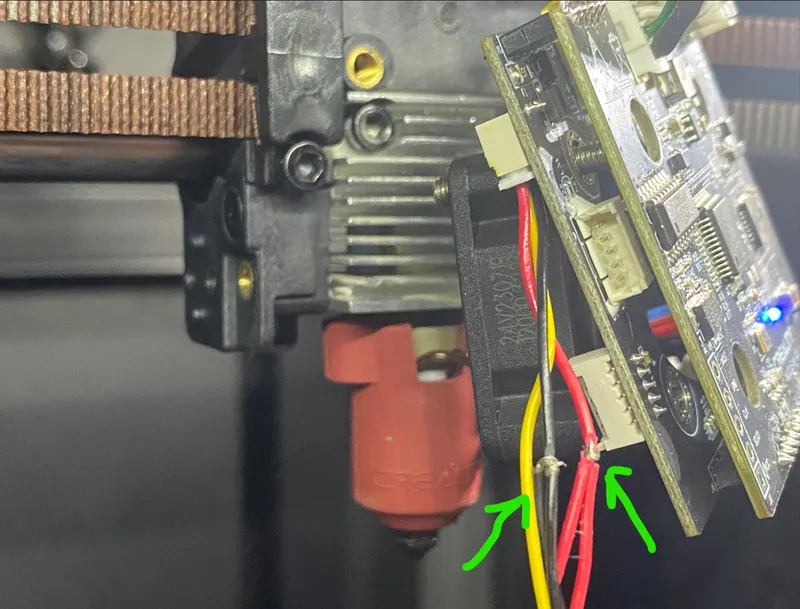
To do this you need to disassemble your extruder assembly to the point that you can get to the fan wires on the left side of the assembly. Carefully cut back the plastic insulation on the red and black wires. Splice in your wires. WARNING! I had this working and then carelessly shorted the red and yellow wires with my voltmeter and destroyed something in the electronics. I had to order a replacement K1 extruder control board. I also had to order a replacement fan. Here is the model number for the stock fan EFC-03A24L (It can be found on amazon.)
After all that damage I gave up and switched to option 2.
Option 2:
Plug into the empty 5v slot intended for the additional filament sensor on the extruder. The 5v will always be on so the fan will always spin. But at 5v it will not be noisy. The 5v fan will not move as much air as the 24v.
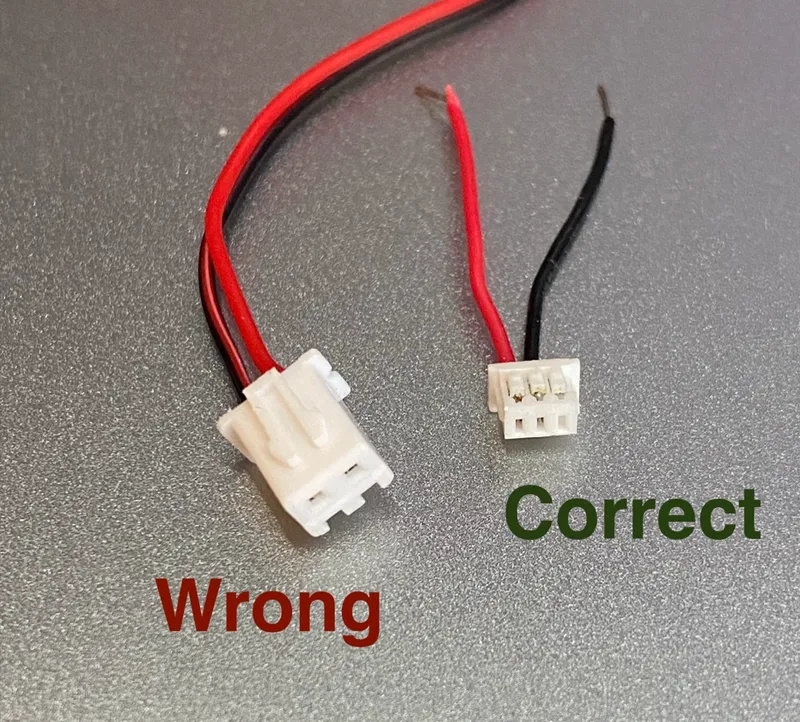
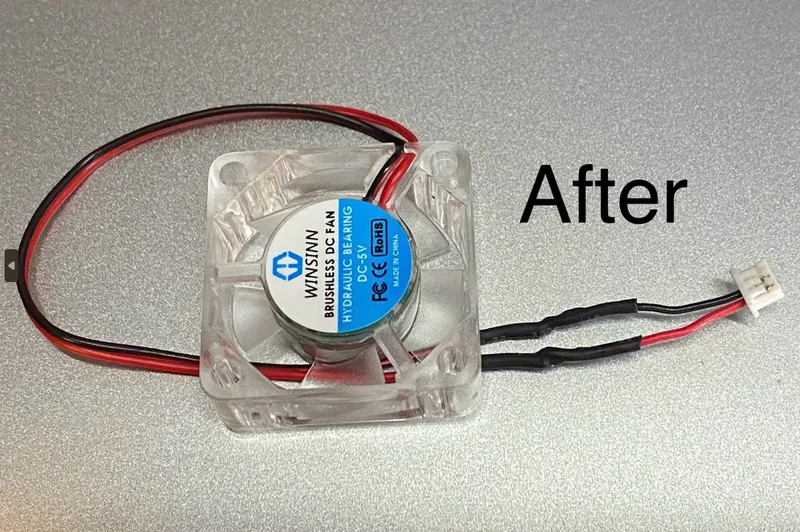
This option is easier but you still have to modify the wires to fit the pin connector. You need a 1.25 mm 3 pin connector (aka JST MX 1.25) but most 5v fans you can buy are a bigger 2 pin connector. I chose to buy these 5v fans and then I swapped out the connector.
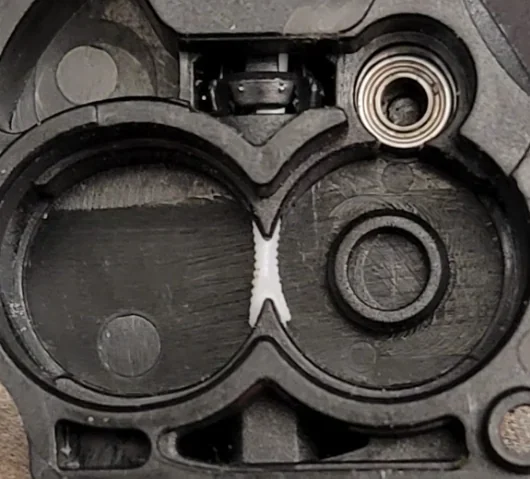
The 3 pin 5v connection on the extruder assembly (right side). From top to bottom the pins are +5 v, ground, signal. We will only use the +5 & ground.
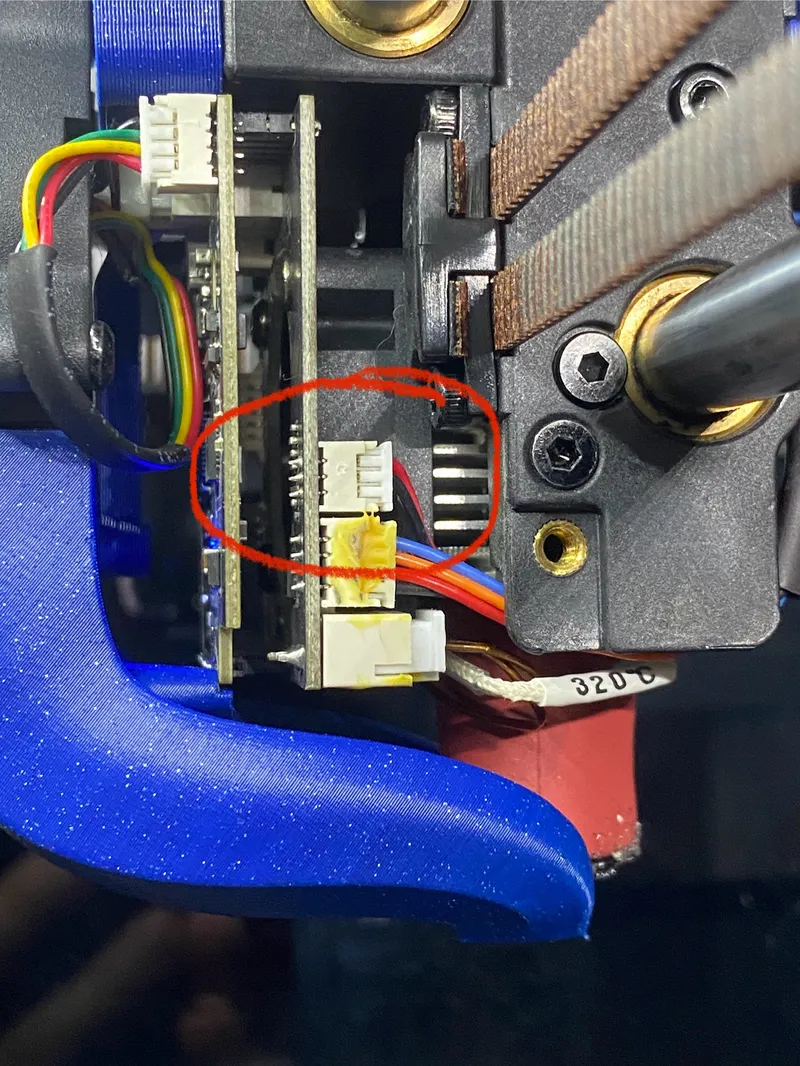
In this picture you can see the connector (left) that came with the 5v fans I bought from amazon. The connector on the right is what you need to connect to the extruder assembly. It is called JST MX 1.25 (1.25 mm 3 pin) and you can order them online.
I cut an old connector off of another fan I had and soldered it onto my new fan.
Option 3:
Run the wires all the way back and add your own power. You could add some LED lights and plug this fan in with your LEDs. Have a sperate on off switch / plug etc.
Print instructions:
- Use a heat resistant filament. ASA or ABS should be fine.
- Make the print as light as possible. I used the following:
- .4 nozzle
- 2 perimeter walls
- 10% lightening infill.
Assembly:
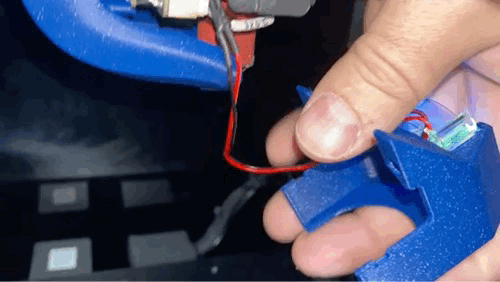
In this gif you can see how easy it is to assemble.
- Run your fan wire through the fan shroud
- Slide your fan into place on the shroud
- Connect your wires
- Snap the shroud into place on top of your extruder assembly.
Other Mod Models seen here:
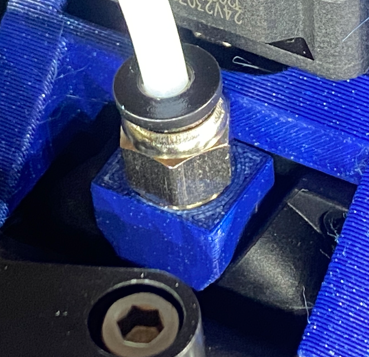
PC4-M10 coupler adapter (optional)
Better part cooling fan shroud (optional)
Tags
Model origin
The author remixed this model.


Differences of the remix compared to the original
This remix relocates the fan and guides the airflow to maximize coverage of the motor.
The fan mounting holes for M3 screws were replaced with a friction slide. This enables the fan to be pushed out of the way to access the extruder lock lever.
This Remix uses a smaller and lighter 3010 fan. Some other models use a 4010 fan. In my opinion that is too big. Those add weight to the extruder and are so big that there is a greater risk of crashing into other parts of your printer.


