


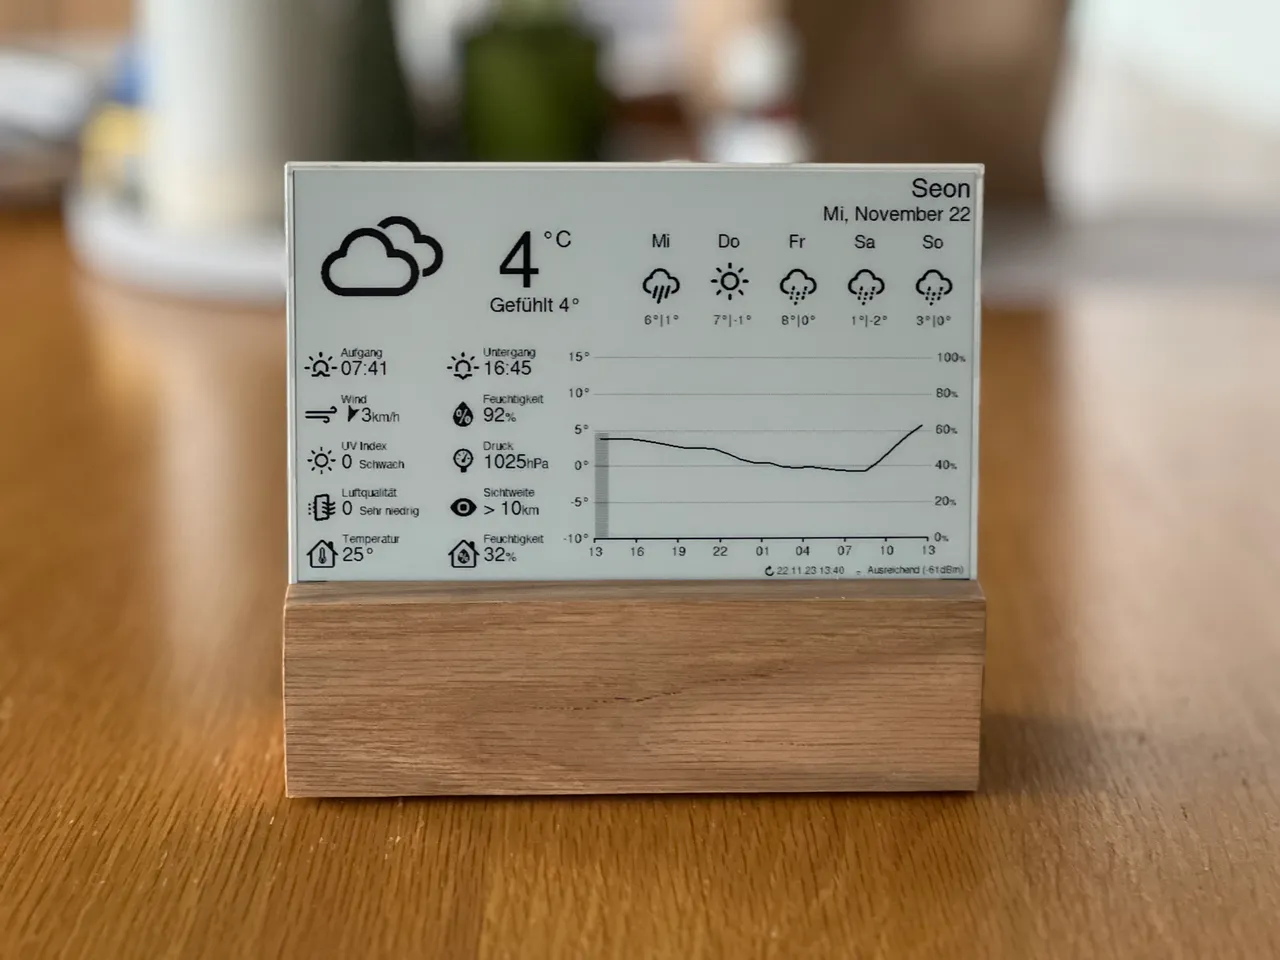
I just added this box as a remix of the original model
As you can see on the picture, some features have been added to the L.Marzen software (amongs other, the ability to display precipitations volume and probability simultaneously, plus a bunch of other) (edited)


I never thought to veneer a 3d printed part before! I bought this veneer: https://a.co/d/eUSl4E0 and used my Cricut Maker 3 to cut the pieces. I wanted to use the model itself for the cut dimensions, so I did the following steps:
1) In Autodesk Fusion,
a) Insert -> Insert Mesh (3MF file)
b) Mesh -> Modify -> Convert Mesh
c) Created Sketch planes to project the edges of the top, front, side, and back on.
d) I recommend strategically making some of the edges slightly wider to avoid gaps at the edges where the veneer meets. Like on all 4 sides of the top and the 2 sides of the front.
e) Right click on each sketch and select “Save as DXF”
2) In Adobe Illustrator or Inkscape
a) Open each DXF file with 1:1 scale
b) Export each DXF as an SVG. The Cricut Design Space SW didn’t manage the DXF files correctly for me.
3) In Cricut Design Space
a) Upload each SVG and place the objects for “basic cut.” Consider the direction of the wood grain.
b) I made a copy of a side and flipped it for the opposite side.
c) Put your veneer on the Strong hold mat (I needed to place it wood side down to get it to stick) and tape the corners with painter’s tape.
d) Use the “deep cut” blade and housing. Select “Natural Wood Veneer” Material.
e) Cut the veneer
4) Apply cut veneer to stand and sand the edges.
5) Add a coat of Tung oil to the veneer to protect it.
Thank you for this model and the veneer idea! (edited)


It looks like the 105mm top case's magnet holes don't have clearance added like the bottom case's magnet holes do. My 4mm magnets fit the bottom just fine but won't go in the top case's holes at all.
Also, any chance you could include a STEP file so we could adjust things ourselves?

@LincolnJones_997719 I found the same but what i did is put the bottom ones in and then place the top ones onto the inserted bottom ones, they snapped into place. Then i placed the lid on and squeezed the two together and in they popped.
Side not i had to use a pair of pliers to force the two halfs together for the reason you mentioned.


Very fast print. Supports came off cleanly. Insert fits well into the tray


Pla+ (eSun), organic supports for the trees, 5mm brim.
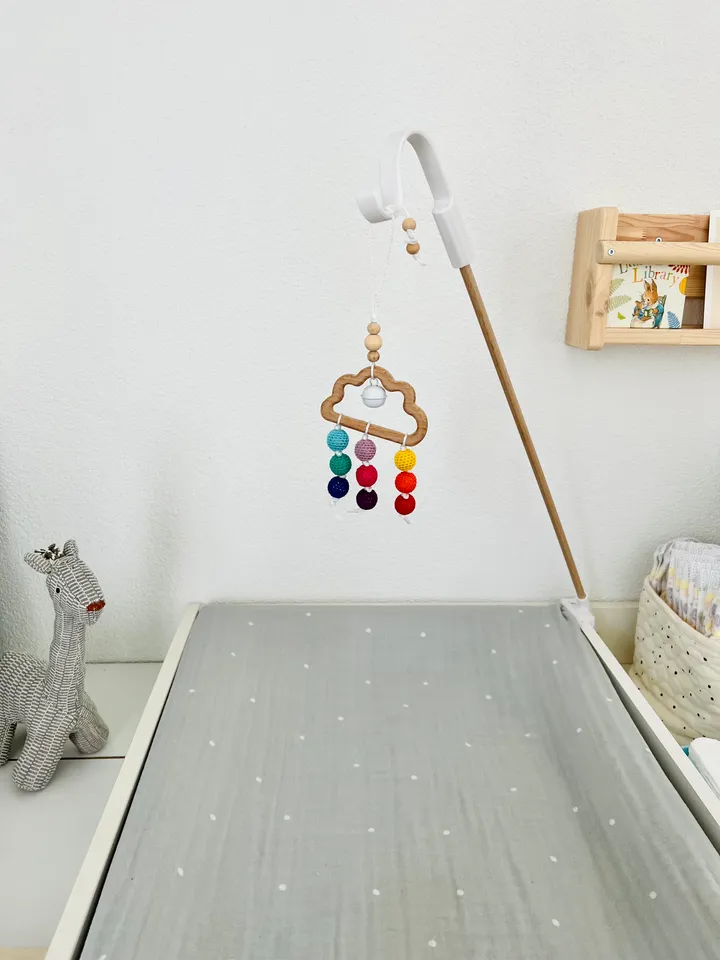
Works well, 10mm rod from the local hardware store (they only had ribbed 10mm, might try 12mm and scale up).
Need to come up with a solution for the earrings though, the hoopy ones work well but the classical ones don't fit anywhere.
Thanks for the nice design! Happy wife, happy life.


Just what i needed! Almost! ;) Do you have a file to make an easy remix? I need one with a gap of 27 mm. Gonna edit it in fusion 360 for now =)

Worked really well with a generic changing table top and printed perfectly with minimal support.
Saved $15-20 on a inferior version on Amazon that would have to be drilled into the wall. Used a cheap 3/8" x 48" dowel from Lowes which worked well with some mounting tape to make things friction fit and adjustable.
Thanks for your work!


good design, could have used some chamfers, just a tad bit thick for my door.
Other than that great model, even in pla this can support quite a bit of weight!


Printed with 0.8mm nozzle and Fiberlogy Easy PLA white.
I scaled the model to reduce the depth, in order to better fit with the available space in the kitchen.


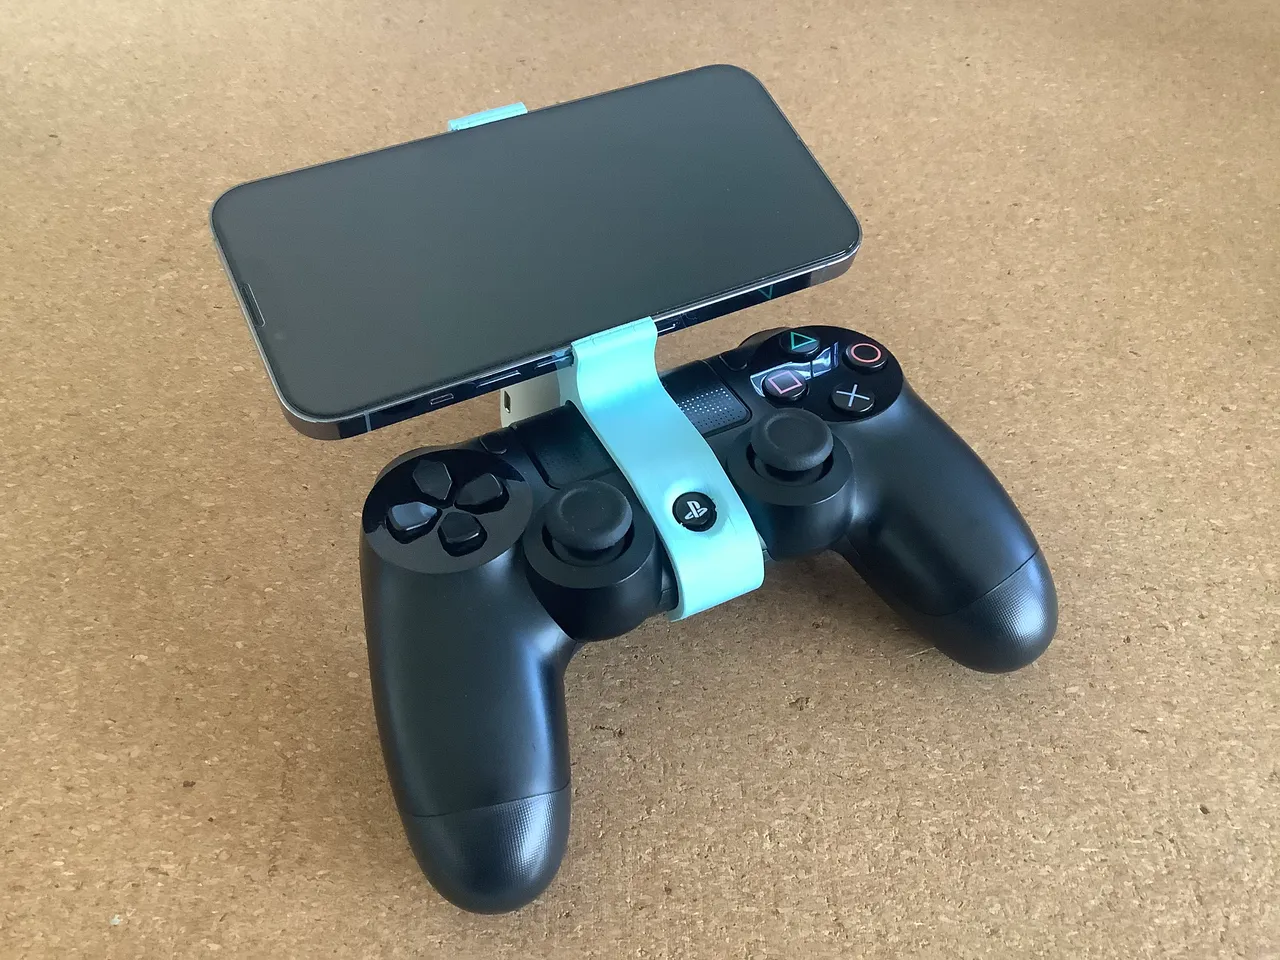

Any chance you could upload a STEP or f3d file? I'd like to remix this for iPhone 15 :)
can you size it for the iphone 15 ??


Thank you so much!
Turned out great in ASA, 0.6 nozzle, 0.2 layer. I'd suggest a more rigid mount for the parts fan because it's very easy to nudge it forward/back when it's on a single screw. Maybe a notch somewhere or another screw just to keep it aligned. (edited)


Since MINI got higher movement speeds by default (5.1.0-alpha firmware + new PrusaSlicer profiles), I've started noticing major design flaw in this mount which are likely inherited from the original mount by E3D.
Bowden tube bending back and forth on long X axis movements is causing so much strain on the hotend that the hotend rotates in its thread. This really affects layer consistency.
I printed the mount a year ago in white ASA (my previous comment) and it only started doing this the new profiles increased travel speeds. But even infill speeds are wiggling it a lot - I can clearly see it rotating by ~5mm back and forth with every X axis movement. I only noticed it because the mount is white and ASA rubs off as the hotend rotates, leaving white dust on the hotend.
Most of the ASA dust in this photo has actually ended up under the thread so it's not really visible.

View one more comment
@PapalPotato_144364 I'm not using it anymore :( It was great for a year, but I'm now using a more robust Mini+ E3D Revo Micro Edition 2 duel fan duct.
I really didn't like dealing with wobbly fan mount and loose threads on this one.

@horza_33551 Do you have a link? My overhangs are pathetic with the stock setup. I have a revomicro as well.