#0181 Nautilus 2 Rotating Caddy [2 Variants]

Description
PDF*** Thanks for checking out this model! ***
If you appreciate what I'm doing, consider buying me a coffee, and check out my other models for something else you might like!

**********
[UPDATED Sep 21, 2024] Added a smaller variant, for those with more space constraints.
*********
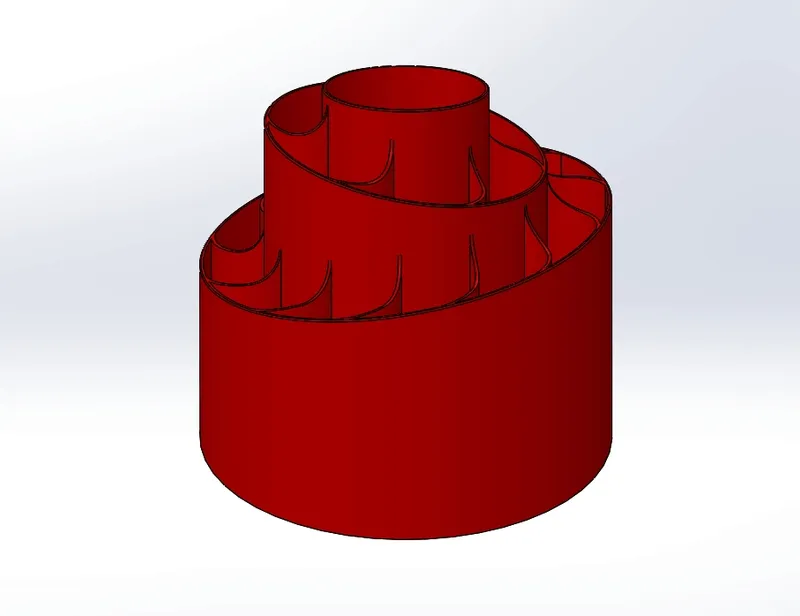
This is my 3rd "functional art" project - a pen / pencil rotating caddy inspired by the shape of a nautilus shell. It changes its looks depending on which angle you view it from. Here, the many “chamber walls” of a nautilus act as partitions for any and all your writing/coloring/artistic instruments.
The entire caddy rotates smoothly on 6mm ball bearings that sit inside the “race” under the caddy - which gives you easy 360° access to all your writing instruments.
Key Features:
- Versatile storage caddy that rotates smoothly for easy access to all items.
- Efficient use of desk space to keep things organized, neat, and tidy.
- Allows you to organize pens/pencils from shortest on the outside rings to longer ones in the inner rings.
- Tall slender items like rulers can go in the center cup, depending on length.
The many uses include:
- Help a disorganized student get organized.
- Help an organized student stay organized.
- Help student artist organize their art pens / color pencils / brushes.
- Even if you are not a student, this can help you organize your desk better.
Printing recommendations:
- Print models as oriented on the print sheet.
- Great use for PLA.
- 0.2mm layer, 0.4mm nozzle. Tested with Polymaker Matte Fossil Gray PLA.
- Print using a bi-color or tri-color silky PLA filament for an even more interesting effect!
Other things you'll need:
- 1x M3x10 socket head cap screw.
- 6x 6mm ball bearings (there are slots for up to 12x bearings).
Assembly tips:
- The 2.75mm hole in the center of the caddy includes a sacrificial 0.2mm layer that allows for bridging (thus avoiding supports). This sacrificial layer can easily be removed with an Xacto knife.

2. Note the orientation of the ring as assembled, see below. It is upside down from its print orientation.
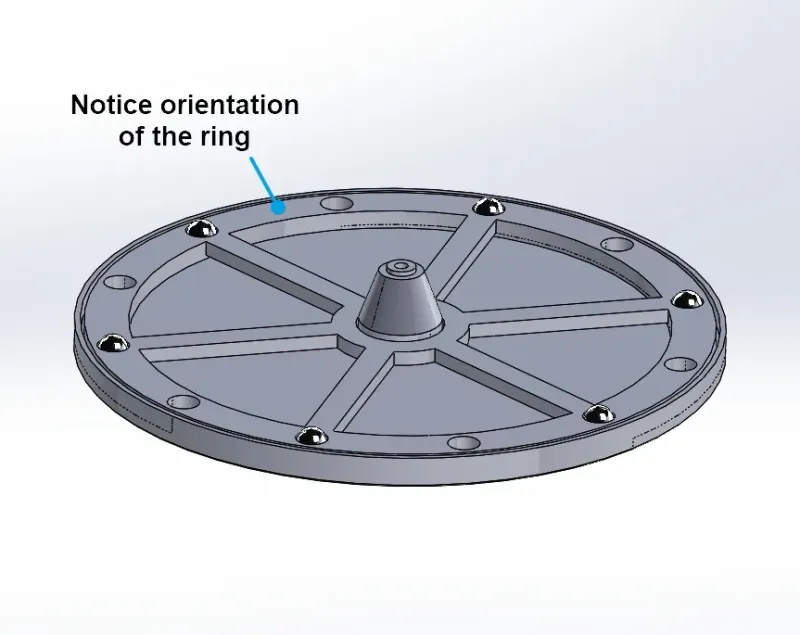
3. After installing the ring and bearings, drive the screw into the caddy from the underside of the base.
4. Tighten screw to “finger tight” then back off about ¼ turn or until the caddy spins freely against the base.
**********
If you add this to your collection and/or download the model, please >click< the LIKE button and give it some STARS!
Remember, you can earn some Prusameters if you post a pic of your make! Plus, it would make my day to see it. ;-D
Happy Printing!
P.S. Please post some constructive feedback if you'd like to see something improved.
Tags
Model origin
The author remixed this model.

Differences of the remix compared to the original
This model has curved compartment dividers that more closely resembles a nautilus shell's chamber walls.