Omnidirectional XRP Robot


Description
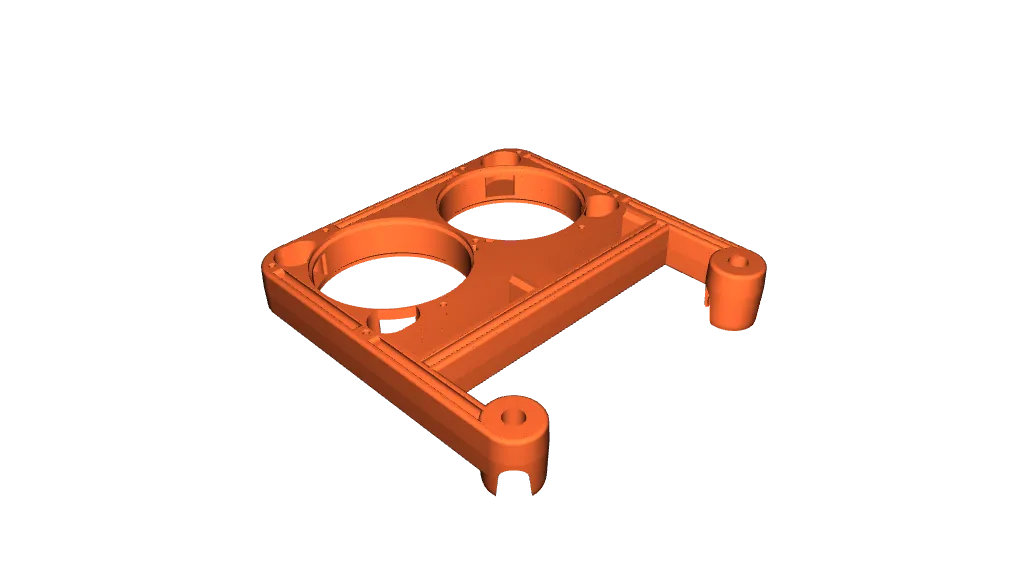
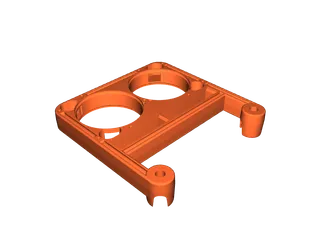
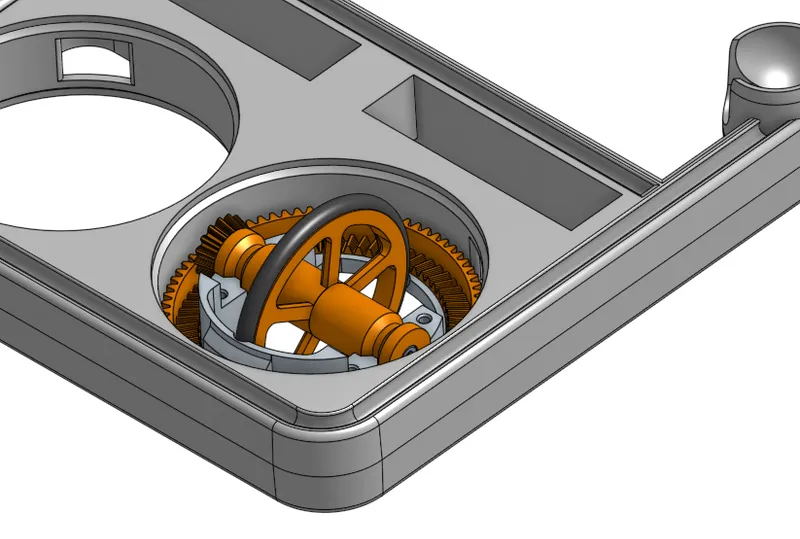
PDFThis is a modified XRP chassis with swerve drive modules.
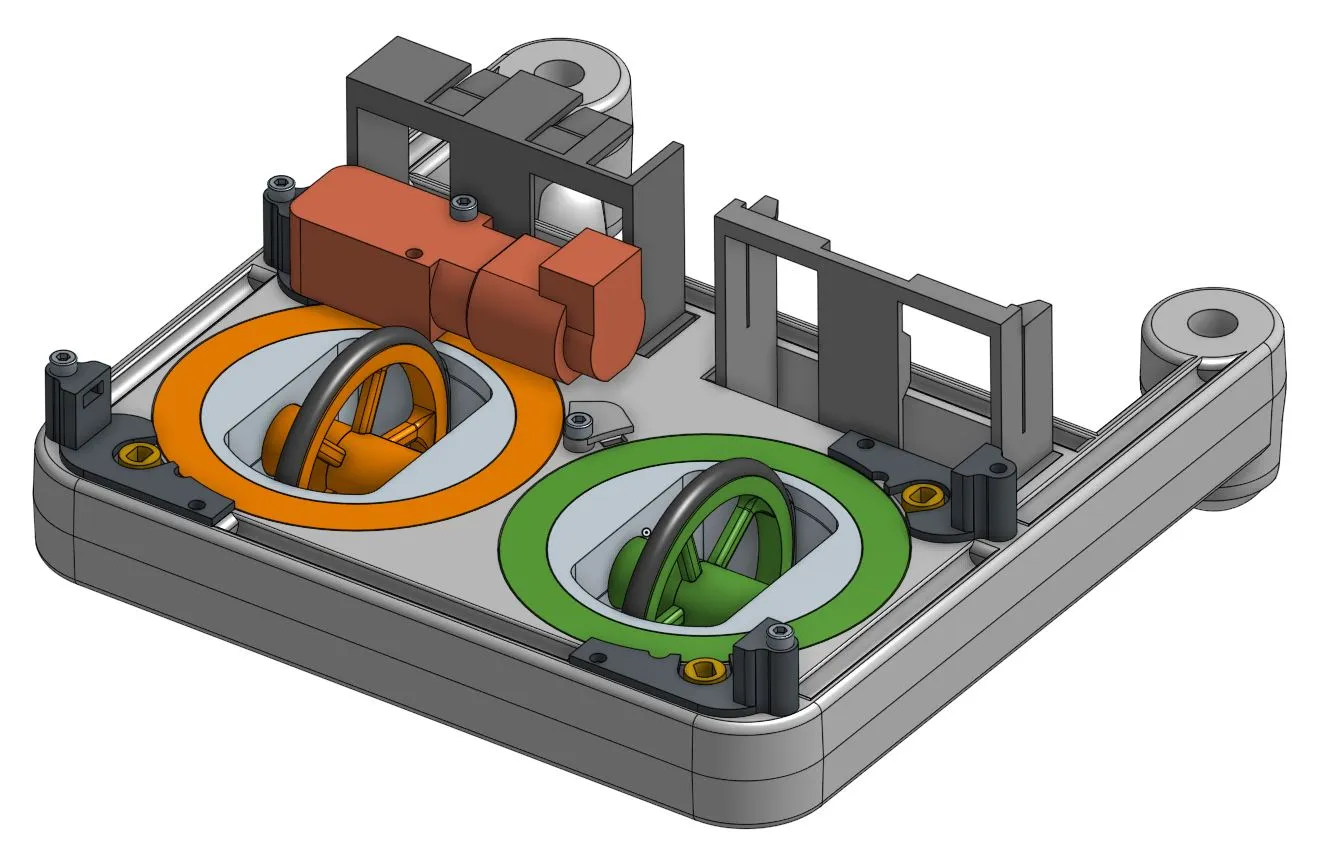
I tried to keep most of the original XRP features, so the size and mounting rails are the same. Both the battery and the controller are mounted in a frame as in the original (however vertical), and the o-ring and the motors are the same.
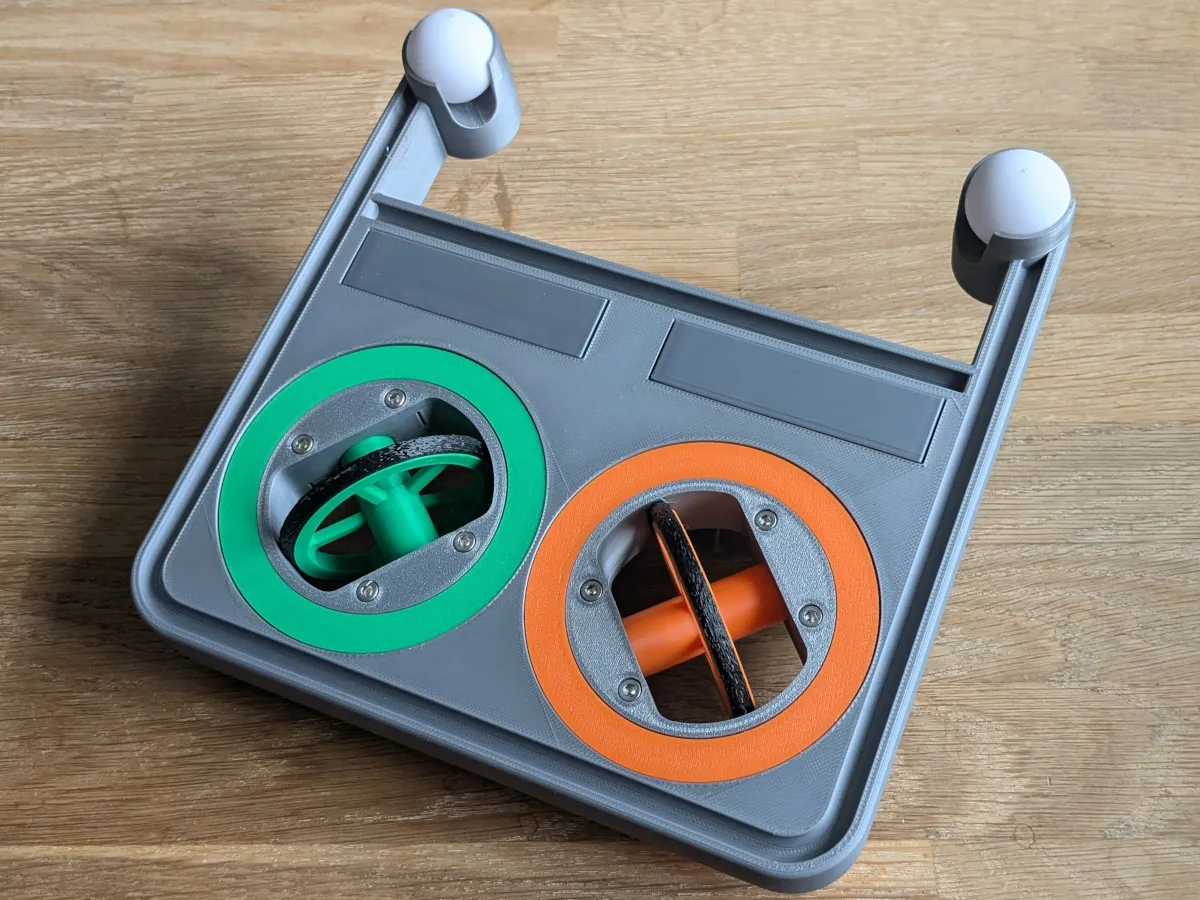
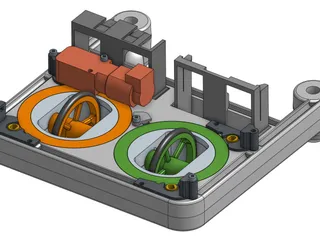
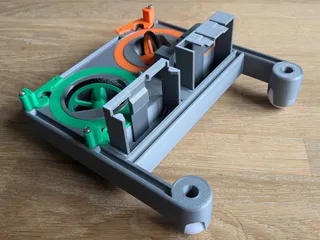
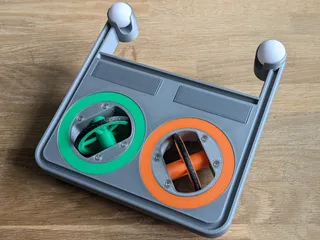
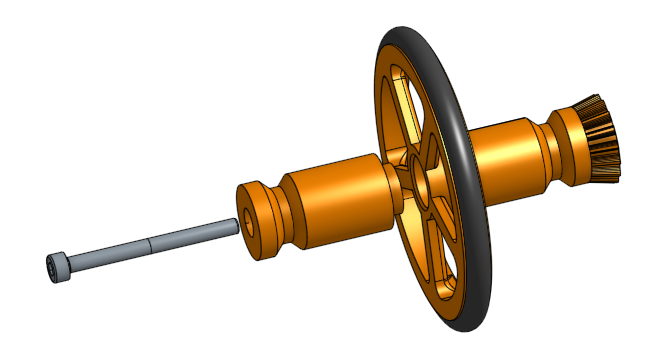
The swerve drive allows the wheels to spin and change direction by the use of two stationary motors. The rotation of the motors is transferred to the wheel assembly by the use of two gears rotating around the wheel. The model features both a differential swerve (orange) and coaxial swerve (green). The modules look the same from the outside, but are controlled differently.
For an explanation of the differential module see this video:
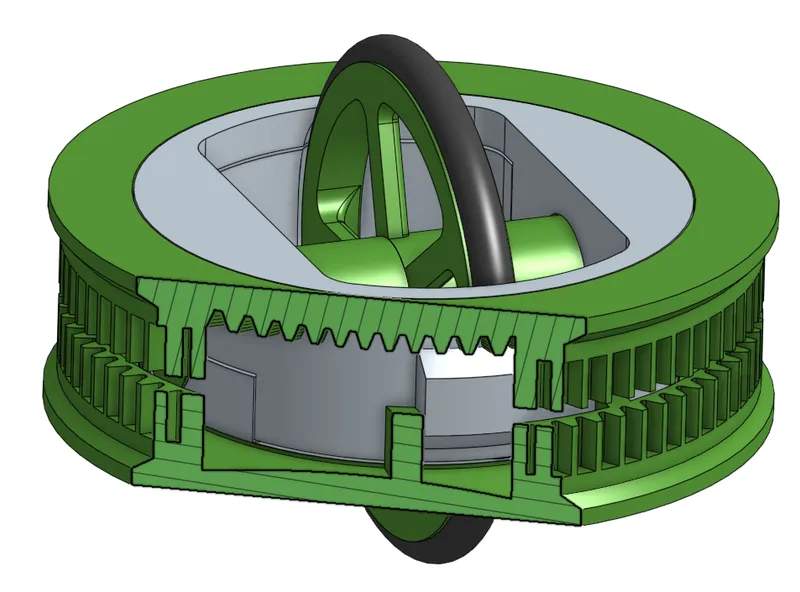
The coaxial version differs, in that the large lower gear is different. It doesn't have teeth on the inside. So the lower gear is not coupled to the axle of the wheel. Instead, it has a tab, that locks the gear to the inner hub (gray). This means, that the lower gear directly controls the angle of the wheel, while the top gear controls the rotation of the wheel. The section view below shows how the lower gear locks to the hub:
Printing
The table below summarizes how many times you need to print each part. Most parts can be printed without support, but I recommend adding tree support for the chassis and the hub-bottom.
| Part | Qty for differential | Qty for coaxial |
|---|---|---|
| chassis | 1 | 1 |
| gear-differential | 4 | 2 |
| gear-coaxial | 0 | 2 |
| hub-bottom | 2 | 2 |
| hub-top | 2 | 2 |
| gear-bottom-small | 2 | 2 |
| gear-top-small | 2 | 2 |
| wheel-gear | 2 | 2 |
| wheel-axle | 2 | 2 |
| kit-motor-mount-a | 2 | 2 |
| kit-motor-mount-b | 2 | 2 |
| cover-sensor | 1 | 1 |
| mount-battery | 1 | 1 |
| mount-pcb | 1 | 1 |
Note, that the only difference between the differential and coaxial configuration is the gears. For the coaxial, the bottom gear is different from the differential version.
All model files are provided in stl and step format. You only need one of the formats. Step is easier to modify and also prints nicer.
Other Parts
If you already have an XRP robot and you want to experiment with swerve drives, you only need very few parts in addition to the printed parts.
| Part | Qty |
|---|---|
| Hex socket head cap screw M3x16 | 9 |
| Hex socket head cap screw M3x20 | 4 |
| Hex socket head cap screw M3x35 | 6 |
| Hall sensor A3144 | 2 |
| Cylindrical magnet 4x5mm | 2 |
Parts in italic are only needed if you want automatic zeroing of the direction of the wheels.
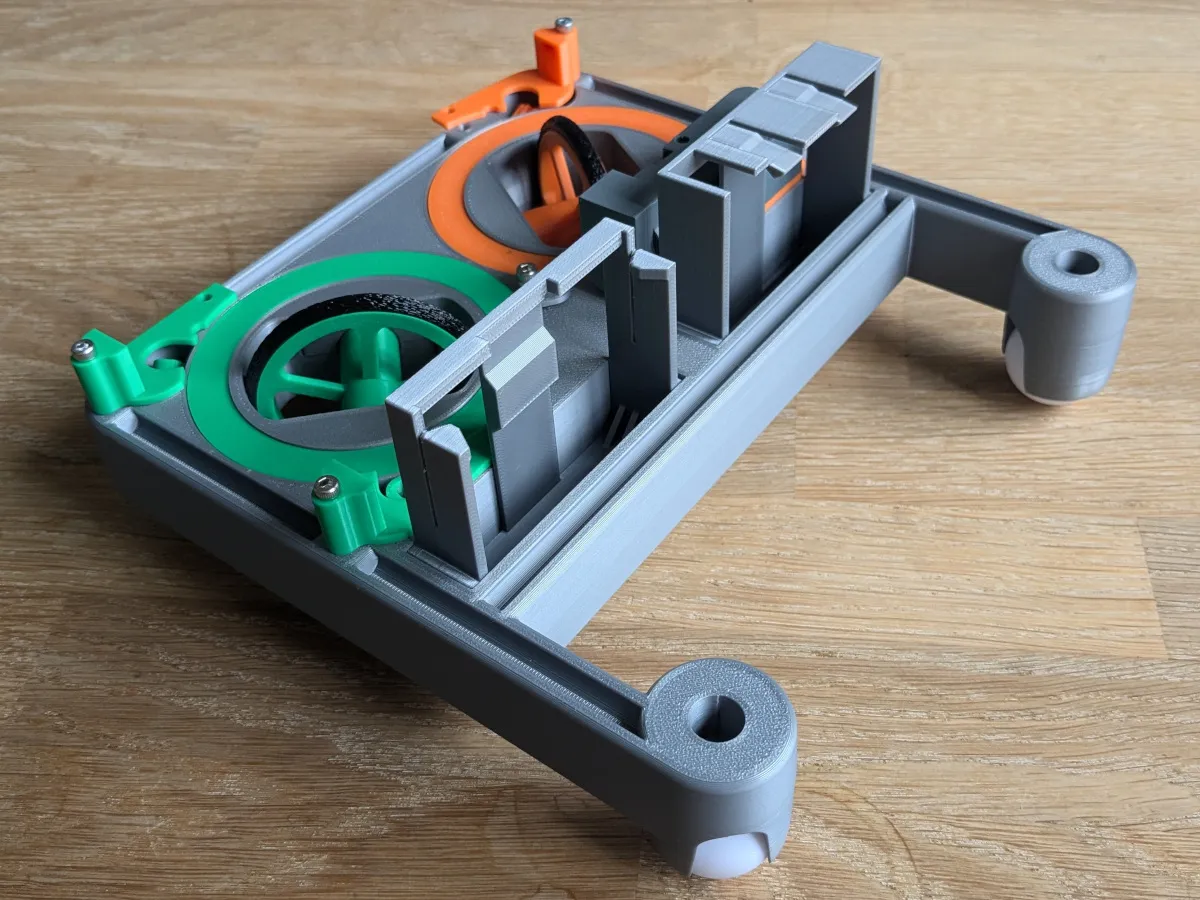
In addition to those parts you will also need some XRP parts: 4 motors (the photos only show one dummy motor mounted), 4 O-rings, 2 castor balls, controller and battery.
Assembly
- Attach wheel-axle with wheel-gear using M3x35. Also, add the o-ring.
- I recommend lubricating all moving parts during the assembly. I used lithium grease for this.
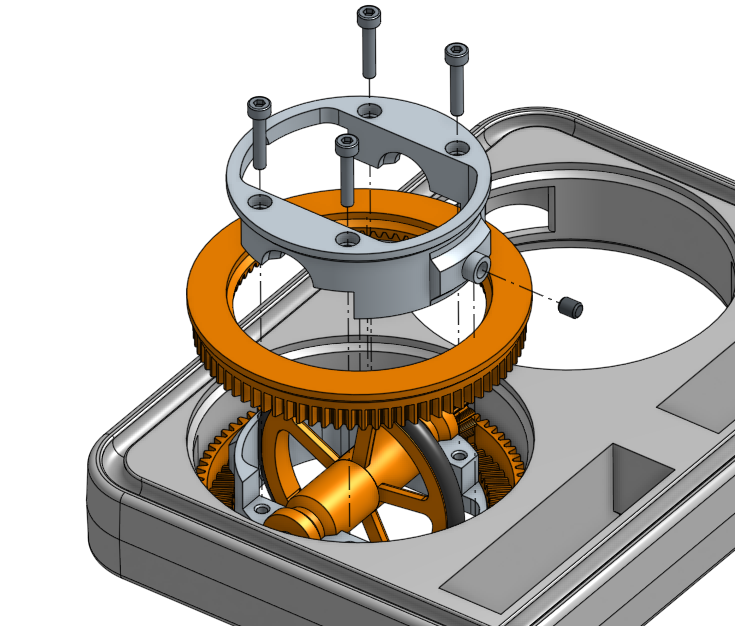
- The wheel assembly is attached to the top gear-differential and the hub-top.
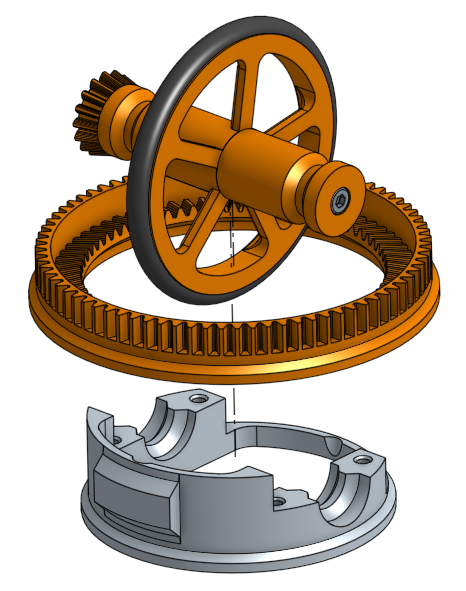
- With the chassis having the bottom facing upwards, put the assembly in:
- Still working from the bottom, attach the hub-bottom to the second gear-differential, and secure the bottom parts to the top parts with 4 M3x16. If you want automatic zeroing with a hall-sensor, also glue in a 4x5mm magnet.
- Working from the top, attach kit-motor-mount-a to the motor, and add the gear-bottom-small to the motor axle. Slide in the motor assembly from the side, and secure with one M3x20 and one M3x35.
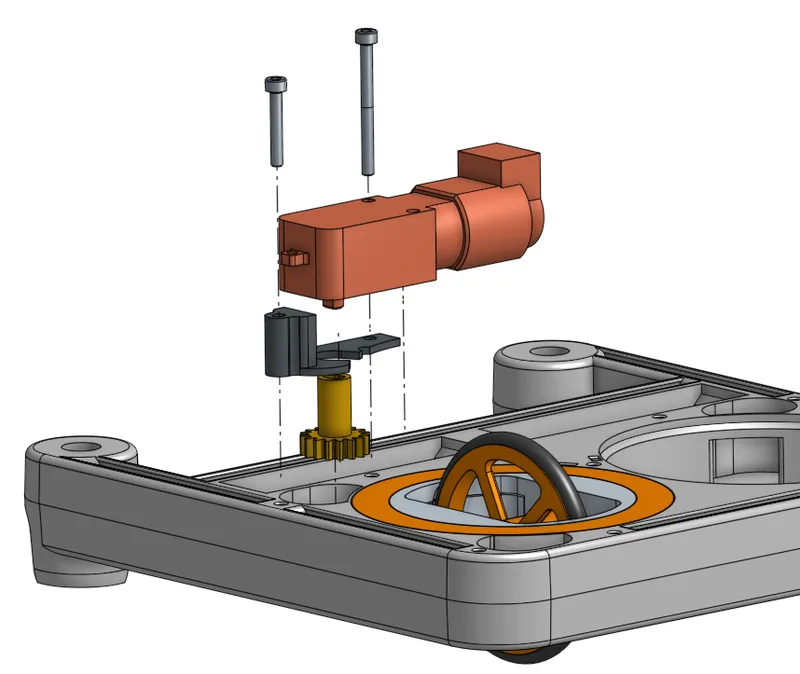
- The other motor attaches the same way, but with the parts kit-motor-mount-b and the gear-top-small
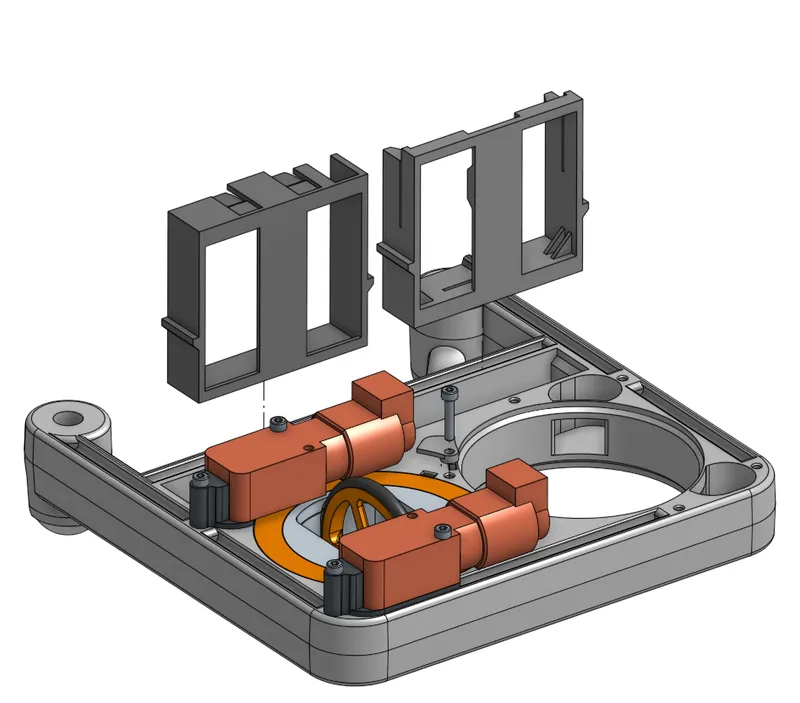
- Repeat for the second wheel. As explained above, you can use gear-coaxial for the bottom gear, if you want coaxial control.
- Finally, you can slide in mount-battery and mount-pcb. Also, for automatic zeroing you can put 2 A3144 hall-sensors in the holes in the chassis and fix them using cover-sensor and one M3x16.
If you make remixes of this model and publicly shares the modifications, please consider uploading your changes in an editable format like STEP. It makes it so much easier for others to improve on your changes.
Tags
Model origin
The author marked this model as their own original creation.


