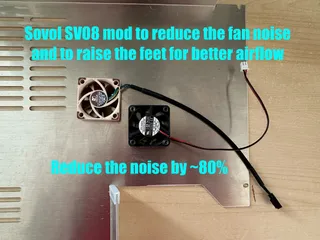
Silent fan & AirFlow mod for Sovol SV08


Description
PDFSilent fan & AirFlow mod for Sovol SV08
Out of the box the Sovol SV08 prints not that bad… But… Well… It is difficult…
To be honest: It does not come even close to my Prusa MK3.5 machines regarding print quality, handling, hardware and software quality, but it is way faster and WAY LOUDER. For the last point I did not know that this is a feature too so far... ;-)
On one of my first prints you will see in the following video I had to wear my Apple AirPods with noise reduction to avoid aborting the print, because the mainboard fan gave me real headaches, because of it was a permanently screaming noise and that not after the machine went hot, no it directly screams from turning on the machine… You will hear it in the video as the constantly loud fan noise and then after that with the mod.
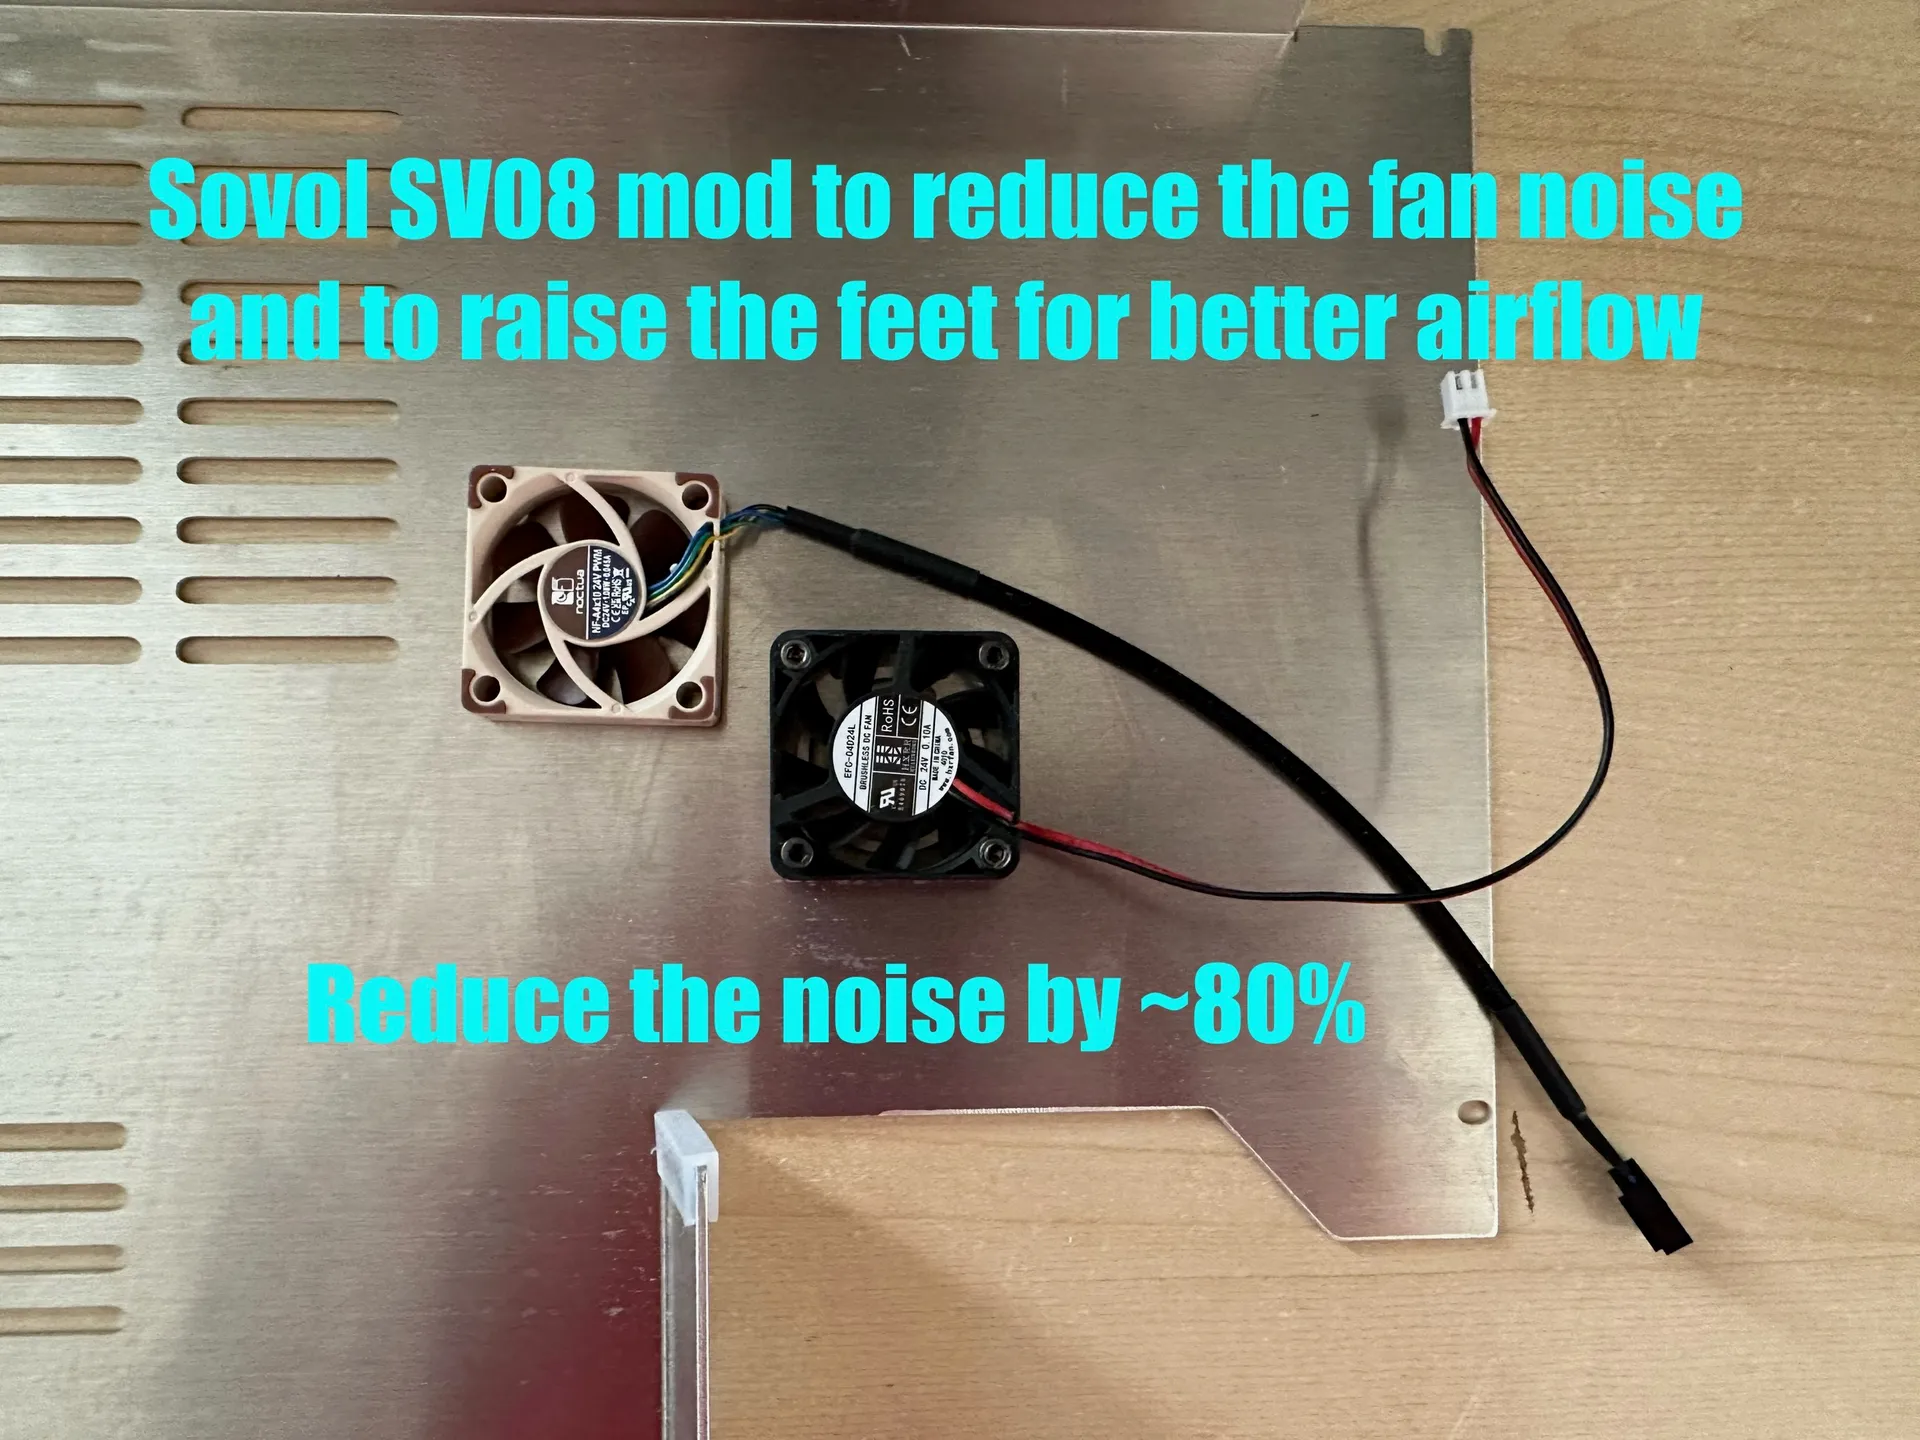
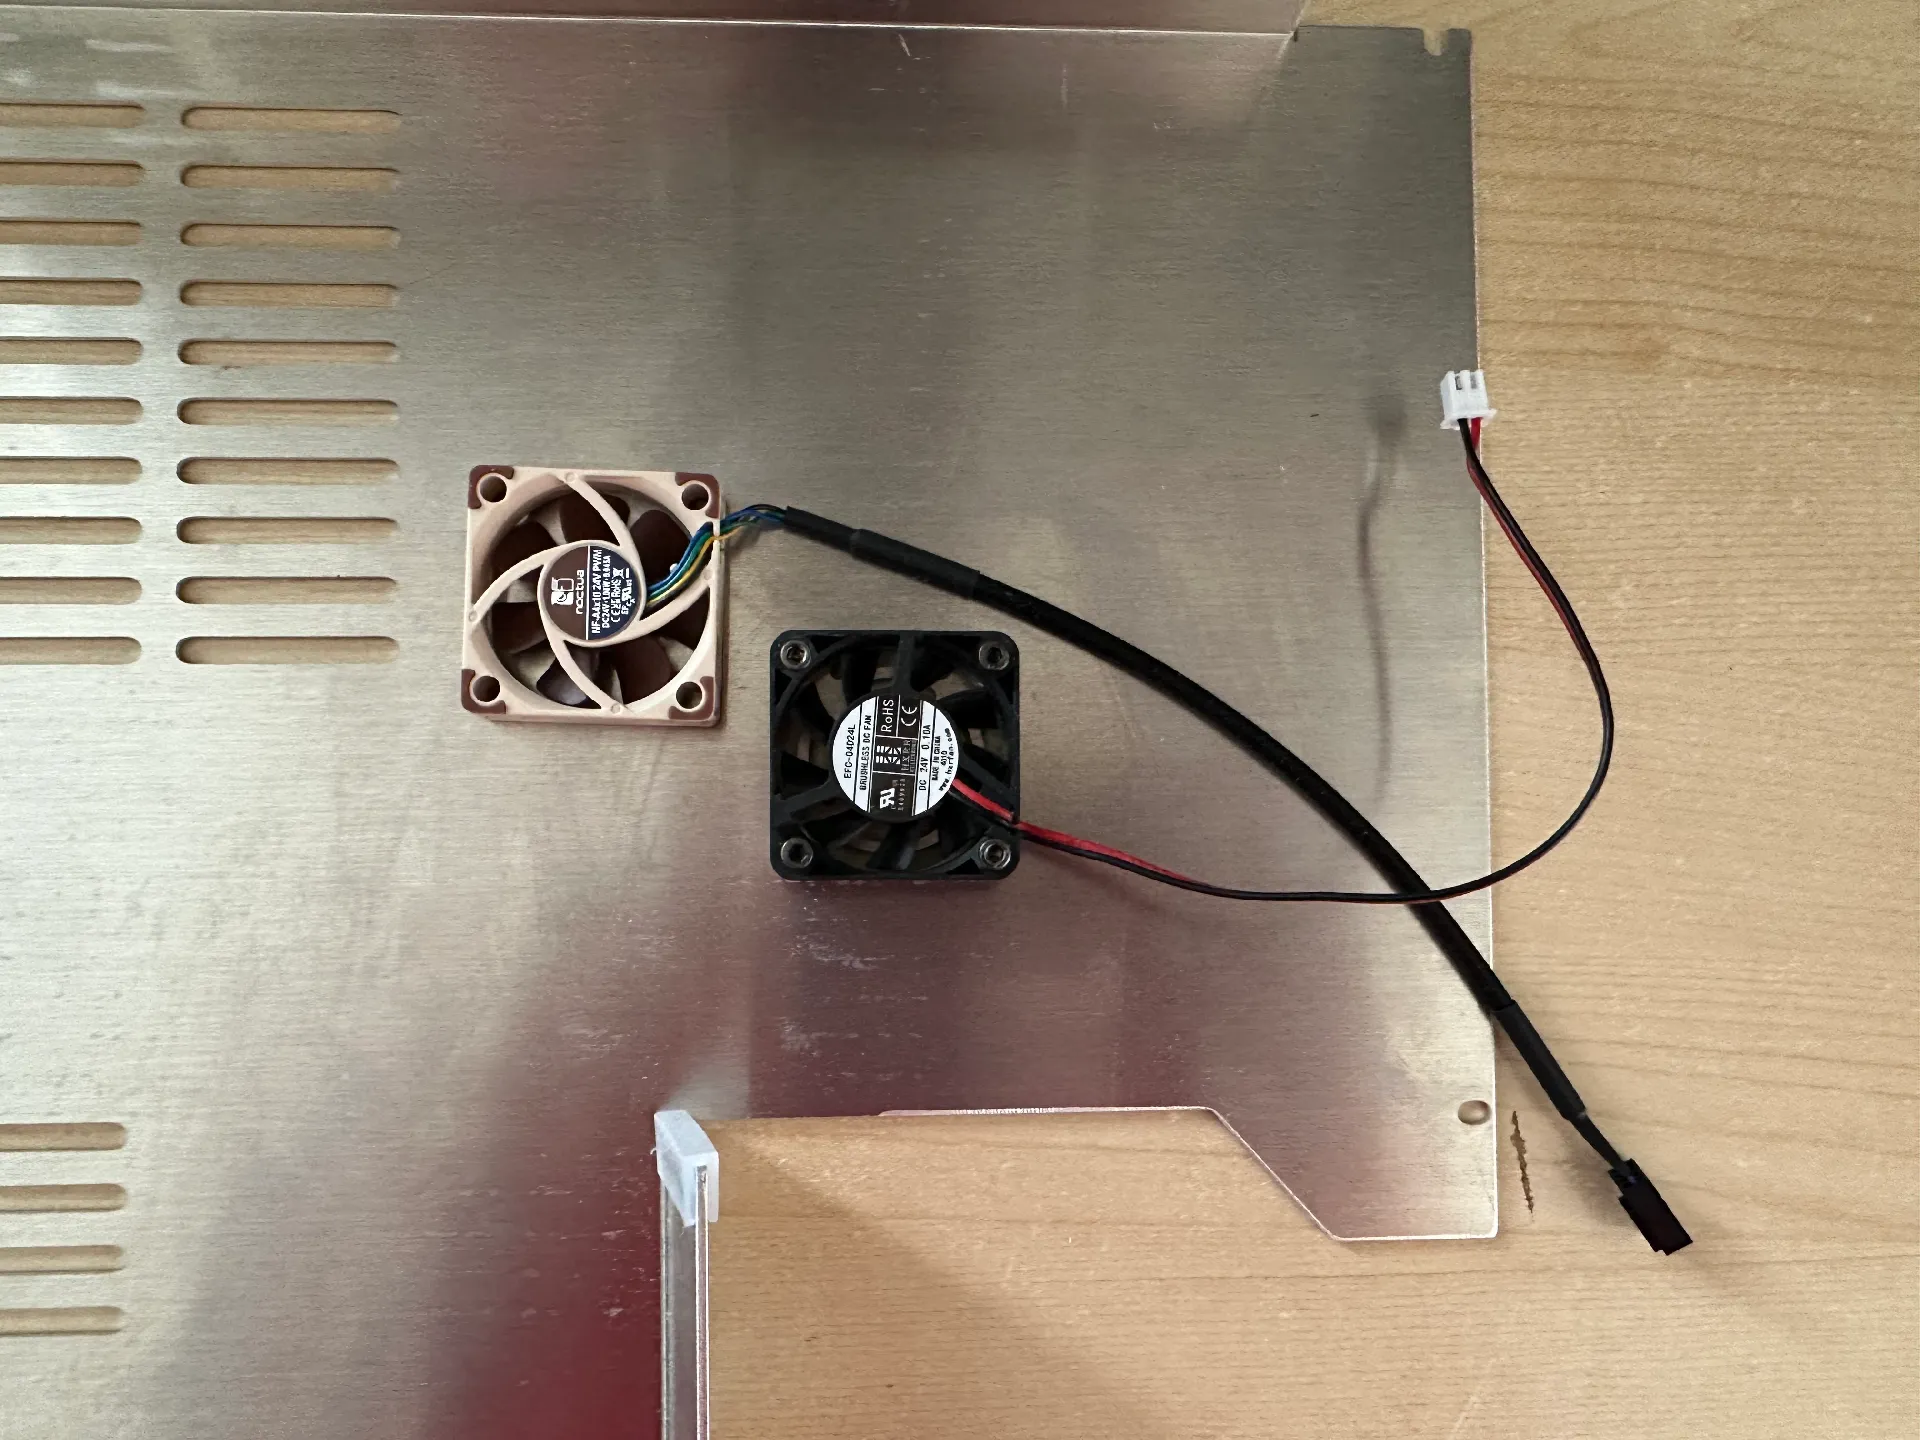
The reason for this is a (as it seems) really cheap and noisy 24V fan in 40x10 and (I think) a false config in the Klipper settings. The config can be changed directly too to hear the effect, but as soon as you start to print it will get loud again after a few minutes… So we need to take care of that to reduce the noise…
With this mod you can add a new almost fully silent fan and airflow raiser feet to help with the cooling too. You can keep the bottom cover, which makes this change really quick. For me this reduced the noise level at about 80% (I think) which makes the machine useable for me in my environment now - finally! Otherwise I think I would not want to use it. I was already thinking of selling it again, when I would not have this solution now. Because the print speed is really good and it seems to have potential to be modded to get better, I will keep it. Without this I think I would not want to run it another day… Sorry, but this is my opinion about this machine. Prusa machines show, that it works better and if it would not have had this super low price (459€ incl. shipping) I definitely would have gone for the Prusa XL, which I will get later too, but of course is a total different price range... =)
NOTE: The printer has still some other issues I will try to take care of later too… ;-)
Watch the video to compare it for yourself. I would say 80% of the noise came from the stock mainboard fan:
Now on to the mods:
Please follow these steps carefully to change the fan and get better airflow:
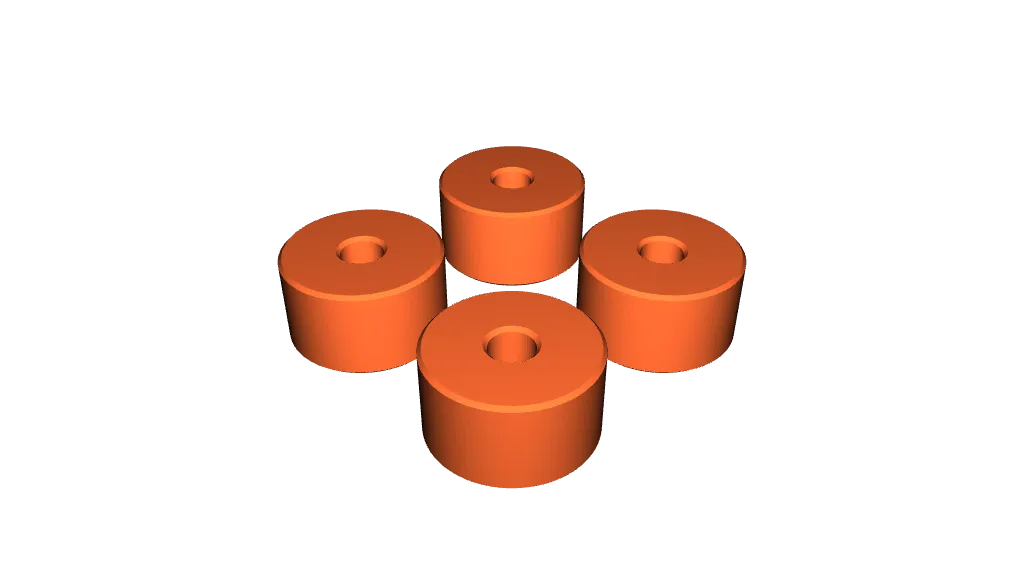
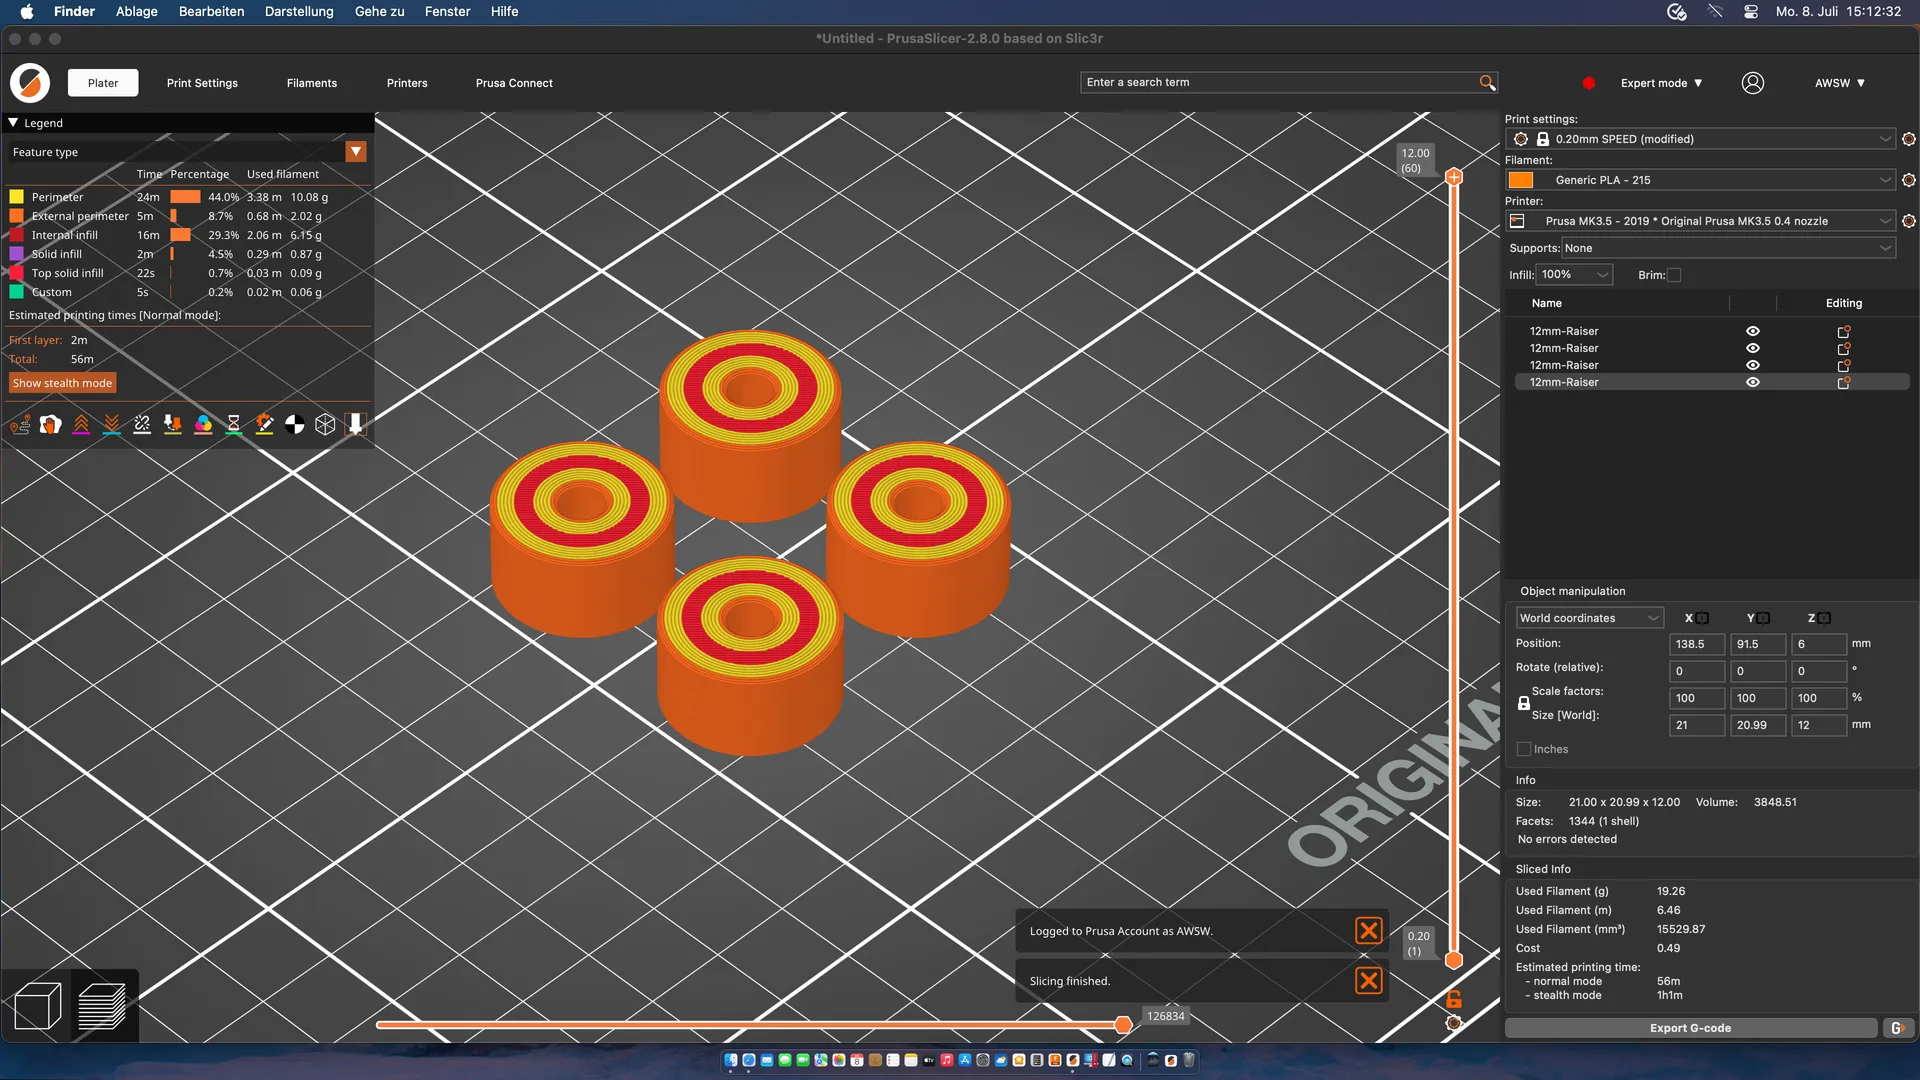
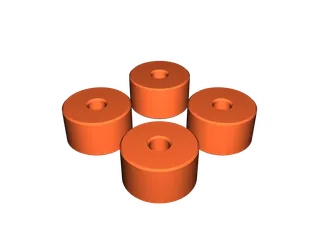
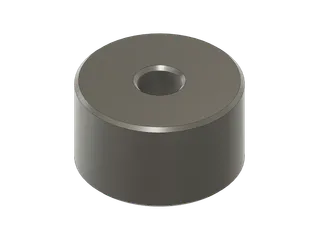
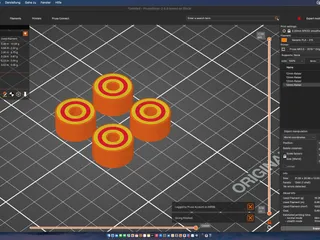
- Print the 4 raisers before proceeding, if you want to attach them too during the steps.
- Shutdown the printer and turn it off.
- Remove the mains power cable. Seriously please do so!
- Place the printer on one of its sides and try to avoid the sides with the display, USB sticks in USB ports and filament roll holder. ;-)
- Remove the bottom cover screws and hold the cover in place to avoid dropping it.
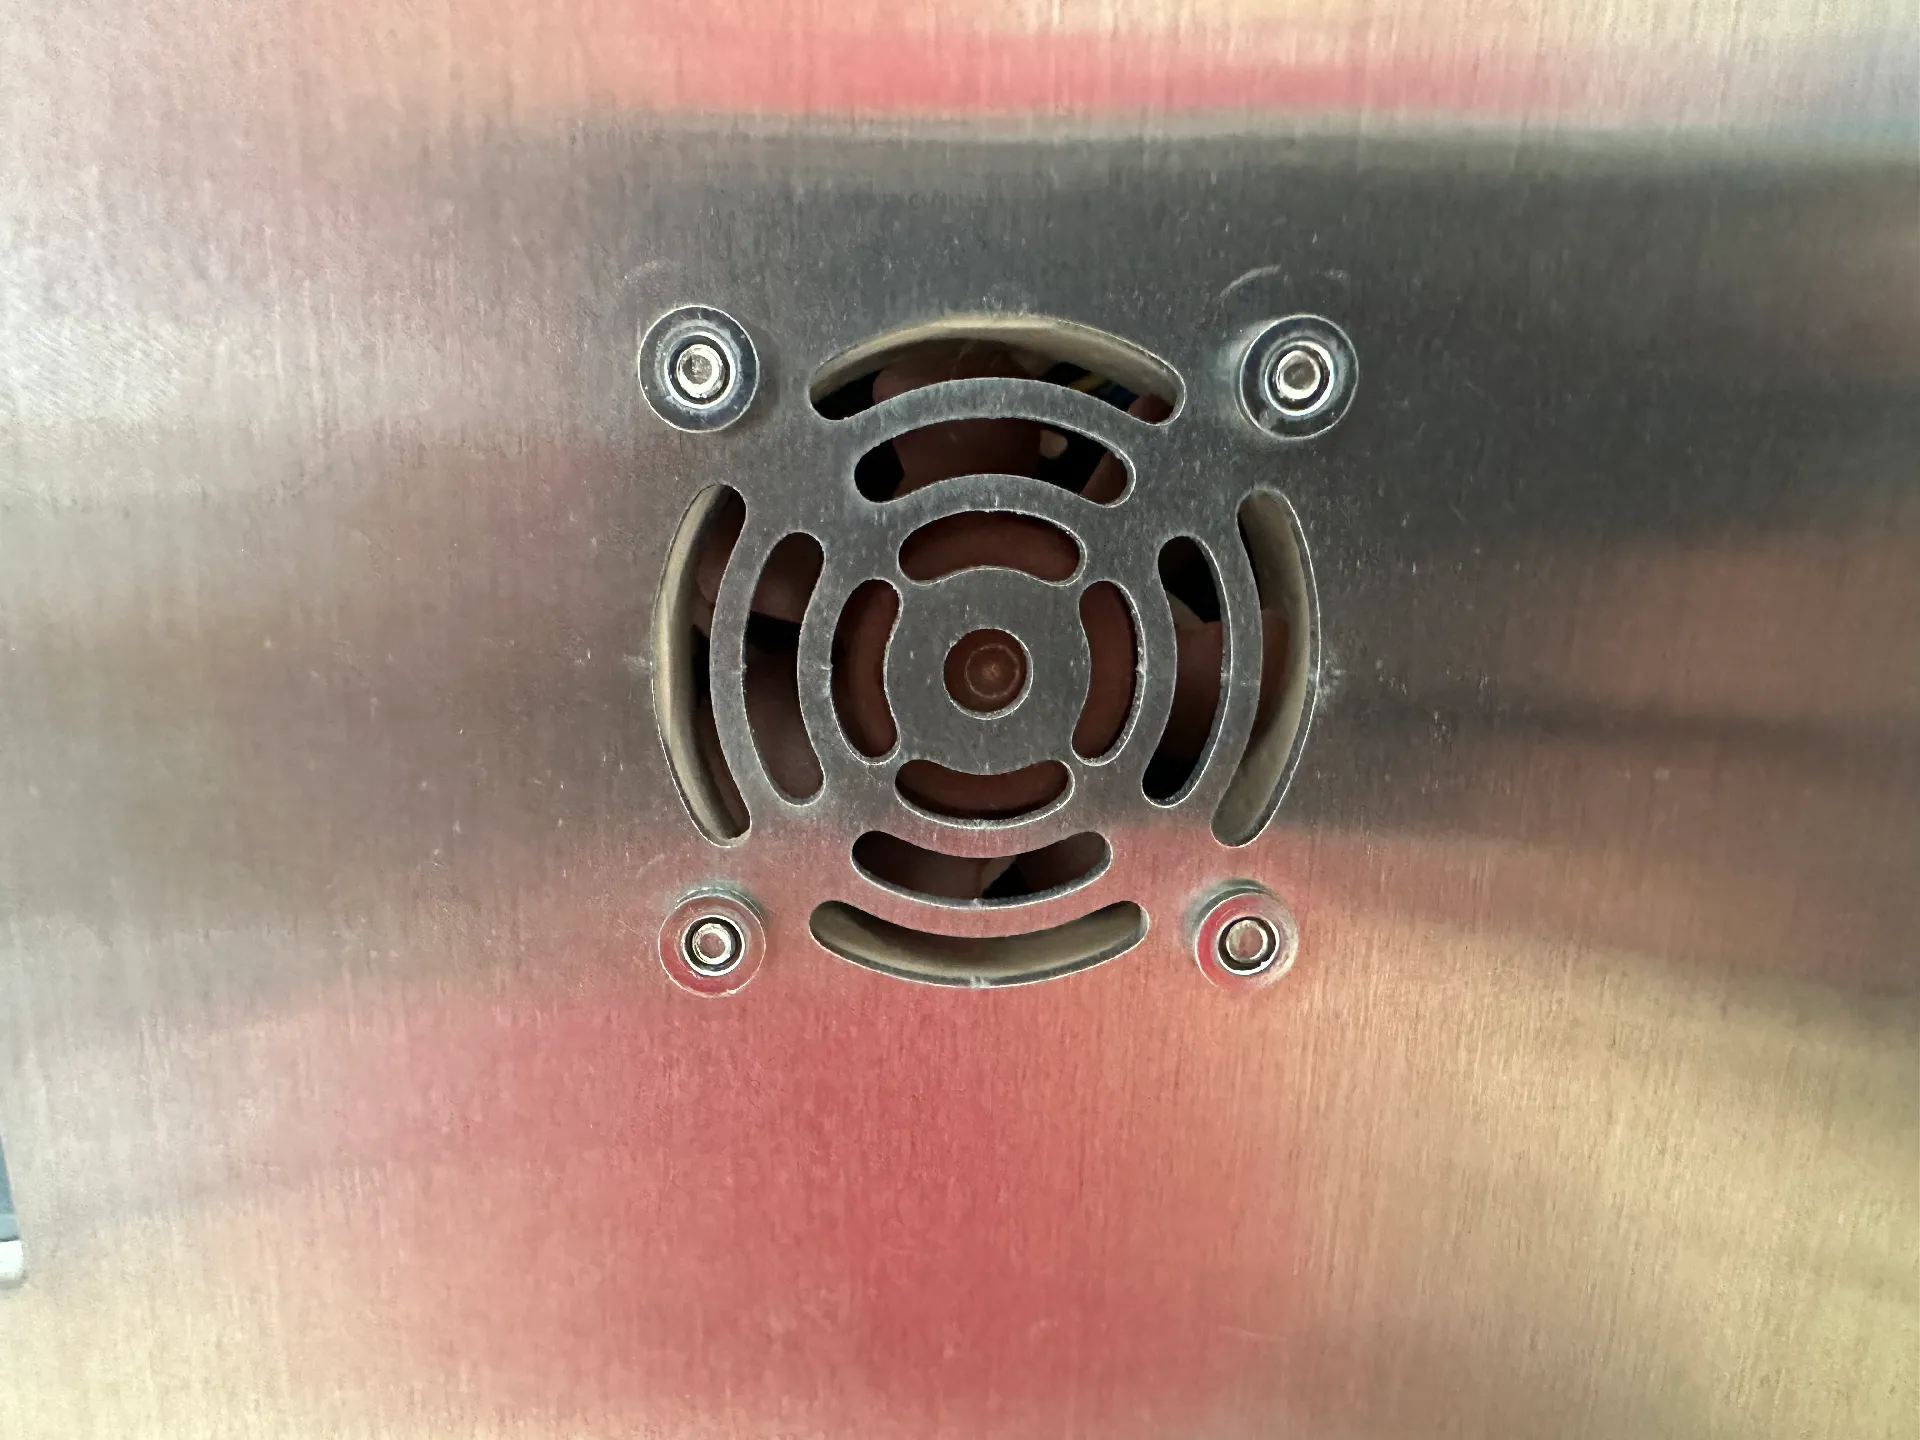
- Carefully remove the bottom cover and try not to pull out the fan cable with this action.
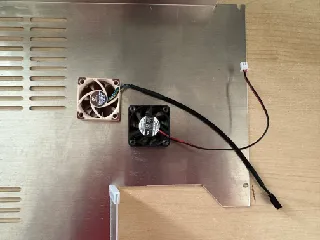
- Have a look where the fan is connected to the mainboard and remember its position.
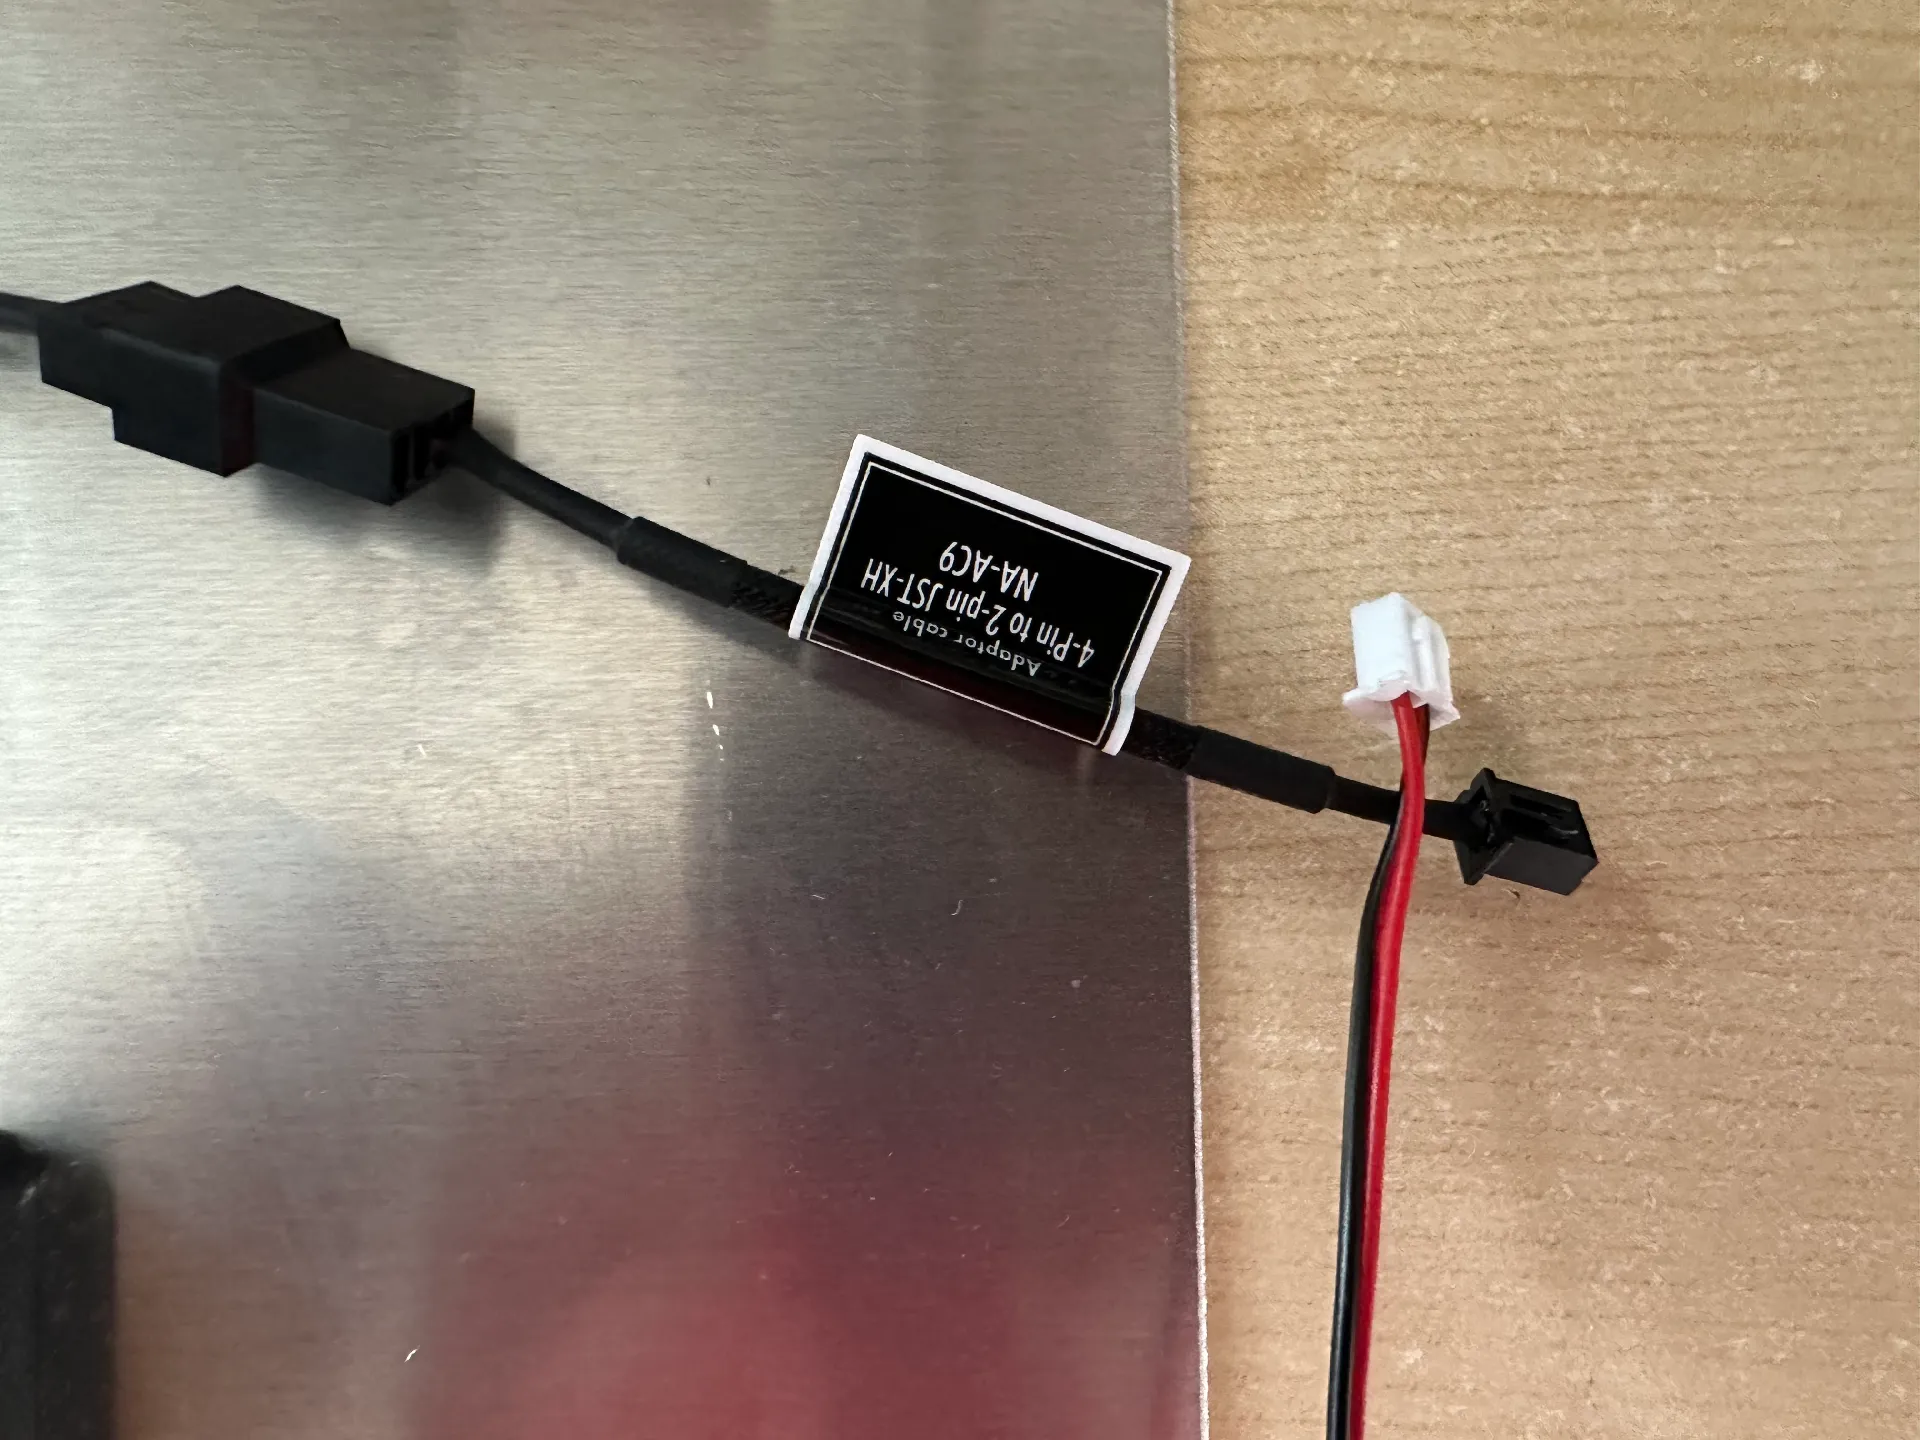
- Remove the piece of hot glue around the fan plug on the mainboard connector.
- Unplug the old fan from the mainboard.
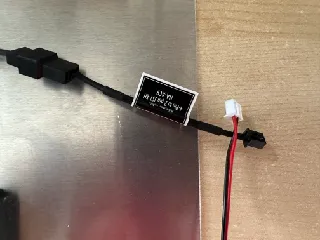
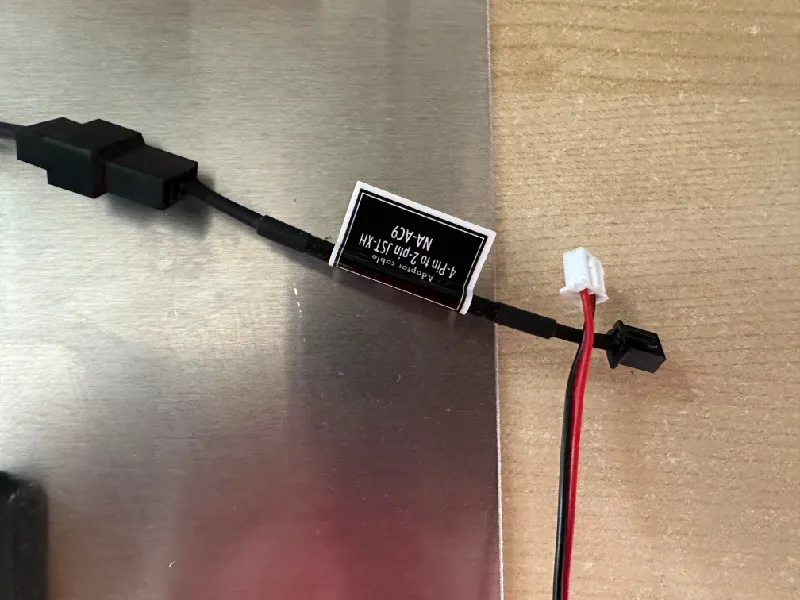
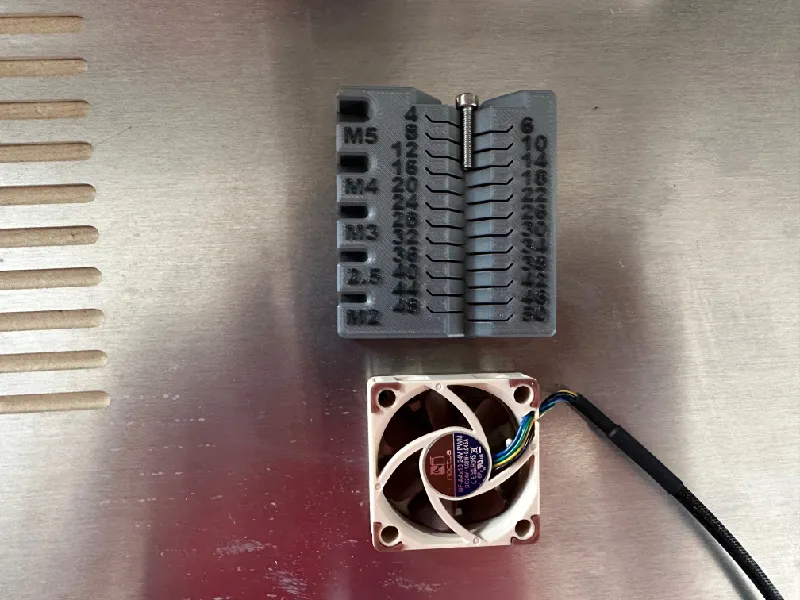
- Take a look at the connector on the fan wire which was plugged into the mainboard. You will find a similar looking adapter cable within the package of the new fan. See pictures below…
- Try to remember the fan orientation of the fan… See pictures below…
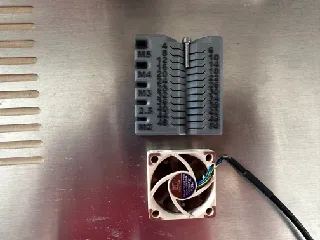
- Remove the old fan from the bottom cover by unscrewing its 4 M3x12 screws.
- Put the old fan and its 4 screws to the side. You will not need them anymore in the following steps.
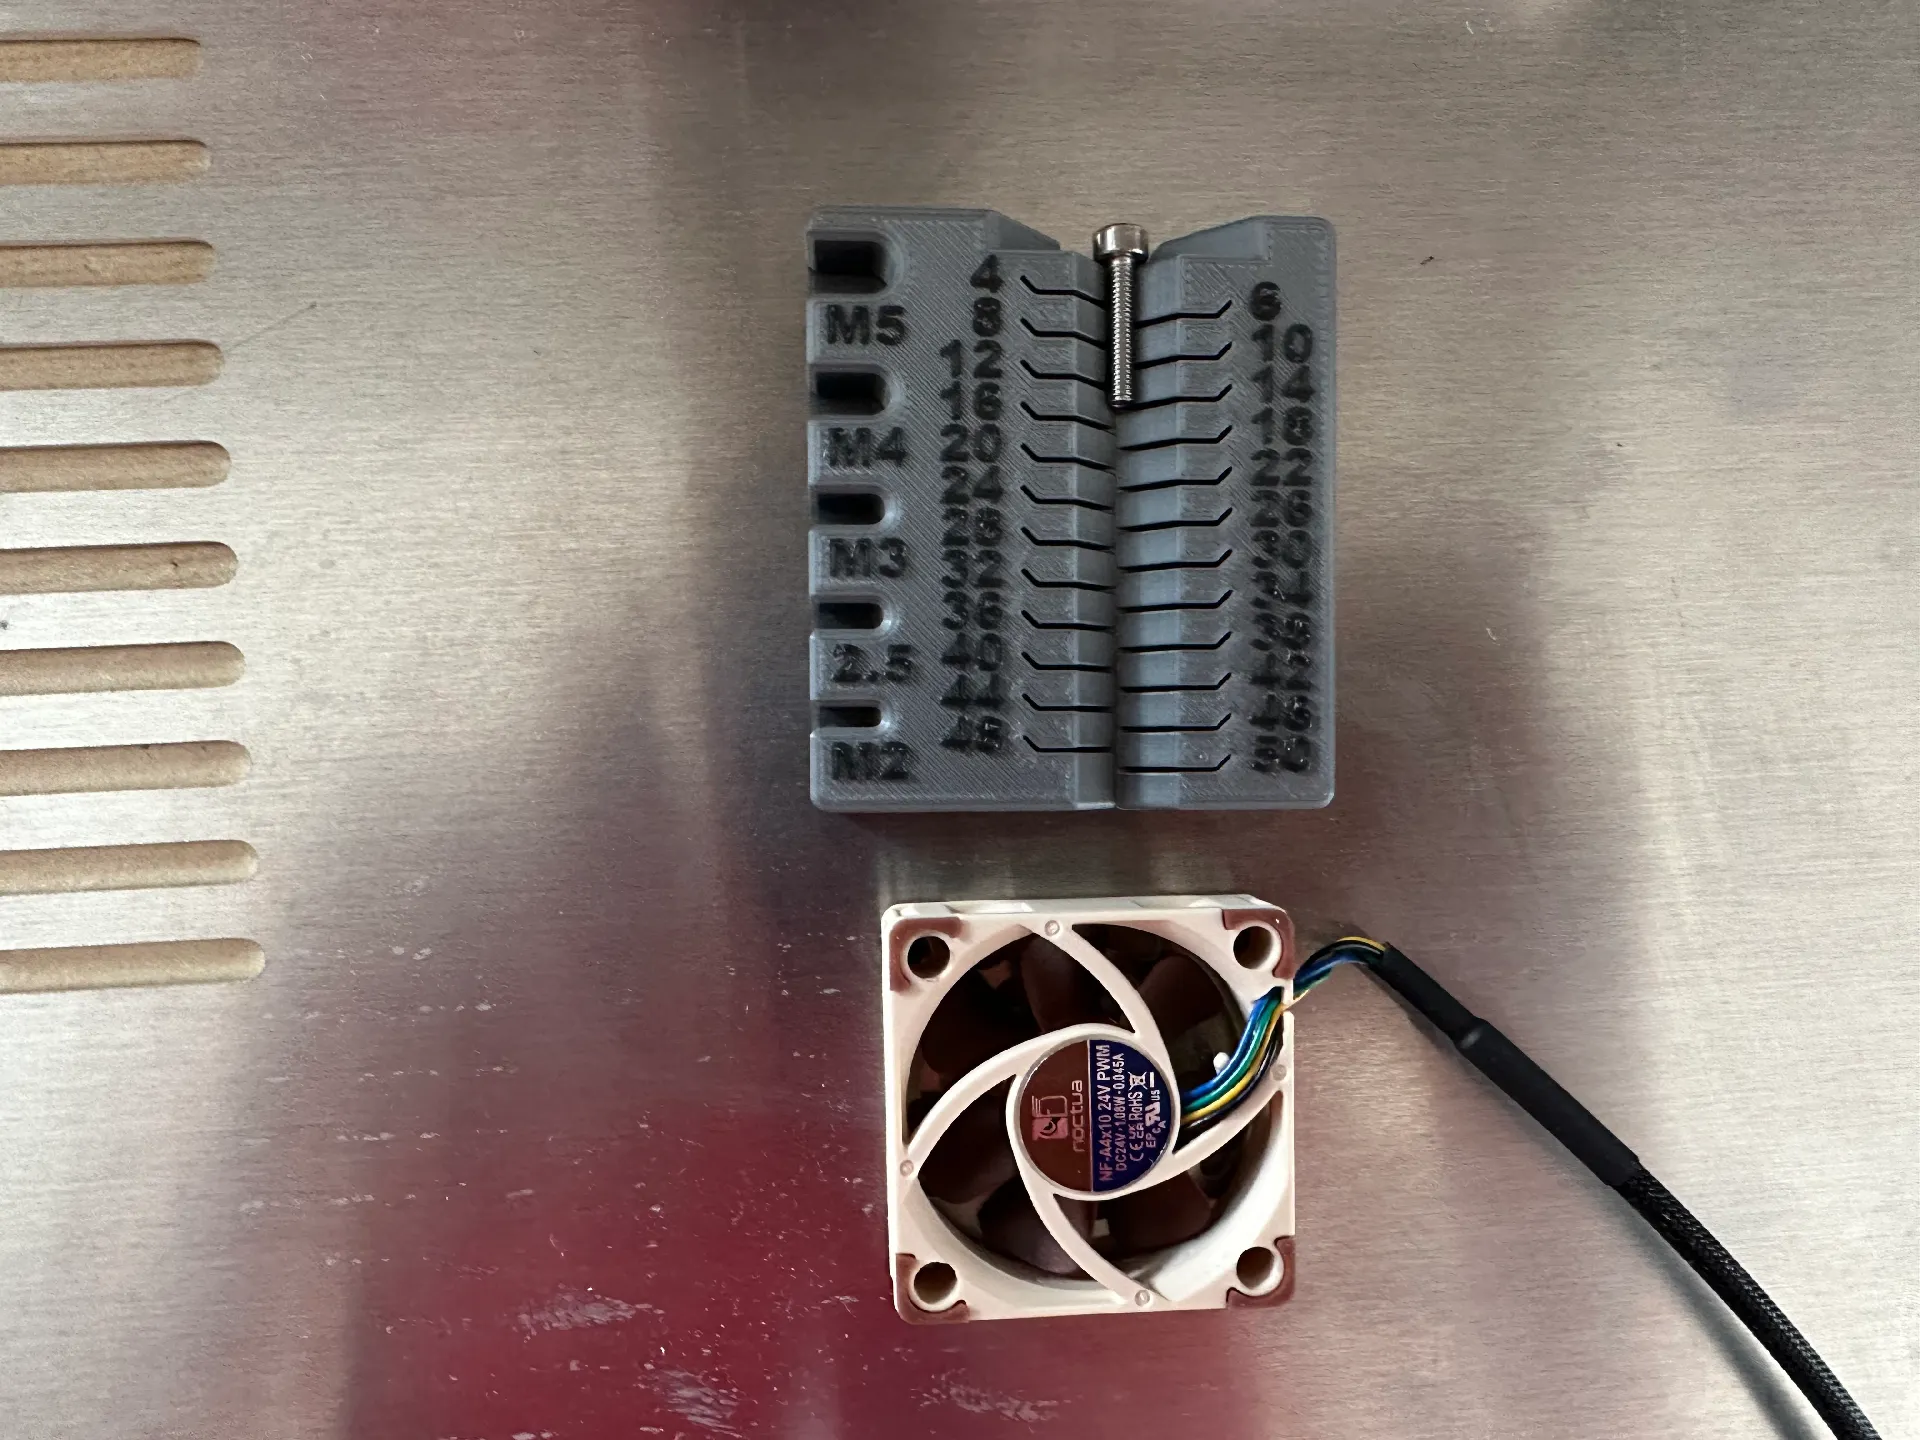
- Unpack the new fan and search the adapter cable named above and connect it to the fan. Take care of the orientation, which should be obvious… See pictures below…
- Mount the new fan with the 4x M3x14 screws to the bottom cover in the same orientation as the old one was… See pictures below…
- Plugin the new fan into the previously used connector on the mainboard.
- Close the bottom cover carefully and try not to catch other cables on the bottom.
- Mount the bottom cover with its screws again.
- Now on to mount the already printed 4 raisers for better airflow:
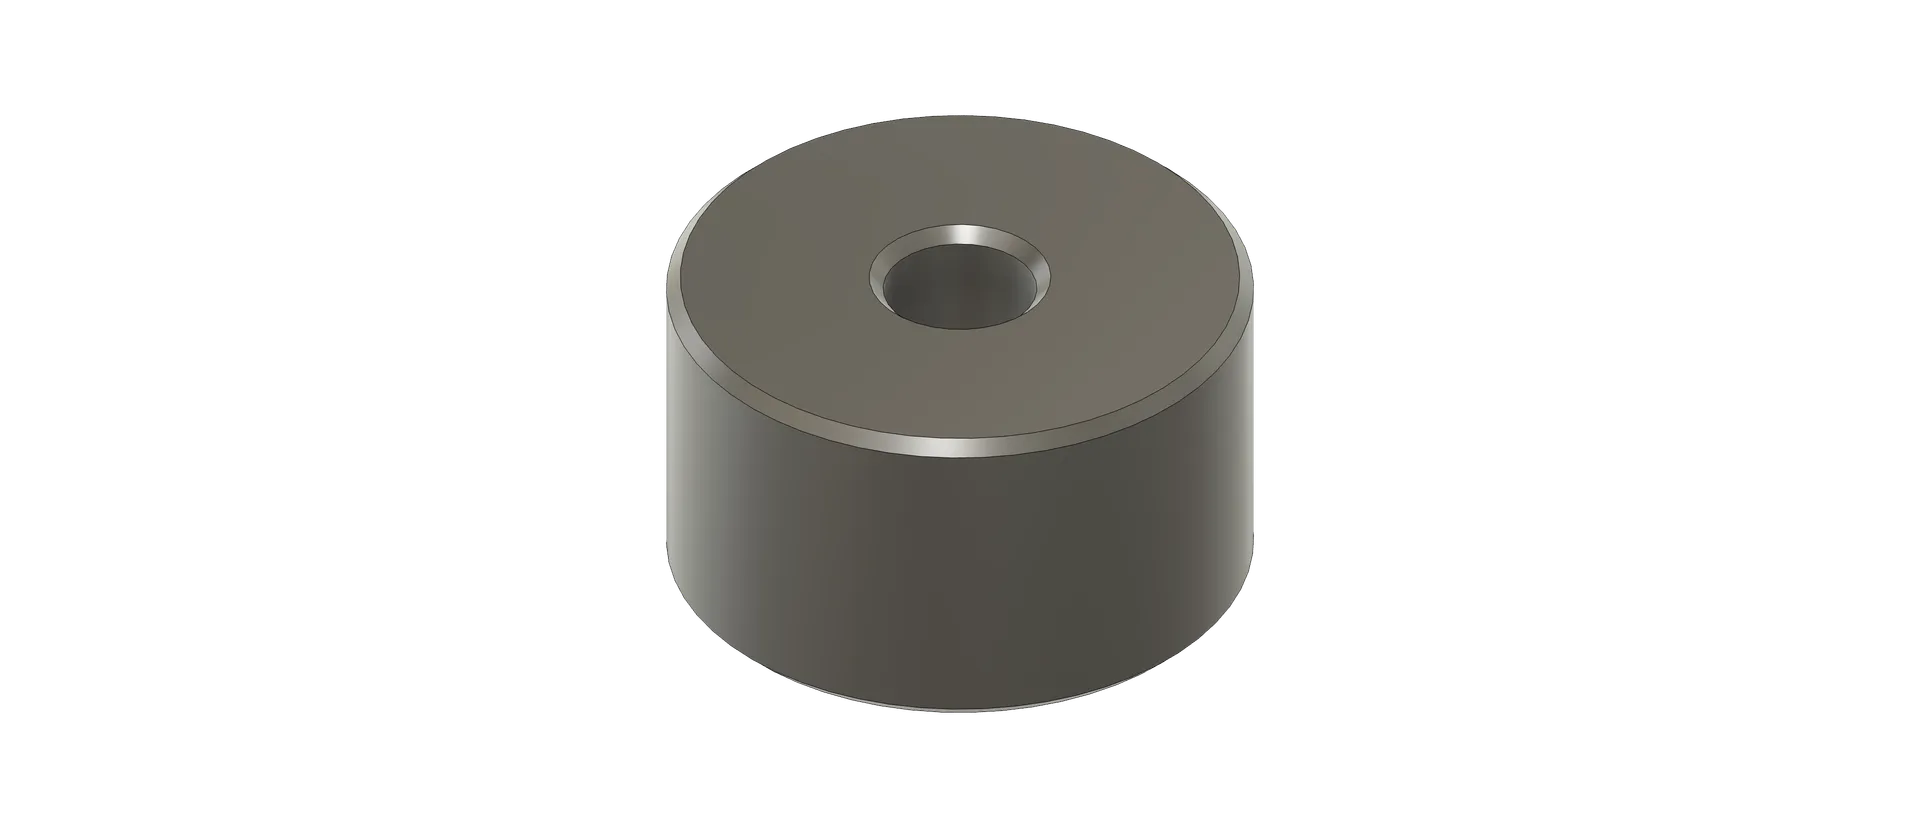
- Unscrew the 4 rubber feet from their positions in the corners.
- Replace the 4 stock screws with the 4x M5x30 and add the printed raisers on top of each foot.
- Screw the raised feet again to their positions again.
- Place the printer on its feet again.
- Plug the power cable in and turn the printer on again.
Here are the mentioned pictures:


Now on to continue with the software part…
Open the Klipper webpage of the printer and follow these steps:
In the Klipper machine configuration section of your Sovol SV08 open the “printer.cfg” file at about line 375 to replace the existing lines about fan3 from
[fan_generic fan3] # exhaust fan
pin: PA2
max_power: 1.0
to this:
[temperature_fan fan3]
pin: PA1
kick_start_time: 0.5
max_power: 1.0
min_temp: 0
max_temp: 90
hardware_pwm: true
target_temp: 60
sensor_type: temperature_host
max_speed: 1.0
min_speed: 0.1
control: pid
pid_Kp: 2.0     ;40
pid_Ki: 5.0     ;0.2
pid_Kd: 0.5     ;0.1
pid_deriv_time: 2.0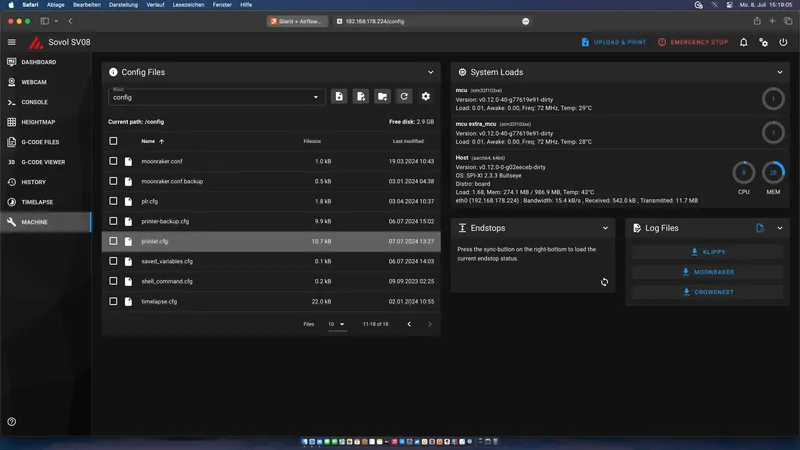
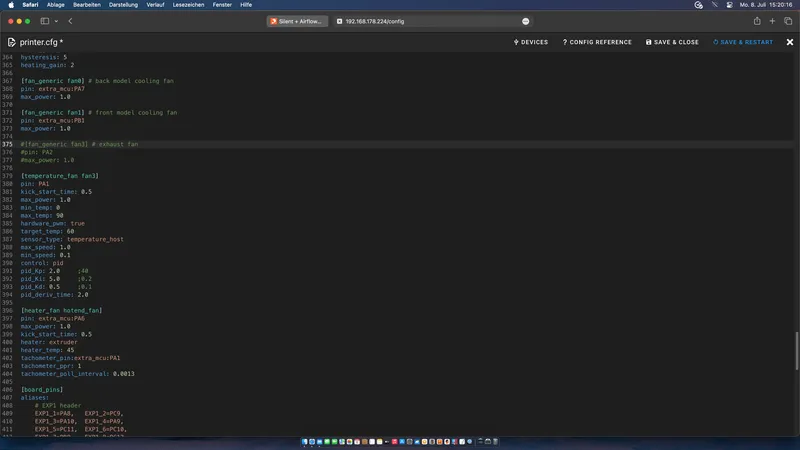
After the change is done, use the upper right button “Save & restart” and you will have a new entry in the dashboard called “Fan3” which shows the current usage and the temperature:
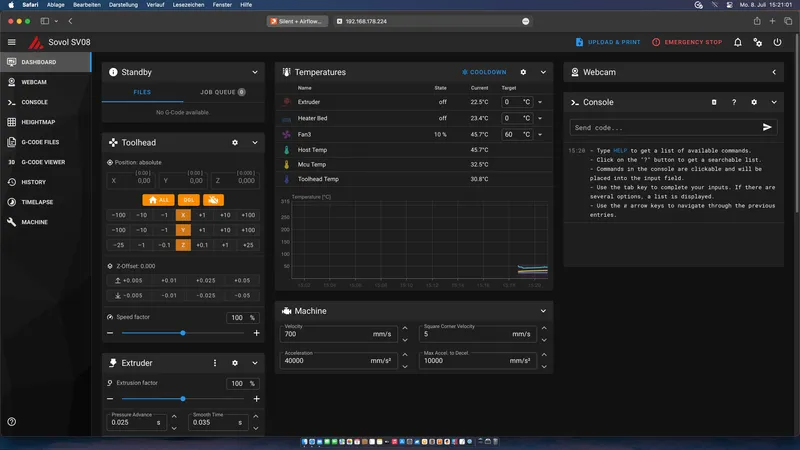
And if not already done, you will recognize that the screaming fan is now gone and replaced with a super silent one you will not really hear even under full load. ;-) You can try it directly by reducing the target temperature from 60°C to e.g. 40°C and it will spin fully at 100% then…
Site note: After this was done I played the Depeche Mode song “Enjoy the silence” 3x… ;-)
I had no issues with this so far and printed 2 parts which took more than 14 hours and the temperature was kept good by the fan at around 60-65°C (140-149°F) or below. 
On really hot days here with 32°C (89,6°F) I tried it too and it then runs at 66-69°C (150,8-156,2°F) and even with very long prints it was totally fine. With this setup I now printed more than 75 hours without any issue.
IMPORTANT NOTE: Of course all changes you do to the software and hardware are up to your own risk and using other fans might not have the same effect or may reduce the cooling too much, which might end in an hardware error in the end… So take care and try not to over improve this too much…
Parts needed:
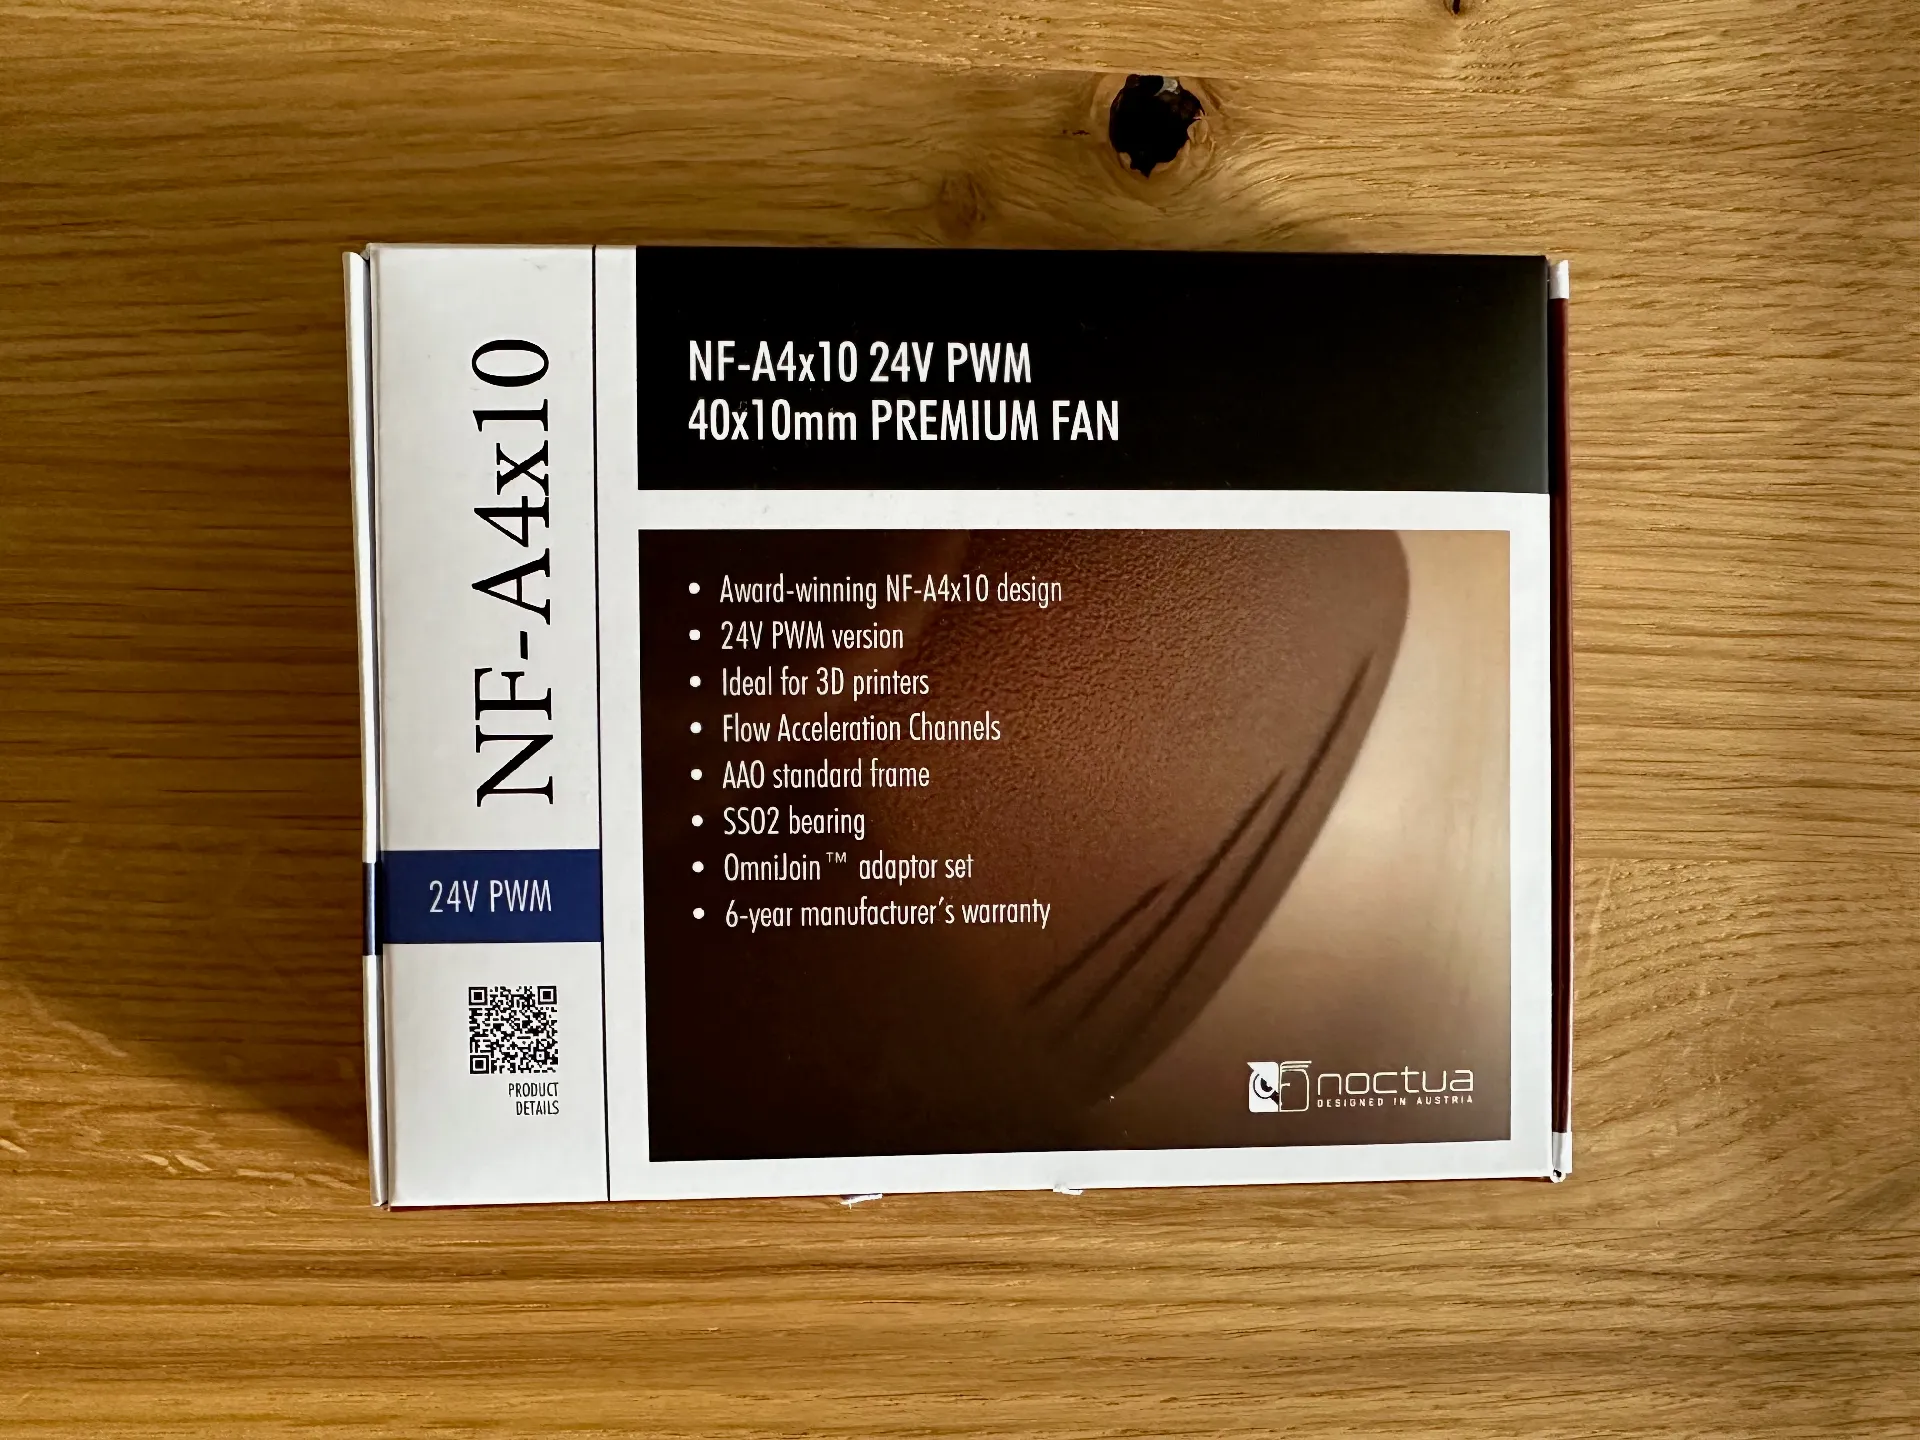
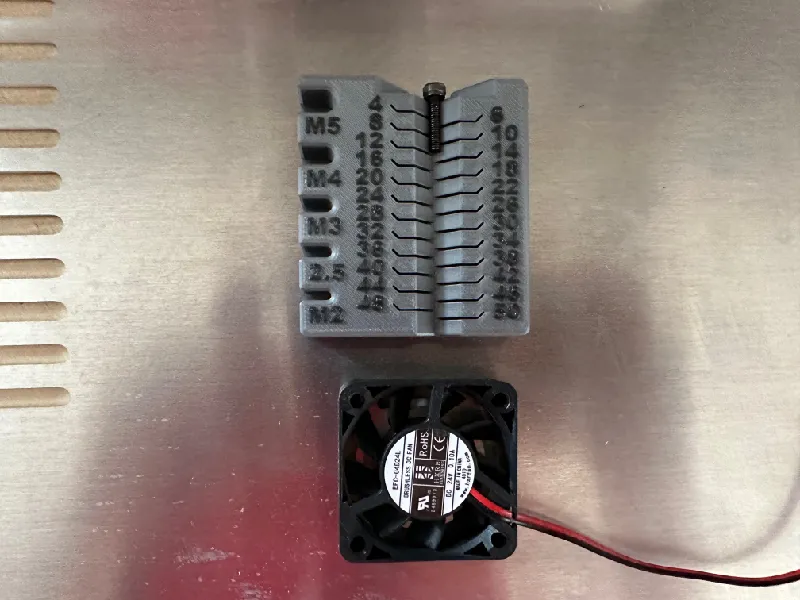
- 1x fan: Noctua NF-A4x10 24V PWM (Take care to get a 24V fan!)
- 4x M3x14 screws for the fan
- 4x M5x30 screws for the raisers
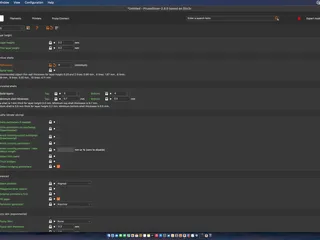
Print settings:
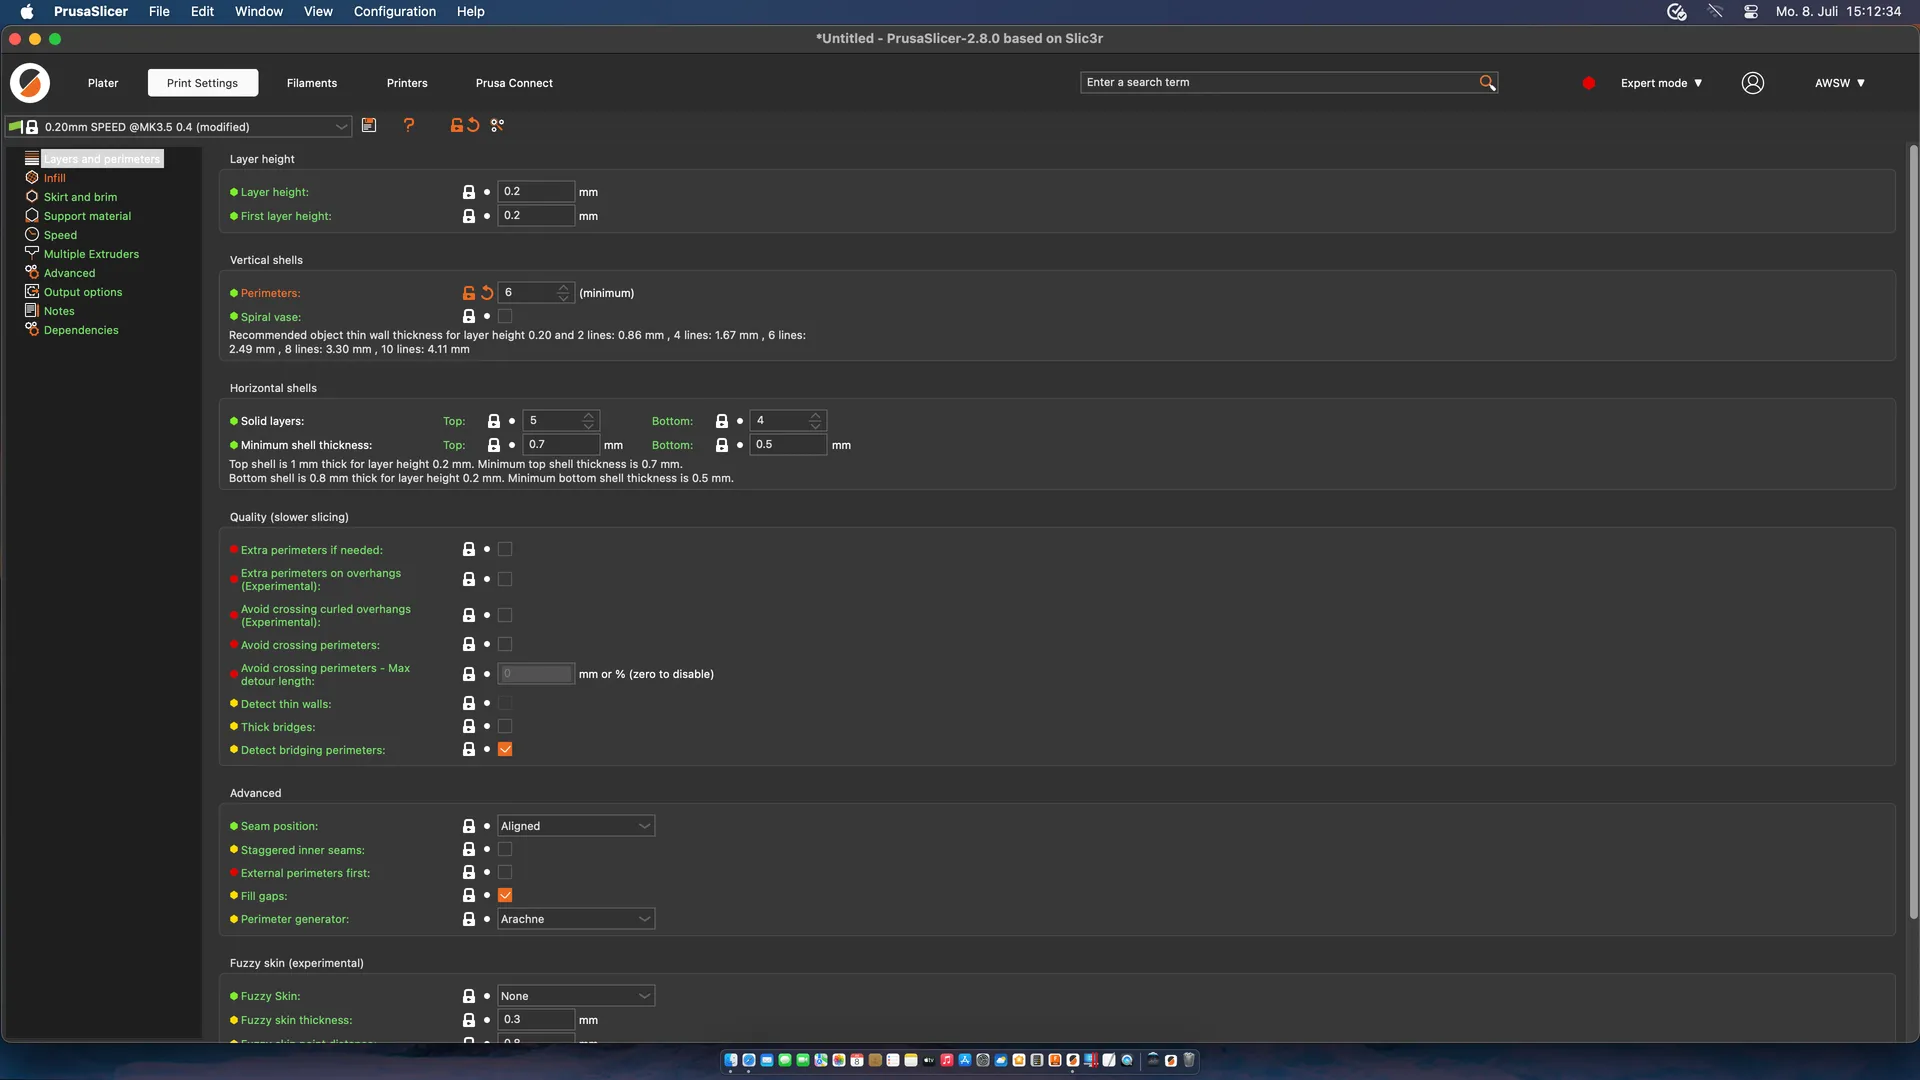
- 0.2 speed profile
- Outline perimeters set to 6 to make it stronger
- Infill set to 100% to make it stronger
- No brim needed
- No support needed
Happy printing and happy modding =)
Tags
Model origin
The author marked this model as their own original creation.


